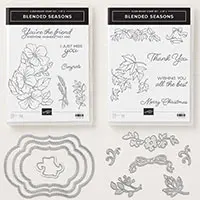
I debuted the Blended Seasons Bundle during the July InKing Royalty Blog Hop. You can see that card HERE. This stamp set is only available during August and While Supplies Last! The stamps are perfect for Spring/Summer, Fall, and Christmas. But the Framelits are spectacular. They match a few of the stamps but the best part are the three layers that are stitched! They are stitched inside the cutting line and leave stitching around the outside of the cut out. It’s a super look! Take a look at today’s Fall inspired card.
Blended Seasons Bundle, 149894
I used one of the layering dies from the matching framelits so you can see the stitching. The background is the Subtle Embossing Folder. The leaves are part of the Blended Seasons set as well as the Die Cut leaf.
I stamped the leaves in Cherry Cobbler Ink and then used the Watercolor Pencils and a Blender Pen to color the leaves. The sentiment is from the precious Host Stamp Set – Very Vintage.
Thank you for stopping by today. I hope you have a great weekend and will return to see my Monday project. All of the supplies are listed at the bottom of the page.
Don’t forget about Bonus Days!!! For every $50.00 you spend (at one time) during August, you will receive a coupon code worth $5.00 to use in September. It’s like getting paid to shop!
Copper has always been a favorite of mine. So I cannot explain why I have waited this length of time to try embossing on the Copper Foil Sheet! I hope you will be as happy with today’s outcome as I am.
Lovely Floral Dynamic , 148048
Isn’t that gorgeous??? (Please excuse the glare, it is difficult to photograph shiny items.) I cannot believe I have waited this long to emboss the foil.
I am sure you recognize the Share What You Love Designer Series Paper. The cut out flowers are from that pack as well. The wonderful sentiment is from that Suite of products and is aptly named Love What You Do!
For the corner rounder I used the new Detailed Trio Punch. I know I have used it several times recently, but I really like how it punches. However, today is the first time I have tried the ribbon hole punch that is one of the three different punches. I will definitely be utilizing it more often.
Thank you very much for stopping by today! I hope you liked today’s card. I have listed all of the products at the bottom of the post.
REMINDER : You only have until the end of the month to take advantage of the fabulous Join promotion to receive a FREE color family of ink pads. Also, the buy 3 get 1 FREE of the DSP will be ending on the 31st as well.
Sneak peek of August special promotion!
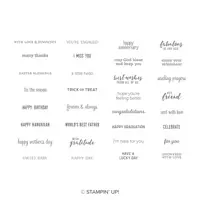
Choose one of the Color Families receive all 10 of the Ink Pads FREE when you join during July !! WOW!!
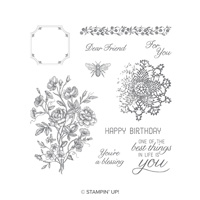
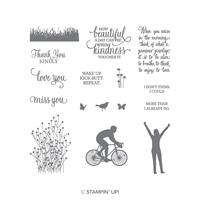
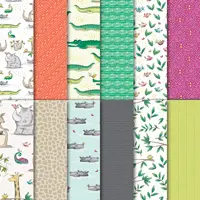
The stamp set I used for today’s card is not your normal flowers, animals, etc. And I absolutely Love that! Sometimes you really need to shake things up. I think this stamp set is great for male and female, and especially our more active friends.
Enjoy Life, 148190
I like the simple elements of this stamp set. Although I paired it with some pretty bright colors and DSP. I am enjoying the new Mango Melody color. Here it is paired with Granny Apple Green. Two of my Color Revamp Favorites! The Designer Series Paper is a reverse side from Animal Expedition DSP. And the perfect sentiment is from the new Itty Bitty Greetings stamp set. It was hard to say goodbye to Teeny Tiny Wishes, but this is an awesome replacement!
Thank you for visiting today! I appreciate it very much and love to hear from you.
Choose one of the Color Families receive all 10 of the Ink Pads FREE when you join during July !! WOW!!
It helps if you put the correct date on the scheduled post. Sorry about that!!
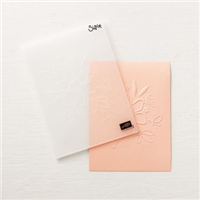
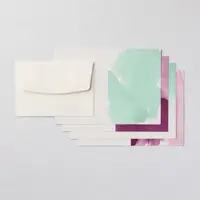
Today I have a one layer card. That is super unusual for me. I do love my layers! But I hope when you see this one, you will consider these great notecards as quick and easy cards to have on hand. Half of the work is already done for you. Take a look and then I will explain what is already on the card.
Delightfully Detailed Notecards, 146911
I love how this card turned out! These notecards are delivered with the watercolor wash look already on them. They are half in Mint Macaron and half in Blackberry Bliss. I love the subtle watercolor look which screams for you to just stamp on top of it. The Blackberry Bliss has a darker background and is maybe even more beautiful.
These notecards would be the perfect way to make and have on hand some quick Thank You type cards, or for a beginner crafter to not have to worry about doing layers. You get 20 notecards and envelopes for $9.50.
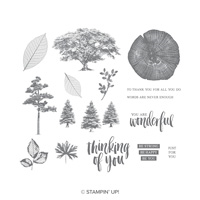
I stamped the sentiment in Soft Suede and the tree by coloring with my Stampin’ Write Markers in Shaded Spruce and Soft Suede. And that is the completed card! It cannot get much simpler than that. The stamp set is Rooted In Nature, a wonderful set, especially for more masculine cards.
I also stamped on the envelope to give a little “something special is in here” look to it. I try to always remember to do that. It is a leaf from the same set stamped in Mint Macaroon.
Thank you for visiting today! I hope you will return on Monday. Please remember to review all of the current specials. The JOIN NOW is the best ever!!!
Choose one of the Color Families receive all 10 of the Ink Pads FREE when you join during July !! WOW!!
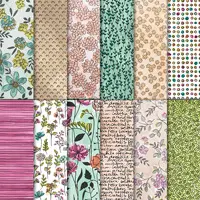
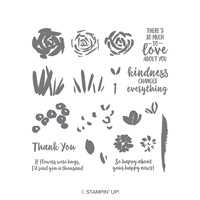
The Stampin’ Up! Share What You Love Designer Series Paper is by far my favorite of all time!! I have used it several times since I received my Pre-Order for the new catalog. And I cannot stop using it. I may need intervention! But in addition to the AWESOME paper, I am showcasing a new fold. Or it could be a new cut, or both! Here it is and then I will explain what I mean.
Abstract Impressions, 147513
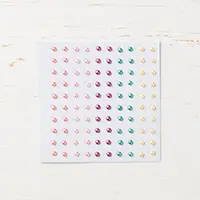
That DSP just shines! Actually it really does shine. This is one of the sheets that has a pearlized look to some of the flowers. The little pearls in the flower centers are the Share What You Love Artisan Pearls. They are just too cute!
The Fold/Cut is a little different. Since the DSP is card stock weight, it can serve as a card base without feeling flimsy. To achieve this look, I cut the Smoky Slate card stock to 5 1/2 X 8 1/2. I scored it at 4 1/4, the normal folding point for an A2 card. But I did not stop there. I went back to my cutter and with the score line at 3/4 on the trimmer ruler , I cut off the rest of the panel. (And I was able to use that cut piece to make the top layer with a bit leftover.)
The DSP is cut to 4 1/4 X 5 1/2. I burnished my fold on the Smoky Slate layer and placed adhesive on the inside of the 3/4 section. Then all I had to do was line up the DSP with the rest of the base and fold the small section over on top of it. Easy Peasy and perfect alignment. An added bonus is that when you open the card, you get to see the other side of this beautiful DSP!! WooHoo!! That is always a problem for me when the DSP is gorgeous on both sides. I hate to hide one of them. With this Cut/Fold, I do not have to hide either side.
Thank you so much for visiting my blog today! I greatly appreciate it and would be happy to answer any questions if I was not very clear on the instructions. I have listed all of the products used at the bottom of the post. I hope you have a great rest of your day!
It is still a great time to become a Stampin’ Up! Demonstrator. I would love to have you join my team. A great perk for demonstrators this time of year is getting to see the new catalog first. Then we get to order and play with the new products a month early. For me, that is one of the best parts of being a SU Demonstrator. Of course, the discount helps! If you are interested, please contact me and let’s talk.
Welcome to our Pals Blog Hop, May 2018. This month we’ll be “Stepping Up with Textures or Techniques.” What’s that? Projects that are “stepped up” by using textures or fun techniques. Who knows, maybe both! Join us in the fun while we inspire you to “step up” your creations.
You may be starting the hop here or you may be coming from a previous Pal’s blog. Either way, you’ve come to the right place. You’ll find the full line-up below to help you move or “hop” along from Pal to Pal.
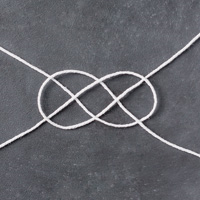
For an old but goody technique, I have done a negative sponging technique. It is one of the simplest techniques to do and always gives surprising and beautiful results.
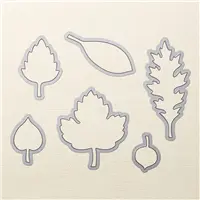
Leaflets Framelits, 138283
I have used the Leaflets Framelits (on the retiring list 🙁 ) to make a template. And it’s a 2 for 1, you get a leaf already cut out for a future project. I centered the negative of the leaf on my Whisper White card stock and secured it with some Washi Tape. You do not want the template to move while you are sponging. To begin, I colored the entire leaf with Calypso Coral, then went over all but the center with Cherry cobbler. I then went around the edges with Cajun Craze for a little more depth. Now just lift up the template and you have a beautiful stenciled Leaf.
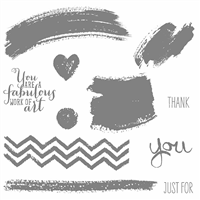
The sentiment is from an old favorite the Work of Art stamp set. I next die cut another leaf from a layer cut for my card. There are two ways to attach the stenciled leaf. It can be adhered to the top layer from underneath. Or it can be adhered to the base card and then the top layer attached over top with Stampin’ Dimensionals. That takes a bit of aligning, but I love the look.
To finish off my card I stamped the little corner decoration in Cherry Cobbler. I love the simple little addition. It is from the Not Retiring new set Hold On To Hope. Although, this is a bundle and the 10% discount for the bundle will end when the Occasions Catalog ends. So jump on it now!
Thank you so much for visiting today! I appreciate your stopping by my blog during the hop. I would love to read comments from you. The supplies I used are listed at the bottom of the page. Remember the Retiring List and Clearance Rack are “While Supplies Last”. The leaf framelits and Work of Art set are both on that list.
Now it’s time to see how the rest of the Pals are Stepping up with Textures or Techniques. Please use the Blog Hop Line-Up below to move from blog to blog. Don’t forget to show us some love by commenting on our creations.
Mark your calendars for June 13, 2018 where we feature projects for Babies, Birthdays and Brides. You’ll probably even see products from Stampin’ Up!s new 2018-2019 Annual Catalog. Don’t miss it!
Another Paper Pumpkin Special: The March PP was so popular due to the special gift that it sold out. So Stampin’ Up! has offered a great deal to replace that. New Subscribers who sign up before April 10, will receive April and May for half price. So 2 months for the price of 1. A great deal. Use my link HERE, and enter the code: SAVEFIFTY0418
It is still a great time to become a Stampin’ Up! Demonstrator. I would love to have you join my team. A great perk for demonstrators this time of year is getting to see the new catalog first. Then we get to order and play with the new products a month early. For me, that is one of the best parts of being a SU Demonstrator. Of course, the discount helps! If you are interested, please contact me and let’s talk.
The content in this blog is the sole responsibility of Jackie Beers as an Independent Stampin' Up! Demonstrator. The use of and content of classes, services or products offered is not endorsed by Stampin' Up!