This card is another that is really quick and has more coloring. It is one that could be for a variety of occasions which is always a good thing.
Stamp Bundle
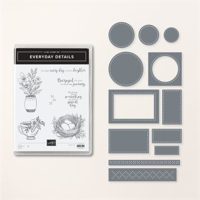
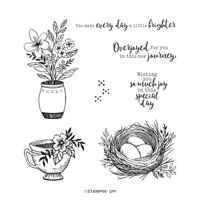
The adorable flower arrangement is from the Everyday Details stamp set. This stamp set is little individual stamps, like this one, that can be used for almost any occasion. I chose to let it stand alone like a painting. The image is stamped using Memento tuxedo Black Ink and then colored using Stampin’ Blends. They are all listed in the Supply List at the bottom of the post.
The fun cut out of the floral layer is from the Die set in this Bundle. I love it because it is simple and different. There are several shapes for layering and some texture dies included in this set. The shape I used gives a fun frame to this flower arrangement.
Papers and Finishes
To match the colors I chose for the flowers, I decided on Boho Blue as the card base. This is my favorite blue and it is going to be retiring with the next Annual Catalog. I am already sad! But I have a few months to use what I have. And it pairs with a lot of colors very well. For this card I chose to add some Highland Heather as a companion.
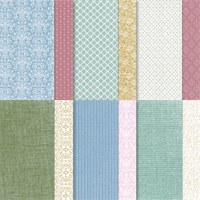
This pretty DSP is from the Poetic Expressions Designer Series Paper. The pack of paper is softer and patterns that remind me of wallpaper. Not ugly wallpaper!! Wallpaper that would look nice with any item next to it. I know that sounds odd! LOL!!! But I do enjoy this pack of paper and have used it a few times. This sheet is a perfect companion for the Boho Blue and the floral painting I made.
To finish this card there must be Bling! And one of the new favorites are the Purple Fine Shimmer Gems. These are in a couple of different sizes and shades of purple. I scattered a couple around for pops of bling and color.
Thank you for stopping by today!!!
HOST CODE
My FEBRUARY Host Code is PR4KTFTS. Please use this code for orders under $150.00. I will have a small gift for those with orders over $50.00 in addition to the Perk Rewards Program. You can read all of the information at the top of the page in the Menu Bar under SHOP / Perks.
Thank you for stopping by today. I hope you enjoyed today’s project and will come back. I do read and reply to all of the comments individually. They mean a lot to me. Please reach out if you have a question.
I have a fun mix of products for today’s card. The “sweet” treats of watermelons and cherries is mixed together for a perfect blend.
Stamps
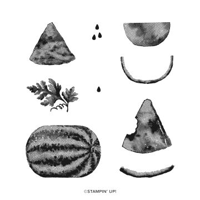
The cute little watermelon, along with the stem and the slice of watermelon, are from the Sale-A-Bration set Watercolor Melon. This set has different images and no sentiments. Personally, I love the shaded and distressed look of the images. A great example of this is the whole watermelon. I stamped it using Garden Green on to Basic White card stock. That was all I did and the variation in colors is perfect! For the slice I stamped the rind with the Garden Green and the flesh with Sweet Sorbet. The addition of the seeds is with Early Espresso.
The sentiment is from the Annual Catalog stamp set Sweetest Cherries. The Sweet is stamped with the Sweet Sorbet and the other sentiment part with Early Espresso. I think it fit great with the watermelon. To make it fit my layout, I fussy cut the sentiment and adhered it with Stampin’ Dimensionals.
Papers
The card base is Early Espresso to match the sentiment and the watermelon seeds. The Basic White layer helps the red DSP layer to pop and matches the focal layer. The red DSP is from the Sale-A-Bration paper Most Adored Designer Series Paper. And the green is from the Poetic Expressions Designer Series Paper from the Mini Catalog.
Finishes
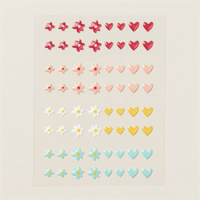
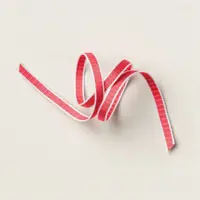
To add some earthy texture, I used Linen Thread to wrap around the layers. I love how great Linen Thread is to work with and it goes with anything. The other final touch is a bit of bling. Except this bling is some more sweetness. I added a trio of red hearts from the Adhesive Hearts & Flowers embellishments.
Measurements
The card base is 5 1/2 X 8 1/2 scored and folded at 4 1/4. The Basic White layer is cut to 5 1/4 X 4. Another White strip for stamping is 5 1/8 X 2 1/4. For the red DSP, it is 5 1/8 X 3 7/8 with the green DSP at 5 1/8 X 2 3/4. The Linen Thread is wrapped around all of the layers with a bow added with a glue dot.
Thank you for stopping by today!!!
HOST CODE
My FEBRUARY Host Code is PR4KTFTS. Please use this code for orders under $150.00. I will have a small gift for those with orders over $50.00 in addition to the Perk Rewards Program. You can read all of the information at the top of the page in the Menu Bar under SHOP / Perks.
Thank you for stopping by today. I hope you enjoyed today’s project and will come back. I do read and reply to all of the comments individually. They mean a lot to me. Please reach out if you have a question.
Today I am sharing a fun Slim Line card with the Ice Cream Swirl Bundle as a Valentine Card. What could be better than ice cream and your sweetheart? Maybe more ice cream?? LOL!!!
Bundles and Stamps
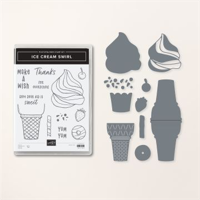
The star of this card is the Ice Cream Swirl Bundle. I love the ice cream cone! The dies are amazing and so simple to layer. Since my husband likes vanilla ice cream, it was simple to use Basic White for the ice cream. The base is a solid piece with the more swirled look layered on top. It gives a great 3D look to the ice cream. And the cone has definition build into the die. An Easy Peasy layer.
The stamp part of the bundle is on the inside of the card. But I did add another great Valentine set for the front sentiment. The For You is from the Country Bouquet stamp set in the Annual Catalog. I wanted just a small tag for the ice cream cone.
Punches
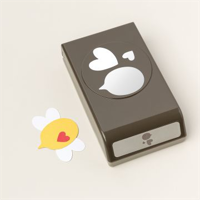
This card is fairly simple looking but utilized a variety of products. There are two stamp sets and one die set mentioned above. And then I used two separate punches. The sweet hearts are from the Bee Builder Punch. The larger heart is used to punch the bee wings, and the smaller ones are for the antenna. I was thrilled when Stampin’ Up! showed those extra uses for the punch!
The second punch is for the tag. It is the Best Label Punch. This little guy is a favorite for simple little tags like this one. I use it fairly often for sweet and little sentiments. Adding the ribbon may seem a little odd on an ice cream cone. I call that creative license! LOL!!!
Papers
The fun hearts paper is from the Bee Mine Designer pack. Fun but not overly girly. I paired it with Real Red card base and just a layer of Basic White. Of course the hearts are Real Red as well. I consider the hearts as my bling on this card. And I know that is shocking. But I was being conservative.
Measurements
Since this is a slim line that I have not used in a while, I have measurements for you. The card base is 8 1/2 X 7 and scored and folded at 3 1/2. The White layer is 8 1/4 X 3 1/4. I cut two of those, one for front and one for inside. And the DSP is 8 X 3. I hope you will give a slim line a shot!
Thank you for stopping by today!!
HOST CODE
My FEBRUARY Host Code is PR4KTFTS. Please use this code for orders under $150.00. I will have a small gift for those with orders over $50.00 in addition to the Perk Rewards Program. You can read all of the information at the top of the page in the Menu Bar under SHOP / Perks.
Thank you for stopping by today. I hope you enjoyed today’s project and will come back. I do read and reply to all of the comments individually. They mean a lot to me. Please reach out if you have a question.
A sweet appreciation card is what I have to share today. It stars a few Sale-A-Bration items that add definition and fun to the card.
Stamp Bundle
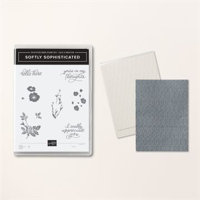
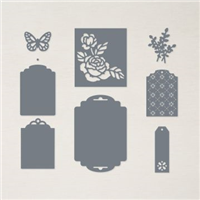
The sweet background for this card is made with DSP, that I will get to in a minute, and the gorgeous Embossing Folder that is part of the Softly Sophisticated Bundle. This is a Sale-A-Bration Bundle. You can see the fun design the embossing folder leaves. It works great with the variegated color in the DSP.
The stamps from this bundle are what created the flowers in the focal center. The greenery is one stamp and the flowers another. To create this scene I stamped twice. Actually I die cut the shape prior to stamping. This made it easier to fill the area than to try to gauge how much space I had.
Focal Layers
There are two focal points on this card and they actually work well together. The first is the floral area. The Softly Sophisticated flowers are die cut using the second largest of the Thoughtful Expressions Dies from the Mini Catalog. These are a bundle in the Mini Catalog. I love both of the layering shapes in this die set. They are both unique shapes and multiples of each.
The second focal point is the tag. This tag is from the Designer Tags Dies. It is a die set in the Annual Catalog. The sentiment is part of the Softly Sophisticated stamp set also.
Papers
The papers on this card are minimal. I used Basic White Thick card stock for the card base as I wanted the focal layers to pop. And the fun variegated blue is from the Flight & Airy Designer Series Paper, a Sale-A-Bration paper. It is one of the reverse sides of the birds.
Finishes
The focal layers are raised with Stampin’ Dimensionals and layered over each other. I used the White Baker’s Twine colored with a Boho Blue Stampin’ Write Marker to make the little bow. This needed a small bow and coloring Bakers Twine is an easy way to do that. The final touch is a scattering of Iridescent Pearls.
Thank you for stopping in today!!
HOST CODE
My FEBRUARY Host Code is PR4KTFTS. Please use this code for orders under $150.00. I will have a small gift for those with orders over $50.00 in addition to the Perk Rewards Program. You can read all of the information at the top of the page in the Menu Bar under SHOP / Perks.
Thank you for stopping by today. I hope you enjoyed today’s project and will come back. I do read and reply to all of the comments individually. They mean a lot to me. Please reach out if you have a question.
Today’s card is a fairly “clean” card. At least for me anyway. It stars the Delicate Forest stamp set and is a two tone card.
Stamps
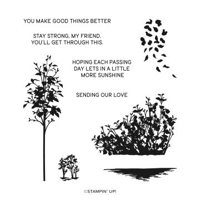
This simple, and perfect, little tree is just enough to work on this card. It is from the Delicate Forest stamp set. This is a Bundle set, but I only utilized the stamps. I wanted a quick and easy, and ended with Quick, Easy, and Clean all in one. Clean is not something I can say very often. I like layers and texture.
The sentiment is also from the stamp set. The boldness of the letters is a bit of contrast to the softer tree. For the inside of the card, which I show a bit further down, I also added a small stamp of trees. The inside sentiment is absent as this could be a “wait and see what you need” type card regarding that sentiment.
Layers
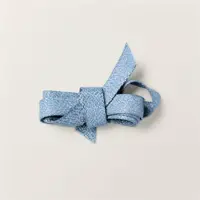
The idea from the beginning was the two tone card. So I began with Basic White, and this is the regular weight. Next is the layer of Boho Blue. Followed by another Basic White. Then I wrapped the two layers with the Boho Blue Ribbon. I was being a little different for me and added a layer to the inside. By using the regular weight Basic White, it was fine to add another layer without making it too thick. Here is a view of the inside.
Finishes
The Boho Blue Ribbon, with the simple knot, is part of the finishes. But I also added a trio of the Boho Blue Dots from the Rainbow Dots. Keeping the blue theme ties everything together.
Thank you for stopping by today!! I hope you have a wonderful weekend.
HOST CODE
My FEBRUARY Host Code is PR4KTFTS. Please use this code for orders under $150.00. I will have a small gift for those with orders over $50.00 in addition to the Perk Rewards Program. You can read all of the information at the top of the page in the Menu Bar under SHOP / Perks.
Thank you for stopping by today. I hope you enjoyed today’s project and will come back. I do read and reply to all of the comments individually. They mean a lot to me. Please reach out if you have a question.
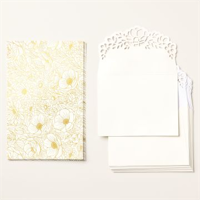
The card today begins with the gorgeous Gold Foiled Flowers Cards and Envelopes in the Mini Catalog. When you have this as the base, the card is so easy to build.
Card Base
The card base is a pre-made card with a gorgeous matching envelope. Envelopes can be just as pretty as the cards and this one is. It has a lacy rose edging along the flap. Having a pre-made card base makes everything else easy. And when it is gold foiled you have a really nice starting point. I decided to go a bit outside of the box and do some highlighting on one area of the card. This idea is also shown on page 14 of the Mini Catalog. I chose to color in some of the images using Stampin’ Blends.
Stamp Bundle
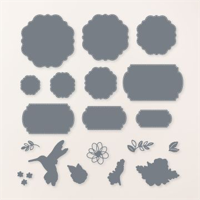
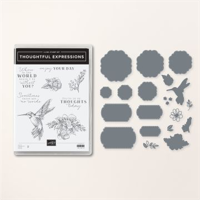
The stamps and dies used are from the Thoughtful Expressions Bundle. I love the hummingbird and tried coloring it from a photo a friend took. My colors are not nearly bright enough, but the softer seems to go with the other colors here. All of the little floral is from the die set as well. As is the sentiment layers. These shapes are a new layering favorite!
Sentiment
The sentiment is from a separate stamp set. It is the Everyday Details. I chose this one for flexibility. This card could work for a variety of occasions. I tend to not not add an inside sentiment until I know who I am giving the card to. This is a special card with all of the gold foil.
Thank you for stopping by today!!
HOST CODE
My FEBRUARY Host Code is PR4KTFTS. Please use this code for orders under $150.00. I will have a small gift for those with orders over $50.00 in addition to the Perk Rewards Program. You can read all of the information at the top of the page in the Menu Bar under SHOP / Perks.
Thank you for stopping by today. I hope you enjoyed today’s project and will come back. I do read and reply to all of the comments individually. They mean a lot to me. Please reach out if you have a question.
The content in this blog is the sole responsibility of Jackie Beers as an Independent Stampin' Up! Demonstrator. The use of and content of classes, services or products offered is not endorsed by Stampin' Up!