I have another first on today’s card. Not a super first, but a step for myself. A few weeks ago I shared a card using one of the Kits. It was the Watercolor one. That was the first time I had used a kit project. (You can see that post HERE) And today I have used die cut / punch outs from one of the DSP. It is similar to what the kits contain. To say I was impressed with the paper and the colors is an understatement. I was amazed and in love. So much that it is the star of today’s card.
PAPERS
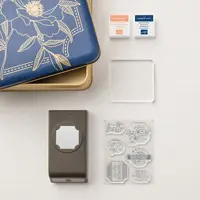
The amazing DSP pack this gorgeous bouquet comes from is the Wildflower Birthday Designer Series Paper. There are two sheets of punch outs just as there are two sheets of each pattern paper. All of these punch outs are as pretty as this bouquet. I hope you see why it is the star of the card. Now I am ready to give all of the kits another look.
This is also the second time in recent days that I have used Blueberry Bushel for the card base. This bright color pops on it’s own. And it really pulls the bits of blue from the bouquet. The blue is the first thing I notice now.
STAMPS
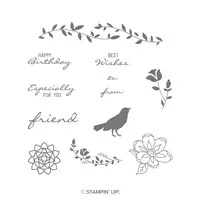
The bouquet really is impressive and fills the front of the card. So there was not a lot of need, or room, for a sentiment layer. However I wanted to add one. So I went with this simple sentiment using two different stamps from the Sentimental Park stamp set. Because they are photopolymer, it was so easy to stamp the bottom sentiment and then add the top centered above it. To give the Basic White strip a touch of extra, I flagged each end with my paper snips.
EXTRAS
This bouquet is beautiful but it still needed something behind it. To add some additional texture I went with the Distressed Tile Embossing Folder. I think it adds just the right background without taking away from the bouquet.
To add bling to match the gold from the bouquet, I added a trio of the Gold Textured Adhesive Dots along with a bow from the Gold Twisted Thread. This thread is easy to work with and a great way to add some shine to a card.
HOST CODE
My FEBRUARY HOST CODE is S2EYAW9N. Orders of $50.00 or more will receive an appreciation gift from me. I appreciate you choosing me as your demonstrator!
Thank you for stopping by today. I hope you enjoyed today’s project and will come back. I do read and reply to all of the comments individually. They mean a lot to me. Please reach out if you have a question.
Smile and Keep On Stamping,
Jackie
New Scrapbooking Catalog
The newest addition to Stampin’ Up! is an Online catalog of Scrapbooking products. You can see the catalog by clicking the photo below and save it to your computer.
Online Exclusives
New Online Exclusives have dropped. There are Halloween, Fall, Christmas, and many that are great year round. Of course the new Designer Series Papers and Embellishments are fabulous as well!
You can go directly to these in my Online Store by clicking HERE
Today’s projects is a Retirement card using the Special Moments and Best Delivery stamp sets. Moving On To Retirement is a good thing!
Stamps
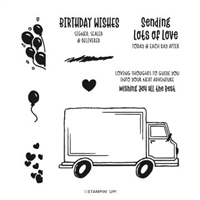
Making it to Retirement is a wonderful event. But cards are a bit difficult for this, and especially when it is a man! However, as soon as I saw the big moving truck, I knew it would make a perfect retirement card. Guys like motor vehicles and it has that large side for the announcement. So Best Delivery stamp set to the rescue!
For the sentiment, I turned to the Special Moments stamp set from Sale-A-Bration. That set has amazing sentiments for so many occasions. And to add some excitement to a large truck, I used the balloons from Best Delivery set, in two colors, blowing out the back. I can envision using this truck for other announcements now. On the inside, I stamped the Happy Retirement sentiment from Senior Years stamp set.
Colors
Since the truck is rather large, I went with a couple of cardstock layers instead of DSP. Not a lot of the layers are actually seen. So Bumblebee and Misty Moonlight were my colors of choice. And that is definitely a change for me since I tend to use multiple pieces of DSP on a card! For the truck to be lighter and allow the outlines to show, I went with Balmy Blue Stampin’ Blends for the cab and boarder of the cargo part.
I hope you will see this truck in a new light now and consider all of the “Announcements” that it can be used for.
Sale-A-Bration is the Best Time of Year!!
HOST CODE
My February Host Code is HFEQADCZ. Please use this code for orders under $150.00. I will have a small gift for those with orders over $50.00 in addition to the Perk Rewards Program. You can read all of the information at the top of the page in the Menu Bar under SHOP / Perks.
Thank you for stopping by today. I hope you enjoyed today’s project and will come back. I do read and reply to all of the comments individually. They mean a lot to me. Please reach out if you have a question.
I hope you enjoyed yesterday’s blog hop! It was my first Christmas card of the year. I will try to do one every now and then, but I mainly will be sticking to summer into Fall for right now. It’s way too hot to be thinking of Christmas here in the south.
Today’s card is a retirement card for a friend. Everything , even the sentiment, would work for other purposes as well. I hope you like it.
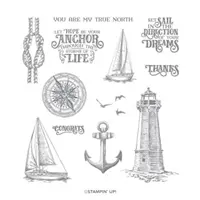
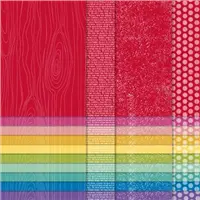
This stamp set is the Sailing Home set. It is a carry over in the annual catalog. I love it for the stamps, but also that it works for anyone who loves the water and sailing. I wanted a “water” color for this card, so went with Coastal Cabana as the base. I then found the perfect compliment of DSP in the Brights 6X6 Designer Series Paper. The pattern on the paper works for so many things.
The boats are stamped using Smoky Slate Ink. The bit of water beneath each one is colored using the Light Pool Party Stampin’ Blend. I use it for various shadows on items. It is just enough color.
The sentiment layer is stamped in Coastal Cabana Ink. I die cut the sentiment using a die from the Smooth Sailing Dies. They used to be a bundle with the Sailing Home stamp set, but are not longer. They are just available individually. To get the Bermuda Bay layer behind the sentiment, I did a little trick that I have used a few times. I flipped the die over, and used a pencil to draw around the outside of it. I then fussy cut, carefully, just outside the line. (For me, just outside the line is easier than trying to cut on the line.) It may not be perfect, but I love the look it gives when you do not have a companion back layer.
The finishing touch was a few of the Epoxy clear dots. Just a bit of water splash in my mind!
Thank you for stopping in today! I really appreciate it and thank you for the nice compliments yesterday. If you missed the hop, here is the link to my card and you can hop around from there. Click Here
Bonus Days is back and that means it’s time for you to start earning coupon codes to redeem in August! If you need a refresher on this promotion, here’s how it works: For every $50 USD you spend 1 July–3 August 2020 (before shipping and tax), you earn a $5 USD Bonus Days coupon code that can be redeemed 4–31 August 2020. When you place a qualifying order, you will receive an email containing the code. SAVE the email!!! There is no way to retrieve it later. So print it and put it with your catalog or on your calendar to redeem in August. There is no limit to the number of coupon codes you can get. WooHoo!
HOST CODE
My July Host Code is AHTQERJB. Please use this code for orders under $150.00. I will have a small perk for those with orders over $50.00
Today is another of the Royal Challenge cards I made last week. This one is a CASE of the catalog. I chose to use the catalog card as the idea, but used everything different than they used. A CASE can be just the idea, layout, or a pretty much copy. I love that we SHARE EVERYTHING!
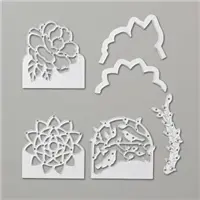
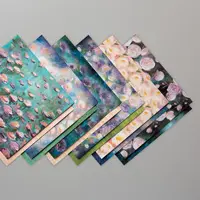
This is a CASE from page 41 of the Annual Catalog. When I saw the DSP behind the cut out, I realized I had done a similar one recently. But I love the look and I just happened to be playing with the Perennial Essence Designer Series Paper. I knew I had to use it. This gorgeous paper is simply above and beyond all the other beautiful paper Stampin’ Up! carries.
For my card, I used the Stitched Rectangle Framelit Dies and cut out Daffodil Delight. I then stamped on the “frame” with Daffodil Delight Ink and a stamp from Botanical Bliss stamp set. I also die cut the Garden Green stems using the Botanical Tags Dies. The sentiment and flower is from Botanical Bliss as well. It is stamped and then punched with the Darling Label punch. I love this almost square punch. It is the only one that is not more oval shaped!
Thank you so much for visiting today. I will have another new project to share with you tomorrow.
My July Host Code is ZGQ6YRAU. Please use this code for orders under $150.00. I will have a small perk for those with orders over $50.00.
UPDATES:
For every $50.00 of product you spend during July, you will receive a coupon code worth $5.00 to use in August. There are no limits to the number of coupons you can receive!
Joining Stampin’ Up! and my TEAM is always a good idea. Now there are some good incentives to do it during July and August. For the price of the Starter Kit, which is the ULTIMATE BUNDLE!!!!, you receive an additional $30.00 of products, plus a $10 coupon.
The Starter Kit is $99.00. For that amount, you normally receive $125.00 in product. During July and August, you will receive $155.00 in product. This includes FREE SHIPPING, and an additional $10.00 Coupon to be used the following month. There are NO requirements to ever place another order. However, if you do decide to use your discount and place other orders, you will receive a 20% discount on every order.
If you are thinking about joining, even the first hint of a thought, I would love to talk with you about it. Please reach out to me and I will tell you all the reasons I Love Stampin’ Up!
Welcome to InKing Royalty’s June Blog Hop! This year’s Blog Hop themes are inspired by a single word – and this month our projects are centered around NEW. With the launch of Stampin’ Up!’s 2019 Annual Catalog, NEW gives us the opportunity to showcase new products and play with new colors. There are also new occasions (babies, weddings, graduations) to celebrate, so you are going to see a variety of projects in this hop. We are excited to share our creations with you today! After you read my post, I hope you’ll hop over to the next person on the list at the base of this post.
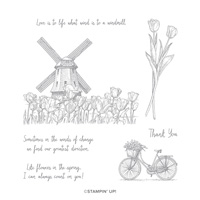
My card reflects two of the NEW theme ideas. I am showcasing a NEW stamp set, Winds of Change. I looked at this set when I received my catalog and it was a must have. As you know, I love to color with the Stampin’ Blends, and this set is perfect for coloring. I also LOVE to travel. Next month I am going on another Viking River Boat Cruise. And we begin in Amsterdam! I have never been to Amsterdam before, so this is my second NEW for the theme. I am so excited about the trip, and am equally excited to share my card idea with you.
Even the sentiment on the card goes along with the theme! I googled Amsterdam and looked at all of the windmills for some color inspiration. They are typically brownish, but the blades can be different colors. I added just a touch of the Granny Apple Green to my blades to match the bottom section of the windmill building.
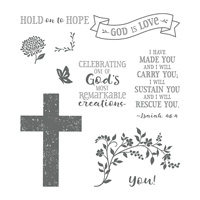
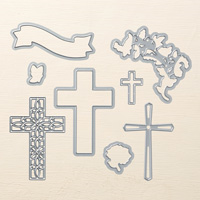
All of the pictures I saw were in vibrant colors, so that is what I went with. I always prefer a mix of colors in flowers, so I mixed my tulips and then added a whimsical touch with the butterfly. The butterfly is from the Hold On To Hope stamp set and the Cross of Hope Framelits. I colored it with Granny Apple and Daffodil Delight markers then die cut it.
The sentiment is done with my favorite new technique. I used the Rectangle Stitched Framelits and cut to fit the size I needed. (As I mentioned in yesterday’s post, there are several videos out there on how to do this little trick).
Thank you for stopping by today. I hope you’ll hop along to the next stop on the bloghop, Lynn Kolcun at Avery’s Owlery. There’s lots of inspiration to be found in this group – and you don’t want to miss it!
Thank you for hopping along with us. If you get stuck during the Blog Hop, please use this line-up as a guide:
I have been using the well loved retiring products for a while with only a sneak peek of new items. Today I have another new suite to share. And the paper is AWESOME!! I know, I tend to love all the Stampin’ Up! Designer Series Paper. But if you have not seen the Perennial Essence DSP, be prepared to be in awe! The piece I am showing today is beautiful but not close to the prettiest of the pack.
I wish I could paint like this DSP. It is a beautiful watercolor. You almost hate to cover it up with anything. I was sweating when I stamped the sentiment onto the DSP. I love the unexpectedness of that. But I am always saying a small prayer to not mess it up!
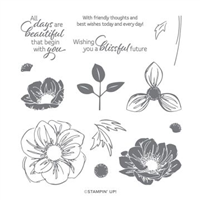
The flower is from the Floral Essence stamp set. I stamped it and colored with the Flirty Flamingo Stampin’ Blends Combo. It is fussy cut with my sharp Paper Snips. The vellum leaves are just perfect for the softness of the DSP I believe. This suite of products has , not only the Perennial Essence DSP, but Perennial Essence Vellum! A definite WOW! There are several soft shades of vellum that match the DSP. This is definitely a suite where “I Want It All!”.
Thank you so much for stopping by today. I hope you like this card. It is a bit different than my usual cards.
My May Host Code is XKQZNUBZ . Please use this code for orders under $150.00. I will have a small perk for those with orders over $50.00.
Click on the Last Chance icon to go to my Online store. This will give you up to date what is left on the retiring lists. And if you would like to place an order, I have a Host Code just below the icon.
The content in this blog is the sole responsibility of Jackie Beers as an Independent Stampin' Up! Demonstrator. The use of and content of classes, services or products offered is not endorsed by Stampin' Up!