Until a couple of years ago, I was one who always used traditional colors for Christmas. That changed with a ribbon I found that had Red and ,in Stampin’ Up! colors, Granny Apple Green. I was immediately drawn to it, and that ribbon changed my opinion of Christmas Colors.
Based on my new found love of “different” colors, the Whimsey & Wonder Designer Series Paper was right up my alley. Today’s card is there as well.
Paper
The stamp should be the star of the show, and it is, but the paper is just so very pretty! This piece from the Whimsey & Wonder Designer Series Paper is amazing! In trying to decide colors, I placed it next to Polished Pink, Soft Succulent, and Misty Moonlight. They all were awesome and each gave a little bit different look. I ended choosing the Polished Pink for the brightness.
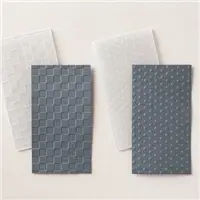
Since this card was for my Stamp Club to make, I needed to stretch the DSP. To do that I embossed a piece of Soft Succulent with the Dots Embossing Folder.
Stamps
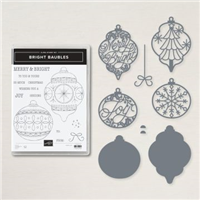
The stamp set is the Bright Baubles and is a Bundle. I love the possibilities with this Bundle. My plan is to make tags for my Christmas gifts this year using the different ornaments and inserts. The one I chose for this card is pretty simple. It was stamped using Polished Pink Ink and colored with Polished Pink and Soft Succulent Stampin’ Blends. The finishing touches are a Polished Pink Jewel from the 2021-2023 In Color Jewels, and a glittery ribbon.
Measurements
The Polished Pink card base is 4 1/4 X 11 scored and folded at 5 1/2
The DSP is cut to 5 1/4 X 2 3/8
The Soft Succulent is cut to 5 1/4 X 1 5/8 (The piece is actually 5 1/4 X 3 1/4 and embossed with the Dots Embossing Folder and then it is cut at 1 5/8. So you get two pieces from one use of the folder)
A Basic White piece is cut 5 1/4 X 4 and used to easily layer the DSP and Embossed pieces. They totally cover the White.
A 3 1/2 X 3 1/2 piece of Basic White was used to stamp the ornament and then die cut.
The 2nd Sale-A-Bration Is Here!!
Join My Team Promotion During Sale-A-Bration!!
HOST CODE
My August Host Code is Y4GZ7QNY. Please use this code for orders under $150.00. I will have a small gift for those with orders over $50.00 in addition to the Perk Rewards Program. You can read all of the information at the top of the page in the Menu Bar under SHOP / Perks.
Thank you for stopping by today. I hope you enjoyed today’s project and will come back. I do read and reply to all of the comments individually. They mean a lot to me. Please reach out if you have a question.
I have a very quick and easy card to share today that is really beautiful!! And it is not due to me or my stamping. It is 100% the beautiful Stampin’ Up! Peaceful Place Designer Series Paper.
It’s All About The Paper!
This beautiful piece from the Peaceful Place Designer Series Paper IS this card. This sheet is designed to be cut into four 6X6 pieces of this pattern. I really hated to trim it down. What I cut off can be used as a strip to carryover to the inside of the card though. I am not about to waste this beauty.
All of the texture, shading, and glimmer is built into the paper. All I did was add the simple sentiment at the bottom. The sentiment is from the Stars Are Shining Stamp set. And it is perfect for this calm scene. Other than the sentiment, the card is layered on Basic Gray with the base of the card being Thick Basic White cardstock. It could not get any easier than this one!
Please forgive my odd placement for the card in the photograph. I did not want to hide the sentiment!
The 2nd Sale-A-Bration Is Here!!
Join My Team Promotion During Sale-A-Bration!!
HOST CODE
My August Host Code is Y4GZ7QNY. Please use this code for orders under $150.00. I will have a small gift for those with orders over $50.00 in addition to the Perk Rewards Program. You can read all of the information at the top of the page in the Menu Bar under SHOP / Perks.
Thank you for stopping by today. I hope you enjoyed today’s project and will come back. I do read and reply to all of the comments individually. They mean a lot to me. Please reach out if you have a question.
The card I have to share with you today is one that showcases a few of the reasons that I LOVE Stampin’ Up!! As soon as you see today’s card you will recognize at least one of those reasons. It is hard to miss it.
Paper
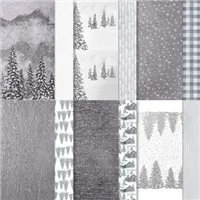
The first of my many reasons to love Stampin’ Up! is the gorgeous Designer Series Paper. This card showcases two sides of one sheet included in the Whimsy & Wonder 12×12 Designer Series paper. I wanted to share those gorgeous snowflakes on the Blushing Bride paper. But then the opposite side shows all of the colors in the paper pack on one sheet. I truly love those stripes. (The DSP piece is cut to 3 3/4 X 5 and then cut 1″ off of the 3 3/4 side. Flip the 1″ strip over for the stripes to show.)
I pulled the Misty Moonlight from the stripes to use as the base of the card. It really showcases the pink. There is a thin layer of Basic White between the Misty Moonlight and the DSP. I just have a hard time putting the DSP directly onto the base cardstock. LOL!!
Stamps
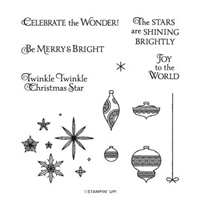
To continue with the paper being the star of the show, I went with a very small sentiment. The “let your heart be light” is so sweet. I tried different positions and sizes of paper for it and nothing seemed correct. Then I placed it at an angle and it seemed to be the proper location. This allows the other products to shine. This adorable sentiment is from the Whimsical Trees stamp set.
Finishing Touches
As a finishing touch, I added the Wonderful Snowflake to the center of the card. With these gorgeous papers on the card, it really does not require much stamping. And I hate to cover up the paper. The snowflake piece has some iridescent color on the snowflakes. At first I thought it was silver it shows so well. You get 24 iridescent snowflakes in a package. The opposite side is white paper. So they could be sponged or colored any color you wish on that side.
All of these products, plus the matching Christmas Trees Dies (A Bundle with the Whimsical Trees) and the Blushing Bride Frayed Grosgrain Ribbon, are the complete Suite of products in the Whimsey & Wonder Suite! I do not always purchase the complete Suite of products. But this one is an exception to that. I love everyone of the products included in the Suite.
The price for the entire suite is $80.25. With a couple of added cardstock or supply items you could have a $100.00 order. This amount would earn you FREE SAB Items, either 2 at the $50.00 level or 1 at the $100.00 level. PLUS you would earn 2 of my Star Shopping Rewards for my customers.
The 2nd Sale-A-Bration Is Here!!
Join My Team Promotion During Sale-A-Bration!!
HOST CODE
My August Host Code is Y4GZ7QNY. Please use this code for orders under $150.00. I will have a small gift for those with orders over $50.00 in addition to the Perk Rewards Program. You can read all of the information at the top of the page in the Menu Bar under SHOP / Perks.
Thank you for stopping by today. I hope you enjoyed today’s project and will come back. I do read and reply to all of the comments individually. They mean a lot to me. Please reach out if you have a question.
Today’s card is another sneak peek from the upcoming Mini Catalog. I have not really thought of Christmas cards yet, except for one I did for a blog hop. But after playing with this stamp set, it has given me some wonderful ideas. I hope it inspires you as well.
Stamp Set
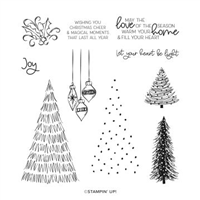
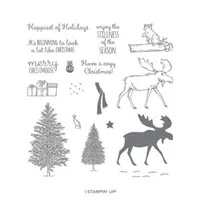
As I said, this set is from the upcoming Mini Catalog, so I do not have the photo of it to add to the supply list. But it is the Whimsical Trees set. It also has matching Dies, DSP, and a Ribbon in the Suite. All of them are amazing!!!!
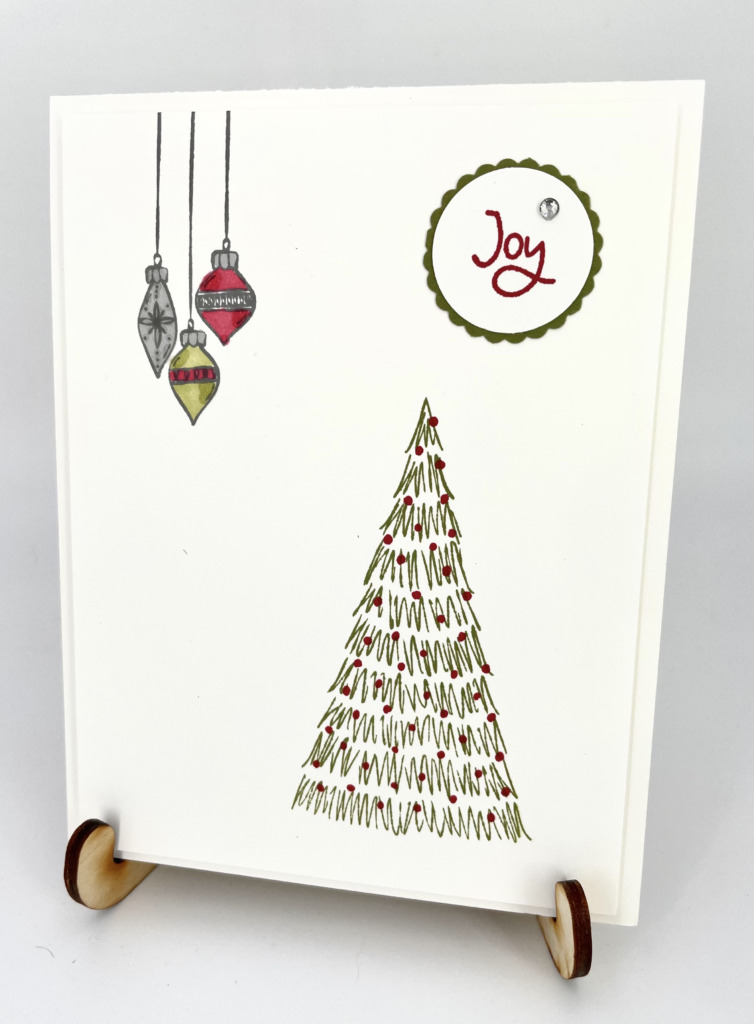
All of the stamps used here are included in the stamp set. This is probably my favorite of the trees. And it stamps wonderfully! Even though it is red rubber, the ornaments (or lights if you prefer) fit perfectly over top of the stamped tree image. So it is very easy to line it up so lights are not off in the white space.
I love the trio of hanging ornaments. The stamp includes the trio all in one. You could always add more of the ornaments across the top of the card. They remind me of some of the ornaments from my childhood. Coloring them was really quick and easy with the Stampin’ Blends. I will say that I tried stamping them in Memento Black and it was too dark for the smaller image. Basic Gray is what I ended up using.
Layout
I wanted this to be one of the “Clean” cards that I see so often. Sadly, I struggle to do this type. I like layers!! But I controlled myself and only did the stamped layer and the base layer. By stamping directly onto the layer I am always afraid I will make a mistake. Luckily that did not happen this time.
The “Joy” focal point was the only added layers. I used the smallest of the Layering Circles Dies to get this look. To finish it off I added a single Rhinestone for some bling!
The picture below shows the Designer Series Papers that are included in the Sale. There are 9 to choose from!!
HOST CODE
My July Host Code is 2GKGF4Q7. Please use this code for orders under $150.00. I will have a small gift for those with orders over $50.00 in addition to the Perk Rewards Program. You can read all of the information at the top of the page in the Menu Bar under SHOP / Perks.
Thank you for stopping by today. I hope you enjoyed today’s project and will come back. I do read and reply to all of the comments individually. They mean a lot to me. Please reach out if you have a question.
Welcome to InKing Royalty’s July Blog Hop! During this year’s blog hops, we are having fun with our stamping favorites – our favorite themes for seasonal cards and projects. This month’s projects feature Christmas! I hope you are in a Holiday mood because there is a lot of Christmas fun headed your way. We are excited to share our creations with you today! After you read my post, I hope you’ll hop over to the next person on the list at the base of this post.
Christmas is my favorite time of year for card making. I am very excited to share with you a card using two of the Christmas sets in the upcoming Mini Catalog.
Stockings
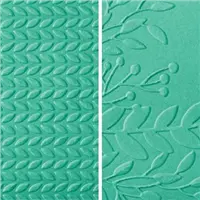
The stockings are so darn cute!! They are from the Stockings Dies as part of the Sweet Stockings Suite of products. For this card I only used the stockings from the suite. I wanted them to be the star of the show. Instead of stamping the design stocking, I used the Greenery Embossing Folder to give them the knitted looking texture. The toe layer is part of the dies as is the front banner looking lever holding the stockings.
I added just a simple sentiment of “Joy” by going with a third stocking. This one is cut from the Tidings of Christmas Designer Series Paper. I then used Cherry Cobbler Ink to stamp the Joy. The Joy and the inside sentiment are both from the Whimsical Trees stamp set. That is another great set!
Colors
The color choices all came from the gorgeous DSP. As mentioned above, it is the Tidings of Christmas Designer Series Paper from the Annual Catalog. I fell in love with this piece immediately. For a different look to my card, I went with Pool Party as the base color. It is not a listed color of the paper stack but works perfectly.
The Sahara Sand also works perfectly with this sheet of paper. I used it to separate the base and DSP. The lever on the front has a little strip of another sheet from the DSP pack. To bring out the Real Red / Cherry Cobbler of the paper, I added that strip to hang the stockings from. And to also stamp the Joy on the center stocking.
Layout and Measurements
This card is one I have seen several times lately. I think of it as an offset gate fold card. I have already played with a variety of different sizes of the folds. Here are the measurements for this one.
Base of Pool Party is cut to 4 1/4 X 11 and scored at 4 & 9 1/2
Sahara Sand is cut to 4 X 3 3/4 and 4 X 1 1/4
DSP is cut to 3 7/8 X 3 5/8 and 3 7/8 X 1 18
Inside White layer is 4 X 5 1/4
Here is a view of the open card. I added an extra stocking there as well.
Reminder that the stockings and sentiments are from the Stockings Dies and the Whimsical Trees (sentiments) stamp set. These products are in the Mini Catalog that goes live on August 3rd.
Thank you for stopping by today. I hope you’ll hop along to the next stop on the blog hop, Marylin Jones at Stamp With MJ. There’s lots of inspiration to be found in this group – and you don’t want to miss it!
Thank you for hopping along with us. If you get stuck during the Blog Hop, please use this line-up as a guide:
The picture below shows the Designer Series Papers that are included in the Sale. There are 9 to choose from!!
HOST CODE
My July Host Code is 2GKGF4Q7. Please use this code for orders under $150.00. I will have a small gift for those with orders over $50.00 in addition to the Perk Rewards Program. You can read all of the information at the top of the page in the Menu Bar under SHOP / Perks.
Thank you for stopping by today. I hope you enjoyed today’s project and will come back. I do read and reply to all of the comments individually. They mean a lot to me. Please reach out if you have a question.
I have been working on finishing my Christmas Cards, Gift Tags, and gifts for pharmacy and doctor offices. I have a huge mess in my craft room. I was supposed to be finished with everything by now, but life gets in the way sometimes!
A friend loves my projects and I usually give her some gift tags each year. So that is my project to share with you today. And Yes, I have already given them to her. I wouldn’t want her to be as late as I am in wrapping gifts! 🙂
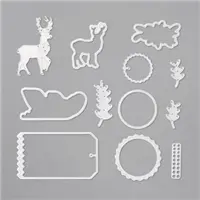
I kept the tags very simple. Although I think they are pretty cute. My favorite part is the tag itself. It is the tag from the Die Set North Pole Wonder. I will hold on to this set simply for that tag! I paired it with the tree from the Merry Moose stamp set. It is stamped in Just Jade Ink. The sentiment is a favorite little one, little in size I mean. It is from the Festive Post stamp set.
I finished the tag with the star from the All The Trimmings Embellishments. I used some old White Baker’s Twine to corral the ribbons. I used the Bumblebee In Color Ribbon and left them not tied for ease in attaching to the packages in whatever way she wanted. I can tell you that trying to gather those ribbons together to make them look even a little neat was not in the least easy!! They did not want to cooperate at all.
I couldn’t simply give the bundle of tags! So I created a little box to slip them into.
The little box is made from Just Jade card stock with Tis The Season Designer Series Paper on the front and back. I stamped the same little sentiment on a scrap of Whisper White and punched it out using the Pine Tree Punch. I also added the same little star on the tree. There are ten tags in the little box and it is pretty small.
Here are the measurements for the little box:
card stock cut to 4 7/8 X 3 1/2
score on the 3 1/2 at 1/2″
score on the 4 7/8 at 1/4, 2 3/8, 2 5/8, 4 3/4
Fold and burnish the score lines.
with the 1/2′ score line at the bottom. Cut up each line to that score line.
Cut out the two tiny pieces.
Adhere the sides and the bottom.
The DSP is cut 2 wide by 3 1/8 tall
Adhere the DSP before putting the box together
Thank you for stopping by today! I hope you are enjoying this time of year and have a minute to stop back in tomorrow.
HOST CODE
My December Host Code is: 4QDB2ZYE Please use this code for orders under $150.00. I will have a small perk for those with orders over $50.00
The content in this blog is the sole responsibility of Jackie Beers as an Independent Stampin' Up! Demonstrator. The use of and content of classes, services or products offered is not endorsed by Stampin' Up!