Everything is so crazy right now that I forgot to write today’s post! I feel like I would lose my head if it wasn’t attached. But that aside, I have one of my favorite cards to share with you.
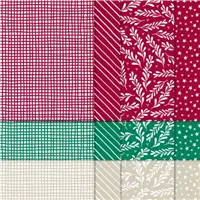
I realize that the DSP I used, Brightly Gleaming, is sold out, and the Sound of The Season Dies may be as well. I apologize for that. However, the layout of this card is very adaptable to whatever you may have on hand. The front panel can be resized to fit your stamp or dies.
I love the look of this card and by that I mean the way it is layered. The base of the card is a 5 1/2 X 8 1/2 that you score at 4 1/4. Then cut off 1 1/4 from the front and put aside for another project. Now cut off 1 1/2 and keep for this card. The DSP is cut to 5 1/4 X 1 1/4 and you need two pieces. Adhere one piece to the section still attached to the base and the other to the cut off piece.
The measurements for my center piece are the Copper Foil is cut to 3 X 3 3/4. The DSP is cut to 2 3/4 X 3 1/2. Adhere those together. The way I put the pieces together is to lay the bottom of the base at the bottom edge of my desk pad. Now place the lose piece of card stock with DSP along the bottom and flush with the bottom and sides. Dry fit the top section to see where to place you Stampin’ Dimensionals, or your adhesive of choice. Add your adhesive and adhere it to the top and bottom.
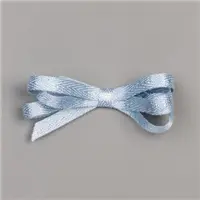
My finishing touch was a banner for the Merry Christmas. I used the Banners Pick A Punch, which makes this so very easy to do. The only difficult part was making sure I had the dimensionals in the correct place to catch the top layers of the card. I almost attached the bottom edge to the inside!!! I also added the Embroidered Ribbon as the bow for the ornament.
The inside layer is a regular 4 X 5 1/4 piece. Just remember to choose a stamp that fits behind your center piece with room for your signature and any extra writing.
Here is a view of the inside. I added a bit of pretty stamping along the bottom of the inside, but still have enough room to write.
Thank you very much for stopping by today. Please come back on Monday for new projects. If you have any questions regarding this one and the direction, message me and I will be happy to assist you.
HOST CODE
My December Host Code is: 4QDB2ZYE Please use this code for orders under $150.00. I will have a small perk for those with orders over $50.00
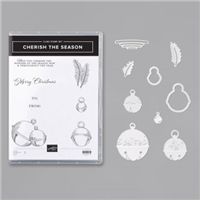
I am unfortunately sharing cards with retired, and possibly sold out, products. However, I hope you can use these as ideas for your own take on them. My title says Blue Bells and I immediately thought of the flower of the same name! My brain has really been out of sync lately!!
The Blue Bells are the Balmy Blue Glimmer Paper I used for these Christmas Bells. I believe the paper is sold out, but there are several other glimmer papers that would work just as well. I paired the blue with the Snowflake Splendor Designer Series Paper.
My thought on this card was a string of bells like on a sleigh. My Mom had a string like this of larger bells that she would hang on our porch each Christmas. The little stamped bell is part of the stamp set itself as is the small sentiment.
Thanks for stopping in today. Please come back tomorrow for the December InKing Royalty Blog Hop. There will be great projects from my fellow Royals that I am sure you will love.
HOST CODE
My December Host Code is: 4QDB2ZYE Please use this code for orders under $150.00. I will have a small perk for those with orders over $50.00
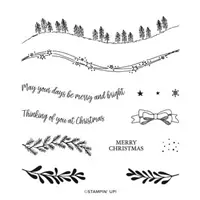
I have a bit of whimsical card to share with you today. I was playing with the Merry Moose stamp set yesterday. I though of a retro look and packages under a tree. And then I came up with this………
I was trying to keep as much of the Plaid Tidings Designer Series Paper showing as I could with the large scene I had created. My thought was an oldish technique of tearing paper. And I liked it! It does go along with the more rustic look I created.
The moose is actually carrying a package to add to the group beneath the tree. I got this crazy idea from the little racoon on the log in the stamp set It was like he was waiting on the packages. Sadly he got torn off of the scene. But the idea he gave me worked, at least for me!
The packages are a stamp with three attached. I colored them and then cut them apart for placement. To finish my little scene, I added the sentiment from the stamp set as well. It is framed with the upcoming new Double Oval Punch. I LOVE this punch. It is a wonderful size to fit a variety of sentiments.
Thank you for stopping by today. I am sure you have heard of the Whisper White card stock going away due to the business closing. It has been a hard year for a lot of companies both small and larger. That said, the Clearance Rack and the Retiring Products are going strong. If you are interested in the sale products, please click on the SHOP button at the top of the page. items are selling out and it is difficult to keep the list up to date. So best to just go to the store and see what is still available.
HOST CODE
My December Host Code is: 4QDB2ZYE Please use this code for orders under $150.00. I will have a small perk for those with orders over $50.00
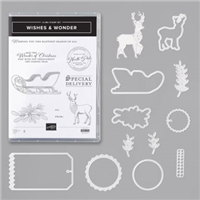
I have a two for one project to share with you today. The stamp set is a beautiful one and is on the Retiring List. It is the Wishes & Wonder Bundle. I paired it with another favorite, the Classic Christmas Designer Series Paper.
This is a quick card to make, which is my favorite kind. I used two different pieces of the Classic Christmas Designer Series paper to create the front panel. I then cut a tag using the Dies from the Wishes & Wonder Bundle. The stamped “postage” is from the stamp set. The circle and scalloped circle are also fro the dies. I finished it off with strips of each of the DSP pieces along with a Whisper White Seam Binding Ribbon at the top.
To pair with the card, I made a gift tag to match.
The sleigh is from the stamp set as well! I used the same tag die but made it to open. I folded the card stock in half with the fold on the left side. I layed it on the die with that fold just up against the INSIDE of the left cutting edge. This way it cuts everything but that side. Here is an open view.
I used the same stamps from the card to add to the sleigh. The inside stamps are from the set as well. I think these would make a great addition to a gift.
Measurements:
card base is 4 1/4 X 11
White is 4 X 5 1/4
DSP is 3/4 X 5 and 2 7/8 X 5
Folded Tag is 4 1/2 X 3 3/4
Thank you for stopping by today. I hope you have a wonderful weekend and please return on Monday.for more new projects.
I have the Retiring List here as well. Click on the picture and it will open to the three pages. It has been updated to show that individually purchasing the bundle pieces is cheaper than the bundle. Some of the dies are 30% off.
HOST CODE
My December Host Code is: 4QDB2ZYE Please use this code for orders under $150.00. I will have a small perk for those with orders over $50.00
Hello, welcome to the Stampin’ Pretty Pals’ Blog Hop! This month our Design Team created projects showing “My Favorite Things” from any of the two current catalogs or the upcoming catalog in January. We hope you enjoy and will be inspired by them! Don’t forget to leave comments! We love hearing from you. At the end of my post, you will find the full line-up to help you “hop” along from Pal to Pal.
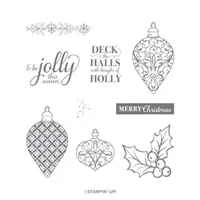
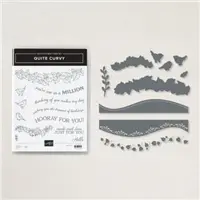
I Love Christmas. I love everything about it. And of all of the stamp sets and paper from Stampin’ Up! this year, I believe my favorite pair is the Curvy Christmas and the Classic Christmas Designer Series Paper. These two products are only for a limited time, and I have thoroughly enjoyed them.
Since I use DSP on most of my cards, you know I love Stampin’ Up!’s Designer Series Paper. But these designs on the Classic Christmas DSP are among the top for me. To celebrate that, I used four different pieces for this card. It may be a tad on the “busy” side, but it makes me happy!
The stamps are all from the Curvy Christmas stamp set. I had to re-curve them to fit the curve of the die I used. The Die is from the Curvy Die set. (It along with the Quite Curvy Stamp set will be in the next Mini Catalog. However the Curvy Christmas and Classic Christmas DSP are only available through the end of the year.) Since the stamps are photopolymer, the curving is a simple matter to achieve.
The bow was a last minute touch that I am crazy about! I even used it on yesterday’s card as well. You can see that card HERE. The bow does not have a matching die, but is very easy to fussy cut using our great Paper Snips. My finishing touch was to add Wink of Stella to the bow and the stamped stars across the top.
Thank you for visiting today! I would love to read your thoughts on my layers of DSP happiness. 🙂
More inspiration awaits! Use the Blog Hop Line-up below to visit the rest of this month’s Design Team. My fellow Pals are excited to show you what they’ve created! Mark your calendars for our next blog hop on January 13th when our theme will be Time to Sale-A-Brate. Participants will showcase tags or 3D items that will be great for gifts for any occasion. Don’t miss the fun! Until then, please stay safe and have fun in your craft room.
Before I get to today’s card, I wanted to share the Year End Closeout Sale with you. I am sure you have seen the retiring lists. The one I am sharing is a paired down version. This one does not include bundles and other languages. The bundle products are less when purchased individually. And this way makes it easier to find. Just click on the picture below and it will open up to a three page spread. Remember, all of these items are while supplies last. So if you really want something, this may be the last chance. Or give a wish list to a family member or friend and have them contact me. I would be thrilled to assist them in a gift for you.
Now for today’s card. It is a quick Christmas card using the Curvy Christmas stamp set.
The gorgeous Designer Paper is from the Classic Christmas DSP and is part of the special Curvy Christmas Suite.
All of the stamps are from the Curvy Christmas stamp set. It is only available through January 4th. The three Fir boughs are stamped using Shaded Spruce Ink. The bow is stamped using Cherry Cobbler Ink and then colored with Cherry Cobbler Blends. There is not a die for the bow, so I fussy cut it with my handy Paper Snips. It is really easy to cut. You can see the flyer I have at the bottom of the post.
The sentiment is also from the stamp set. But the oval backgrounds are a sneak peek of an upcoming punch. It is the Double Oval Punch. Yes, you read that correctly!! The scalloped oval and the plain oval are both on one punch. I love punches for quick cards and this is a must have to me. This punch will be available in the January – June Mini Catalog.
Thank you for stopping by today. Please come back tomorrow for another new project as part of the Pals December Blog Hop. There will be a lot of great projects shared.
HOST CODE
My December Host Code is: 4QDB2ZYE Please use this code for orders under $150.00. I will have a small perk for those with orders over $50.00
The content in this blog is the sole responsibility of Jackie Beers as an Independent Stampin' Up! Demonstrator. The use of and content of classes, services or products offered is not endorsed by Stampin' Up!