I have a Chocolate Cookie treat for you today. I made this card for my cousin, who is like a sister, as a birthday card. She loves plaid, and who doesn’t love cookies!
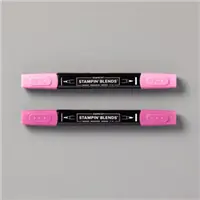
I love that the cookies have a bite missing. That is definitely something I would have done in my young days. I made five cookies and was able to place them so that the bites were covered except for the top one. I also found a great little tip when I stamped the cookies. The outside edge and the inside do not totally meet. However, the Dark Crumb Cake Stampin’ Blend pairs perfectly with the Crumb Cake Ink. You cannot tell where I touched up the cookie inside.
I used two pieces of the In Good Taste Designer Series paper. I was going for the look of the cookies sitting on a countertop. So I have a wood counter with the stone backsplash. Those designs in that pack of paper are very realistic!
I used the Foam Adhesive Sheets to make the Chocolate sign. Those sheets are so easy to work with and are soft enough that the dies do not have any problem cutting through them. I have had that issue with other brands of the adhesive foam.
The plate is created using the Layering Circles Dies. I cut one from the Perfectly Plaid DSP and another from Early Espresso card stock. A nice wintertime plate of yummy cookies! The finishing touch is the little banner saying “adulting is hard”. I really love that! I stamped it and cut the one end using the Banner Pick A Punch.
Thank you for dropping by today. I greatly appreciate you looking at my creations and I love to read your comments. Also, from yesterday’s Pals Blog Hop, I used the Curvy Celebrations listed below. They are a sneak peek of the January to June Mini Catalog. However, the Curvy Christmas and the Class Christmas Designer Series Paper are only available from now until January 4 or while supplies last. You can see my card from the hop HERE.
HOST CODE
My November Host Code is: 7C63XEUQ Please use this code for orders under $150.00. I will have a small perk for those with orders over $50.00
Stampin’ Up! is doing an early release with one of the Bundles from the upcoming January – June Mini Catalog. It will be available for you to order beginning tomorrow. In addition to the stamp and die which will be in the Mini Catalog, there are additional products that are only available during this early release. It is a Christmas stamp set, which pairs with the dies, and some beautiful 6X6 Designer Series Paper. I was able to preorder it as a demonstrtor. That is one of our awesome perks! So I have a birthday card using the bundle and the Designer Series Paper.
The Pictures of the products are shown below. The Quite Curvy Bundle will be in the upcoming Mini Catalog. As I said above, the Curvy Christmas and the Classic Christmas DSP will only be available during this Sneak Peek time of November and December.
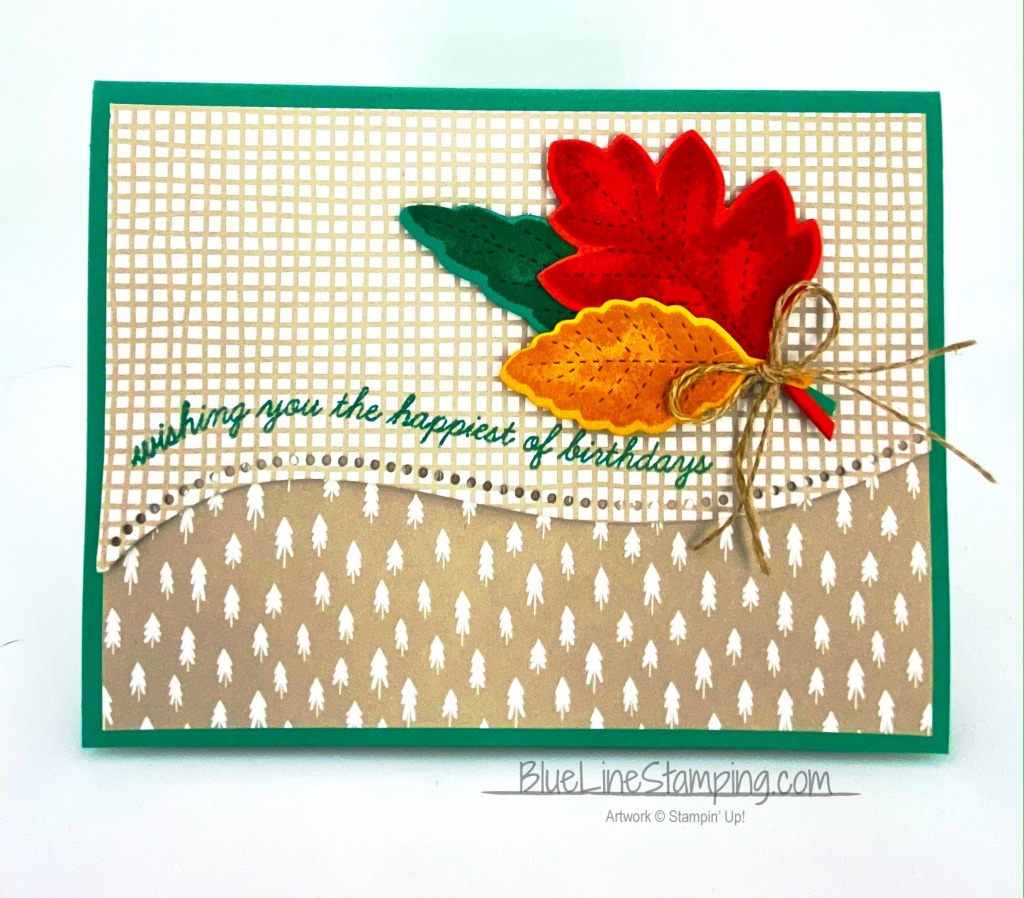
For today’s project I used two sheets of the Classic Christmas DSP. The colors are gorgeous! I cut the top piece using one of the curvy dies in the bundle.
The sentiment is from the Quite Curvy stamp set. It is shaped a little curvy to go along with the curve of the die cut. I stamped the sentiment using Just Jade Ink to pair with the Just Jade base card.
The leaves are from the Love Of Leaves Bundle. I stamped the images tone on tone and then used both the definition die as well as the cutting die for each leaf. After laying them out the way I liked, I added a double strand bow using Linen Thread. The Linen Thread is one of my must have products!
Thank you for stopping in today! I really appreciate it and hope you like the card. Please come back tomorrow for another new project.
HOST CODE
My November Host Code is: 7C63XEUQ Please use this code for orders under $150.00. I will have a small perk for those with orders over $50.00
I have a birthday card to share with you today. It is almost out of season in regard to more summer type flowers, but here is to one last card. Here in the South, summer lasts quite a bit longer than other parts, so I still have some flowers blooming. And I love this stamp set that I used today!
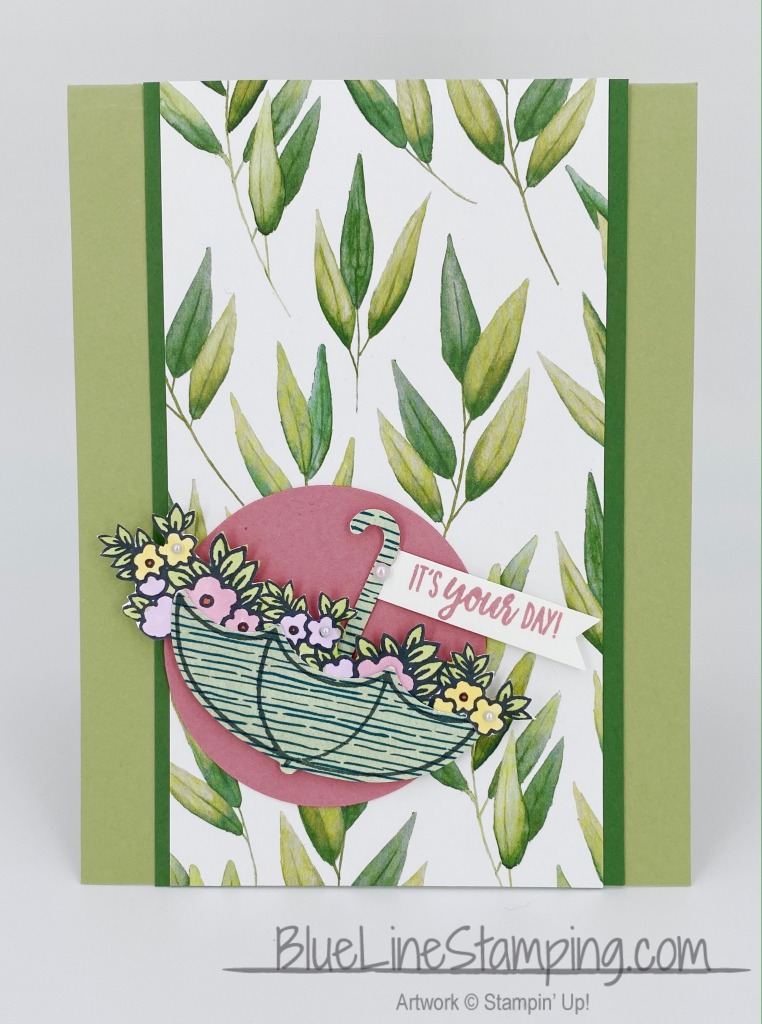
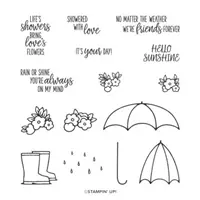
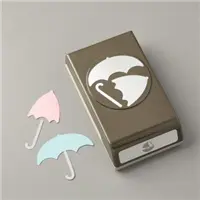
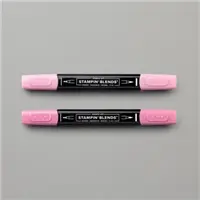
I paired Under My Umbrella stamp set with the Forever Greenery Designer Series Paper. To create the flowers I stamped along the bottom edge of a scrap of paper. I used two different flower stamps from the set to create this little uneven line. I colored them using Stampin’ Blends and then fussy cut them along the ends and top.
The umbrella is stamped directly onto the sheet from Forever Greenery DSP and punched using the Umbrella Builder Punch. I added some dimensionals to the base and then tucked the flowers behind and over the ends.
The Rococo Rose circle is cut using the 2 1/4″ Circle Punch. I wanted the umbrella and flowers to Pop a bit off of the green background. I chose the color from the flowers. When layering everything together, I wanted the umbrella and flowers to spill over the edge a bit. Plus it left a little more room for the tag. I like seeing the flowers hanging over the center panel and onto the card base. It shows the flowers a bit extra.
The tag sentiment is from the stamp set as well. I used the Classic Label Punch to punch it out. I then put the one end back into the end of the punch to make the banner tip. The other end I cut off straight and tucked behind the umbrella handle. I also added a few small pearls to a couple of the flower centers for a bit more dimension and a touch of bling!
Thank you for stopping by today! I do appreciate your visits and comments very much. I have all of the supplies I used at the bottom of the post. Don’t forget about the 15% OFF DSP Sale! We have a little under two weeks to go.
HOST CODE
My October Host Code is SXDVJZF3 Please use this code for orders under $150.00. I will have a small perk for those with orders over $50.00
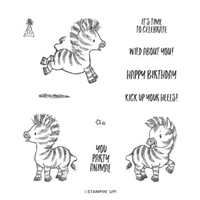
One set that was extremely popular on debut of the Annual Catalog was the Zany Zebras stamp set. I did not get it immediately but after all of the cute cards, decided it needed to come to me. So today I have a bright and fun card.
I love the face on this precious zebra! So I took some creative license and decided she needed to be spruced up for the birthday party. She was given a Magenta Madness Manicure and Pedicure, along with some new Magenta Madness Lipstick. LOL!!! It is my world and I can be as crazy , or creative, as I want.
Really this card was so quick and simple. You can see there is only a little bit of stamping and coloring. I took my color choices from the Artistry Blooms Designer Series Paper. ( Yes, it is one of the DSP packs that are included in the 15% OFF Sale!) I added the touch of matching Ribbon in Magenta Madness, as well as die cutting the focal point using the Stitched So Sweetly Dies.
Thank you for stopping by today. I hope my spiffy Zebra gave you cause to smile!! Please come back tomorrow for the Pals October Blog Hop. You will see quite a few great projects.
HOST CODE
My October Host Code is SXDVJZF3 Please use this code for orders under $150.00. I will have a small perk for those with orders over $50.00
I have a little different Fun Fold to share with you today. It isn’t new by any means, it is an old one that I found when cleaning out. I love when I find older styles and folds that I have not seen in quite a while. Today’s find is a Matchbook fold. The most recent Matchbook fold I have used was with a little Life Saver Candy that I made in a Matchbook last year. I handed them out during the Holidays.
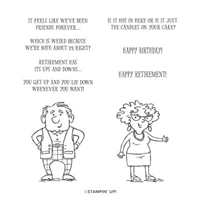
I think this stamp set, Senior Years, is a hoot!! But then I qualify as a Senior, so best to just laugh about it, Right???
The man and the sentiment are both from the Senior Years set. I colored the man thinking of Sheldon on Big Bang Theory and his plaid pants. I added the background colors based off of the pants.
The card is a pretty quick one in terms of the fold. It is a 4 1/4 X 11, scored at 1″ and 6 1/4″. The 1″ is the matchbook part. I still have the old Stampin’ Up! stapler. But any little stapler will do the trick. Just fold the 1″ section up and staple it equal distance apart, like 1/3 in from each end. But staple it a bit below 1/2″. That way your card has room to get behind the fold and not hit the staples.
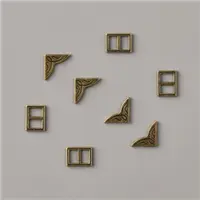
To Dress Up the card, I added four of the Antique Corners from the Antique Corners and Slides accessories from the World Of Good Suite in the Annual Catalog. They seem very “manly” when placed with these colors and the “senior” man.
Thank you for stopping in today. I greatly appreciate it. If you have any questions regarding the card, do not hesitate to reach out. I will gladly explain more or answer a question.
HOST CODE
My October Host Code is SXDVJZF3 Please use this code for orders under $150.00. I will have a small perk for those with orders over $50.00
I mentioned yesterday that I was behind on Birthday cards. So I have another one to share today. I also used another of the DSP that are included in the 15% OFF Sale. This one is a favorite of almost everyone in terms of the texture it gives to a card. Can you guess which one that is?
If you guessed In Good Taste Designer Series Paper as the DSP, you are correct! This piece is my favorite of all of the ones in the pack. Misty Moonlight is my favorite of the new In Colors, and this piece has a touch of Misty Moonlight in the folds on the paper.
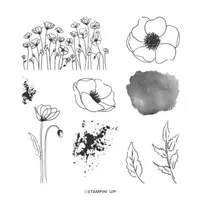
A little bit of a different touch to this card is that I stamped directly onto the DSP. I love how the texture shows through these poppies. I still colored them using the Stampin’ Blends in Just Jade and Purple Posy.
For the focal point, I stamped the single flower image and then die cut using the Stitched Nested Labels Dies. I used the 4th from largest die. I colored this flower using the same Stampin’ Blends. Then to give it a little background, I used the marker flick to give the splatter look. I used the Misty Moonlight Stampin’ Write Marker and flicked the brush tip against the inside of the lid to “splatter” the card stock. I wanted to tie in that piece to the DSP without doing a background layer.
The focal flower is raised with Dimensionals. I also added a bow tied using the blue and white baker’s twine from the Flowers For Every Season Ribbon Combo. It was just enough of an extra touch.
Thank you for stopping by today. Please return tomorrow and I will have another new project to share.
HOST CODE
My October Host Code is SXDVJZF3 Please use this code for orders under $150.00. I will have a small perk for those with orders over $50.00
The content in this blog is the sole responsibility of Jackie Beers as an Independent Stampin' Up! Demonstrator. The use of and content of classes, services or products offered is not endorsed by Stampin' Up!