Today’s card is Bright, Cheery, and a Fun Fold. I think it is a winner and gives me a Smile. It is Black and Magenta Madness. I was thinking Black with a touch of Red, but wanted something that says Happy. You cannot get much brighter than Magenta Madness.
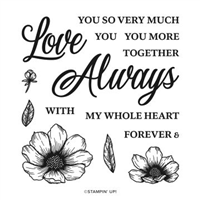
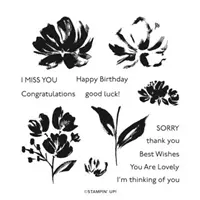
The Magenta Madness along with the True Love Designer Series Paper is a winner in my book. The black and white of the DSP needs a bright color, but just a touch. The flowers are from the Forever & Always stamp set. There are matching dies in the die set, but I wanted a more subtle look. Although a single raised flower would be a step up!
The best part of this card, to me, is the Fun Fold. Better yet, it is a simple Fun Fold. I started with a piece of Thick Basic White cardstock that is cut 4 1/4 X 11. I scored it at 5 1/2, the normal fold, and then cut off 3″ from one end. The cut off piece is 3 X 4 1/4 and becomes the front stamped area with the flowers and sentiment. Here is the ope view.
There is quite a bit of flexibility with this. The card could be turned in two other directions ( upside down so fold is at the top, or sideways with the fold on the left). It could also be used as a gift card holder if instead of cutting off the 3″ piece you scored there and only cut off 1 1/2″ then fold that under. I have made those previously.
The finishing touches are the sentiment and the In Color Dots. The sentiment is from the Happy Thoughts stamp set. The dots are placed randomly to keep the Magenta look going. The centers of the flowers are also colored using the Dark Magenta Madness Stampin’ Blend.
Measurements:
Base card is 4 1/4 X 11, scored at 5 1/2, then cut off 3″.
The base Magenta Madness is 4 X 5 1/4
The striped DSP is 3 7/8 X 5 1/8
The Magenta Madness folded section is 4 X 2 1/4
The fold DSP is 3 7/8 X 2 1/8
The Magenta Madness sentiment layer is 4 3/8 X 3 1/8
The sentiment layer is the cut off base card and is 4 1/4 X 3
The inside writing layer is 2 1/2 X 4
I hope you will give this Fun Fold a try. It is a great base card and I would love to see your take on it. You will be surprised at the few products I used to make this one. The supply list is at the bottom of the post. Please come back tomorrow for another new card.
HOST CODE
My February Host Code is: MRYR7XY2 Please use this code for orders under $150.00. I will have a small perk for those with orders over $50.00
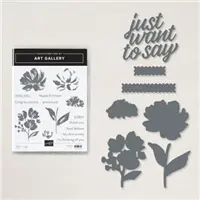
I know the title may be a bit confusing to you! I used the word dies from the Art Gallery Bundle as the star of this card. It turned out to be a really “Busy” card. But I believe that is perfectly fine. I hope you do as well.
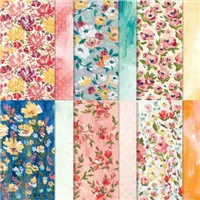
My choice of DSP is the Paper Blooms Designer Series Paper from Sale-A-Bration. I used three different patterns from the paper pack. And I do realize from the photo the saying is a little difficult to see. It is not quite as hard in person.
The cut out sentiment is from the matching Dies from the Art Gallery Bundle. It says “Just Want To Say”. There are a variety of words to finish that sentiment in the stamp set. I chose the “Happy Birthday” . The cute die trimming the Happy Birthday is also from the Die set.
The main wording is created using the Foam Adhesive Sheets. I cut a piece of the DSP a little larger than needed. I also cut a piece of the Foam Adhesive the same size. I do love this product. All you have to do is peel off the top cover, like on the dimensionals, and add the DSP. These thicker foam layers go through the Cut and Emboss Machines very easily. I do recommend running it through and then back the opposite direction to get a really good cut. Now all you have to do is peel off the sheet on the back of the foam and lay it down. Easy Peasy!!!
The measurements for the layers of this card are as follows:
Base card of Rococo Rose is 5 1/2 X 8 1/2 scored and folded at 4 1/4
Night Of Navy layer is 4 X 5 1/4
DSP is 3 7/8 X 5 1/8
Rococo Rose layer is 4 X 2 1/4
DSP is 3 7/8 X 2 1/8
Thank you for stopping by today. Please come back tomorrow for another new project!
HOST CODE
My February Host Code is: MRYR7XY2 Please use this code for orders under $150.00. I will have a small perk for those with orders over $50.00
Welcome to InKing Royalty’s February Blog Hop! During this year’s blog hops, we are having fun with our stamping favorites – our favorite themes for seasonal cards and projects. This month’s projects feature balloons, so you are in for a celebratory treat. We are excited to share our creations with you today! After you read my post, I hope you’ll hop over to the next person on the list at the base of this post.
I believe balloons are a definite Fun item. Anything that makes me Smile is fun. So I have combined the smile inducing, adorable, Happy Birthday Chick stamp set with a Fun Fold to share for this Blog Hop Challenge.
This is the first time I have made this Fun Fold. There are a couple of names that I have seen in looking for it on various card sites. So I chose to call it the Corner Fold. It worked perfectly to show off the balloons. And since the little chicks are shouting Happy Birthday, the balloons are appropriate.
Here is the inside view and you can see the fold as well.
I LOVE the chick with the balloon hanging off her tail! You can see the corner pieces under the chick and above her. Those fold inside the card when it is closed. I positioned the chick to lay down with the fold and not be seen when the card is closed. The three balloons from the closed card are attached on the back side of the fold.
The chicks are all stamped with Memento Tuxedo Ink and colored with the Stampin’ Blends. All of the colors will be listed in the supply list. They are all cut out using the matching Dies in the bundle. The Happy Birthday from the front is stamped and punched out using the Classic Label Punch.
I chose to have a background for the balloons as the strings are not really sturdy. I used the 2″ Circle Punch for this. All of the DSP is from the Ice Cream Corner Designer Series Paper. I think it worked perfectly for this birthday card.
Thank you for stopping by today. I hope you’ll hop along to the next stop on the blog hop, Ann Murray at Murray Stamps Ink. There’s lots of inspiration to be found in this group – and you don’t want to miss it!
Thank you for hopping along with us. If you get stuck during the Blog Hop, please use this line-up as a guide:
Hello, welcome to the Stampin’ Pretty Pals’ Blog Hop! This month our Design Team created “Birthday Bonanza” projects to inspire you to make for all of your family and friends. We hope you enjoy and are inspired by them! Don’t forget to leave comments because we all love hearing from you! At the end of my post, you will find the full line-up to help you “hop” along from Pal to Pal.
I have a birthday card to share with you today that highlights the gorgeous Fine Art Floral Designer Series paper. I have also used other products from that Suite and created a fun fold that is designed to show off each layer. I hope you like it.
The DSP is always a great place to begin color choices. I chose Old Olive, Misty Moonlight, and Petal Pink to compliment the flowers of the DSP. For the top layer flower, I stamped Petal Pink for the base and used Flirty Flamingo for the highlight areas of the 2 Step Stamping.
For the first time, I used the Gilded Leafing and Heat & Stick powder. I applied the Versamark Ink with the “center” stamp of the flower. After adding the Heat & Stick powder, heating it, I applied the leafing. It was not as nerve racking as I had anticipated!!! Normally being a bit messy with embossing powder is not good. But with this application a few flecks of the gold leafing looks like they belong on the petals.
The flower layer is cut using the Stitched Rectangles Dies. I used the 3rd Largest one. It is then layered onto a piece of Misty Moonlight. The Petal Pink is the second part of the Fun Fold. You can see that in the next photo.
The colors of the DSP are so vibrant that I wanted you to see what a punch it has when you begin opening the card. This fold is the same one I have used several times as a gift card holder. I did not do that today. But all you need is to slightly shorten the folded under layer beneath the DSP and adhere it on the sides to make the pocket.
Before adhering the front flower layer, I did a bit of “flicking” of color using Stampin’ Write Markers. I used the same colors as the cardstock. Also, going back to the first picture, I used the 2 smallest of the Stitched Rectangle Dies for the sentiment layer on the front.
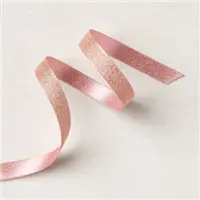
To finish the card, I wrapped some of the beautiful, and glittery, Blushing Bride Metallic Ribbon around the Petal Pink layer of the fun fold. I wrapped the ribbon and secured it on the front beneath the sentiment. For the little knot of ribbon, I cut a smaller piece and simply tied a knot around the strip of ribbon. The easiest way to add a ribbon in my opinion.
Here are all of the measurements:
Base card of Old Olive is 4 1/4 X 11, scored at 2 1/4 and 5 1/2. (to make a gift card, after scoring cut off 1″ from the left end . After burnishing the scores, fold under the short section and secure the layer with Tear & Tape)
Inside Misty Moonlight layer is 4 1/8 X 5 3/8
Petal Pink section is 3 1/4 X 9 1/2, folded in half
White inside of Petal Pink is 3 X 4
Misty Moonlight beneath Focal Flower is 3 1/8 X 4 1/2
Misty Moonlight beneath DSP is 2 5/8 X 4 1/8
DSP is 2 1/2 X 4
More inspiration awaits! Use the Blog Hop Line-up below to visit the rest of this month’s Design Team. My fellow Pals are excited to show you what they’ve created! Mark your calendars for our next blog hop on March 10th when our theme will be “Cute Critters” where the design team will be sharing projects that will feature critters of all sorts to inspire you. Don’t miss the fun! Until then, please stay safe and have fun in your craft room.
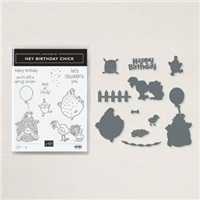
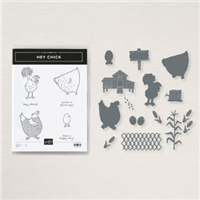
I have a 2 For 1 to share with you today. I am being a little different. I hope you already know that the Hey Chick from a previous Sale-A-Bration is returning. Actually it is already here and was orderable beginning on Monday. PLUS…. it has matching dies ! Oh My!!
In addition to the previous Hey Chick, there is a new stamp set in this current Mini Catalog named Hey Birthday Chick. It is adorable. Well…..Stampin’ Up! has added dies to match this new Hey Birthday Chick stamp set as well. How Awesome is that???? So I am sharing a pretty simple stamping with the Hey Birthday Chick and then just a second card that is just a touch stepped up.
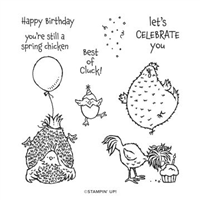
Isn’t that chick just too stinkin’ cute??? I colored her in not a very flattering way. She looks like maybe she had too much fun at the party. For the background, I used the New Blending Brushes to shade in some Just Jade Ink. Everything is stamped directly onto the Thick White Cardstock using Memento Tuxedo Black Ink. All of the coloring is done using Stampin’ Blends.
Here is the second version.
For this version, I did everything the same as the first card. I then added a layer of Real Red Cardstock to show off the red in the chicken. I stamped the sentiment on scrap paper and punched it using the Classic Label Punch. It is then raised with Mini Stampin’ Dimensionals. For the finishing touch, I added Red Rhinestones scattered around.
It will not be long before I share a new card using this stamp set and the super cute dies that match. Here are a look at both bundles. You can just click on the image for a closer look in the Online Store.
Thank you for stopping by today. I really do appreciate every time you check out my projects! All of the supplies I used in both of the cards today are just below.
HOST CODE
My February Host Code is: MRYR7XY2 Please use this code for orders under $150.00. I will have a small perk for those with orders over $50.00
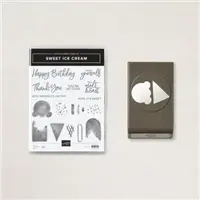
I hope you have seen the New Mini Catalog and the Sweet Ice Cream Suite! Oh My! It is so stinking cute. I loved it immediately. My card today is using that bundle.
I love this cute ice cream cone, especially a double scoop!! The cone and scoop are together in one punch. And I truly love punches! The background DSP is two sheets of the Ice Cream Corner Designer Series Paper. Every sheet is as cute as can be.
I pulled all of my colors from the two sheets of DSP. My base card is Bermuda Bay, the layer is Purple Posy, and the “scoops” are Soft Sea Foam with “sprinkles” of Coastal Cabana.
The cone is a solid but shaded stamp. You then add the hatching marks with a second stamp. I used Cinnamon Cider for both. Due to the shading on the main stamp it allows the hatching to show very well.
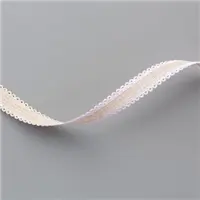
I layered the cones on a panel cut using Painted Labels Dies. I like that it hangs over just a tad bit. The ribbon I used to join the two DSP sheets is the Purple Posy Scalloped Ribbon.
This is a pretty quick card and could be made in just about any color combinations. I love papers that allow so many choices. It would allow you to match a birthday theme color very easily.
Thank you for stopping by today! Please come back on Monday for another new project.
HOST CODE
My JANUARY Host Code is: AYRTRJCQ Please use this code for orders under $150.00. I will have a small perk for those with orders over $50.00
The content in this blog is the sole responsibility of Jackie Beers as an Independent Stampin' Up! Demonstrator. The use of and content of classes, services or products offered is not endorsed by Stampin' Up!