I very much enjoy making Fun Fold cards. Today I have one to share that I have done once previously. It is maybe more of a Fun Cut, than a Fun Fold. But I enjoyed making it.
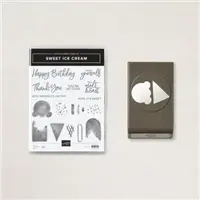
This card is made using the Sweet Ice Cream Bundle, as well as the matching Ice Cream Corner Designer Series paper. The ice cream is cut using the Ice Cream Cone Builder Punch. I really enjoy punches for quick cards. They are great when making multiples as well.
The cut of the paper is my Fun Fold. I have made the same Fold / Cut for a card once before when I used the Donkey stamp set during Sale-A-Bration. You can see that card HERE.
A Bonus Tip for you : Even though the cards look very similar, they are actually quite different. For the donkey card I used a 4 1/4 X 5 1/2 piece of cardstock for the base and then added a 2 3/4 X 5 1/2 piece (scored at 1 1/4 on the 5 1/2 side) and then layered to the bottom front and covered the small folded section with a piece of Smoky Slate cardstock. That added piece makes the barn door.
For this Ice Cream card, I began with a 5 1/2 X 8 1/2 piece of cardstock and scored it at 4 1/4. I then used my Paper Trimmer to cut down the scored line 2 1/2. I turned the paper and cut across the front panel. This cuts off the top section of the front panel. I used the cut off section and cut it down to 2 X 3 1/2 for the backing of the ice cream layer. Two cards that look the same, but are created very differently. Each method would work perfectly for the two cards.
Here is a view of the card open.
Here are all of the measurements for today’s card.
Base card of Blackberry Bliss is cut 5 1/2 X 8 1/2, scored at 4 1/4
Cut down the scored line 2 1/2 and then across the front panel. This cuts away the top right section 2 1/2 X 4 1/4. Cut this section to 2 X 3 1/2 for the ice cream layer
Inside White layer is 4 X 5 1/4
Front bottom flap White layer is 2 3/4 X 4
Front bottom flap DSP layer is 2 5/8 X 3 7/8
Ice Cream White layer is 1 7/8 X 3 3/8
Thank you for visiting today! I believe most everyone loves ice cream and think this is such a fun card to make as well. I hope you will give it a try.
Click on the below picture for a PDF of the retiring products. They are going quickly!
HOST CODE
My March Host Code is: B6JC9CHE Please use this code for orders under $150.00. I will have a small perk for those with orders over $50.00
Today’s card is a simple masculine birthday card. I see posts regularly asking about masculine cards with comments that they are difficult. I agree somewhat in that quite a lot of the stamps seem to be geared towards females. And we like to add embellishments to those cards. I think of masculine cards as more “simple”. I mean that to be just “less”. I would love to know your thoughts.
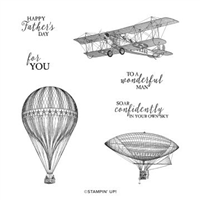
This card is for a dear friend and I tried to adhere to the thoughts I expressed above. I knew when I first saw the Soar Confidently stamp set that it would be great for masculine cards of any age. Most guys I know love flight. And when I saw this piece of the Well Suited Designer Series Paper, I immediately thought to stamp on it. I love the grid look.
The strip of DSP is the opposite side of the grid paper. I hesitated just a second because it is Poppy Parade. But I knew it needed some color. So the base of Pacific Point and the layer of Poppy Parade are both from that strip of DSP.
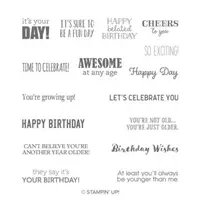
With the simple Memento Tuxedo Black stamped airplane, I needed a touch more of texture and brightness. I went with the “Awesome At Any Age” sentiment from the Itty Bitty Birthdays stamp set. (I love all of the Itty Bitty sets!) I tried all of the punches and came to the Label Me Fancy for the sentiment layer. It made me think of military dog tags, which made it perfect since the friend is retired military. For a backing layer I went back through all of the punches I have. When I tried the Tailored Tag punch I was happy. It frames the first tag almost perfectly.
Thank you for stopping by today. I hope you have a great day and will come back tomorrow.
HOST CODE
My March Host Code is: B6JC9CHE Please use this code for orders under $150.00. I will have a small perk for those with orders over $50.00
Today’s card is a quick and easy one that is supposed to make you Smile. I kept it pretty simple with some easy stamping. I hope you enjoy it.
I used the Pretty Perennials Bundle for this card. I love the “Fun” look of the flowers as well as the Happy and the coordinating sentiments. I used the matching dies for the one bottom left flower. It is stamped and die cut then raised using a Stampin’ Dimensional. However, you could quickly use your paper snips to accomplish cutting that one flower if needed.
The colors are some of my favorites. The card base is Highland Heather, the layer is Misty Moonlight, and the layer behind the white is Purple Posy. The flowers are Seaside Spray for the solid flower with the outline done in Highland Heather. The sentiments are stamped using Misty Moonlight. And the finishing touch is the In Color Enamel Dot of Misty Moonlight in the center of the raised flower.
Measurements:
card base of Highland Heather is 4 1/4 X 11, scored and folded at 5 1/2
layer is Misty Moonlight cut to 3 3/4 X 5
layer of Purple Posy cut to 3 X 4 1/4
White layer is 2 7/8 X 4 1/8
This was a quick and fun card to make. It could be done in your, or the recipient’s, favorite colors. Thank you for stopping by today. Please come back tomorrow for the InKing Royalty March Blog Hop.
HOST CODE
My March Host Code is: B6JC9CHE Please use this code for orders under $150.00. I will have a small perk for those with orders over $50.00
I love purple and I know quite a few of my friends do as well. I wanted a purple birthday card without overdoing the single color. Of course I turned to some of the Hydrangea Hill Designer Series Paper to get the perfect piece. The colors and prints of that pack of paper is simply gorgeous.
I hope you can see the tone on tone flowers in the DSP of the labels. I love the softness of those colors. I chose the Stitched Nested Labels Dies to cut the two focal layers. I paired these with the Highland Heather cardstock for the base. The Basic White is embossed with the Ornate Floral Embossing Folder.
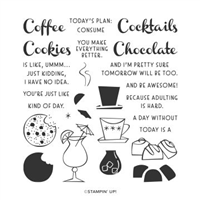
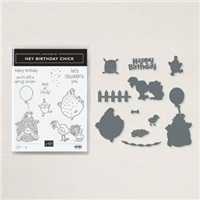
The sentiment is from the Birthday Chick Dies. I love the fun and bold Happy Birthday. Since I have been dreaming of summer with these warmer days, I went with a fruity drink for the other panel. It is from the Nothing’s Better Than stamp set. I stamped off the HIghland Heather Ink for the umbrella and the liquid of the drink. The bit of shimmer in the drink is from a touch of Wink Of Stella. Just to add a bit more detail, I punched the drink using the Rectangle Postage Stamp Punch.
The finishing touch is the addition of just a couple of the Pastel Pearls. They are a bit lighter than the cardstock so fit perfectly with the tone on tone of the DSP.
Thank you for stopping in today. Please come back by tomorrow for another new project.
HOST CODE
My March Host Code is: B6JC9CHE Please use this code for orders under $150.00. I will have a small perk for those with orders over $50.00
In cleaning up my desk, I made a really cute card. I had been putting leftover pieces from cards I was working on in a spot, or three, on my desk. When cleaning up, I decided to make a card out of those pieces. You can be the judge of it was a good idea. LOL!!
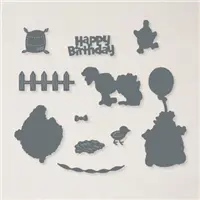
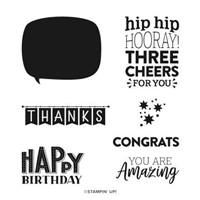
For starters I found the die cut chick from Hey Birthday Chick which had been cut with the matching dies. The word balloon is from the You are Amazing stamp set. It was just the stamped balloon on a piece of scrap paper. I added the Happy Birthday from the same set and then fussy cut the word balloon using my Paper Snips.
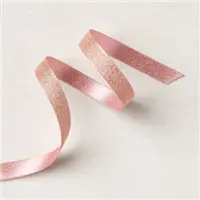
The DSP is the Ice Cream Corner Designer Series Paper. I had used the opposite side of this paper for a card and had two strips. To join the two, I added the Terracotta Tile and Bumblebee cardstock layers. For a bit of glam, I added the Blushing Bride Metallic Ribbon. The Blushing Bride and the touch of Gold both work wonderfully with the other colors.
As a finishing touch I added a couple of Rhinestones for a little bling. I hope you will try a “pieces” card and show what you create.
Thank you for stopping by today. Please come back on Monday for another new project.
HOST CODE
My March Host Code is: B6JC9CHE Please use this code for orders under $150.00. I will have a small perk for those with orders over $50.00
I needed a birthday card for a 1 year old little guy. I know he would not care about a card, but his Mom loves Disney. And I remembered seeing a card making the mouse ears from the Ice Cream Builder Punch. that was my start.
I made one of the Quick and Easy Shaker cards, with the added bonus of Micky Mouse Ice Cream. I used the Ice Cream Cone Builder Punch to punch a “scoop” from Bermuda Bay and Coastal Cabana cardstock. The ice cream stick is from the Sweet Ice Cream stamp set. The stamp set and punch come as a bundle with a 10% discount!
The “confetti” circle is from the Ice Cream Corner Designer Series Paper. I used the 2 1/4″ Circle Punch. The sentiment is from the stamp set. I used the scalloped oval of the Double Oval Punch to cut it out. That “You Melt My Heart” is so cute and unique. I think it would make a great card for anyone you are sending love to.
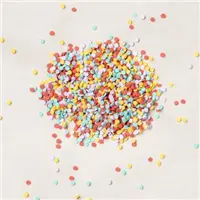
The shaker card is made using one of the Clear Envelopes. I cut a different piece of the Ice Cream Corner DSP to 4 X 5 1/4 and placed it inside the envelope. I then added quite a few of the Ice Cream Corner Sprinkles. I closed the envelope, with the closed part on the back side and folded the edges down for a tight fit. All I had to do now is add Tear & Tape to the back side and adhere it to the card base. Note: You have to be very careful as it is a One Shot to make it right type application. The Tear & Tape is not at all forgiving!! Ask me how I know! LOL!!
Once the shaker was put together, all I had to do is add the front pieces and I had an adorable little ice cream card. It just hints at Disney and Micky, but I know that’s what it is.
Thanks for stopping by today. I hope you will give this easy shaker card a try. And also remember to turn your ice cream scoop upside down for some mouse ears!
HOST CODE
My March Host Code is: B6JC9CHE Please use this code for orders under $150.00. I will have a small perk for those with orders over $50.00
The content in this blog is the sole responsibility of Jackie Beers as an Independent Stampin' Up! Demonstrator. The use of and content of classes, services or products offered is not endorsed by Stampin' Up!