Welcome to the Stampin’ Pretty Pals’ Blog Hop! This month, the theme is Birthday Bash. We really hope that you enjoy and will be inspired by them! As you hop from blog to blog, we would appreciate your comments because we enjoy hearing from you. You will find the lineup at the end of my post to help you “hop” along from Pal to Pal.
I love an opportunity to share Stampin’ Up! products and Birthday cards are the ones I make and send the most. They are always happy cards. For today’s Hop Card, I went with a new product from the Mini Catalog, the Artfully Layered Bundle. After having seen beautiful cards with this Bundle, I ended up casing the catalog somewhat.
I cased the catalog for the front panel and the Fun Fold is from Mary Deatherage. She called it a Book Fold Easel Card. The card folds flat for mailing! Here is a flat view.
The Bundle +
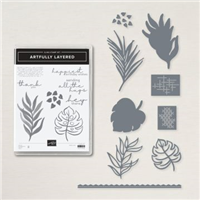
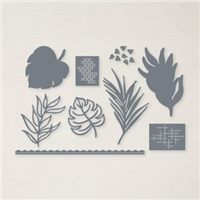
The Artfully Layered Bundle is amazing. I love the mix of fonts in the sweet sentiments, and the leaves can be stamped, embossed, die cut, and are so much fun! The “+” is the Picture This Dies. I used the center of the triangle Picture This for the inside sentiment layer. The stitching around these dies are different from any of the layering dies. And it happened to be laying on my messy desk when I was looking for an idea on the sentiment layer. LOL!! Sometimes messy is a good thing!
The Papers
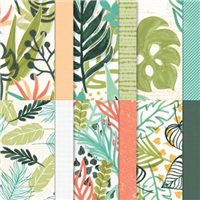
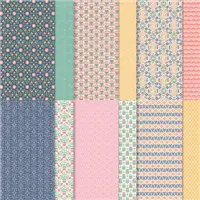
The gorgeous colors of the DSP are all so bright and cheery. That is one of the reasons I chose this Bundle / Suite for this card. The paper is named Artfully Composed Designer Series Paper. And I pulled all of the colors from the paper. For a varied look, I even pulled in lighter versions of some of the main colors. My paper scraps came in very handy for this one. Stampin’ Up! has the best colors for using shades of a color.
Finishing
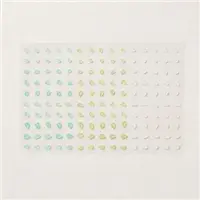
For the final touches of this fun card. I White Heat Embossed the two sentiments. The front one is on one of the die cut leaves. It does not show quite as brightly as I had hoped. And the last touch was using a new product for the first time. It is the Faux Sea Glass Adhesive gems. They are so very different and such fun! I went a bit overboard and added more than the preferred three.
More inspiration awaits, so use the lineup below to visit the rest of the Design Team. The Pals are excited to show you what they’ve created! Then, please mark your calendars for our next blog hop on March 9th. Our theme will be Cute Critters where our Design Team creates a project with any kind of animals, birds, butterflies or insects.
The Barn Door style Fun Fold card is a quick one that has great visual appeal. After learning the cut, the hardest part is deciding what image to use as the focal point. Today I paired the Amazing Silhouettes stamp set and Sweet Symmetry DSP with the Fun Fold for a bright and happy card.
Stamp sets
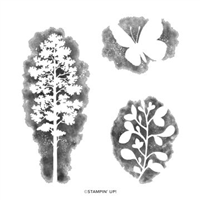
The Amazing Silhouettes stamp set definitely lives up to the name! There are three images in the set that are shaded beautifully and stamp perfectly. I chose the Leaves stamp for today’s card. By using the Bumblebee Ink it pulls the Bumblebee color from the paper. But the one single stamp easily stands alone on the focal panel of my Barn Door card.
To finish the focal section, I stamped the Happy Birthday from the Peaceful Moments stamp set. This is a great set of sentiments that cover most occasions. My choice for the sentiment layers is the Double Oval Punch. I think this is one of the best punches Stampin’ Up! carries. Between the two ovals, they fit most sentiments that we have.
Papers
All of my colors were chosen from this bright DSP. It is the Sweet Symmetry Designer Series Paper. I love the mix of Night of Navy, Calypso Coral, and Bumblee. The bold pattern of the paper is partially covered, but still holds it’s own on the card. You know I love bright colors, and this fits the bill.
For a finishing touch, I added a bit of bling. I wanted a different kind of bling for a change on this card. So I went with the Blue Adhesive Gems. There are two shades of blue in the pack, but they also seem to change colors a little as well. You can see a bit of the gold in the three I used when you look closely.
Directions
I have used this barn door card previously. Take a 5 1/2 X 8 1/2 piece of cardstock and score in half at 4 1/4. Place the score line on the cutting track of your Paper Trimmer. Cut down the score line 2 1/2″. Turn the cardstock and cut from where you stopped over to the edge of the front panel. You are basically cutting off the top section of your front panel. Save this piece to use as the layer for the vertical focal point. Decorate however you wish.
Sale-A-Bration is the Best Time of Year!!
HOST CODE
My January Host Code is GR679MMV. Please use this code for orders under $150.00. I will have a small gift for those with orders over $50.00 in addition to the Perk Rewards Program. You can read all of the information at the top of the page in the Menu Bar under SHOP / Perks.
Thank you for stopping by today. I hope you enjoyed today’s project and will come back. I do read and reply to all of the comments individually. They mean a lot to me. Please reach out if you have a question.
Today I have a Masculine card that is really quick . It pairs Wildlife Wonder with the New Horizons DSP. The paper is really the star of the show!
Paper and Ribbon
As I said at the beginning, this New Horizons Designer Series Paper is obviously the star of the show here. The colors and the look of a mist or fog in the air is amazing. It makes me think I could be there. Except I would be long gone since the bear is front and center!!
Pulling the colors from the DSP was an easy choice for the card layers. Evening Evergreen and Smoky Slate are the card base and layer. And I used the Evening Evergreen for the back layer of the sentiment. Paired with the sentiment are two strips of ribbon. One is Soft Succulent and the other Evening Evergreen. They are simply to ground the sentiment. I also added one of the gray Classic Matte Dots for the sentiment.
Stamps and Dies
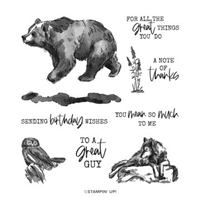
Since the DSP is so amazing, I did not want to cover much of it up. From the Wildlife Wonder stamp set I chose to use the bear, along with the great sentiment. Since masculine cards can be a bit of challenge sometimes, this is a quick and easy one. For the bear, I stamped him on the DSP and then again on scrap paper. I purposely had only the front half on the paper. He is too large and would have covered too much space.
After fussy cutting the extra bear, I layered it directly on top of the DSP bear. This gives the little extra hairs showing that are difficult to cut around. Once I had adhered the bear layer, I took my Paper Snips and trimmed off the extra of his body flush with the DSP. The sentiment is stamped and cut using the Layering Circles Dies. A quick and simple sentiment layer to finish the card.
Sale-A-Bration is the Best Time of Year!!
HOST CODE
My January Host Code is GR679MMV. Please use this code for orders under $150.00. I will have a small gift for those with orders over $50.00 in addition to the Perk Rewards Program. You can read all of the information at the top of the page in the Menu Bar under SHOP / Perks.
Thank you for stopping by today. I hope you enjoyed today’s project and will come back. I do read and reply to all of the comments individually. They mean a lot to me. Please reach out if you have a question.
I have another fun whimsical, animal card today. You know how much I love the funny stamp sets. And today’s is another good one! The bonus is that it is a Fun Fold / Gift Card holder.
Stamp Set and Dies
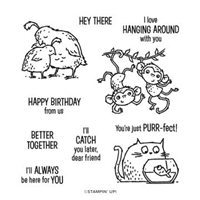
Isn’t the face on the cat just perfect? I love it. And of course the sentiment fits right in as well. These are both from the new set in the Mini Catalog named Catch You Later. The set includes various animals with adorable sentiments to match. I love cats, so that was the first one for me to try out. This is a birthday card for someone who also loves cats. Like I needed a reason to use the cat. LOL!!
For a bit of a different look, I did the angled banner for the sentiment. The positioning is a little bit out of the normal, but that is fine to me. To get the great shapes for the stamped images I went to a favorite of mine. They are the Stitched So Sweetly Dies. I love that the shapes are quite different from any of the other die sets. And they surprisingly fit most sentiments and any of the smaller images.
Papers and Fund Fold
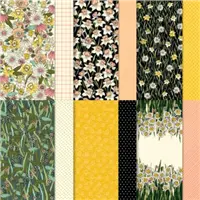
You may not recognize the two DSP patterns I used on this card. They are both the “back” sides of paper in the Sale-A-Bration paper Daffodil Afternoon Designer Series Paper. I love both of these patterns. I paired them with Pale Papaya as the card base. And the unexpected color for a pairing to Pale Papaya is Flirty Flamingo. I would never have put the two together without the plaid pattern using it. Now I am a fan!
As I mentioned, this card is a Fun Fold. And of course, I failed to take a photo of the inside before mailing. However, the measurements are as follows
Card Base is 5 1/2 X 8 1/2 scored on the 8 1/2 side at 2 1/4 from each end.
The Flirty Flamingo layer is 5 1/4 X 2 (x2)
The DSP layer is 5 1/8 X 1 7/8 (x2)
Inside White sentiment layer is 3 3/4 X 4 1/2
Strips for sentiment are 1 X 3 and 3/4 X 2 3/4
To make the Fun Fold, fold on the scoring lines and burnish the folds. The folds are the same size, so it does not matter which is top or bottom. Whichever one you decide is the bottom, add Tear & Tape against the edge on each side and fold up to make the pocket. There is room for the White inside card as well as a gift card. I left the card attached to the little tag they come on and still had room.
Sale-A-Bration is the Best Time of Year!!
HOST CODE
My January Host Code is GR679MMV. Please use this code for orders under $150.00. I will have a small gift for those with orders over $50.00 in addition to the Perk Rewards Program. You can read all of the information at the top of the page in the Menu Bar under SHOP / Perks.
Thank you for stopping by today. I hope you enjoyed today’s project and will come back. I do read and reply to all of the comments individually. They mean a lot to me. Please reach out if you have a question.
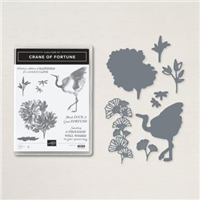
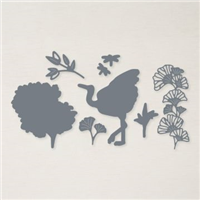
I am very much enjoying breaking out the new stamps from the Mini and Sale-A-Bration Catalogs. Today’s project is created using the Crane of Fortune, and a bit of imagination.
Stamps
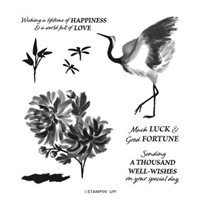
The star of this card is the beautiful Crane, and maybe the flowers. They both have awesome detail that I love from the Stampin’ Up! design team. The flowers are stamped first and then partially masked to get the greenery added around it. To give just a bit more detail for the crane, he is stamped and die cut using the matching dies. He is then adhered flat but it is enough of a raise that you can tell.
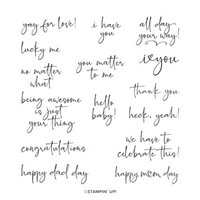
To finish the card the All Day Your Way was chosen. This stamp is included in the Happy & Heartfelt stamp set. The set is all sentiments and are made with this fun font. That was a must have for me!
Paper , etc.
The card base is Just Jade with a layer of Smoky Slate. Cranes tend to be either gray or white, so he is stamped with Smoky Slate. Just Jade was used for the greenery and Petal Pink for the pretty flowers. The sentiment is stamped with Memento Tuxedo Black Ink and punched using the Label Me Fancy Punch.
For a bit of a change, I layered some of the Cotton Ribbon Combo ribbon behind the sentiment layer. There are several of the 2021-2023 In Color Jewels spread around also. The ones in the greenery are very difficult to see in the photo. It appears they blend very well.
Sale-A-Bration is the Best Time of Year!!
HOST CODE
My January Host Code is GR679MMV. Please use this code for orders under $150.00. I will have a small gift for those with orders over $50.00 in addition to the Perk Rewards Program. You can read all of the information at the top of the page in the Menu Bar under SHOP / Perks.
Thank you for stopping by today. I hope you enjoyed today’s project and will come back. I do read and reply to all of the comments individually. They mean a lot to me. Please reach out if you have a question.
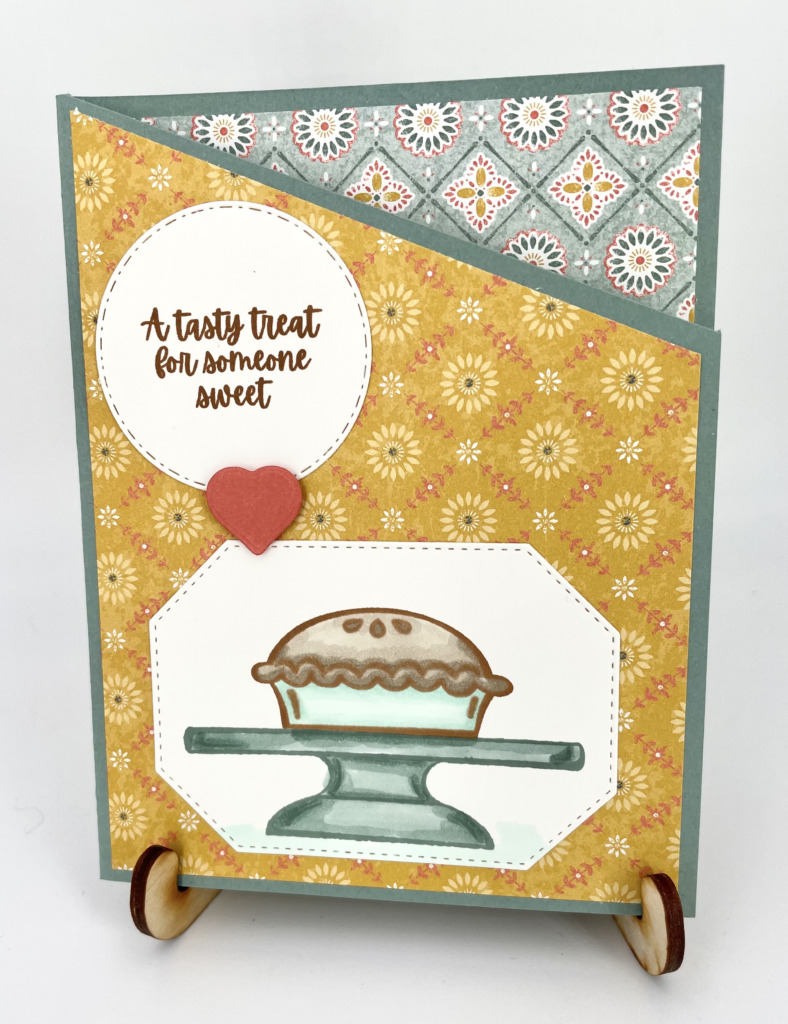
Today’s project is a Birthday card with some Sweet Treats for the recipient. There are also a few angles thrown in for a bit of a change.
Angle Cut Card and Paper
To give this birthday card a bit of different look, I made a simple angle cut across the front flap. After scoring the card base, I positioned the top of the score line in the cutting track. Next I rotated the front, top right of the card to the 1 1/2 mark. And then cut to make the angle. (These directions are quite easy with the Stampin’ Up! Paper Trimmer as it goes to 1 1/2 on the right side of the cutting track. This extra measuring area is so handy!)
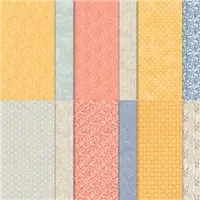
The Designer Series Paper is from the Harvest Meadows pack. I cut the top layer of DSP to 4 X 5 1/2. Make the same cut on this piece of paper to match the angle. For the inside of the card, I only added DSP to the upper section where it is seen from the cut away. That piece measures 4 X 2. I also added a White piece meaasuring 4 X 3 1/4 to complete the inside layer. This leaves plenty of space for your sentiment and signature.
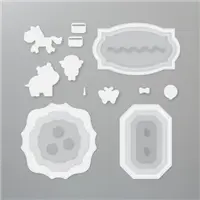
Stamps and Dies
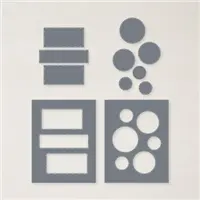
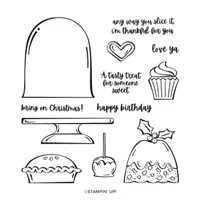
There are a variety of Dies used on this project. I started with stamping the cake plate and pie from the Sweets & Treats stamp set. This set will definitely be missed!! I then die cut the yummy pie and plate using a piece from the Hippo & Friends Dies. These dies are so nice and in several different shapes. To help the sentiment pop a bit, I used the circle from the Warm Wrap Dies. The cute, little heart is cut from one of these dies as well.
HOST CODE
My December Host Code is AVHFJFAU. Please use this code for orders under $150.00. I will have a small gift for those with orders over $50.00 in addition to the Perk Rewards Program. You can read all of the information at the top of the page in the Menu Bar under SHOP / Perks.
Thank you for stopping by today. I hope you enjoyed today’s project and will come back. I do read and reply to all of the comments individually. They mean a lot to me. Please reach out if you have a question.
The content in this blog is the sole responsibility of Jackie Beers as an Independent Stampin' Up! Demonstrator. The use of and content of classes, services or products offered is not endorsed by Stampin' Up!