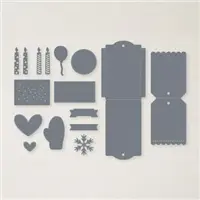
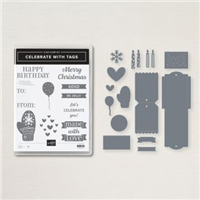
The product I am showcasing today contained a wonderful surprise. It is the Celebration Tags Dies and a gift card will actually fit inside of it. How exciting is this?
Dies
Since the tag / envelope on the front of the card is the star of this show, I am beginning with the tag. There are two foldable tags included in the Celebrations Tag Dies, along with several other pieces. This card includes the larger of the envelope / tags plus the balloon. It also includes the layer the sentiment is stamped on. With this versatility I believe this is a must have die set.
The best part of this card, besides being cute, was the discovery that a gift card will fit in the tag. After gluing the tag / envelope together, I had the idea to try a gift card. Having not seen anyone demonstrate that one would fit, I had my doubts. But surprisingly, and with great excitement, I discovered it fits perfectly!
Here is a view of the card being pulled out of the tag.
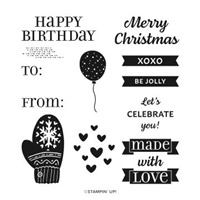
Stamp set / Bundle
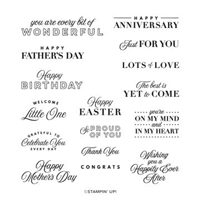
Since I have been going on about the die set, I should tell you that it Bundles with the Celebration With Tags stamp set. The stamp set includes the Happy Birthday as well as some other great sentiments. Even though the dies are my favorite part, the stamps are very good and fit the layers. That is always a good thing.
Paper
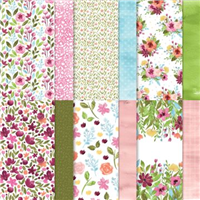
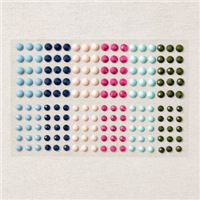
The paper choices were dictated by my needing a female birthday card. And with a different sentiment, these colors and papers would be great for a baby shower. Backing up to the DSP, you know that it was my first choice, as that is how I generally begin. So the pink and blue from the Awash In Beauty Designer Series Paper is what prompted the Balmy Blue and Blushing Bride cardstocks. The balloon is die cut from the same piece of DSP. It is showing the reverse side. And has a Heart Pearl as an embellishment.
Gift Card Pull
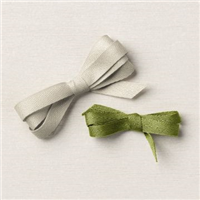
Having the tag containing the gift card on the front of the card required an easy means of retrieving the gift card.. This “Pull” idea came from The Paper Pixie on a gift bag she did recently. Since the tag already has the holes on both the front and the back layers, all I had to do was thread the ribbon through them. The ribbon is 12″ of the Old Olive Ribbon that is part of the Sahara Sand and Old Olive Ribbon Combo in the Annual catalog.
Feed the ribbon through one side and all the way through the other side. Pull through to the back with about 3″ of ribbon. While holding on to that piece, place the gift card in the opening and push down. This will take the length of the ribbon from the front down into the tag with the gift card. When the gift card is fully inside the tag, you should have about the same amount of ribbon left on the front and the back. You can tie with Bakers Twine, as I did, leave as is, or use your own idea. Then simply trim the ribbon ends to the same length.
Mini Catalog and Sale-A-Bration
Click on either catalog photo and you will be taken to my Online Store where you can download either or both catalogs.
HOST CODE
My July Host Code is ZMG9Q7EX. Please use this code for orders under $150.00. I will have a small gift for those with orders over $50.00 in addition to the Perk Rewards Program. You can read all of the information at the top of the page in the Menu Bar under SHOP / Perks.
Thank you for stopping by today. I hope you enjoyed today’s project and will come back. I do read and reply to all of the comments individually. They mean a lot to me. Please reach out if you have a question.
The card I have to share with you today is for a little boy’s birthday. This is definitely not a normal card need for me. So it took mixing a few things to hopefully get an acceptable child’s card.
Stamps
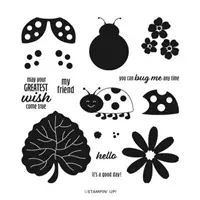
There were two stamp sets used for this card. The first is the Hello Ladybug set. Since most little boys like bugs, I assumed a ladybug was a safe bet. Choosing the solid ladybug over the stamp, which fits the punch, was fairly easy. A multiple legged little bug won over the wings of the other bug. And to give the little bug a place to land, I stamped and fussy cut the large leaf. Fussy cutting the ladybug was also fairly simple with just a bit of extra care around those little legs.
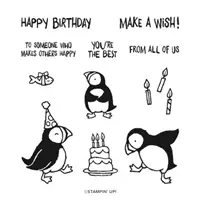
Another fun set that works well for children is the Party Puffins. These fun guys would work for anyone actually. This is the set the sentiment came from. And to help it stand out a bit, I stamped it on the Sweet Sorbet, same as the color of the ladybug, and then heat embossed it using Black Embossing Powder. For an added element, the end of the Happy Birthday strip was cut in a banner tip using the Paper Snips.
Paper and Embellishments
Adding to the woodsy, little boy look is the DSP I chose. This tree piece of paper is from the Happy Forest Friends Designer Series Paper. The leaf of the Ladybug doesn’t really match the trees, but that is a bit of creative license.
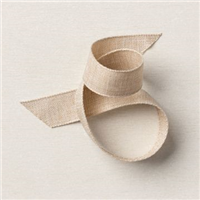
Assisting with grounding the ladybug and the sentiment is a strip of the Natural Finish Ribbon. This ribbon is really pretty and has the extra width to be used as a layer. By cutting the sentiment strip a bit narrower than the ribbon, it allows the ribbon to really shine as well as tie everything together. For the finishing touch there has to be a bit of bling. Although black is not really classified as bling, I added a single Matte Black Dot to the sentiment piece.
HOST CODE
My July Host Code is ZMG9Q7EX. Please use this code for orders under $150.00. I will have a small gift for those with orders over $50.00 in addition to the Perk Rewards Program. You can read all of the information at the top of the page in the Menu Bar under SHOP / Perks.
Thank you for stopping by today. I hope you enjoyed today’s project and will come back. I do read and reply to all of the comments individually. They mean a lot to me. Please reach out if you have a question.
Today’s card is a fun birthday card using a Christmas set from the new Mini Catalog. Using it for a different occasion is a great bonus!
Stamps
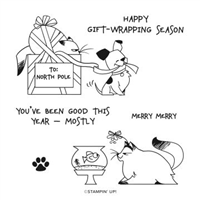
Since I love most animal stamps, and especially cats, it was a surprise to No One that I would purchase this stamp set as soon as possible. A mischief cat is just a fact! So when I needed a birthday card for someone who loves cats as well, I was ready to give this stamp set a try. The name is appropriate as it is North Pole Mischief. It will be such fun to make Christmas cards with these stamps, but this was the first use.
Sentiment
At first glance in looking at the stamp set, this sentiment is for Christmas and the good or naughty list. But I looked at it for a birthday and feel that it fits there as well. Plus the recipient is an adult and would get a kick out of those words! And with the lighter color of the DSP, I took a scrap and used it to stamp the sentiment.
To finish the front sentiment I added a couple of the Solid Faceted Dots. Grounding the little banner was a necessity I thought.
The inside birthday wishes are from the Peaceful Moments stamp set. Here is a look at the inside of the card. It is a gift card holder which adds to fun.
There is still plenty of room to write underneath the card. No worries for you there.
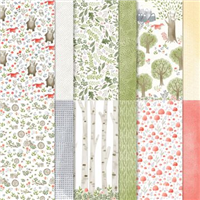
Paper
This gorgeous DSP is from the Sun Prints Designer Series paper. Both the stripes and the distressed looking gray work perfectly together and are pretty to boot. Plus they highlight the stamped images. It always surprises me when I think to stamp on the DSP. When the paper is a light enough color it works for images, but this paper was perfect for the sentiment and helps tie everything together.
Measurements
This gift card layout is a good one for multiples. It only requires a half sheet of cardstock cut to 4 1/4 X 11, and then scored at 3 1/2 and 8 3/4. Fold up the smaller scored end for the gift card pocket. There is a White layer under the DSP pieces. It is 4 X 3 1/4 beneath the stripe and 4 X 2 beneath the gray. The Sun Prints striped paper is cut to 3 7/8 X 3 1/8 and the gray is 3 7/8 X 1 7/8.
For the stamped area, the Starry Sky cardstock is cut to 3 1/2 X 2 1/8 with the White at 3 3/8 X 2 1/16. Sorry for the funky measurement there, you can adjust the size to fit your image of course. On the inside of the card, the stamped White is 4 X 2 3/4 with the piece beneath the gray at 4 X 2. And the gray is cut to 3 7/8 X 1 7/8.
HOST CODE
My July Host Code is ZMG9Q7EX. Please use this code for orders under $150.00. I will have a small gift for those with orders over $50.00 in addition to the Perk Rewards Program. You can read all of the information at the top of the page in the Menu Bar under SHOP / Perks.
Thank you for stopping by today. I hope you enjoyed today’s project and will come back. I do read and reply to all of the comments individually. They mean a lot to me. Please reach out if you have a question.
Today’s card features some gorgeous DSP and a really fun and interesting Die. It is a shabby, chic sort of birthday card.
Paper and Colors
This layout is a bit out of the norm for me, and especially some of the layers. They are a bit out of order more than anything. In my opinion, the star of the card is the gorgeous Texture Chic Designer Series Paper. Those colors are some of my favorites and they work so well together. Of course all of the colors used came from that pieces of DSP. And I am sure that you are as surprised as I was on some of the colors chosen.
The background of Pool Party cardstock is not a normal companion for the Soft Suede layer. And who would ever decide to add Soft Sea Foam with those two colors? But to top it off with Petal Pink is really stretching! However, since they are all in the gorgeous DSP piece, they all really work well together.
Stamps and Dies
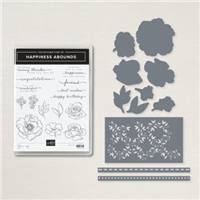
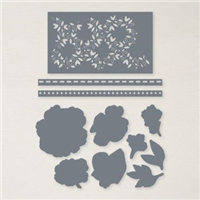
Since I said the DSP was the star of the card, I will add the second best is the “torn notebook page” look given to the DSP. That Die is featured in a few of the samples in the Annual Catalog. Two of my Club ladies found it and the set it was from even before I did. The Die is from the Blossoming Happiness Dies that are part of the Happiness Abounds Bundle. There is also another similar die in the set for a different edging.
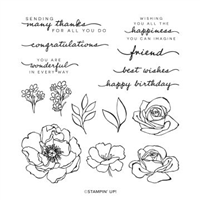
The flower and sentiment both come from the Happiness Abounds stamp set. Not wanting to cover the DSP layer was a priority in choosing what other products were added to the card. By using the small flower, it could be placed on a smaller layer. And the sentiment on a strip of cardstock was so easy as it is a photopolymer stamp set. Simply snipping the ends was quick to finish everything.
Sneak Peek
The flower was not large enough to stand alone, so it was layered using one of the newer punches. This punch is the Handmade Tag Punch. The unique shape is a great one that can be used as a square or as a diamond. A sneak peek of seeing a new product ahead of time is something I love. This lovely tag pairs with a stamp set in the upcoming July – December Mini Catalog.
Last Chance on Retiring Mini Catalog Products
Click on the photo to get the complete PDF of retiring products. Pay close attention to discounted items. It may be less expensive to purchase some items that are part of a bundle separately, than at the bundle price! I want you to get the most for your dollars.
HOST CODE
My June Host Code is B4ZVQK6D. Please use this code for orders under $150.00. I will have a small gift for those with orders over $50.00 in addition to the Perk Rewards Program. You can read all of the information at the top of the page in the Menu Bar under SHOP / Perks.
Thank you for stopping by today. I hope you enjoyed today’s project and will come back. I do read and reply to all of the comments individually. They mean a lot to me. Please reach out if you have a question.
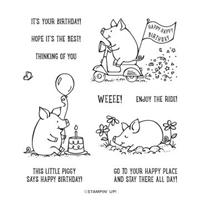
Today is the Fun Folds Blog Hop and I have a fun, Tri-fold card. Best of all it includes the This Birthday Piggy stamp set. It is one I have been excited to use.
Stamps
This Birthday Piggy stamp set is new in the Annual Catalog. Personally, I love all of the animal sets. And this one reminded me of one a couple of years ago. You may remember “when Pigs Fly”. That was special. This one brings back memories of the Geico commercial with the little piggy and his pinwheel saying “WEEEEE”. Well, the “weee” is in the stamp set.
Of course that sentiment had to go on the card!
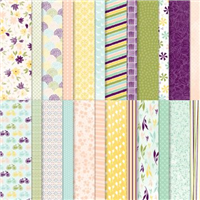
Paper
This beautiful and fun paper is the Design A Daydream Designer Series Paper. It is a Host Rewards in the Annual Catalog. This means that you get A Lot of paper for minimal cost. It is on page 135 and there are 48 sheets of double sided paper for $18.00.
As soon as I saw the pinwheel piece of DSP, I knew it went perfectly with this stamp set. And from a scrap piece of the DSP, I fussy cut a pinwheel. It is attached to the top of the bicycle flag. That was a perfect spot for it to appear as if it was planned that way.
Layout
There are several names for this type of fold as well as several different dimensions. For this one, I went as simple as I could and combined a few of the directions I found. However, it does only allow for one card from an 8 1/2 X 11 piece of cardstock. The card base is 5 1/2 X 11. It is scored on the 11″ length at 3 3/8 from each end.
Making the angle cuts is actually easier than it sounds. Beginning with either end, make a tick mark 1″ down from the top edge, and then 1″ in from the bottom edge. Then cut from the top score line over to the 1″ down mark. That provides the top downward angle. From that point, cut down to the 1″ in at the bottom. This provides the bottom angle. Repeat on the other end.
For the DSP. you need two pieces of DSP that measure 3 1/8 X 5 1/4. Decide which patterns you want to show on the two sides. They can be complimentary or two different ones as I did. Once decided. place the two pieces back to back. In other words, have the front piece with the side you want to show facing you, and if you turn the two over, have the other piece facing you. Make the exact cut that you did for the base. Go down 1″ from the top right and make a mark and in from the bottom right 1″ and make a mark. Then cut same as before. The two pieces will now fit the card. If this is too stressful, you can cut them individually!
I have a template picture to show that may be clearer.
Here is the open card.
Please Hop along with us to see more Fun Folds and ideas.
Last Chance on Retiring Mini Catalog Products
Click on the photo to get the complete PDF of retiring products. Pay close attention to discounted items. It may be less expensive to purchase some items that are part of a bundle separately, than at the bundle price! I want you to get the most for your dollars.
HOST CODE
My June Host Code is B4ZVQK6D. Please use this code for orders under $150.00. I will have a small gift for those with orders over $50.00 in addition to the Perk Rewards Program. You can read all of the information at the top of the page in the Menu Bar under SHOP / Perks.
Thank you for stopping by today. I hope you enjoyed today’s project and will come back. I do read and reply to all of the comments individually. They mean a lot to me. Please reach out if you have a question.
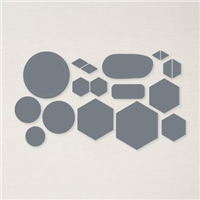
Today’s card is a Many Folds card showcasing the Framed Occasions Bundle with the Beautiful Shapes Dies. Fun Folds are my favorite and this one has some extras.
Card of Many Folds
This card was so much fun to make because of the many folds. It is a CASE of a card from Dawn Griffith. And she has a great video for you instead of me trying to explain. Here are the surprise extra folds.
And the Final one.
Paper
Starting with the paper seems the proper place to begin as this card gives you the opportunity to showcase a variety of it. This paper is the Happy Forest Friends Designer Series Paper. It is a fun, woodsy paper that can be used for many occasion, as I have shown. The first thought when looking at the paper and the matching stamp set is that it is mostly for children. Maybe this will change your mind as it did mine!
Stamps and Dies
The fun shapes containing sentiments are from the Framed Occasions Bundle. It includes the Beautiful Shapes Dies. These shapes are a bit different from the usual and I love that. The Calypso Coral circle has embossing around it for an extra detail. And the inside White circle includes stitching. A great unexpected shape is the hexagon at the bottom. Not something we would expect in a Die, but I love it as well. The matching inside holds a few of the different sentiments.
For the actual “writing on” layer, I went back to a favorite. That is the Scalloped Contours Dies. Adding the bit of flower finishes the card wonderfully.
Last Chance on Retiring Mini Catalog Products
Click on the photo to get the complete PDF of retiring products. Pay close attention to discounted items. It may be less expensive to purchase some items that are part of a bundle separately, than at the bundle price! I want you to get the most for your dollars.
HOST CODE
My June Host Code is B4ZVQK6D. Please use this code for orders under $150.00. I will have a small gift for those with orders over $50.00 in addition to the Perk Rewards Program. You can read all of the information at the top of the page in the Menu Bar under SHOP / Perks.
Thank you for stopping by today. I hope you enjoyed today’s project and will come back. I do read and reply to all of the comments individually. They mean a lot to me. Please reach out if you have a question.
The content in this blog is the sole responsibility of Jackie Beers as an Independent Stampin' Up! Demonstrator. The use of and content of classes, services or products offered is not endorsed by Stampin' Up!