The card I have to share today is my first attempt at this type card. I am calling it a fence card because that is what it looks like. It could be a gate, but there are so many versions of gate fold cards that it might be confusing. This one actually looks like a fence, or a gate, A friend gave me a card with this design so of course I had to give it a try.
Dies
The floral dies are , in my opinion, the best part of this card. I tried to make it a little rustic or masculine as it was a graduation card for a neighbor. And it is for a guy, so no flowers climbing the fence! The two floral images are from the Gorgeously Made Dies. It also includes the sentiment shape, as well as a few more pieces. I really love this Die set, and the entire Suite of products.
The two floral images are cut from Pretty Peacock card stock and Lost Lagoon card stock. These two colors pair beautifully! And they work well with the fence color of Pecan Pie card stock.
Sentiment
The sentiment layer is cut from the Gorgeously Made Dies as mentioned above. I love the ragged edges, which again work great with the fence. It is stamped using Pretty Peacock. The sentiment is from the Sentimental Park stamp set.
Fence
To make the fence I copied the card I was given. It begins with a piece of Pecan Pie card stock that is 5 X 5 1/2 and scored at 3/4″ on the 5 1/2 side. Just the 3/4″ folds to the front. Next I cut 4 strips that measure 3/4 X 5 1/2 and 6 strips that measure 3/4 X 4 1/4. They are layered as you see. The 6 strips are the horizontal ones with three on the front and the other three on the inside.
There is an extra “card” on the inside of the card for writing so the white does not show through the fence pieces. Here is an inside view.
I could not lift the flap to show more because I was on autopilot and went ahead and wrote my note! DUH!!!. But you can see the flap. It is made with a piece of Pecan Pie that is 3 1/2 X 5 1/4. Score on the 3 1/2 at 1/2″. Miter cut the ends of the 1/2″ score and fold under. Attach a piece of Basic White that is 3 1/4 X 4 5/8 to that flap to hide it. Next secure the little “card” to the inside of the fence card. The DSP piece is 3 X 4 1/4.
Finishes
Completing the card was pretty simple since it was for a male recipient. But it still needed some bling and “something”! By adding a bit of Linen Thread looped around the flora and beneath the sentiment I took care of the something. To add a little touch of bling was accomplished by placing a few of the Brushed Metallic Dots. These are the ones that have a reddish shade to them. It worked great with the color of the Pecan Pie.
Thank you for stopping by today!!!
Online exclusives are here to stay! Click on the photo and be taken directly to them in my online store. If you place an order, please use my Host Code listed just below.
HOST CODE
My May Host Code is K326G6VQ. Please use this code for orders under $150.00. I will have a small gift for those with orders over $50.00 in addition to the Perk Rewards Program. You can read all of the information at the top of the page in the Menu Bar under SHOP / Perks.
Thank you for stopping by today. I hope you enjoyed today’s project and will come back. I do read and reply to all of the comments individually. They mean a lot to me. Please reach out if you have a question.
If you love Designer Series Paper then today’s card is one you will really like. It is a fun layout that stars a piece of DSP. What could be better.
Layout and DSP
I have to first say that I got this quick and adorable card from The Paper Pixie. She shared this awesome layout and I fell in love. I believe you will as well. The beautiful plaid DSP is from the Dandy Designs Designer Series paper. It is the extra thick pack that is a Sale-A-Bration item.
I love purple and this paper was a quick choice in flipping through the options. Although it is more Fresh Freesia than a purple probably. The plaid DSP piece is cut 3 7/8 X 3 7/8 and scored from one corner to the other, like a diamond. That size, which took my non-math brain a minute to understand, has a center that is 5 1/2″ long. So it fits perfectly down the side of the card. A bonus is that you are also seeing that large triangle of DSP on the inside flap of the card. I really love seeing more DSP!!
Stamps
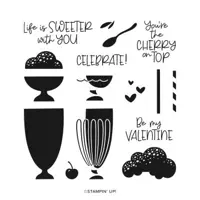
To allow the DSP to shine, I wanted a smaller stamp for the focal layer. This fun desert is in the Share A Milkshake stamp set. As is the sentiment. My color choice may be a bit confusing. First, I took color liberty to help the desert match the DSP. That is definitely allowed. Actually though my favorite ice cream as a child was Grape flavored. And an ice cream shop near my home had Grape. I will say that it drove my Mom crazy! 🙂 But I loved it and that was my first thought on matching the paper.
Finishes
This card is fairly monochromatic in that there are various shades of purple. The plaid DSP, the Fresh Freesia layers and the Gorgeous Grape desert bowl all work together. So to complete this theme I added a few of the Opaque Gems. There are a couple of different sizes and different colors in this assortment. I chose a large in Gorgeous Grape with two smaller sizes of Fresh Freesia.
Thank you for stopping by today. I hope you will give this fun layout a try.
Additional FREE Sale-A-Bration Items for February…..
Sale-A-Bration and Join Promotion
Not only is SAB all about Free Products, but Stampin’ Up! has really upped the rewards if you choose to join my team.
The regular Starter Kit, I call it the Ultimate Bundle, is 125.00 in product for 99.00. You get to choose all of the products yourself. For these two months of SAB, there are three options for you to choose and the rewards are amazing!
Option 1: The exclusive Boho Blue Mini Machine ($63 ) + your choice of $175 of Stampin’ Up! products for only $129 .
Option 2: The original white Mini Machine ($63 ) + your choice of $175 of Stampin’ Up! products for only $129 .
Option 3: Your choice of $175 of Stampin’ Up! products for only $99 .
Options 1 and 2 offer you 50.00 more in product and the Mini Machine for only 30.00 above the regular price.
Option 3 offers you $50 more product than the standard Starter Kit offer for the regular price!
These are the best deals I have seen. If you are interested, please reach out to me and let’s chat about it.
HOST CODE
My February Host Code is FCF2FJVJ. Please use this code for orders under $150.00. I will have a small gift for those with orders over $50.00 in addition to the Perk Rewards Program. You can read all of the information at the top of the page in the Menu Bar under SHOP / Perks.
Thank you for stopping by today. I hope you enjoyed today’s project and will come back. I do read and reply to all of the comments individually. They mean a lot to me. Please reach out if you have a question.
A young lady that I think of as a God-Daughter, and her Fiance, have just graduated from Nursing School. She was even Summa Cum Laude !! WooHoo!!! I made them each a card using the Suit & Tie Dies which makes an awesome Nurse’s Uniform . Although some of the products have retired, I still wanted to share the cards with you. They had to see the cards before anyone else!
Female Version
I made the cards a bit early, and was not thinking about this color now being retired. Purple is her favorite color which made my color choice quite simple.
Male Version
It is the same card, just Misty Moonlight in place of Purple Posy cardstock.
Products
I will apologize again regarding using now retired products. But I could not post the cards until I gave them to the awesome couple. The color and the center of the stethoscope can be easily duplicated with other products if you do not have the retired ones.
The same products were used on each card. I just changed the colors a bit. The cute heart pattern inside each of the stethoscopes is from the newly retired Heartfelt stamp set. The Congratulations at the bottom of each card is from the Peaceful Moments stamp set. The sentiment fit perfectly across there. It is stamped using Memento Tuxedo Black Ink.
The stethoscope is made using two of the Layering Circles Dies. One is Silver Foil and the other White cardstock. For the black rubber part, I took a scrap of Basic Black and just rough cut with my Paper Snips an arch. Then it was easy to trim to fit.
Measurements:
The base of each card is 4 1/4 X 11, scored and folded at 5 1/2.
The White layer is 4 X 5 1/4
The Misty Moonlight and Purple Posy layers are 3 7/8 X 5 1/8
The pocket is from a scrap of each color.
I would Love for you to Join My Team !!!
It’s a fabulous time to JOIN MY STAMPIN’ UP! TEAM. You get even MORE FREE products in the customizable Starter Kit. From 4–31 May, new team members can get $125 USD $155 USD worth of products for only $99 USD + free business supplies + free shipping + all the fun being a part of Stampin’ Up! If you have an interest I would LOVE to talk with you about all of the Fun!!
HOST CODE
My May Host Code is SGHBX62J Please use this code for orders under $150.00. I will have a small perk for those with orders over $50.00
I added an extra post last night with some information regarding the Retiring List. If you missed that one, I have the same information below. But first, lets get to today’s card.
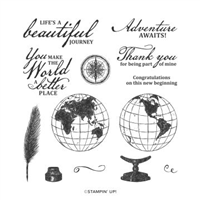
I say I love a lot of the stamps and paper Stampin’ Up! carries. But this is a wonderful one. It has really nice sentiments and is wonderful for graduations , travel, and masculine cards. This one is geared more towards a graduation or birthday for a certain age.
I paired the gorgeous World Of Good Designer Series paper with Gold Foil for the main part of the card. My little gap between the two pieces of DSP was an accident that I was thrilled with. I love when that happens. I had intended for the pieces to touch. But I believe that little gap just lets all the gold shine even more.
This was a really quick card with the exception of cutting paper. I have all of the measurements for you just below. The sentiment is stamped in Misty Moonlight and is finished off with the 2020-2022 In Color Dots. The world is stamped in Basic Gray with the circles for it and the background cut using Layering Circles Dies.
Measurements:
Card base of Misty Moonlight cut to 4 1/4 X 11 and scored at 5 1/2
Gold Foil layer cut to 4 X 5 1/4
Left side DSP strip cut to 3/4 X 5
Right side DSP cut to 3 X 5
Sentiment background of Misty Moonlight cut to 1 1/4 X 4
Sentiment White cut to 1 X 4
If you click on the picture it will open the PDF of the Retiring Items. Here are a few things to be aware of:
The retiring items are as supply lasts
The In Colors that are retiring will go quickly!
Pay attention to Bundles. They may carry over, there will be an astric or two. Check the coding on the bottom of the last page.
And if you place an order from me, please use my host code listed on the right column or beneath the picture.
Enjoy!!!
HOST CODE
My March Host Code is: B6JC9CHE Please use this code for orders under $150.00. I will have a small perk for those with orders over $50.00
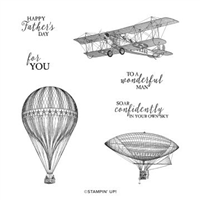
I have another new stamp set to show today. It is from the Mini Catalog and one that I have had, but have not inked up until now. I do love it! The stamped images are very detailed and stamp beautifully. It is the Soar Confidently stamp set. I needed a masculine card and gave this one a try.
I kept this very simple in terms of how much extra I added on. It is for a young man and I didn’t think he would care for much bling! I did use the Painted texture Embossing Folder again. I really am excited every time I see all of the texture it leaves. It may not be the perfect “sky” but I think it works well for it.
I stamped the hot air balloon and colored with patriotic colors in Light Real Red and Dark Daffodil Delight Stampin’ Blends. Since the background sky is blue, I thought those colors would work well. I stamped the balloon in Night of Navy Ink. A Tip: let the Night of Navy dry a minute or two before you begin coloring or it may bleed over just a bit. The balloon is raised using Stampin’ Dimensionals to add to the 3D effect of it floating.
I fussy cut the balloon and it was a really easy one to do. For the sentiment, I used one from the stamp set. I stamped it in Real Red on White cardstock and used the Banner Pick A Punch to get the banner tip on one end.
Thank you for stopping by today. Please come back tomorrow for another new project.
HOST CODE
My March Host Code is: B6JC9CHE Please use this code for orders under $150.00. I will have a small perk for those with orders over $50.00
I shared the graduation card on the Pals April Blog Hop on April 8th. I gave the basic instructions for the fold at that time. I have since made a video of how I scored for the fold. I have updated that post. But wanted to post it here in case you were interested and might not go back a week.
I also included the written directions from the original post as well.
Please let me know if you have any questions. This is now my third video. Woohoo!! I appreciate your comments.
Directions:
Card Base is 4 1/4 X 11, score at 5 1/2. Then make little marks at 3 3/8 and 7 5/8. Rotate 180 and make the marks on the other side. If you imagine connecting the marks you should have a long X.
Line up the marks from opposite sides using your Simple Scored (I have a black marker line down the 6″ score line of my SS so it shows up very well) or use your Paper Trimmer and scoring blade. Using the scoring tool, connect the two marks. Rotate the paper and repeat with the other two marks.
Fold on all of the score lines. Crease well with your bone folder.
For the inside layer, cut to 5 1/4 X 4, Make a mark on the 4″ side at 2″. Rotate to the5 1/4″ side and make a mark at 2″. Rotate 180 and make the mark on the opposite side at 2″.
Using your Paper Trimmer, line up the mark on the 4″ side and one of the longer side marks and cut off that triangle. Repeat for the opposite side.
HOST CODE
My April Host Code is HKP6K3Z4. Please use this code for orders under $150.00. I will have a small perk for those with orders over $50.00.
The content in this blog is the sole responsibility of Jackie Beers as an Independent Stampin' Up! Demonstrator. The use of and content of classes, services or products offered is not endorsed by Stampin' Up!