My New Year wish is for everyone to Happy, Healthy, and Safe! And to go along with that, today’s project is about the Happy New Year also. Even if a day late, this is my first post of 2023.
This bright card has a bit of Old (going away) and New (current products) to reflect a happy New Year to come. It is also my Design Team entry for the Make My Monday Blog Challenge. The theme for this challenge is Something New. That could be taken a few different ways, but my thought was totally new, as in the New Year. You can see all of the designers’ cards, and enter the challenge yourself by clicking on the little MMM badge below.
Paper
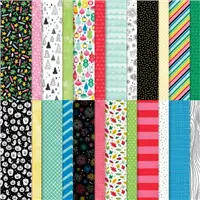
Once again the paper is the standout of the card. This is one that is almost gone in terms of being purchasable. It is the Celebrate Everything Designer Series Paper and is a Host reward in the current Mini Catalog. So you only have until the end of day on January 4th to order it. Actually these are the two sides of one paper. I loved the brightness of the red and pink piece. And the fireworks page was perfect for a Happy New Year.
Stamp
This beautifully scripted sentiment is from the Brightest Glow stamp set. And with cheers of joy, it is carrying over! All of the sentiments in this are beautifully written. With the bright papers, especially the fireworks, I did not think this really needed a lot of extras. So I kept it fairly simple with the one sentiment and paper layers.
Embellishments
To say simple and go from there is a bit lacking. There must still be some bling. Especially with the fireworks! They are their own sparkle but still need something! So I added to the center of the fireworks a variety of colors from the 2021-2023 Opal Rounds. Some of the colors match and others are fairly close. I think they give some subdued sparkle to the card.
HOST CODE
My January Host Code is HEMUVZZK. Please use this code for orders under $150.00. I will have a small gift for those with orders over $50.00 in addition to the Perk Rewards Program. You can read all of the information at the top of the page in the Menu Bar under SHOP / Perks.
Thank you for stopping by today. I hope you enjoyed today’s project and will come back. I do read and reply to all of the comments individually. They mean a lot to me. Please reach out if you have a question.
Today I have another sneak peek for you. If you have followed me for very long you know I love cats!! The upcoming Love Cats stamp set is a must for cat lovers.
Stamp set
This cute Hanging Out Cat is from the Love Cats stamp set. There are a couple of different “purrfect” cat positions that any cat person would recognize immediately. This one spoke to me because one of my cats lays like this from almost any platform. Here is one of her favorite positions.
Additionally, the sentiments are just as cute as the images. The one I used is perfect for any occasion but really emphasizes the image. This is one that makes me Smile! I hope it does for you as well.
Papers
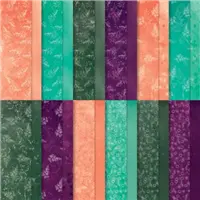
This color choices for today’s project was mainly because I wanted to use something different. Not red, green or blue. And Blackberry Bliss is a color that I do not use very often. Especially as the overall color. So here we are. Of course with all of the Stampin’ Up! DSP, I was able to find a beautiful piece to work perfectly. This gorgeous print is from the Pretty Prints Designer Series Paper. I love the variations of the color.
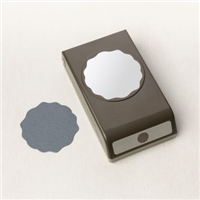
Punch and Finish
The sentiment gave me a bit of trouble as to how to position it. I could not decide on a layer. But with the small Blackberry Bliss heart the cat is holding as inspiration, I decided on a larger heart. The small heart is from the Country Bouquet Punch. It punches two hearts at once. However the larger one was too narrow for the sentiment. So I went to the smaller of the Heart Pack Punches. It is the non-scalloped one. Then all I needed to do was adhere the sentiment to the heart and trim around it with the outline of the heart. Easy Peasy!!
To finish this fun card it needed a bit of bling. I only wanted a small bling. So the Iridescent Hearts fit the bill perfectly. It adds a bit of white to the dark heart and has some shine.
HOST CODE
My December Host Code is Y7T7EMTC. Please use this code for orders under $150.00. I will have a small gift for those with orders over $50.00 in addition to the Perk Rewards Program. You can read all of the information at the top of the page in the Menu Bar under SHOP / Perks.
Thank you for stopping by today. I hope you enjoyed today’s project and will come back. I do read and reply to all of the comments individually. They mean a lot to me. Please reach out if you have a question.
I have a sneak peek for you from the upcoming Mini Catalog. This is such a fun card and the stamps are quite different from previous ones.
Stamps
Lately I have been starting my post about the DSP. And this DSP is amazing. But the star of this card is the fun Stamp set. It is the Taco Fiesta. You know that I love fun and humorous stamp sets the most. And this fits the bill perfectly. This adorable piñata is just so darn cute!! Adding in the bowl of guacamole with chips is just perfection. We love Mexican food, as does the recipient of this card, so this set was at the top of my preorder list.
Colors
The images are all stamped using Memento Tuxedo Black Ink, They are then colored using Stampin’ Blends. Usually the DSP calls the colors I use, but not in this case. The guacamole and it’s stone bowl were a given on the must do colors. I did bring in the DSP colors on the blanket of the Piñata. But it needed a color to Pop! The Dark Pool Party was the blanket and hat brim blue.
To add another bright color to the mix for more Pop, I went back to the blanket blue but a little more. The blue highlights are the Coastal Cabana for the card stock and the new 3 Twine Combo Pack for the blue twine. These two pops of blue really made a difference.
Paper
This fun DSP is another upcoming product. It is the Dandy Designs Designer Series Paper. This is another mega DSP pack that is in the upcoming Sale-A-Bration catalog. The two sheets you see are the front and back of one sheet.
Here is a view of the inside of the card. It is a gift card holder of course. The inside sentiment is from the Best Day stamp set, which is another upcoming new set. You will definitely be seeing that set soon as it has a cat!!!
Hopefully you have your upcoming Mini Catalog by now. The upcoming product images are not available from my supply list builder yet. If you do not have a catalog in hand, and are in need of a Stampin’ Up! Demonstrator, please reach out and I will be happy to send you a catalog!
HOST CODE
My December Host Code is Y7T7EMTC. Please use this code for orders under $150.00. I will have a small gift for those with orders over $50.00 in addition to the Perk Rewards Program. You can read all of the information at the top of the page in the Menu Bar under SHOP / Perks.
Thank you for stopping by today. I hope you enjoyed today’s project and will come back. I do read and reply to all of the comments individually. They mean a lot to me. Please reach out if you have a question.
Today’s card is a mix of current and upcoming products. I love how Stampin’ Up! products work well together regardless of old or new.
Paper and Colors
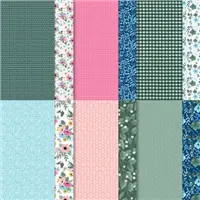
I knew which stamp set I wanted for this card, but needed some direction with the color and flow. Turning to my DSP is always my next step. The colors and patterns are wonderful. Yesterday I shared with you the Fitting Florets Designer Series Paper. (You can see that card HERE!) And today I have gone back to the Fitting Florets for yet another piece of that gorgeous paper.
This one is very bright and happy. And it led me to this finished product. The Night of Navy and Balmy Blue are a perfect match. It is the unexpected Polished Pink that is the surprise and the star!
Stamps
Beginning with the Polished Pink and hearts was a fairly certain thing. The stamps used are from the upcoming Country Bouquet stamp set and punch Bundle. Did you notice Punch Bundle? They are my favorite type of Bundles because they are less expensive and so quick and easy. The two hearts are on one stamp but punch with one punch due to the layout. That is an extra bonus. Personally I also love the distressed, or I suppose Country, look of the hearts. A bit of a softer look.
Punches
I went a bit heavy with punches for this card. The background of the focal layer is the Decorative Circle Punch. Then the leaves and flowers are from the Boughs Punch. And last but not least is the sentiment layer of the Label Me Fancy Punch. But as I mentioned before, they are so easy to look at your punch stash and decide what works best.
Hopefully this card works for you! I love the mix of the dark and bright colors. So to finish it off, I went with a few of the 2021-2023 In Color Opals in Polished Pink. They are scattered on the boughs and a larger one on the sentiment layer. And to finish the sentiment layer I chose one of the 2022-2024 items. It is the Twine in those In Colors. This one is Starry Sky, but against the mix of Night of Navy and Balmy Blue, it works perfectly.
HOST CODE
My December Host Code is Y7T7EMTC. Please use this code for orders under $150.00. I will have a small gift for those with orders over $50.00 in addition to the Perk Rewards Program. You can read all of the information at the top of the page in the Menu Bar under SHOP / Perks.
Thank you for stopping by today. I hope you enjoyed today’s project and will come back. I do read and reply to all of the comments individually. They mean a lot to me. Please reach out if you have a question.
I have a pretty card to share with you today that all of the products are still available. It is from the Framed and Fitting Florets. However the paper is only available until the 4th of January. When the Mini Catalog goes live, the paper goes away. And it is beautiful paper!
Papers
As I said in the beginning, I think this paper is one of the prettiest available right now. And it is still available. The Fitting Florets Designer Series paper has great colors and patterns. I have paired a floral and a check with this Evening Evergreen card base. The brightness of the blue flowers surprisingly to me plays very well with the Evening Evergreen darker shade.
Stamps
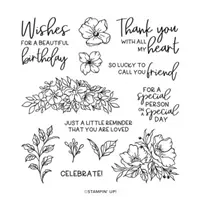
The stamp set and bundle will carry over to the upcoming Mini Catalog. They are the Framed Florets Bundle. Although I did not use the dies on this card, they are amazing as well. The flowers are a match to the paper. And I decided to color it by copying the paper. I used Balmy Blue Stampin’ Blends with a touch of Night of Navy for a darker shading.
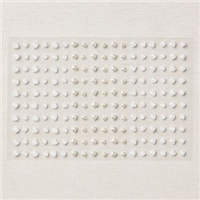
Plus the sentiments in this set are the kind I love. They have a mix of fonts in them. You can see that from both the front and inside sentiments that I used. These make me happy! And to finish the card, I added a scattering of the Iridescent Pearls that I colored with the Dark Balmy Blue Stampin’ Blend. The iridescent shine comes through even after being colored!
Layout
This is not a new fold, but one I changed just a bit. The card base is 5 1/2 X 8 1/2 and scored on the 8 1/2 side at 1 1/4 and 4 1/4. Normally I would fold the small score back to the front. But on this card I decided another gift card holder, or cash holder, was called for. So I folded it to the inside. You can see that from the second photo. I have a PDF of this card for you. Click on the image below to get it.
There are still 90 Items on the Clearance Rack. Plus quite a lot of the
HOST CODE
My December Host Code is Y7T7EMTC. Please use this code for orders under $150.00. I will have a small gift for those with orders over $50.00 in addition to the Perk Rewards Program. You can read all of the information at the top of the page in the Menu Bar under SHOP / Perks.
Thank you for stopping by today. I hope you enjoyed today’s project and will come back. I do read and reply to all of the comments individually. They mean a lot to me. Please reach out if you have a question.
Merry Christmas Eve to all of you. Things are beginning to settle down! Since I failed to get a post completed yesterday with some pound cake baking and gift wrapping, I decided to re-gift you all some of my favorite Christmas card posts from this season.
I hope you enjoy these cards. By clicking on each one you will be taken to the original post for it.
Merry Christmas everyone!
HOST CODE
My December Host Code is Y7T7EMTC. Please use this code for orders under $150.00. I will have a small gift for those with orders over $50.00 in addition to the Perk Rewards Program. You can read all of the information at the top of the page in the Menu Bar under SHOP / Perks.
Thank you for stopping by today. I hope you enjoyed today’s project and will come back. I do read and reply to all of the comments individually. They mean a lot to me. Please reach out if you have a question.
The content in this blog is the sole responsibility of Jackie Beers as an Independent Stampin' Up! Demonstrator. The use of and content of classes, services or products offered is not endorsed by Stampin' Up!