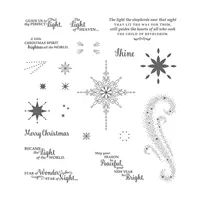
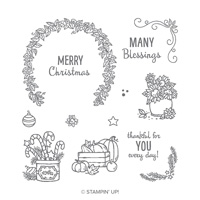
I am showcasing an Oldie But Goodie stamp set. It is a carryover from the last Annual Catalog and has always been a favorite of mine. It is The Star of Light stamp set. I have probably utilized this Christmas set more than any other. And of course it has matching dies. I just did not use them today. For today I went quick and easy.
Star of Light, 142110
As I said above, I kept this card very simple. The swoosh is stamped in Smoky Slate ink, as are the silver stars. The sentiment and focal star is in Merry Merlot. I debated on the focal star being in Crushed Curry, but decided to go with just the two colors.
This card is a 4 X 4, although you could use this same layout and go with any size. My main Christmas card from last year was this layout with the medium star from the dies layered on the center.
I hope you enjoyed today’s card and will join me back here tomorrow for Halloween! All of the supplies are listed at the bottom the page, as few as they are!
I hope I still have my loyal followers here today. I had an awesome two week vacation in France, but now I am back to share new projects with you.
The weather in France was warmer than expected and I came home to a bit cooler temperatures. That was an unexpected pleasure. This put me in the holiday spirits, plus realizing that Halloween is in two days! Yikes!!! So I covered all of the upcoming holidays in one project for you. And it is a quick one as well.
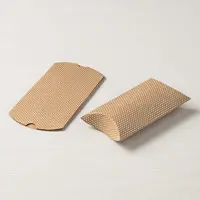
Kraft Pillow Boxes, 147018
I created treat boxes for each of the upcoming holidays. All of these were really quick. I could have kept going on each one of the themes. With the Designer Series Paper, Ribbon, and great seasonal stamp sets, the ideas are just endless for decorating these little boxes.
The great part of these boxes are the price. You get 10 boxes for $5.00. That is an awesome deal! They are large enough to hold a variety of candies or small gifts. These are fairly basic in the designs. I can see the beauty in coming up with a theme and creating a basket of these to have by your door for holiday guests or to take to a gathering.
Thank you for visiting today. I really appreciate you hanging around for my return from vacation. The supplies I used on the boxes are all listed at the bottom of the post.
Before I get started on today’s post I wanted to give you a heads up! I am going to be traveling after today. I will not return until the end of the month. Woohoo for me! A big vacation / girl trip!! But that means that I will not have new blog postings. I just have not had the time to plan ahead. I apologize and I hope you will come back the end of the month when I return.
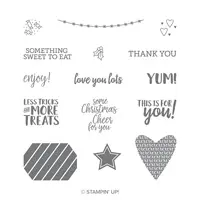
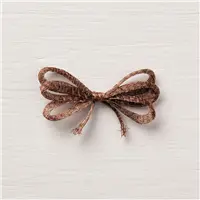
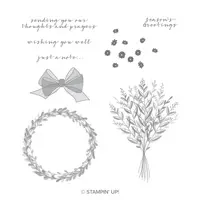
So for today’s card I have another card from the awesome set Wishing You Well. I really do love this set. The card I am sharing today is one I gave for a wedding over the weekend. What better use of “Wishing You Well” than for a bride and groom.
Wishing You Well, 147864
I think of this as a simple elegance. I hope you do as well. I utilized the Subtle Textures Embossing folder on the So Safron layer. The flowers are stamped in Crushed Curry to stand out more. I then topped each one with a small pearl.
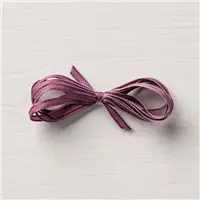
Even though in the picture it looks almost black, the dark layer is Blackberry Bliss which matches the bow. That bow is my favorite stamp in the entire Stampin’ Up! inventory I believe. 🙂
Thank you for visiting today. I apologize for going to be absent for a little over two weeks. I will post some photos when I return.
Today is Not a Card. It is the adorable box from Takeout Thinlits. It is shaped like the Chinese takeout containers , but in miniature size. There are quite a few different ones that you can find on Pinterest, etc. I made this one a little bit ago when my Upline, Brian King, had a challenge on our group Facebook page to post every day. Since I do not do a blog post on the weekends, I have a couple of cute little projects left over. But first, I hope you will fall in love with this cute little takeout box.
Takeout Thinlits, 147927
My takeout container is done very simply. I used designer series paper for the entire box. Most of the samples you will see utilize the DSP as the layers for the sides. The dies are awesome for this layering as there is a die that cuts the side layers included in the set. Yay for Stampin’ Up!
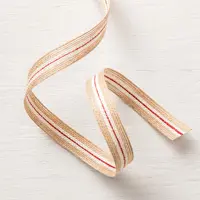
I kept the decoration pretty simple as well. The heart is an included die and the white heart is cut using that. I simply adhered the die cut heart to the Fresh Fig card stock and fussy cut around it. It was not really very fussy cutting! I then used the 1/8″ handheld punch to punch a hole through both layers. The cute little ribbon is the Fresh Fig ribbon also.
This adorable little box would hold a handful of Hershey Kisses or a couple of Lindorf Truffles even. Better yet, a cut little gift!
Thank you for visiting today. I appreciate it very much. All of the supplies I used are listed at the bottom of the post
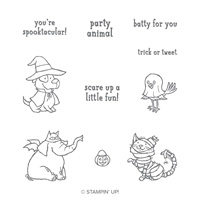
I have a Halloween card for you that I made using the Sketch Challenge for Global Design Project #158. It is an awesome layout that I believe I will be using quite often. I tweeked it just a bit, and love both of the layouts.
Trick or Tweet, 147722
Nothing is sweeter than dogs and cats together, unless it is them Trick or Treating! Instead of the center animal, I chose to show the love and added a heart. It is from the Takeout Thinlits Dies. I really love this die set. I will share the little box I made at a later date.
This is the sketch from GDP.
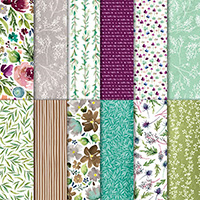
The gorgeous purple designer series paper is from the Frosted Floral Specialty DSP. I paired it with Blackberry Bliss card stock and Whisper White to bring out the bright colors. The animals are stamped with Memento Tuxedo Black ink and colored with a variety of Stampin’ Blends. I do LOVE the Stampin’ Blends!!
I have the measurements listed below, as well as the complete supply list at the bottom of the page. Thank you very much for visiting today. I do very much appreciate you checking on my projects.
TMEASUREMENTS:
Base card of Blackberry Bliss is 5 1/2 X 8 1/2, folded in half
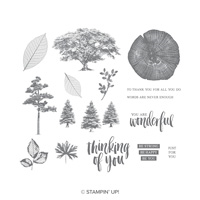
I don’t know about you, but it can be difficult for me to make a masculine card. Occasionally they pop right out, but generally I have to really think about it. I have found a stamp set that is a great resource for masculine cards. The Rooted In Nature set is just perfect in my opinion for rugged, nature, masculine cards. Today’s card is for my sweet husband’s birthday. Although I did not put birthday on the front.
Rooted In Nature, 146482
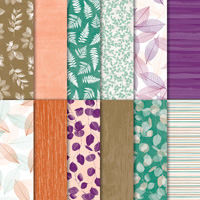
I paired the trees with the Nature’s Poem Designer Series Paper. If you saw yesterday’s post, it was using the Nature’s Poem DSP as well. And it was a totally different look!!
To get the effect I did for the trees, I colored them with the Mossy Meadow and Soft Suede Stampin’ Write Markers. The center front tree is full strength and the others are repeated without re-inking. I did do a second re-ink. You get three stampings with one inking. The third is very light. I hope you will play with this technique and let me know what you think of it.
Thank you for stopping by today. I hope you will come back tomorrow. All of the supplies are listed at the bottom of the page.
The World Card Making Day 10% Off Sale is going on now. You can see the list of products by clicking HERE. This goes to my Online Store and all of the specials are on the home page.
The content in this blog is the sole responsibility of Jackie Beers as an Independent Stampin' Up! Demonstrator. The use of and content of classes, services or products offered is not endorsed by Stampin' Up!