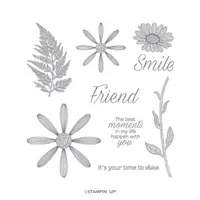
During Christmas I made a card that “stands up” using the Feels Like Frost Designer Series Paper. Today I have used that same design for a sunny Smile card. Daisy Lane stamp set meets Flower & Field Designer Series Paper.
I really love that this card easily stands on it’s own. And this DSP is definitely good for a Smile ! I paired the Daisy Lane stamp set with the paper and pulled the colors from the paper.
I stamped the small and regular daisy with Pool Party Ink and then filled them in with the Pool Party Stampin’ Blends. I added a touch of Daffodil Delight Stampin’ Blend to the center. I also added some bling to the center of the flower in the form of a Rhinestone.
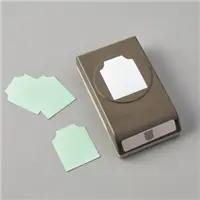
The tag is the Essential Tag Punch. It is a carryover from the Fall Mini Catalog. The “Smile” is from the stamp set, as is the other sentiment.
Here is a view of the closed card. It is a normal A2 card size and fits easily into a regular card envelope.
Thank you very much for stopping by today! I love reading your comments. And I do read each one and respond. I send a personal note to the email address instead of responding on the blog.
I hope you have a great rest of your day!
HOST CODE
My JANUARY Host Code is: AYRTRJCQ Please use this code for orders under $150.00. I will have a small perk for those with orders over $50.00
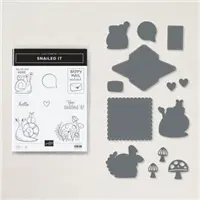
The Snailed It stamp set is becoming a quick favorite. It just makes me smile! I have two versions of the same card to show today. The DSP in the Snail Mail Designer Series Paper has such versatility that I have used the same patterns with different base colors.
This is a really quick card to make and just a bit of coloring on the snail. I paired this pretty paper with the Coastal Cabana Cardstock. And here is the same card with a different base color.
For this card I used Blushing Bride as the base color.. Everything else is the same. Both color choices came from the DSP. I love when there are several great colors in one paper. The main sheet also has about three more colors that are listed, plus a few that are close enough to work well.
This fold is what I call my Book Fold. I have shared it recently. I love that it gives just a bit of a different look when you open it. The inside stamped and signature layer is 4 X 4 1/4. I have all the measurements just below.
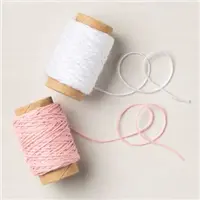
The sweet twine on the “spine” of the card is the Snail Mail Twine Combo. It is a Blushing Bride and a White twine. These are more the size of the SU original Baker’s Twine. They are very easy to work with. I secured the two on the inside of the spine, and then cut short sections to simply tie around the strings on the front. An easy method of adding a bow.
Measurements:
base card is 4 1/4 X 11, scored at 4 1/2 and 5 1/2
Spine DSP is 4 X 1/2
Front bottom layer of white is 3 1/2 X 3 1/4
Front DSP is 3 3/8 X 3 1/8
Cardstock layer under snail is 2 1/4 X 2 3/8
Snail layer is 2 1/8 X 2 3/8
Inside layer is 4 X 4 1/4
Thank you for stopping by today! I really appreciate it. And please remember about the Sale-A-Bration going on right now. With the purchase of the Snailed It Bundle, and a pack of paper, you would be at the $50.00 purchase needed to get a FREE item from the SAB catalog.
Also, now is a great time to Join My Team! The starter kit is always the Ultimate Bundle!! You get to choose $125.00 of product for $99.00 price. Additionally, right now you will receive a great packet of 6X6 DSP from the upcoming Annual Catalog. So a sneak peek and a lot of paper! I would love to talk with you about joining!!
HOST CODE
My JANUARY Host Code is: AYRTRJCQ Please use this code for orders under $150.00. I will have a small perk for those with orders over $50.00
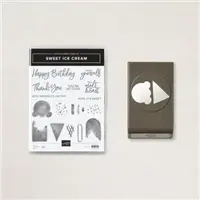
I hope you have seen the New Mini Catalog and the Sweet Ice Cream Suite! Oh My! It is so stinking cute. I loved it immediately. My card today is using that bundle.
I love this cute ice cream cone, especially a double scoop!! The cone and scoop are together in one punch. And I truly love punches! The background DSP is two sheets of the Ice Cream Corner Designer Series Paper. Every sheet is as cute as can be.
I pulled all of my colors from the two sheets of DSP. My base card is Bermuda Bay, the layer is Purple Posy, and the “scoops” are Soft Sea Foam with “sprinkles” of Coastal Cabana.
The cone is a solid but shaded stamp. You then add the hatching marks with a second stamp. I used Cinnamon Cider for both. Due to the shading on the main stamp it allows the hatching to show very well.
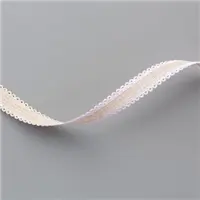
I layered the cones on a panel cut using Painted Labels Dies. I like that it hangs over just a tad bit. The ribbon I used to join the two DSP sheets is the Purple Posy Scalloped Ribbon.
This is a pretty quick card and could be made in just about any color combinations. I love papers that allow so many choices. It would allow you to match a birthday theme color very easily.
Thank you for stopping by today! Please come back on Monday for another new project.
HOST CODE
My JANUARY Host Code is: AYRTRJCQ Please use this code for orders under $150.00. I will have a small perk for those with orders over $50.00
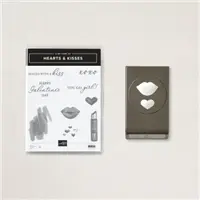
I have never been a fan of really Girly things. That is just not me. But the minute I saw the Hearts & Kisses Bundle in the Mini Catalog, I was in love. Especially in love when I saw the punch! I do love my punches.
You may be surprised, but the gorgeous DSP is the Sand & Sea Designer Series Paper. I love this variegated look on some of the sheets in the package. I pulled all of the colors from the paper, of course! The picture does not show the edges of the DSP well, but I used the Stitched With Whimsey Die around the edge. It has a whimsical, hence the name, trail of stitching. It shows in person but the busy of the paper doesn’t allow it to show in the photo.
The card base is Melon Mambo with a layer of Blushing Bride beneath the DSP. All of the stamps are from the Hearts & Kisses set. The background squiggle is stamped using Petal Pink. The hearts and lips are each using Melon Mambo, Flirty Flamingo, and Blushing Bride. I punched out each piece and raised them using Stampin’ Dimensionals.
The sentiment is from the Hearts & Kisses as well. I didn’t really have room to layer it as I normally would. After looking at it a few minutes, I decided it would be a pretty straight cut. So out came my Paper Snips and away I went. I did cut straight across the bottom and top, with the exception of the tail of the “g” and the height of the “L and !”. As I was finishing I noticed the angle after the explanation point and decided to go with that. I also gave an angle to the other end.
Just a reminder about Sale-A-Bration! With the purchase of the Hearts & Kisses Bundle, the Sand & Sea DSP, and a pack of card stock…you are at the $50.00 level for a FREE product from the Sale-A-Bration Catalog. This bundle has a lot of flexibility, especially with the punch. And you get FREE product. WooHoo!!!
As another bonus…..with the $50.00 purchase point to receive SAB, you also would be at my Blue Star Perks reward. For every $50.00 of product, you receive a star. With 10 stars, you get a $50.00 shopping on me! The rewards is explained at the top of the page under the SHOP button.
Thank you for stopping by today. I really do appreciate your comments and visits.
HOST CODE
My JANUARY Host Code is: AYRTRJCQ Please use this code for orders under $150.00. I will have a small perk for those with orders over $50.00
Welcome to InKing Royalty’s January Blog Hop! During this year’s blog hops, we are having fun with our stamping favorites – our favorite themes for seasonal cards and projects. This month’s projects feature hearts, so prepare yourself for lots and lots of love. We are excited to share our creations with you today! After you read my post, I hope you’ll hop over to the next person on the list at the base of this post.
There are so many “heart” stamps to choose from! I had narrowed it down to about three, when I ran across a set still on my desk. I knew this was the perfect one, even though a tad out of the norm when you think about hearts. Or at least the way I was originally thinking.
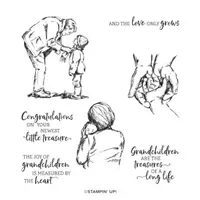
The center heart is the one that caught my eye and made me decide on this direction! It is from the new to the Mini Catalog Treasures of Life stamp set. Oh My! I am not a parent or grandparent, (except for 4 legged varieties) but I still fell in love with this set. And luckily I have friends who have recently become first time grandparents.
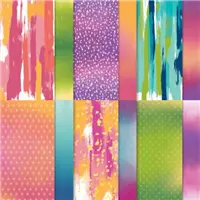
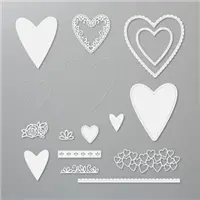
The DSP is the unexpected Artistry Blooms Designer Series Paper. I pulled the other colors from that paper. To cut the hearts I used the Be Mine Stitched Dies. The main hearts as well as the ones on the bottom are from the die set.
Here is a view of the inside. I cut around the negative to give a frame to the sentiment. I decided one more heart was needed. This also shows another view of the Fun Fold.
I cased this Fun Fold from fellow demonstrator Susie Wood. If you follow me at all, you know I love fun folds. This one is a keeper.
Measurements:
Base of Coastal Cabana is 4 1/4 X 9 scored at 5 1/2
Base layers are Highland Heather cut 4 X 4, and 1 5/8 X 4
DSP is cut 3 7/8 X 3 7/8 and 1 1/2 X 3 7/8
White inside layer is 3 1/2 X 4
Thank you for stopping by today. I hope you’ll hop along to the next stop on the blog hop, Ann Murray at Murray Stamps Ink. There’s lots of inspiration to be found in this group – and you don’t want to miss it!
Thank you for hopping along with us. If you get stuck during the Blog Hop, please use this line-up as a guide:
The card I am sharing today is a bright and cheery one. I cased a card I received from one of my downline for the layout. Thank You and shoutout to Deirdre Reilly.
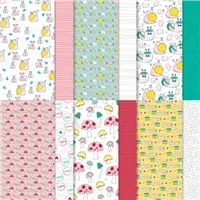
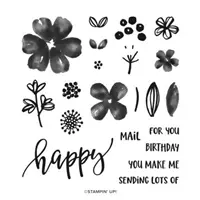
I used the beautiful Pretty Perennial stamp set and pulled the colors from the DSP. The DSP is the Flower & Field Designer Series Paper is that is a FREE one from the Sale-A-Bration Catalog. I have more about that at the bottom of the post.
I love all of the flowers and leaves in this set which allows you to make your own flowers in whatever color you choose. As I said, I pulled colors from the DSP, and went on the bright side of the colors.
Probably my favorite part of this stamp set though is the “Happy”! I love that cursive writing. Plus it has a few different words that pair with the happy included in the set. I chose to use the “birthday”.
This is a great layout to use up scraps of DSP that if you are like me, you have plenty!! The base of the card is 4 1/4 X 5, and then the white layer is cut to 4 X 10 1/2 and folded in half. The DSP layer i used is 4 X 1 3/4 with a 4 X 1/2 strip for the birthday. However, you could make the DSP strip any size that fits your leftover pieces.
I made a second card using the same colors and layout. The main difference is that I did a black base card. Here is a look at that one.
I hope you have had a chance to look at the offerings in the Sale-A-Bration catalog. The choices are really pretty and the best part is that they are FREE with a qualifying purchase. I always recommend for people to save their end of year purchases until January – February so they get an added bonus. For every $50.00 of merchandise you purchase, you get to choose one of the SAB items at no charge. There are also $100.00 options. And with a $100.00 order, you can choose 2 of the $50.00 options or 1 of the $100.00 options. WooHoo!!
Thank you for stopping by today! I hope you will give this easy layout a try and use up some of your scraps of DSP. I hope you have a great rest of your day.
HOST CODE
My JANUARY Host Code is: AYRTRJCQ Please use this code for orders under $150.00. I will have a small perk for those with orders over $50.00
The content in this blog is the sole responsibility of Jackie Beers as an Independent Stampin' Up! Demonstrator. The use of and content of classes, services or products offered is not endorsed by Stampin' Up!