Thank You cards are always needed, but especially around the Christmas Holiday. I made a packet of two different designs to share with you today.
Peaceful Cabin to begin
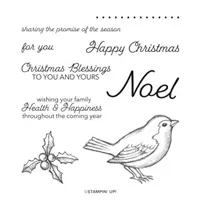
I love the simple stamping that the Peaceful Cabin stamp set calls for. There are dies which can make gorgeous cards by die cutting the images and layering. To me they are wonderful without the layering. I stamped the trees by stamping with Just Jade Ink and then stamping again without re-inking. The adorable fox just fit with the gray color scheme.
Peaceful Place Designer Paper
A friend who is also a demonstrator posted a card very similar to this one yesterday. Her version was beautiful and had more details. Since mine is a Thank You card, I kept it fairly simply as I was making several of each of these.
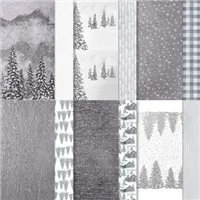
The star of this card is the DSP. The trees here are a piece of the DSP, as is the background strip. The Peaceful Place DSP is so versatile and gorgeous. The idea for these cards came to be due to having strips the size of the ones on both cards. I cannot bear to waste beautiful DSP.
Check back later today for the Last Chance Lists from the Mini Catalog.
Fabulous Stampin’ Up! Join Promotion
Join my team by purchasing the Starter Kit for $75.00 and receive $125.00 of products totally of your choosing! That is a fabulous deal at a $24.00 discount off of the regular Starter Kit price. This is always the Ultimate Bundle of products, and now it is even better! You can simply click on the picture below and Join.
HOST CODE
My November Host Code is M4GF9KZ7. Please use this code for orders under $150.00. I will have a small gift for those with orders over $50.00 in addition to the Perk Rewards Program. You can read all of the information at the top of the page in the Menu Bar under SHOP / Perks.
Thank you for stopping by today. I hope you enjoyed today’s project and will come back. I do read and reply to all of the comments individually. They mean a lot to me. Please reach out if you have a question.
Today’s project is a peaceful, snowy evening at home type card. The best part is that it is really quick and easy to create.
Paper
The star of this card is the beautiful Peaceful Place Designer Series Paper. There is no stamping on the front of the card. I could see no reason to hide any of that gorgeous scenery in the DSP. You cannot see it very well, but there are some silver star/snowflakes in the paper. That is why I added the Silver Simply Elegant Trim .
This is a Gate Fold card with the scenery added to just the left side. Again, it is difficult to see, but the white side pieces are embossed using the Merry Melody Embossing Folder. I pulled Smoky Slate, with a layer of Basic Black under the embossed White for the card colors.
Stamps
The Peaceful Place Designer Series Paper pairs perfectly with the Peaceful Cabin Stamp Set. There are matching dies in the Peaceful Bundle, but they were not needed on this card. As I mentioned above, I did not do any stamping on the front of the card. But you can see where I added the trees to the envelope. I try not to send naked envelopes!! The inside of the card is stamped with those trees plus a sentiment from the stamp set.
Measurements
The base card of smoky slate is cut 5 1/2 X 8 1/2 and scored at 2 1/8 from each end of the 8 1/2.
The basic black layers are cut 2 @ 2 X 5 3/8
The basic black behind the DSP is cut to 2 5/8 X 4 5/8
The DSP is cut to 2 1/2 X 4 1/2
The embossed White is cut 4 X 5 1/4 for ease, embossed and then trimmed to 2 pieces cut 1 7/8 X 5 1/4
Fabulous Stampin’ Up! Join Promotion
Join my team by purchasing the Starter Kit for $75.00 and receive $125.00 of products totally of your choosing! That is a fabulous deal at a $24.00 discount off of the regular Starter Kit price. This is always the Ultimate Bundle of products, and now it is even better! You can simply click on the picture below and Join.
HOST CODE
My November Host Code is M4GF9KZ7. Please use this code for orders under $150.00. I will have a small gift for those with orders over $50.00 in addition to the Perk Rewards Program. You can read all of the information at the top of the page in the Menu Bar under SHOP / Perks.
Thank you for stopping by today. I hope you enjoyed today’s project and will come back. I do read and reply to all of the comments individually. They mean a lot to me. Please reach out if you have a question.
Instead of a single card for today, I am sharing several that fall under the Grateful and Thanksgiving theme. I am so very grateful for all the joy and people that Stampin’ Up! has brought into my life!
If you click on the photos you will be taken to that blog post in case it is one you have not seen.
Well Defined stamp set
A Fun Fold with Pretty Pumpkins stamp set
Another Pretty Pumpkins stamp set
A mix of Pretty Pumpkins and Gorgeous Leaves
And one more Pretty Pumpkin paired with the Blackberry Beauty DSP
I hope you have a wonderful Thanksgiving with family and friends. I am thankful for you for sharing my love of paper crafting and following my journey here at Blue Line Stamping. There will be a new project for you tomorrow so I hope you will come back.
Fabulous Stampin’ Up! Join Promotion
Join my team by purchasing the Starter Kit for $75.00 and receive $125.00 of products totally of your choosing! That is a fabulous deal at a $24.00 discount off of the regular Starter Kit price. This is always the Ultimate Bundle of products, and now it is even better! You can simply click on the picture below and Join.
HOST CODE
My November Host Code is M4GF9KZ7. Please use this code for orders under $150.00. I will have a small gift for those with orders over $50.00 in addition to the Perk Rewards Program. You can read all of the information at the top of the page in the Menu Bar under SHOP / Perks.
Thank you for stopping by today. I hope you enjoyed today’s project and will come back. I do read and reply to all of the comments individually. They mean a lot to me. Please reach out if you have a question.
Today I am participating in a Fun Fold Blog Hop. My card is Floating Chicken, what could be better! I hope you will follow along.
I found this Fun Fold idea from Dawn Griffith. She has great directions so I am not going to attempt to duplicate her work.
The open card:
And the top view:
Stamps
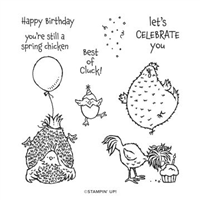
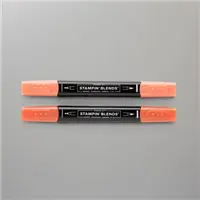
I used the Hey Birthday Chick stamp set. This card needs multiple images and I needed a birthday card. LOL!! I kept everything fairly simple to allow the Fun Fold to shine. The images are all stamped with Memento Tuxedo Black and colored with Stampin’ Blends. I did add Wink of Stella to the little chick’s egg on the inside. The party sprinkles are colored using both Pale Papaya and Fresh Freesia Markers.
Paper and Embossing
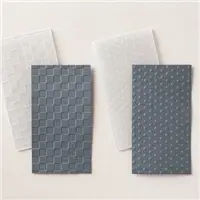
I chose the colors for my recipient and even though they are not a normal pairing I believe they work well. They are Pale Papaya and Fresh Freesia. It is difficult to see from the photo, but I embossed the White of the two flaps with the Dots Embossing Folder. This is one of the Mini Folders that comes in pairs. The pair for the Dots is a Checks. They are both wonderful.
Thank you for hopping along on this Fun Fold Adventure. You should be able to continue on by clicking the link below.
Fabulous Stampin’ Up! Join Promotion
Join my team by purchasing the Starter Kit for $75.00 and receive $125.00 of products totally of your choosing! That is a fabulous deal at a $24.00 discount off of the regular Starter Kit price. This is always the Ultimate Bundle of products, and now it is even better! You can simply click on the picture below and Join.
HOST CODE
My November Host Code is M4GF9KZ7. Please use this code for orders under $150.00. I will have a small gift for those with orders over $50.00 in addition to the Perk Rewards Program. You can read all of the information at the top of the page in the Menu Bar under SHOP / Perks.
Thank you for stopping by today. I hope you enjoyed today’s project and will come back. I do read and reply to all of the comments individually. They mean a lot to me. Please reach out if you have a question.
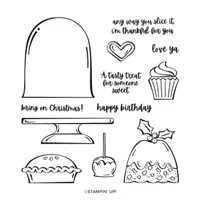
The Sweets & Treats stamp set is one that makes me smile. I love all of the holiday treats included in this fun set.
Even though my fruitcake is a bit undercooked looking, it screams Holiday to me!
Stamps
The fun stamp set I used is the Sweets & Treats stamp set. This is my idea of a Homy Christmas. All of the foods shown are Fall and Winter Holiday food. I stamped the cake plate, and fruitcake then colored using a variety of Stampin’ Blends. My plate is a Carnival Glass blue / green since my Mom had one that color. I fussy cut the image and added them to the die cut pieces with Stampin’ Dimensionals.
The little sentiment is from the Happy Holly-Days stamp set. It was the perfect size for the treat. And using the Simply Elegant Trim they added just enough of a Special feeling to the treats. My additional extra item is Red Rhinestones in place of the berries for the holly.
Dies
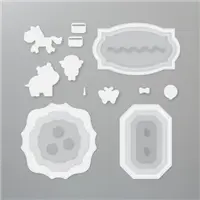
I used two different die sets to create the focal layer. The larger Shaded Spruce and White layers are from the Hippo & Friends Dies. These dies are some of my favorite. They layer beautifully and are different shapes from the norm.
The sentiment is cut using a die from the Ornate Frames Die set. All of the tag dies I tried were too small and this one was Just Right in fitting the little sentiment.
Paper
To compliment the focal point of the card, I pulled all of the colors from the fruitcake. I wanted bright colors for the fruit in the cake. So Shaded Spruce and Real Red were the winners. The DSP is from the Heartwarming Hugs Designer Series Paper. It was a narrower piece than I needed, but that is ok. I simple divided it and layered the smaller White piece over top of the two to create the width that I needed. A great way to use scraps of DSP.
Fabulous Stampin’ Up! Join Promotion
Join my team by purchasing the Starter Kit for $75.00 and receive $125.00 of products totally of your choosing! That is a fabulous deal at a $24.00 discount off of the regular Starter Kit price. This is always the Ultimate Bundle of products, and now it is even better! You can simply click on the picture below and Join.
HOST CODE
My November Host Code is M4GF9KZ7. Please use this code for orders under $150.00. I will have a small gift for those with orders over $50.00 in addition to the Perk Rewards Program. You can read all of the information at the top of the page in the Menu Bar under SHOP / Perks.
Thank you for stopping by today. I hope you enjoyed today’s project and will come back. I do read and reply to all of the comments individually. They mean a lot to me. Please reach out if you have a question.
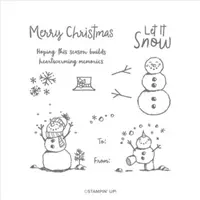
My card for today is a Fun Snowman card. There are a couple of different simple techniques I have shared as well.
Also, today is my first time as a Design Team Member of the Make My Monday card challenges. This is my entry for a Cute Christmas. You can see the other Design Team Member’s cards by clicking on the link and can also enter your card there as well. Just click on the logo below.
Stamps
The cute snowman that looks so very happy is from the Snowman Season stamp set. This is a carryover from last year and is in the Annual Catalog. I paired him with the “Joy” from the Bright Baubles stamp set. He is colored with a Light Pool Party for shading but it is difficult to see in the photo. And instead of a traditional red, I went with Poppy Parade for the Joy and in coloring his scarf and hat. Of course I had to use the Stampin’ Blends for all my coloring. You know they are my favorite!
Paper
The DSP pieces are both from the Tiding Of Christmas Designer Series Paper Pack. It is also in the Annual Catalog. I paired these two pieces with Sahara Sand for the base and Soft Succulent as the layer and Snowman background. For a little bit of a fun change, and a very old technique, I tore the snowflake paper across the top. This gives the illusion of a bit of a hill with the trees behind. At least it does in my brain. LOL!!
Dies
I had a bit of a difficult time deciding how to frame the snowman. After looking through all of my dies and punches, I came to the Rectangle Stitched Dies. I used these for the snowman and the layer of Soft Succulent. The dies were perfect in their width but to tall. I mentioned another technique and this is it. With the Stitching dies you can first die cut your image, and then line up the stitches again.
In my case I needed to make them shorter. So I matched up the stitching on the top of the paper where I needed it to be with the top of the die. It takes a minute but is fairly simple. You must line up the stitching the rest of the way down your already die cut layer. But once you get it at the top, it is easy to press the others into place. And as an added bonus, the Joy flag along with the extra one are the pieces that were cut off to make the others shorter. I couldn’t waste those.
Fabulous Stampin’ Up! Join Promotion
Join my team by purchasing the Starter Kit for $75.00 and receive $125.00 of products totally of your choosing! That is a fabulous deal at a $24.00 discount off of the regular Starter Kit price. This is always the Ultimate Bundle of products, and now it is even better! You can simply click on the picture below and Join.
HOST CODE
My November Host Code is M4GF9KZ7. Please use this code for orders under $150.00. I will have a small gift for those with orders over $50.00 in addition to the Perk Rewards Program. You can read all of the information at the top of the page in the Menu Bar under SHOP / Perks.
Thank you for stopping by today. I hope you enjoyed today’s project and will come back. I do read and reply to all of the comments individually. They mean a lot to me. Please reach out if you have a question.
The content in this blog is the sole responsibility of Jackie Beers as an Independent Stampin' Up! Demonstrator. The use of and content of classes, services or products offered is not endorsed by Stampin' Up!