January snowflakes with a supple shimmer. Sparkle and bling create beautiful snowflakes that are neither cold or wet!
Today’s project is a mix of Old, New and Retiring products. This project is for the Make My Monday Challenge where I am on the Design Team. This challenge is simply Snowflakes!
I mentioned above that this is the Make My Monday Challenge. You are welcome to play along. And you can visit the website by clicking on the icon below.
Retiring Products
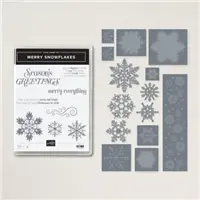
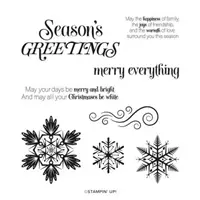
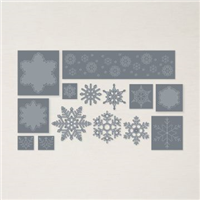
As I said, I have a mix of going away, coming in, and current products in this card. The Retiring Products are the Snowflakes and sentiment. They are from the Merry Snowflakes Bundle. It is all in the details as they say. And these snowflakes have detail galore! Also they cut beautifully even with the glitter paper!
The Merry Melody 3D Embossing Folder is from the Mini Catalog which expires at the end of today also. It is going to carryover however. That is awesome because it gives great detail to a card. And since I have Zero Musical ability, it is a way for me to add some.LOL!!
New Products
The gorgeous Supple Shimmer Specialty Paper is coming in the January-June Mini Catalog which debuts tomorrow. (If you have seen the paper in a catalog, the shimmery white/pool party color is shown as a blue in the catalog photos. This is the real color of it.) I love that there are two different colors of the shimmer paper. And as you can see, it cut wonderfully using the snowflakes dies. That is a definite Win!
Current Products
I used Blushing Bride as the card base to match the pink of the Shimmer paper. It is paired with Pool Party, which pulls the blue of the second shimmer paper. To also go along the pink theme, I used Polished Pink ink to stamp the sentiment.
The sentiment is die cut using the Rectangle Stitched Dies. These are a staple to my die collection as they fit most any stamp with one die or the other. There are quite a few in the set. And for the last touch of bling, I added a variety of sizes of Rhinestones. You just cannot have too much bling with snowflakes. They are a jewel all by themselves.
Before I go, I want to say I hope everyone had a wonderful Holiday! I had an unexpected physical issue and have been missing in action since mid December. No Christmas cards went out, no posts, etc. I haven’t even delivered some gifts! But all is well, or getting there.
That said, I wanted to offer you one more chance at my Product Shares. I will place the order tomorrow….So today is the last chance. If you reach out and can pay with Paypal, or are local, I can get you added to the list. Click on my SHOP at the menu bar and then Product Shares. There is a form to complete which will notify me.
HOST CODE
My January Host Code is GR679MMV. Please use this code for orders under $150.00. I will have a small gift for those with orders over $50.00 in addition to the Perk Rewards Program. You can read all of the information at the top of the page in the Menu Bar under SHOP / Perks.
Thank you for stopping by today. I hope you enjoyed today’s project and will come back. I do read and reply to all of the comments individually. They mean a lot to me. Please reach out if you have a question.
Welcome to InKing Royalty’s December Blog Hop! During this year’s blog hops, we are having fun with our stamping favorites – our favorite themes for seasonal cards and projects. This month’s projects are all about party fun – festive gatherings like New Year’s, birthdays and other fun times. How fun! We are excited to share our creations with you today! After you read my post, I hope you’ll hop over to the next person on the list at the base of this post.
I do not normally make a New Years card. This time there was an idea in my head that I had to put to paper. And this card was the result.
Front Dies
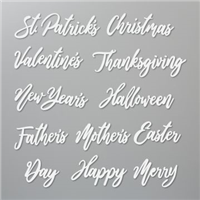
The front of the card is a mix of Silver and Gold which I love. Plus I am totally in love with the Word Wishes Dies! They are awesome. All I had to do is add a piece of adhesive sheet to Basic Black cardstock, add the dies, and run through the Cut & Emboss machine. It is like magic.
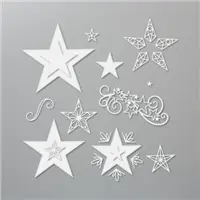
The stars are all from the Stitched Stars dies. There are such unique designs, as well as a great mixture of sizes in this die set. I love the mix of size and colors. And of course Basic Black goes with everything!
Inside Dies and stamp
I designed the card around the idea for the inside. And I am thrilled that it turned out just as I envisioned it. Early last week I made a Pop Up gift card holder. I shared it with The Paper Pixie and she made the Pop Up section one piece instead of two. Her version is what I used that idea to hold my swirl of gold stars. This piece is also sized down a bit since it only needed to hold the two little pieces.
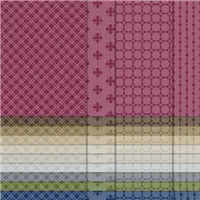
My choice for the DSP is from the Neutrals 2021-2022 6 X 6 paper stack. I used the Smoky Slate piece to pair with the silver. What you see of the two stand up Gold pieces are actually one die cut that is cut in half. And the extra stars are what was popped out of the die cut piece. No waste here!!
Thank you for stopping by today. I hope you’ll hop along to the next stop on the blog hop, Brian King at Stamp With Brian. There’s lots of inspiration to be found in this group – and you don’t want to miss it!
Thank you for hopping along with us. If you get stuck during the Blog Hop, please use this line-up as a guide:
My December Host Code is AVHFJFAU. Please use this code for orders under $150.00. I will have a small gift for those with orders over $50.00 in addition to the Perk Rewards Program. You can read all of the information at the top of the page in the Menu Bar under SHOP / Perks.
Thank you for stopping by today. I hope you enjoyed today’s project and will come back. I do read and reply to all of the comments individually. They mean a lot to me. Please reach out if you have a question.
Before I get to today’s project, I wanted to let you all know that I am doing a Product Share from the upcoming January – June Mini Catalog. Last catalog I only did the paper. This time I am doing Ribbon shares as well. You can email me if you have questions, or would like to order.
Now for today’s project! This is a Corner Fold card that I have cased from The Paper Pixie. Julie did a video on it that is great, as she always is.
Stamps and Dies
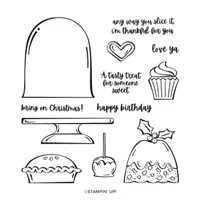
The stamping and die cut star are from the Tidings & Trimmings Bundle of products. I am in love with the star! It looks so delicate and elegant. Both of the stars are included in the bundle. For the background of the stars, I repeatedly stamped the image from the Tidings & Trimmings stamp set. This card is actually a quick and easy one to do.
Paper
I used the stamped image to mimic the berries in the DSP. This piece of Designer Series Paper is from the Painted Christmas DSP. The pop of red goes great against the Evening Evergreen, except it is actually Poppy Parade instead of Red. LOL!! The Soft Succulent background star is pulled from the paper as well. The intricate star is cut from the Gold Metallic paper. This is a two pack of Gold and Rose Metallic papers. To make for ease in adhering the intricate cuts, I added the Adhesive Sheet to the Gold prior to die cutting. The adhesive sheet turns the die cut image into a sticker.
Directions
As I mentioned above, I cased this from The Paper Pixie. Here is a link to her video. Click Here
HOST CODE
My December Host Code is AVHFJFAU. Please use this code for orders under $150.00. I will have a small gift for those with orders over $50.00 in addition to the Perk Rewards Program. You can read all of the information at the top of the page in the Menu Bar under SHOP / Perks.
Thank you for stopping by today. I hope you enjoyed today’s project and will come back. I do read and reply to all of the comments individually. They mean a lot to me. Please reach out if you have a question.
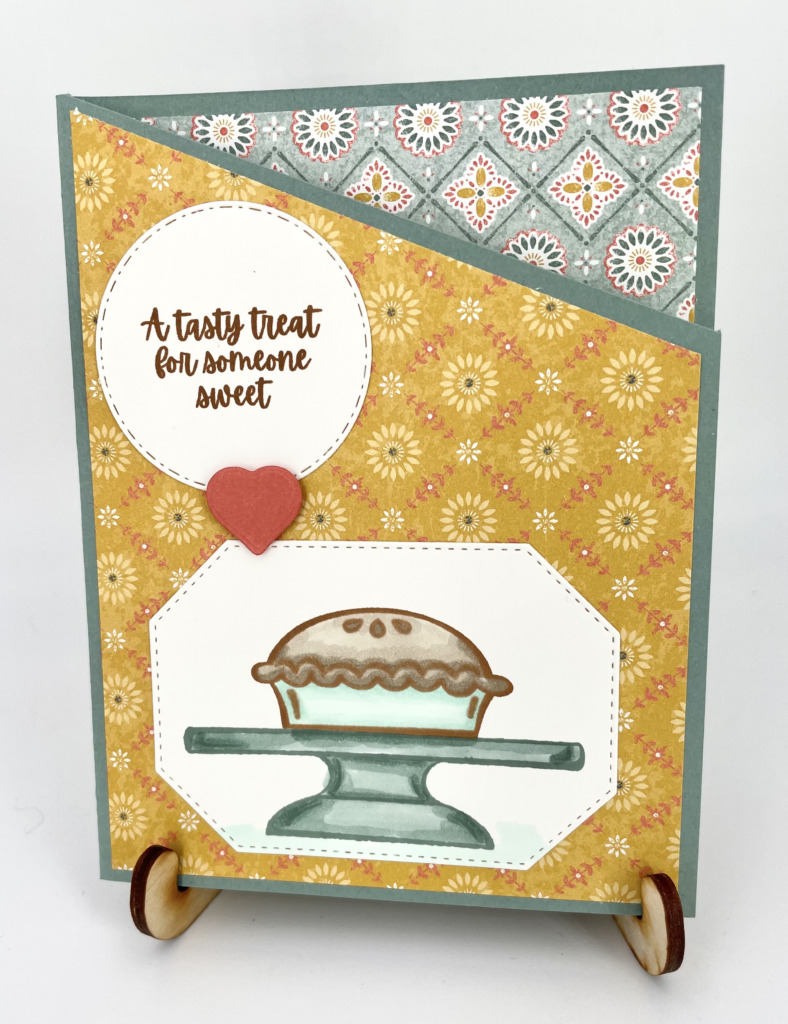
Today’s project is a Birthday card with some Sweet Treats for the recipient. There are also a few angles thrown in for a bit of a change.
Angle Cut Card and Paper
To give this birthday card a bit of different look, I made a simple angle cut across the front flap. After scoring the card base, I positioned the top of the score line in the cutting track. Next I rotated the front, top right of the card to the 1 1/2 mark. And then cut to make the angle. (These directions are quite easy with the Stampin’ Up! Paper Trimmer as it goes to 1 1/2 on the right side of the cutting track. This extra measuring area is so handy!)
The Designer Series Paper is from the Harvest Meadows pack. I cut the top layer of DSP to 4 X 5 1/2. Make the same cut on this piece of paper to match the angle. For the inside of the card, I only added DSP to the upper section where it is seen from the cut away. That piece measures 4 X 2. I also added a White piece meaasuring 4 X 3 1/4 to complete the inside layer. This leaves plenty of space for your sentiment and signature.
Stamps and Dies
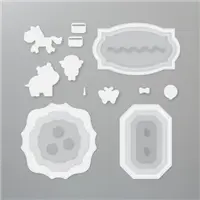
There are a variety of Dies used on this project. I started with stamping the cake plate and pie from the Sweets & Treats stamp set. This set will definitely be missed!! I then die cut the yummy pie and plate using a piece from the Hippo & Friends Dies. These dies are so nice and in several different shapes. To help the sentiment pop a bit, I used the circle from the Warm Wrap Dies. The cute, little heart is cut from one of these dies as well.
HOST CODE
My December Host Code is AVHFJFAU. Please use this code for orders under $150.00. I will have a small gift for those with orders over $50.00 in addition to the Perk Rewards Program. You can read all of the information at the top of the page in the Menu Bar under SHOP / Perks.
Thank you for stopping by today. I hope you enjoyed today’s project and will come back. I do read and reply to all of the comments individually. They mean a lot to me. Please reach out if you have a question.
Simple and easy to make gift card holders are the best. When they show off beautiful DSP, they are perfect. That is what I have to share with you today.
And here is the good part.
Stamps and Punches
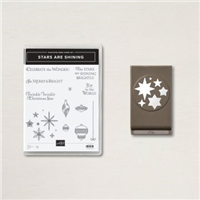
The beautiful stars are punched from DSP using the Starlit Punch which is part of the Stars Are Shining Bundle. I love punch bundles! They are so easy to create multiple cards with. And this one gives multiple stars in one punch. I did not use all of them on the front of this card.
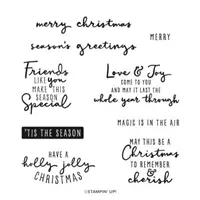
The sentiment is from the Stars Are Shining Stamp Set, the other half of the bundle. There are some great sentiments and stamps in the set. This one fit perfectly with my theme. For the inside sentiment I went to the Christmas To Remember stamp set. This set is all sentiments that are sweet and perfect.
I used the Banner Pick A Punch to cut the sentiment. This may be the first time I have used the single point banner instead of the two point one. Also I used the Label Me Lovely punch to make the finger pocket on the gift card pouch. Although it is not really necessary if you want to skip that step.
Papers
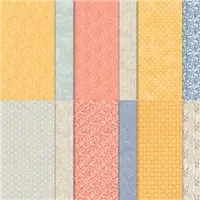
This Whimsy & Wonder Designer Series Paper is one of the prettiest papers this year. I chose the snowflakes because the pink looks beautiful against the Misty Moonlight card base. Afterwards I had the idea to punch the stars from the same paper. The bits of foil in the snowflakes are now in the stars as well. And it was a little scrap of DSP that I used, so no waste. There are a few added Rhinestones for a touch more bling!
Directions and Measurements
The card base is Misty Moonlight cut to 4 1/4 X 5 1/2
The DSP layer is 4 X 5 1/4
The accordion folded White piece is cut 4 1/4 X 9 3/4 and scored at 3 1/4 & 6 1/2
The decorated top Misty Moonlight is cut 4 1/8 X 3 1/8
The gift card pocket Misty Moonlight is cut 4 X 2 and then notched using the Label Me Lovely Punch
The DSP strip across the pocket is cut 4 X 1
HOST CODE
My December Host Code is AVHFJFAU. Please use this code for orders under $150.00. I will have a small gift for those with orders over $50.00 in addition to the Perk Rewards Program. You can read all of the information at the top of the page in the Menu Bar under SHOP / Perks.
Thank you for stopping by today. I hope you enjoyed today’s project and will come back. I do read and reply to all of the comments individually. They mean a lot to me. Please reach out if you have a question.
I love to make little treat boxes and had an opportunity to make some for a group. Merci Chocolates are so yummy, and I think of them as the perfect little Thank You treat. A little humorous play on words!
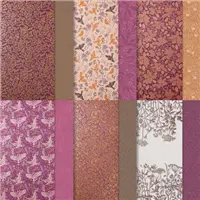
Here is a close up of one piece of the Blackberry Beauty Designer Series Paper. I love the shine!
I had just pieces of the gorgeous paper leftover. So I made these boxes , which required paper in sizes that fit what I had to work with. It was meant to be!
My Merci Chocolate Treat Boxes are cased from The Paper Pixie. She is the Queen of 3D projects. Here is the link to her post for wonderful directions. Just click the photo below.
HOST CODE
My December Host Code is AVHFJFAU. Please use this code for orders under $150.00. I will have a small gift for those with orders over $50.00 in addition to the Perk Rewards Program. You can read all of the information at the top of the page in the Menu Bar under SHOP / Perks.
Thank you for stopping by today. I hope you enjoyed today’s project and will come back. I do read and reply to all of the comments individually. They mean a lot to me. Please reach out if you have a question.
The content in this blog is the sole responsibility of Jackie Beers as an Independent Stampin' Up! Demonstrator. The use of and content of classes, services or products offered is not endorsed by Stampin' Up!