This card is a tad unusual, but I love the colors I used. It is also colored with watercolor pencils and a blender pen. I am beginning to understand the appeal of people who use the coloring books now to relax. I would not want to make multiples of this card, but one or two would be quite fine.
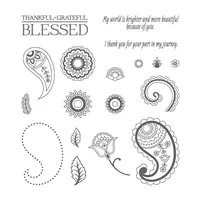
The stamp set I used today is Paisleys and Posies. This is another one that I used when it first appeared in the Holiday catalog last fall. I thought it was beautiful, and I still do, but then I have not touched it until today????? I am very happy that it carried over into this new catalog.
Paisleys & Posies, 142196
Even though this card is “different”, I still am very happy with the outcome. It was basically just random stamping and some coloring. If five people did this similar layout with the stamp set, I believe you would have five totally different cards.
My color inspiration for this card came after I began coloring and I chose the two colors I thought would most “POP”.
I used Memento Tuxedo Black ink to stamp all of the items on our Shimmery White card stock. I then colored with the Watercolor Pencils and went over it all with a Blender Pen. Actually it only took a few minutes to complete. I love the softness of the watercolor pencils and using a blender pen instead of an Aqua Painter is , at least for me, much easier to control. I hope you will give it a try if you are new to using the watercolor pencils.
The sentiment is from the Confetti Celebrations stamp set. I stamped it on a scrap of the Shimmer White card stock and punched it out using the Classic Label Punch. To make the Old Olive matching layer, I just fussy cut around the original one. It was pretty easy and I was thrilled with the result.
There are several stamp sets in the new catalog that are perfect for coloring. I hope you will give this technique a chance. Please let me know if I can help you at all.
Reminder of the EXTRA Host Rewards through the end of June !! A great value for a large order or if you would like to host a workshop. I would love to help you organize a day/night for a friends stamping event.
The supplies I used today are listed below. You can click on any item and be taken directly to my ONLINE store.
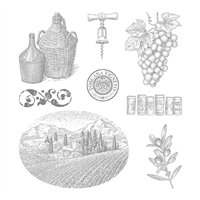
I am using a “Not Very Much Used” stamp set today. It is the Tuscan Vinyard. I fell in love with the set when it debuted last year, but then never really used it. So today I have dusted it off and I really like the outcome.
Tuscan Vinyard, 141902
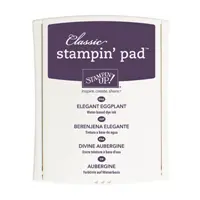
My color inspiration was obviously the grapes, but it led me to another “Not very Used” ink color: Elegant Eggplant. And on it went from there. Here are the colors I have used today.
As I was putting the card together and looking at the finished product, I asked myself why I had not been using Elegant Eggplant! It really pops! I don’t think I am going to need to “dust it off” for the near future. I can think of several sets that it would work beautifully with.
I chose to use the smaller items included in the stamp set. So instead of having a lot of background to cover or additional layers, I decided on a 4 X 4 card.
The Elegant Eggplant base is 4 X 8 and folded in half
The Old Olive layer is 3 3/4 X 3 3/4
The Very Vanilla layer is 3 1/2 X 3 1/2
The grapes are stamped in Memento Tuxedo Black Ink and colored with the Aqua Painter
The cork screw and the corks are stamped in Sahara Sand ink
The splatter is from flicking the Elegant Eggplant Marker tip into the lip of it’s cap. (Thank you #paperpixie, Julie DiMatteo)
The wine seal is stamped in Elegant Eggplant and punched out using the 1″ Circle Punch
The Linen Thread is just wrapped around the card and the seal is added with dimensionals.
And that , as they say, is that! A very quick and easy card. Each time I do the square card I ask myself why I do not do it more often. Please give it a try. I do believe you will love it.
Thank you so much for stopping by my blog today. If you have any questions or comments I would love to hear from you.
Remember that June Hosts receive additional Host Rewards!!!! I would love to work with you on a workshop/party or an order if you do not have a current Stampin’ Up! Demonstrator.
Welcome to InKing Royalty’s June 2017 Blog Hop! Today’s Blog Hop is filled with projects inspired by Stampin’ Up!’s 2017-2019 In Colors – Berry Burst, Fresh Fig, Lemon Lime Twist, Powder Pink and Tranquil Tide. What an amazing collection of new colors! We are excited to share our creations with these new colors. After you read my post, I hope you’ll hop over to the next person on the list at the base of this post.
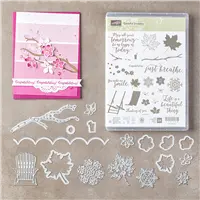
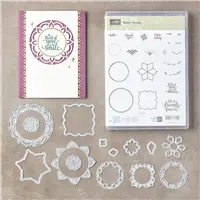
Colorful Seasons Bundle, 145348
I began my idea with two of the five In Colors, and ended up using four of the five! At least I left off the one I have been using continuously ….Lemon Lime Twist.
I believe that this set of new In Colors work together better than any every have before. I also believe that this wonderful set and bundle, Colorful Seasons, is one of the most versatile sets in the catalog. It covers, spring, summer, fall and winter. What a deal!
The base of the card is Fresh Fig and Tranquil Tide. The flowers are stamped in Berry Burst and Powder Pink. A few of them are cut out using the Colorful Seasons Thinlits Dies. The sentiment is from the set as well. (This set has AWESOME sentiments!!) To make the sentiment more of a focal point, I stamped it in Tranquil Tide and cut it out using the Layering Circles Thinlit Dies. I then went around the edge with the Tranquil Tide Stampin’ Write Marker. I felt like this was a way to help it stand out without adding bulk.
Thank you for stopping by today. I hope you’ll hop along to the next stop on the blog hop, Julie DiMatteo Julie DiMatteo @ thepaperpixie.com There’s lots of inspiration to be found in this group – and you don’t want to miss it!
Thank you for hopping along with us. If you get stuck during the Blog Hop, please use this line-up as a guide:
The supplies I used are listed below. Clicking on any item will take you directly to my OnLine Store. Please let me know if I can assist you in any way.
This is my first card with the Ribbon Of Courage stamp set. There is a bundle with a matching die cut for the ribbon. This set is Patty Bennett’s Million Dollar Achievement set. When a Stampin’ Up! Demonstrator reaches one million dollars in sales, they get to help create a stamp set. WOW !!! I believe this set will touch everyone and be used for every program that has a colored ribbon associated with it. But enough rambling, here is my card.
Ribbon of Courage, 143855
I really love how this card turned out. The coloring of the ribbon took a few minutes, but I feel was well worth the time. I colored with Watercolor Pencils and then went over each color with the blender pen. I am not sure which is the star of the show though. The ribbon or the Ruffled Embossing folder. Oh My! It looks good in the picture but is just beautiful in person.
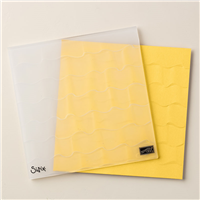
The Ruffled Embossing Folder is a new item in this catalog. It is one of the much thicker folders so takes a little different approach when you use it. Because it gives such dimension to the card stock, you should spritz it with a little bit of water before placing it in the folder. Once in the folder remember that you need a different “sandwich” for your Big Shot. You use the Multi-purpose platform, the embossing folder, and a Top cutting pad. That is all. You do not have a cutting pad between the platform and the embossing folder when you use these thicker embossing folders.
The ribbon is cut out using the Layering Ovals Thinlit Dies. The Marina Mist layer is cut using the next size of the Layering Oval Dies. For a little extra zing, I added some Crushed Curry Mini Chevron Ribbon. I stamped “Courage” from the stamp set and punched it out using the Classic Label Punch. And for some bling I placed a purple heart from the Regals Enamel Shapes.
I hope you like today’s card. I very much appreciate your comments. The June Host Special is still in effect if you would like to host a party or just place an order. I would be happy to assist you.
The items I used for this card are listed below. You can click on any item and be taken to my Online store.
I have to say that I laughed when I first saw this You’ve Got Style set in the new catalog. I love the ladies and the sentiments. I hope I did her justice in today’s card.
You’ve Got Style, 143898
Isn’t she just hilarious? I love her style! And when I was looking for my color inspirations and landed on the Foil Frenzy DSP, I knew it was perfect. Then when it came to putting the card together I could not bring myself to align it normally. The lady just shouted wacky! So that is how she ended up.
The base is Thick Whisper White card stock. The next layers are each the normal smaller layers of Berry Burst card stock, and Foil Frenzy DSP. The lady has a layer of Berry Burst card stock as well. As does the sentiment. The lady is stamped in Basic Gray Archival Ink and then colored with Watercolor Pencils and a Blender Pen. To give it a little more sparkle I added a couple of the Iridescent Sequins and gave the fir on color, cuffs, and hat brim a touch of Clear Wink of Stella. I believe anyone would have a smile on their face if they received this Sassy Lady in the mail.
Thank you so much for visiting my blog today. If you have any questions, or comments, please let me know. And remember our great Host Rewards Special for June.
When I first saw this suite I was not sure that I would use it. Then as I saw the cards and ideas that were being created with it, I thought “This may be ok”. And when I played with it…. I was hooked!! Oh My! The entire suite is just the best. Today’s card is another of my play dates with this stamp set and the new InColors.
Eastern Beauty Bundle, 145308
I would apologize for continually using Lemon Lime Twist…..But I cannot….. It is my current addiction. I just love how it seems to coordinate with everything.
I did use the New (actually an old item returning) Multipurpose Adhesive Sheets! If you use the framelits, and especially the word framelits, this is a must have. You adhere the sheet to your card stock and then use the framlit to cut out your design or words. NOTE: Remember to put the adhesive side on the bottom. You don’t want your words to be upside down! I used the adhesive sheets on all three pieces of my design. After die cutting just remove the paper and it is covered in sticky goodness. No more glue everywhere for me.
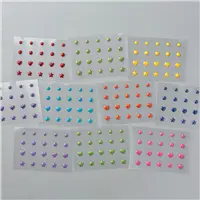
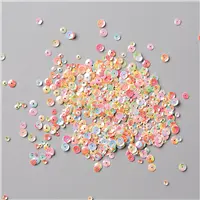
As you can see there is very little stamping on this card. The base of the card is Thick Whisper White card stock. I used four of the new InColors and then just stamped that cute saying underneath. The center of the design is one of the Glitter Enamel Dots.
I hope you will give this wonderful Eastern Beauty Suite a chance. It is definitely a keeper!!
The products I used are listed below. Thank you for stopping by and I thank you for your comments.
The content in this blog is the sole responsibility of Jackie Beers as an Independent Stampin' Up! Demonstrator. The use of and content of classes, services or products offered is not endorsed by Stampin' Up!