Today’s card is Bright, Cheery, and a Fun Fold. I think it is a winner and gives me a Smile. It is Black and Magenta Madness. I was thinking Black with a touch of Red, but wanted something that says Happy. You cannot get much brighter than Magenta Madness.
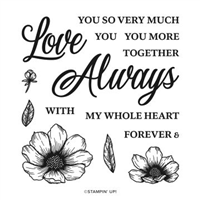
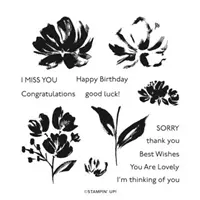
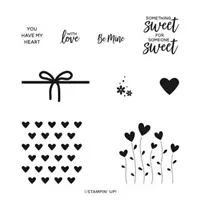
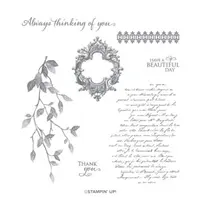
The Magenta Madness along with the True Love Designer Series Paper is a winner in my book. The black and white of the DSP needs a bright color, but just a touch. The flowers are from the Forever & Always stamp set. There are matching dies in the die set, but I wanted a more subtle look. Although a single raised flower would be a step up!
The best part of this card, to me, is the Fun Fold. Better yet, it is a simple Fun Fold. I started with a piece of Thick Basic White cardstock that is cut 4 1/4 X 11. I scored it at 5 1/2, the normal fold, and then cut off 3″ from one end. The cut off piece is 3 X 4 1/4 and becomes the front stamped area with the flowers and sentiment. Here is the ope view.
There is quite a bit of flexibility with this. The card could be turned in two other directions ( upside down so fold is at the top, or sideways with the fold on the left). It could also be used as a gift card holder if instead of cutting off the 3″ piece you scored there and only cut off 1 1/2″ then fold that under. I have made those previously.
The finishing touches are the sentiment and the In Color Dots. The sentiment is from the Happy Thoughts stamp set. The dots are placed randomly to keep the Magenta look going. The centers of the flowers are also colored using the Dark Magenta Madness Stampin’ Blend.
Measurements:
Base card is 4 1/4 X 11, scored at 5 1/2, then cut off 3″.
The base Magenta Madness is 4 X 5 1/4
The striped DSP is 3 7/8 X 5 1/8
The Magenta Madness folded section is 4 X 2 1/4
The fold DSP is 3 7/8 X 2 1/8
The Magenta Madness sentiment layer is 4 3/8 X 3 1/8
The sentiment layer is the cut off base card and is 4 1/4 X 3
The inside writing layer is 2 1/2 X 4
I hope you will give this Fun Fold a try. It is a great base card and I would love to see your take on it. You will be surprised at the few products I used to make this one. The supply list is at the bottom of the post. Please come back tomorrow for another new card.
HOST CODE
My February Host Code is: MRYR7XY2 Please use this code for orders under $150.00. I will have a small perk for those with orders over $50.00
Today’s card has new products and a new technique. The technique is not new, just I have not used it in years. To be truthful, I have always been a little afraid to try it. I worry about messing up my stuff. And that sounds silly even saying it!!
First, let me say that I made this card for the Global Design Project Challenge. It is a CASE the designer challenge. Here is the challenge card.
My new technique is the adding of ink to the inside of the embossing folder. It has been around for a number of years. But I have never tried it. I always worried about messing up my folder. But today I was brave and gave it a try. Silly Me!!! it was a piece of cake to clean up. So please do not be like me, be brave and just go for it!!
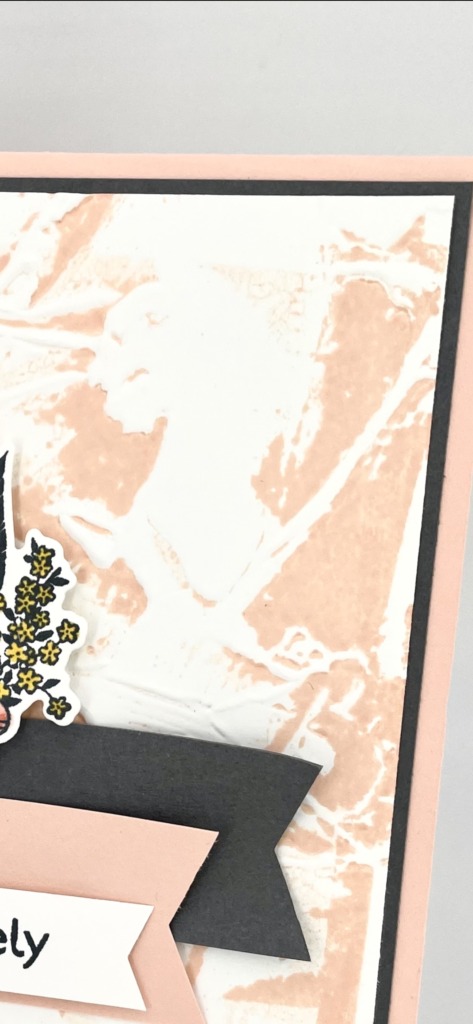
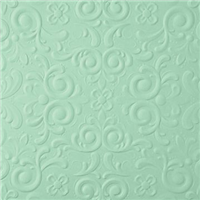
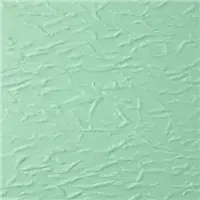
Here is a close up of the texture and how the color only is on the “high” points.
I should have said earlier that my color inspiration came from the Peony Garden Designer Series Paper. Then is decided I wanted more texture behind the focal point. So off I went to look at embossing folders. I have not used the Painted Texture Folder previously. I cannot answer as to why not because I purchased it immediately. Duh!!
Anyway, all of that led me to the colors and the background texture. I stamped my Petal Pink Ink on the inside top layer of the embossing folder and then ran it through the Cut & Emboss Machine. I was so excited with the results. I actually did two, as I tend to make two cards when I design one. After the second one, I took the folder to the sink and just ran water over the embossing folder. The ink ran right off and it was clean as could be. I cannot attest to any other brand of ink, but the Stampin’ Up! Ink ran right off.
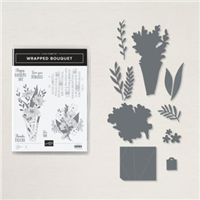
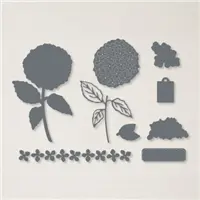
My post is a bit disconbobulated today. I never mentioned the stamp set. I used the Wrapped Bouquet Bundle as the focal point. Several years ago there was a single stamp that looked similar to this one and I totally loved it. In this set, you can stamp the flowers and newsprint as one stamp and die cut or do it as two separate stamps and two separate dies. I used the two separate ones. I like the added dimension the folded newspaper gives.
For the banners I took scraps of Basic Gray and Petal Pink cut to different lengths. I then punched one end of them using the Banner Pick A Punch. I did the same with the White for the sentiment. The sentiment is from the Art Gallery stamp set. I finished everything with a couple of Champagne Rhinestone Jewels. They matched my color scheme perfectly.
Thank you for stopping in today. Please come back tomorrow for another new project.
HOST CODE
My February Host Code is: MRYR7XY2 Please use this code for orders under $150.00. I will have a small perk for those with orders over $50.00
Last week I posted a question on my Facebook page, Blue Line Stamping, asking what stamp sets you would like to see. Sadly I did not receive much of a response. If you are a regular follower of mine here, please take a minute to Like my Facebook page as well. I would appreciate it.
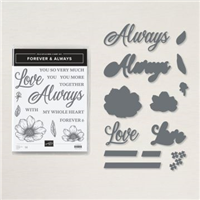
One of the sets that was requested was Forever & Always. So I am sharing a card using those products today. You can never go wrong with Black & White (plus a touch of color). And that is what I have used.
Normally I would not use quite as much color with my black and white card, but I felt the flowers and the love needed the two colors. You cannot see it from the full picture but the Basic Black background is embossed using the Parisian Flourish 3D Embossing Folder.
Here is a close up.
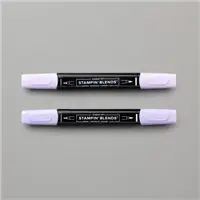
It really is beautiful in person. The details of the embossing worked wonderfully on the black. The flowers are colored using the Purple Posy Stampin’ Blends with the centers being the Light Blackberry Bliss Stampin’ Blend. Plus I added one of the Pastel Pearls to each center.
The leaves are colored using Old Olive Stampin’ Blends. I also added the background of the “Love” using Old Olive cardstock. The LOVE is Purple Posy cardstock attached to Foam Adhesive Sheet and then die cut. This is the best way for a simple adhering of the thin letters as well as giving it a raised look.
The strip of DSP is from the True Love Designer Series Paper. I wanted to add a grounding strip for the flower layers. The flowers are adhered to a die cut from the Stitched So Sweetly Dies. I used the largest of the scalloped layers.
Thank you for visiting today. I hope you enjoyed the card. I have all of the products I used listed at the bottom of the page. Remember that we are almost finished with this first round of Sale-A-Bration. It ends on February 28th.
HOST CODE
My February Host Code is: MRYR7XY2 Please use this code for orders under $150.00. I will have a small perk for those with orders over $50.00
I have a fun card for you today. I started with a fold from a card I had received in a swap. It had several layers that opened like pages in a book. I started with that, but took a wrong turn somewhere in my scoring, LOL!!! But I am happy with the Tri-Fold Card I designed from the error. I hope you will enjoy it as well.
I LOVE Cats and Dogs, and most other animals. And my husband does as well. Maybe even more than I do. So this became the Valentine card I will give to him. Here is a view of the open card.
The cat is smiling up at the frowny face little dog and I thought that was too cute. When in actuality, it would be just the opposite probably. Since cats are usually the stand offish ones.
Here is a close up of the cat.
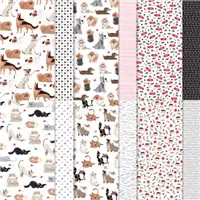
I used the Playful Pets Designer Series Paper for the stand out part of the card. I chose three different papers that worked together. The ribbon is from the Playful Pets Trim Combo. I tried to line them up along the bottom.
The hearts are from the Heart Punch Pack. I kept that simple to show off the dog and cat. They are fussy cut from the Playful Pets DSP also.
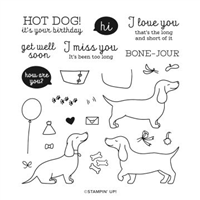
The sentiment is from Hot Dog Stamp Set in the Mini Catalog. I used a small sticky note to block the rest of the sentiment. All I wanted was the I Love You. I have a small pad of those on my desk for a variety of uses. I just have to remember to remove it before I stamp!!
I will add a small piece of White cardstock on the center panel for what I write for hubby. But for the picture I left that off.
Thank you for stopping in today. I do have all of the measurements for you. All of the supplies are at the bottom of the post. I hope this gives you a Smile in your day!!
Measurements:
card base is 5 1/2 X 11, scored at 4 1/4, and 8. (or 3 and 6 3/4, depending on your preference)
DPS is 2 3/4 X 5 1/8 , 3 3/8 X 5 1/8 (X2) , 3 7/8 X 5 1/8
The second of the middle DSP goes on the backside of middle panel as you can see that panel when the card is closed.
HOST CODE
My February Host Code is: MRYR7XY2 Please use this code for orders under $150.00. I will have a small perk for those with orders over $50.00
I was making some 3 X 3 cards for a friend who loves handing them out. The thought struck me to make some Valentine ones for myself as well. These are really quick and simple. The better to make multiples of.
These colors are a bit out of the norm for Valentine, and I love that! I wanted to use the Oh So Ombre Designer Series Paper from Sale-A-Bration (sadly I believe it is all gone now). This is a great project for the 6 X 6 paper stacks or the regular 12 X 12 DSP. The DSP layer is 2 7/8 X 2 7/8, so you can get 4 from one 6 X 6 piece.
I chose the paper first to decide which colors I needed to stamp. Since I went with the Rococo Rose DSP, I stamped the hearts with Rococo Rose Ink. The stamp is from the Valentine Keepsakes stamp set in the Mini Catalog. It is designed to be able to create a continuous background!!
For the coordinating color, I chose Bermuda Bay. It is not one I would normally have paired with Rococo Rose. I chose it because it was a color included in the paper stack. So I knew the colors would work together.
The hearts are both from the Heart Punch Pack. I love punches for the ease of doing multiples! The sentiments are from the Valentine Keepsakes stamp set also. The precious little tag is from the Hydrangea Dies. I knew I had seen a small tag recently so began going through all of the dies until I found it. I stamped the sentiments in Bermuda Bay Ink and then used the Mini Cut & Emboss machine. These being so small , it was quick cutting them out. I did angle the Be Mine just a tad to better fit the tag.
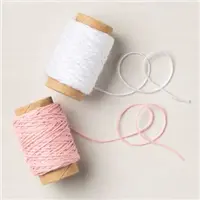
The finishing touch is a little bow tied using the Snail Mail Twine Combo. Although I only used the pink one. It is attached to the top of the tag with a glue dot. I cut an 11″ piece of twine and then tied a finger bow.
Thank you for stopping by today! I hope you like the smaller and quick little cards. Please share your ideas with me.
HOST CODE
My February Host Code is: MRYR7XY2 Please use this code for orders under $150.00. I will have a small perk for those with orders over $50.00
I have been seeing a few more cards that are using the older distressing techniques on the paper. Some are tearing and others are curling and tearing, and aging with ink. I decided to see if I could take myself back quite a few years and make one of these cards.
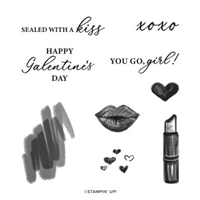
I had seen a card similar to my center stamped layer that I fell in love with. It was from Rosa Miranda. So I started with that layer first. I stamped the background image from the Very Versailles stamp set using Smoky Slate Ink. I then used the heart stamp from Hearts & Kisses stamp set. It is stamped in Just Jade, Rococo Rose, Bumblebee, and Magenta Madness Inks.
To finish off the distressed part for the main layer, I embossed it using the Old World Paper 3D Embossing Folder. You cannot see the embossed area very well. However, the Smoky Slate layer is also embossed using that folder and you can see the detail in that layer. I also tore the top section and roughed the edges of the Smoky Slate layer.
To finish off my card, I distressed the Just Jade layer and then glued everything together. My final thought was the bow. I added a twine bow from the Well Suited Twine Combo Pack. This combo is Night of Navy and Basic Gray. I chose to use the gray to compliment the Smoky Slate.
This is not a “normal” card type for me. But I had a lot of fun playing with different techniques to get the distressed look. You may see me trying more of this style before too long.
Thank you for stopping by today. Since it is the first of the month, please make note that I have a new Host code for February. I greatly appreciate your orders. I have my Blue Star Rewards program (you can see all the details under the Shop button in the menu.
HOST CODE
My February Host Code is: MRYR7XY2 Please use this code for orders under $150.00. I will have a small perk for those with orders over $50.00
The content in this blog is the sole responsibility of Jackie Beers as an Independent Stampin' Up! Demonstrator. The use of and content of classes, services or products offered is not endorsed by Stampin' Up!