Today’s project is not a card. I have a Sneak Peek for you of a sweet box from the upcoming Mini Catalog. It is paired with the Ranunculus Romance stamp set for a sweet young lady gift.
Stamp Set(s)
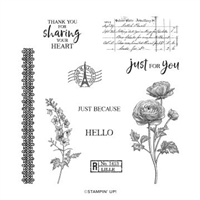
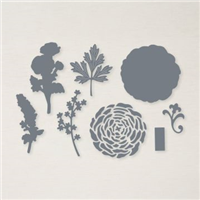
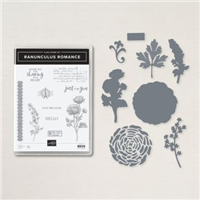
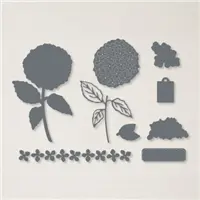
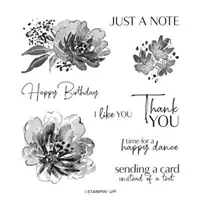
This project began with the Ranunculus Romance stamp set so that is where I am going to start as well. Needing a gift box ,or a card, sometimes leads us down different paths. For this project I wanted to use the “collage” look of the Ranunculus Romance stamp set. (Try saying that , or spelling it, a couple of times!!) Even the little tag was pre-done as I have always loved that little tag from the Hydrangea Dies. The sentiment is from the Hydrangea Haven stamp set.
The Gift Box
After stamping and coloring the flower, there just wasn’t a box I had in my pattern file that seemed to fit. Luckily, I had received my pre-order from the July – January Mini Catalog. And even better was that I had ordered the cute little Envelope Treat Boxes. If you have your catalog already, they are on page 13. They are pre scored and have adhesive already on them. Best yet is there are ten boxes for $8.00.
Instead of having the closure on the top, I decided it needed to be on the bottom. To ensure it stays closed, and to add the pretty flower, I added a Soft Succulent Belly Band. There is a “collage” sort of stamping on what I am calling the top of the box. So here are all of the photos.
You can see the stamping on the box here.
This is what I am using as the bottom of the box with the envelope looking closure.
It also has a second closure, which is wonderful for holding the surprise in place.
And here is the real treat! There are six of the Merci Chocolates, and do you see the dark piece on the bottom? That is a gift card! Yes, it fits a gift card. That is a winner in my book.
Belly Band Measurements
The belly band is loose enough that it slides off easily. Soft Succulent cardstock is cut to 2 1/4 X 7. Then score it at 1 3/8, 2 3/8, 4 3/4, and 5 3/4. It is secured where it overlaps with Tear & Tape.
Last Chance on Retiring Mini Catalog Products
Click on the photo to get the complete PDF of retiring products. Pay close attention to discounted items. It may be less expensive to purchase some items that are part of a bundle separately, than at the bundle price! I want you to get the most for your dollars.
HOST CODE
My June Host Code is B4ZVQK6D. Please use this code for orders under $150.00. I will have a small gift for those with orders over $50.00 in addition to the Perk Rewards Program. You can read all of the information at the top of the page in the Menu Bar under SHOP / Perks.
Thank you for stopping by today. I hope you enjoyed today’s project and will come back. I do read and reply to all of the comments individually. They mean a lot to me. Please reach out if you have a question.
My project for today is a gift tag. Using Flowing Flowers stamp, Sports Event dies, Hearts, and Doilies make a quick and easy project. This one is for my customers who earned my Shopping Award with my Blue Star Perks. You can read about my Perks at the bottom where this month’s Host Code is located. And also the full information regarding my Perks is under the menu bar with Shop / Perks.
Stamps
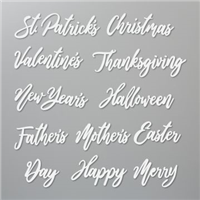
The single stamp used on today’s tag is from the Flowing Flowers stamp set. All of the sentiments in this set have this type of Font. These are some of my favorite sentiments and partly because of the font style. It is stamped using Real Red Ink onto Basic White cardstock.
Punches
For me grabbing a punch is one of the quickest ways to make a card. I love all of the Stampin’ Up! punches. The hearts I have used here are a pair. They are the perfect size for quite a lot of the sentiments, or a small stamped image. Thankfully the smaller one was perfect for the Thank You!
Dies
And the base of the tag is a die from the Sports Event Die set. They pair with the Your Biggest Fan stamp set. And they are part of the Hey Sports Fan Suite of products. So there are quite a lot of products they can work with. However, I didn’t use any of those products for my tag, except the tag itself. So now you can see another use for this Die set. Plus it is a perfect size!
Embellishments, etc.
The doily is from the Heart & Home Doilies. There are three different colors in the package. And I chose the Misty Moonlight. The tag needed something besides more red. And I could add the Cotton Ribbon Combo of Misty Moonlight as well. Continuing the Misty Moonlight a bit further, I added one of the 2020-2022 In Color Gems . I love how all of these pieces make a quick tag. And they are not ones that you would normally think of as pairing.
SAVINGS ARE IN BLOOM
CLICK ON THE PHOTO FOR A VIEW OF ALL ITEMS DISCOUNTED
WAVES OF THE OCEAN SUITE …EARLY RELEASE
CLICK ON THE PHOTO TO SEE THE COMPLETE SUITE OF PRODUCTS
ALL TOGETHER … SPECIAL BUNDLE
CLICK ON THE PHOTO TO SEE ALL OF THE PRODUCTS
HOST CODE
My March Host Code is JGGHP66J. Please use this code for orders under $150.00. I will have a small gift for those with orders over $50.00 in addition to the Perk Rewards Program. You can read all of the information at the top of the page in the Menu Bar under SHOP / Perks.
Thank you for stopping by today. I hope you enjoyed today’s project and will come back. I do read and reply to all of the comments individually. They mean a lot to me. Please reach out if you have a question.
Welcome to InKing Royalty’s December Blog Hop! During this year’s blog hops, we are having fun with our stamping favorites – our favorite themes for seasonal cards and projects. This month’s projects are all about party fun – festive gatherings like New Year’s, birthdays and other fun times. How fun! We are excited to share our creations with you today! After you read my post, I hope you’ll hop over to the next person on the list at the base of this post.
I do not normally make a New Years card. This time there was an idea in my head that I had to put to paper. And this card was the result.
Front Dies
The front of the card is a mix of Silver and Gold which I love. Plus I am totally in love with the Word Wishes Dies! They are awesome. All I had to do is add a piece of adhesive sheet to Basic Black cardstock, add the dies, and run through the Cut & Emboss machine. It is like magic.
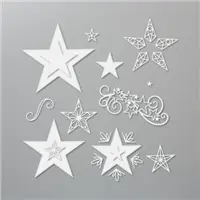
The stars are all from the Stitched Stars dies. There are such unique designs, as well as a great mixture of sizes in this die set. I love the mix of size and colors. And of course Basic Black goes with everything!
Inside Dies and stamp
I designed the card around the idea for the inside. And I am thrilled that it turned out just as I envisioned it. Early last week I made a Pop Up gift card holder. I shared it with The Paper Pixie and she made the Pop Up section one piece instead of two. Her version is what I used that idea to hold my swirl of gold stars. This piece is also sized down a bit since it only needed to hold the two little pieces.
My choice for the DSP is from the Neutrals 2021-2022 6 X 6 paper stack. I used the Smoky Slate piece to pair with the silver. What you see of the two stand up Gold pieces are actually one die cut that is cut in half. And the extra stars are what was popped out of the die cut piece. No waste here!!
Thank you for stopping by today. I hope you’ll hop along to the next stop on the blog hop, Brian King at Stamp With Brian. There’s lots of inspiration to be found in this group – and you don’t want to miss it!
Thank you for hopping along with us. If you get stuck during the Blog Hop, please use this line-up as a guide:
My December Host Code is AVHFJFAU. Please use this code for orders under $150.00. I will have a small gift for those with orders over $50.00 in addition to the Perk Rewards Program. You can read all of the information at the top of the page in the Menu Bar under SHOP / Perks.
Thank you for stopping by today. I hope you enjoyed today’s project and will come back. I do read and reply to all of the comments individually. They mean a lot to me. Please reach out if you have a question.
I love to make little treat boxes and had an opportunity to make some for a group. Merci Chocolates are so yummy, and I think of them as the perfect little Thank You treat. A little humorous play on words!
Here is a close up of one piece of the Blackberry Beauty Designer Series Paper. I love the shine!
I had just pieces of the gorgeous paper leftover. So I made these boxes , which required paper in sizes that fit what I had to work with. It was meant to be!
My Merci Chocolate Treat Boxes are cased from The Paper Pixie. She is the Queen of 3D projects. Here is the link to her post for wonderful directions. Just click the photo below.
HOST CODE
My December Host Code is AVHFJFAU. Please use this code for orders under $150.00. I will have a small gift for those with orders over $50.00 in addition to the Perk Rewards Program. You can read all of the information at the top of the page in the Menu Bar under SHOP / Perks.
Thank you for stopping by today. I hope you enjoyed today’s project and will come back. I do read and reply to all of the comments individually. They mean a lot to me. Please reach out if you have a question.
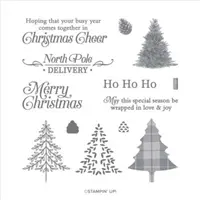
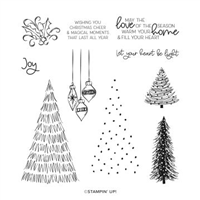
Today’s project is my version of the Pin Wheel Card. It is a great 3D card that showcases products perfectly. Best yet is that it still folds flat.
This is the overhead view to see the Pin Wheel.
The inside sentiment and signature section.
Who doesn’t love Ho Ho Ho ?
The special sentimnet.
Stamps
The Perfectly Plaid stamp set was perfect for the Heartwarming feeling. I was looking for just a fun and simple layout. It worked perfectly. Of course, you could add as much detail to each panel as you wish. I just wanted a simple addition to each panel.
Punches
To keep with the clean, simple, and my normal quick card building, I used two different punches on this card. The Ho Ho Ho is punched using the Double Oval Punch. The scalloped back layer helps the White sentiment layer to pop. And the second punch is the Pine Tree Punch. This punch matches the Perfectly Plaid trees.
Thank you for stopping by today! Don’t forget the Last Chance Sale that begins today. You can click on the picture below to see the pdf of the list.
HOST CODE
My DECEMBER Host Code is AVHFJFAU. Please use this code for orders under $150.00. I will have a small gift for those with orders over $50.00 in addition to the Perk Rewards Program. You can read all of the information at the top of the page in the Menu Bar under SHOP / Perks.
Thank you for stopping by today. I hope you enjoyed today’s project and will come back. I do read and reply to all of the comments individually. They mean a lot to me. Please reach out if you have a question.
Welcome to InKing Royalty’s November Blog Hop! During this year’s blog hops, we are having fun with our stamping favorites – our favorite themes for seasonal cards and projects. This month’s projects feature pretty packages and beautiful tags to inspire your holiday gift-giving. We are excited to share our creations with you today! After you read my post, I hope you’ll hop over to the next person on the list at the base of this post.
Project
I chose for today’s project to share a simple gift that is easy and fun to make. It is a little box which holds gift tags. This fell in line perfectly with the title of the Blog Hop. My box holds 10 tags, however that may very depending on your embellishments.
And here is the side view as well as the tags:
Paper and Ribbon
All of the DSP used is from the Whimsy & Wonder Designer Series Paper. You can see from the tags photo that I used almost all of the different patterns of this gorgeous paper. The base of the box is Thick Basic White cardstock. The tags are all regular Basic White cardstock with the DSP cut and glued to the cardstock prior to punching with the Delightful Tag Topper Punch. This gives them quite a bit more strength.
I used the Blushing Bride Frayed Grosgrain Ribbon for the handle and decorative bow. The ribbon is cut to 7″ and placed from outside to inside of the tag hole. I used two glue dots , one above the other, to adhere the ribbon to the inside of the box. This is done on both the front and the back. The bow I tied for the front is added to the front of the box with a couple of glue dots as well.
The tag ribbon is the White Glittered Organdy Ribbon. I added the ribbon with a bookmarker type tie. This way the recipient can easily remove it and add to a bag, or leave as is and add to a package.
Stamps, Dies, Punches, Etc.
The sentiments you see on all of the tags, as well as the front of the box, are all from the Peaceful Deer stamp set. They were the perfect size to fit where needed. Some of them are angled a bit, but that adds to the look. Also I added a To / From to the back of each tag. Since the back side of the tag is Basic White, It was a no brainer. That stamp came from the Bright Baubles stamp set.
In addition to the Delightful Tag Topper Punch, I also used the Double Oval Punch. The ovals were used together on the front of the box to add some depth for the sweet sentiment. On the tags the smaller one was used and adhered flat to the tag as to not create bulk.
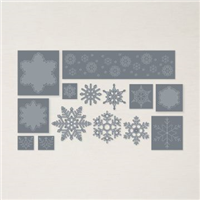
There was one die used on the tags. It is from the Stitched Snowflakes Dies and matched perfectly the snowflakes on the pink piece of the DSP. And of course there has to be bling! I used both the Basic Rhinestone Jewels and the Holiday Rhinestones on the tags and the box sentiment.
PDF of my project
Click on the little photo for a pdf of the box and tags.
Thank you for stopping by today. I hope you’ll hop along to the next stop on the blog hop, Renae Novak at Blessed By Cards. There’s lots of inspiration to be found in this group – and you don’t want to miss it!
Thank you for hopping along with us. If you get stuck during the Blog Hop, please use this line-up as a guide:
Join my team by purchasing the Starter Kit for $75.00 and receive $125.00 of products totally of your choosing! That is a fabulous deal at a $24.00 discount off of the regular Starter Kit price. This is always the Ultimate Bundle of products, and now it is even better! You can simply click on the picture below and Join.
HOST CODE
My November Host Code is M4GF9KZ7. Please use this code for orders under $150.00. I will have a small gift for those with orders over $50.00 in addition to the Perk Rewards Program. You can read all of the information at the top of the page in the Menu Bar under SHOP / Perks.
Thank you for stopping by today. I hope you enjoyed today’s project and will come back. I do read and reply to all of the comments individually. They mean a lot to me. Please reach out if you have a question.
The content in this blog is the sole responsibility of Jackie Beers as an Independent Stampin' Up! Demonstrator. The use of and content of classes, services or products offered is not endorsed by Stampin' Up!