This month, our blog hop team made projects to celebrate Random Acts of Kindness Week, which is February 14-20! We hope you will be inspired by all the beautiful creations the Pals made for you! As you hop from blog to blog, we would love for you to leave a comment. You will find the lineup at the end of my post to help you “hop” along from Pal to Pal.
I love making little Random Act of Kindness cards and gifts. The one for today is a larger version of one I make around Christmas.
Design
Hopefully from the photo you can see that this is one of the old Matchbook treats. When I first began stamping it was a common creation with a variety of notes and treats. I have revitalizing this quick and easy treat for you. Here is a look at the inside.
And Oh My!!! That White Chocolate Sugar Cookie Ghirardelli is amazing !!!! Just saying ! 🙂
Stamps
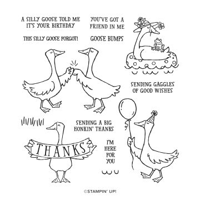
The fun goose with the awesome Thanks is from the Silly Goose stamp set. Yes, I am a sucker for the cute animal stamps. They are my favorites for hoping to give someone a smile. This image is all it took for the front of this treat. It is stamped using Memento Tuxedo Black Ink and then colored with Stampin’ Blends. Although there were only the bill, feet, and the sign to color. Again, a quick and easy treat to make.
For the inside sentiment I went to the Ringed With Nature stamp set. I love the bold Just For You. A perfect match for the treat.
Paper
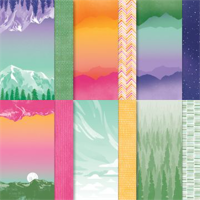
To make the treat I wanted a color matching the goose. Since I went with a White Goose, that didn’t leave a lot of choices, except for the feet and bill. I chose a darker yellow/orange and went to Mango Melody. It is a favorite color of mine. And I found the perfect matching paper in the Enjoy The Journey Designer Series Paper. This piece with slashes of Mango Melody and Melon Mambo was a match at first sight. And it gave me the pink for the Thanks banner!
Finishes
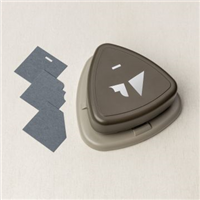
The finishing touch was to give the decorative detail on the corners of the Goose layer. This was accomplished with the Very Best Trio Punch. And to compliment the pink again, I added one of the 2021-2023 Opal Dots in the pink shade for a touch of bling.
Measurements:
The treat base is Mango Melody cut to 3 1/4 X 7 and scored at 3/4, 4, and 4 1/4. The DSP is cut to 3 X 2 1/2 and 3 X 1/2 . I stapled the 3/4″ fold with two staples closer to each side and lower than half way. This allows the front to tuck in behind easily. Staple and then add the small strip of DSP to hide the staples.
The goose layer is a piece of Basic White cut 2 1/8 X 2 3/8. And the inside sentiment White is 3 X 2 1/2. To add the White Chocolate Sugar Cookie treasure, I used a single Glue Dot. They are strong but pull away fairly easily.
Thanks for visiting today !!
More inspiration awaits, so use the lineup below to visit the rest of the Design Team. The Pals are excited to show you what they’ve created! Then, please mark your calendars for our next blog hop on March 8th, when our theme will be Party Time, showcasing cards/projects that celebrate our family and friends.
Not only is SAB all about Free Products, but Stampin’ Up! has really upped the rewards if you choose to join my team.
The regular Starter Kit, I call it the Ultimate Bundle, is 125.00 in product for 99.00. You get to choose all of the products yourself. For these two months of SAB, there are three options for you to choose and the rewards are amazing!
Option 1: The exclusive Boho Blue Mini Machine ($63 ) + your choice of $175 of Stampin’ Up! products for only $129 .
Option 2: The original white Mini Machine ($63 ) + your choice of $175 of Stampin’ Up! products for only $129 .
Option 3: Your choice of $175 of Stampin’ Up! products for only $99 .
Options 1 and 2 offer you 50.00 more in product and the Mini Machine for only 30.00 above the regular price.
Option 3 offers you $50 more product than the standard Starter Kit offer for the regular price!
These are the best deals I have seen. If you are interested, please reach out to me and let’s chat about it.
HOST CODE
My January Host Code is HEMUVZZK. Please use this code for orders under $150.00. I will have a small gift for those with orders over $50.00 in addition to the Perk Rewards Program. You can read all of the information at the top of the page in the Menu Bar under SHOP / Perks.
Thank you for stopping by today. I hope you enjoyed today’s project and will come back. I do read and reply to all of the comments individually. They mean a lot to me. Please reach out if you have a question.
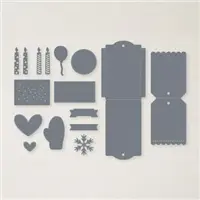
Today’s project is a group of simple gift tags. It uses my favorite tags dies the Celebrations Tags Die set. I went with the rustic look for these.
Tag Dies
It seems every project I make to post that the products sell out before I post. The problem with Last Chance items I suppose. But if you were lucky enough to get the Celebrations Tags Dies, that is the base of this project. The tag and the hearts are from that Die set. I chose a somewhat rustic look for this set of tags with Real Red, Shaded Spruce and they are paired with the Kraft paper. The tag and the hearts are both from the die set.
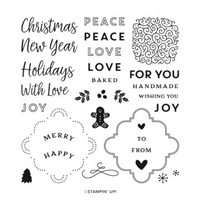
Stamps and Punches
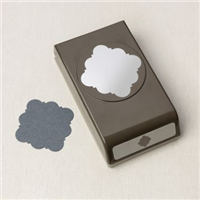
To make quite a few of these tags, I wanted fairly quick and simple. So I opted to stamp a lot of the Joy on a strip of Thick Basic White card stock in the Real Red Ink. This simple little word is loved, and is from the Handmade Wishes stamp set. Sadly, another that is sold out. After checking my punches, as they are my Go To for quick, I found there was one that fit perfectly. This sweet little punch is named Best Label Punch. It is from the Annual Catalog and is Not sold out!! At least one!
Finishes
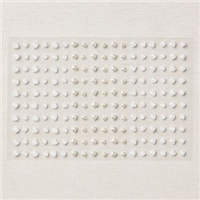
However the gold twine is also sold out. I am so sorry! Things are moving quite quickly now. But the Heart Pearls are also still available! Although any little embellishment would work for a bit of bling on the hearts.
Thank you for visiting in this busy time of year. I hope I have given you some inspiration, even if not with these same products.
HOST CODE
My December Host Code is Y7T7EMTC. Please use this code for orders under $150.00. I will have a small gift for those with orders over $50.00 in addition to the Perk Rewards Program. You can read all of the information at the top of the page in the Menu Bar under SHOP / Perks.
Thank you for stopping by today. I hope you enjoyed today’s project and will come back. I do read and reply to all of the comments individually. They mean a lot to me. Please reach out if you have a question.
I have another Bath and Body Gift box idea to share with you. This is a nice way to give a gift and show your paper crafting talents. The Handmade Wishes Bundle is perfect for little gifts.
Today’s project was made for the Make My Monday Blog Challenge as part of the Design Team. You can see all of the designer’s projects and join the challenge by clicking on the emblem.
Here are the gifts on the inside. There are several small size candy packages that will fit in this space. The Mini Ghirardelli’s have been hard to find this year.
Stamps
I am sad to say that the fun Handmade Wishes Bundle is gone from the Last Chance List. It was there when I was making this last week. However, there are lots of Christmas sentiments that you probably have that will work just as well. And it does not have to be for Christmas! This is a great year round little gift.
If you do have the Handmade Wishes set, or the punch, I used Thick Basic White card stock and punched the tag. Using the Stampin’ Up! grid paper, I lined it up straight and then stamped the sentiments. They are three different words. But being photopolymer they are so easy to line up and place.
Papers and Ribbon
The card base is Garden Green card stock with the matching striped DSP from Sweetest Christmas Designer Series Paper. That is the candy cane paper! The box does not need a ribbon for a closure. But I wanted to add more color, plus the addition of the candy cane. I used the Real Red Faux Linen Ribbon. It is wrapped around the box and I tied a simple bow. The candy cane tucks easily behind the ribbon and is fairly secure.
The Box Instructions
You may have already recognized this box as being a Paper Pixie box. And you would be correct! Julie makes such great box projects that I don’t even try to change anything. Here is a link to her post and video. She is the best at giving directions and making it easy! Paper Pixie Essentials Box
HOST CODE
My December Host Code is Y7T7EMTC. Please use this code for orders under $150.00. I will have a small gift for those with orders over $50.00 in addition to the Perk Rewards Program. You can read all of the information at the top of the page in the Menu Bar under SHOP / Perks.
Thank you for stopping by today. I hope you enjoyed today’s project and will come back. I do read and reply to all of the comments individually. They mean a lot to me. Please reach out if you have a question.
This month, the theme is Last Minute Gifts/Cards to inspire you with your holiday list. We really hope that you will be enjoy all the amazing creations the Pals are sharing with you! As you hop from blog to blog, we would love for you to leave a comment. You will find the lineup at the end of my post to help you “hop” along from Pal to Pal.
My Last Minute Gift idea is a small gift and Gift Card holder in one. I give quite a lot of Gift Cards over the year. But at the same time like to give a little something. This is a perfect mix.
2 in 1 Gift card Box
You can see the top of the gift card peeping out of the finger notch at the top. Here is a view of what it holds.
This sweet box holds perfectly the hand cream from Bath and Body. My Gift Card is not a Bath and Body (I forgot to purchase one!) but you can see the one I substituted. These little boxes go together really quickly. The scoring and cutting of the card stock is the most time consuming. And that is not long at all. I made this one in less than thirty minutes total.
In case you do not recognize this sweet 3D item, it is from The Paper Pixie. And since her videos and directions are the best!, I am going to give you the link instead of trying to explain how to make this. It is Hand Cream & Gift Card Box. Simply click on that highlighted name.
Stamps and Embellishments
The only stamping on this is the ‘Tis The Season from the Brightest Glow stamp set. It is a great size with a fun font. By using the Double Oval Punch, it become a tad taller than the box itself, but still fits perfectly. I think the bit of added height helps it to stand out a little. The only embellishments are the Ribbon bow and the three little Red Rhinestone Gems.
Papers
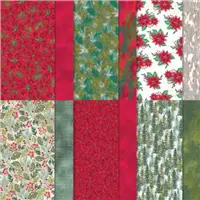
The beginning of this project, after choosing the box, was what papers would show best on a rather small scale. This DSP is from the Boughs of Holly Designer Series Paper. There are a couple of different Poinsettia prints in this pack. I liked this one on the White with smaller flowers. It helps the flowers to stand out individually. And I chose the Shaded Spruce as the green. There are several different ones included in the leaves of the bundles. The Shaded Spruce is the brighter one. This sweet project is a good ones for making multiples of. I am in the process of doing just that. It takes very little DSP and once the scoring is complete you are almost finished!
More inspiration awaits, so use the lineup below to visit the rest of the Design Team. The Pals are excited to show you what they’ve created! Then, please mark your calendars for our next blog hop on January 11th when our theme will be Sale-A-Bration Time. The design team will showcase projects made from Sale-A-Bration items.
My December Host Code is Y7T7EMTC. Please use this code for orders under $150.00. I will have a small gift for those with orders over $50.00 in addition to the Perk Rewards Program. You can read all of the information at the top of the page in the Menu Bar under SHOP / Perks.
Thank you for stopping by today. I hope you enjoyed today’s project and will come back. I do read and reply to all of the comments individually. They mean a lot to me. Please reach out if you have a question.
I hope you have taken advantage of the Clearance Rack Refresh as well as the Last Chance Sale for the Mini Catalog. There are some amazing deals in both places.
My project today is a package of Gift Tags, or Random Act of Kindness cards, using one of the Retiring products. It is the Decorated With Happiness set. This is a wonderful Bundle, and one that is less expensive purchased separately with the sale pricing.
Stamps
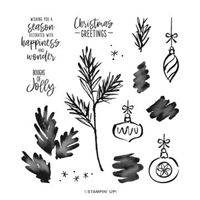
All of the stamps used on this project are from the Decorated With Happiness set. There are matching dies as I mentioned at the top of the post. However, I wanted to keep this as flat as possible. The bough is stamped and then the shadow stamped added. As is the two ornaments. For the sentiment I used the Layering Circles Dies and then turned it into the look of an ornament. To do that I drew a straight line for the hanger using the Sweet Sorbet Stampin’ Write Marker. And to finish that look I tied a bow using the In Color Baker’s Twine in Sweet Sorbet and White.
Cards
The 3 X 3 cards are made the same way as the front of the gift holder. Here is a view of one of those. They do not have the added layers of the sentiment though. I made a few with different ornaments but all done the same way. They each received a Festive Pearl in the center of the ornament for a touch of bling.
Directions for Card Holder
The front stamped layer is 4 X 3 3/4 to begin with. After doing the stamping I cut 1 1/8 off the top to fit over the flap. When adhering this layer, place the bottom section first and allow equal measures on the bottom and sides. Do this with the holder closed and the bottom section you are adhering will be flush against the bottom of the flap. Then add the top piece with it being flush with the bottom of the flap and equal on sides and top.
Here is an open view of the card holder.
This is a very simple card holder. It is another oldy but goody that I found when looking for something! That seems to happen fairly often. The holder begins with a piece of Garden Green card stock cut to 4 1/4 X 11. It is then scored at 1 1/4, 5 1/4, 6 1/4, and 7 1/4. Fold and burnish the score lines to create the mountain in the center .
For a closure, I used clear velcro dots. They were added after the front layer is adhered. You may have your own method for adding these. But I add the one under the flap first. I can place it towards the bottom of the flap and then with the second half attached simply close the flap on to the closed box. This ensures perfect placement.
I included 4 cards and envelopes and there is plenty of room.
HOST CODE
My December Host Code is Y7T7EMTC. Please use this code for orders under $150.00. I will have a small gift for those with orders over $50.00 in addition to the Perk Rewards Program. You can read all of the information at the top of the page in the Menu Bar under SHOP / Perks.
Thank you for stopping by today. I hope you enjoyed today’s project and will come back. I do read and reply to all of the comments individually. They mean a lot to me. Please reach out if you have a question.
Today’s project is a quick and easy Treat Holder. It is similar to the old time “sour cream” holders. All you need is a bit of pattern paper.
Paper and Holder
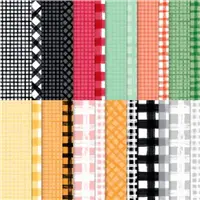
This treat holder came about from necessity! Having purchased some long chocolate covered pretzel treats for some special Halloween friends, I could not decide how to decorate it. What I am sharing was my first idea and is based on the old Sour Cream Container idea. If you are unfamiliar with that it is basically like a tube of paper, think toilet paper roll, and you then secure the ends in opposite directions to make a triangle shape.
Since these pretzels were so long, I went with only securing the bottom end and leaving the top open. By using the Gingham Cottage Designer Series Paper I could make lots of treat holders in the same pattern. This pack of papers is one of the larger ones, and has multiples of each pattern. For this holder I used a piece that is 4 X 9 3/4. It is scored 1/2″ across the bottom of the 4″. Add some Tear & Tape at that score line and then down one side. Roll it up and secure the side and then pinched the bottom closed. This would work on any similar treat. All you need is enough paper to go around the treat and then an inch longer than the treat. As I said, Easy Peasy!!
Stamps, Punch, and Finishes
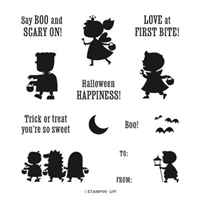
For the tag I used the Scary Cute stamp set. These sentiments are so sweet. And that is what I like. The sentiment and the bats were stamped on a scrap of Basic White using Memento Tuxedo Black Ink. For the shape I used the Label Me Fancy Punch. The shape reminds me of military dog tags with the rounded ends. Also, the punch has a ribbon slot as well as a circle hole. After punching the shape, I then punched the hole in the end to run my ribbon through.
To finish the treat I went with Baker’s Twine. My plan was the Bakers Twine Essentials Pack, which contains a solid Black roll of twine. But in my ribbon drawer was this piece of Black and White twine. This was a look I preferred. But ended up using both. We all have leftovers of ribbon and twine that still work on our projects don’t we! The twine was wrapped around a couple of times and then tied in a simple knot. I hope you will use this quick and easy way of decorating some treats for Halloween or any occasion.
Birthday Organizer Kit
DETAILS
Kit includes one 8″ x 10″ (20.3 x 25.4 cm) monthly planner with space to record birthdays each month as well as a pocket sleeve to hold birthday cards.
Includes 12 full-size birthday cards, 6 of 2 designs, and 12 coordinating envelopes.
Includes Glue Dots, Stampin’ Dimensionals, Adhesive-Backed Embellishments, and Tear & Tape Adhesive
Includes die-cut florals and pieces ready for you to use—no prep work required!
Includes sticker sentiments and die-cut labels in Dutch, English, French, and German
Now is the perfect time to Join Stampin’ Up! and my Team. This is a great promotion with a very good “Bang for your Buck ” deal. There is not obligation to ever place another order as a demonstrator. I would love to talk with you if there are questions or concerns.
HOST CODE
My October Host Code is R26UJTTW. Please use this code for orders under $150.00. I will have a small gift for those with orders over $50.00 in addition to the Perk Rewards Program. You can read all of the information at the top of the page in the Menu Bar under SHOP / Perks.
Thank you for stopping by today. I hope you enjoyed today’s project and will come back. I do read and reply to all of the comments individually. They mean a lot to me. Please reach out if you have a question.
The content in this blog is the sole responsibility of Jackie Beers as an Independent Stampin' Up! Demonstrator. The use of and content of classes, services or products offered is not endorsed by Stampin' Up!