Welcome to InKing Royalty’s December Blog Hop! During this year’s blog hops, we are having fun with our stamping favorites – our favorite themes for seasonal cards and projects. This month’s projects are all about party fun – festive gatherings like New Year’s, birthdays and other fun times. How fun! We are excited to share our creations with you today! After you read my post, I hope you’ll hop over to the next person on the list at the base of this post.
I do not normally make a New Years card. This time there was an idea in my head that I had to put to paper. And this card was the result.
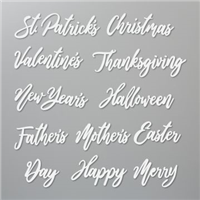
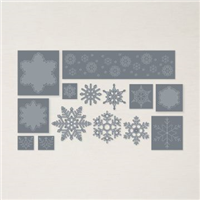
Front Dies
The front of the card is a mix of Silver and Gold which I love. Plus I am totally in love with the Word Wishes Dies! They are awesome. All I had to do is add a piece of adhesive sheet to Basic Black cardstock, add the dies, and run through the Cut & Emboss machine. It is like magic.
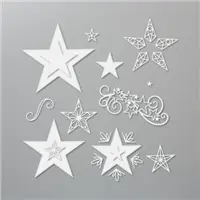
The stars are all from the Stitched Stars dies. There are such unique designs, as well as a great mixture of sizes in this die set. I love the mix of size and colors. And of course Basic Black goes with everything!
Inside Dies and stamp
I designed the card around the idea for the inside. And I am thrilled that it turned out just as I envisioned it. Early last week I made a Pop Up gift card holder. I shared it with The Paper Pixie and she made the Pop Up section one piece instead of two. Her version is what I used that idea to hold my swirl of gold stars. This piece is also sized down a bit since it only needed to hold the two little pieces.
My choice for the DSP is from the Neutrals 2021-2022 6 X 6 paper stack. I used the Smoky Slate piece to pair with the silver. What you see of the two stand up Gold pieces are actually one die cut that is cut in half. And the extra stars are what was popped out of the die cut piece. No waste here!!
Thank you for stopping by today. I hope you’ll hop along to the next stop on the blog hop, Brian King at Stamp With Brian. There’s lots of inspiration to be found in this group – and you don’t want to miss it!
Thank you for hopping along with us. If you get stuck during the Blog Hop, please use this line-up as a guide:
My December Host Code is AVHFJFAU. Please use this code for orders under $150.00. I will have a small gift for those with orders over $50.00 in addition to the Perk Rewards Program. You can read all of the information at the top of the page in the Menu Bar under SHOP / Perks.
Thank you for stopping by today. I hope you enjoyed today’s project and will come back. I do read and reply to all of the comments individually. They mean a lot to me. Please reach out if you have a question.
I love to make little treat boxes and had an opportunity to make some for a group. Merci Chocolates are so yummy, and I think of them as the perfect little Thank You treat. A little humorous play on words!
Here is a close up of one piece of the Blackberry Beauty Designer Series Paper. I love the shine!
I had just pieces of the gorgeous paper leftover. So I made these boxes , which required paper in sizes that fit what I had to work with. It was meant to be!
My Merci Chocolate Treat Boxes are cased from The Paper Pixie. She is the Queen of 3D projects. Here is the link to her post for wonderful directions. Just click the photo below.
HOST CODE
My December Host Code is AVHFJFAU. Please use this code for orders under $150.00. I will have a small gift for those with orders over $50.00 in addition to the Perk Rewards Program. You can read all of the information at the top of the page in the Menu Bar under SHOP / Perks.
Thank you for stopping by today. I hope you enjoyed today’s project and will come back. I do read and reply to all of the comments individually. They mean a lot to me. Please reach out if you have a question.
Today’s project is my version of the Pin Wheel Card. It is a great 3D card that showcases products perfectly. Best yet is that it still folds flat.
This is the overhead view to see the Pin Wheel.
The inside sentiment and signature section.
Who doesn’t love Ho Ho Ho ?
The special sentimnet.
Stamps
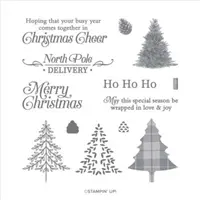
The Perfectly Plaid stamp set was perfect for the Heartwarming feeling. I was looking for just a fun and simple layout. It worked perfectly. Of course, you could add as much detail to each panel as you wish. I just wanted a simple addition to each panel.
Punches
To keep with the clean, simple, and my normal quick card building, I used two different punches on this card. The Ho Ho Ho is punched using the Double Oval Punch. The scalloped back layer helps the White sentiment layer to pop. And the second punch is the Pine Tree Punch. This punch matches the Perfectly Plaid trees.
Thank you for stopping by today! Don’t forget the Last Chance Sale that begins today. You can click on the picture below to see the pdf of the list.
HOST CODE
My DECEMBER Host Code is AVHFJFAU. Please use this code for orders under $150.00. I will have a small gift for those with orders over $50.00 in addition to the Perk Rewards Program. You can read all of the information at the top of the page in the Menu Bar under SHOP / Perks.
Thank you for stopping by today. I hope you enjoyed today’s project and will come back. I do read and reply to all of the comments individually. They mean a lot to me. Please reach out if you have a question.
Welcome to InKing Royalty’s November Blog Hop! During this year’s blog hops, we are having fun with our stamping favorites – our favorite themes for seasonal cards and projects. This month’s projects feature pretty packages and beautiful tags to inspire your holiday gift-giving. We are excited to share our creations with you today! After you read my post, I hope you’ll hop over to the next person on the list at the base of this post.
Project
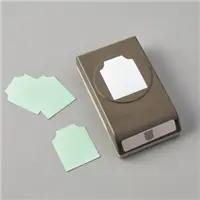
I chose for today’s project to share a simple gift that is easy and fun to make. It is a little box which holds gift tags. This fell in line perfectly with the title of the Blog Hop. My box holds 10 tags, however that may very depending on your embellishments.
And here is the side view as well as the tags:
Paper and Ribbon
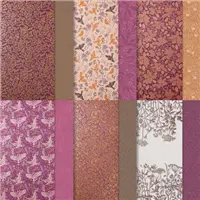
All of the DSP used is from the Whimsy & Wonder Designer Series Paper. You can see from the tags photo that I used almost all of the different patterns of this gorgeous paper. The base of the box is Thick Basic White cardstock. The tags are all regular Basic White cardstock with the DSP cut and glued to the cardstock prior to punching with the Delightful Tag Topper Punch. This gives them quite a bit more strength.
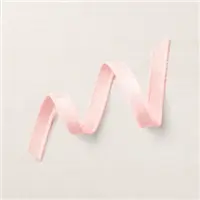
I used the Blushing Bride Frayed Grosgrain Ribbon for the handle and decorative bow. The ribbon is cut to 7″ and placed from outside to inside of the tag hole. I used two glue dots , one above the other, to adhere the ribbon to the inside of the box. This is done on both the front and the back. The bow I tied for the front is added to the front of the box with a couple of glue dots as well.
The tag ribbon is the White Glittered Organdy Ribbon. I added the ribbon with a bookmarker type tie. This way the recipient can easily remove it and add to a bag, or leave as is and add to a package.
Stamps, Dies, Punches, Etc.
The sentiments you see on all of the tags, as well as the front of the box, are all from the Peaceful Deer stamp set. They were the perfect size to fit where needed. Some of them are angled a bit, but that adds to the look. Also I added a To / From to the back of each tag. Since the back side of the tag is Basic White, It was a no brainer. That stamp came from the Bright Baubles stamp set.
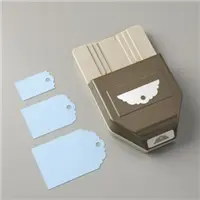
In addition to the Delightful Tag Topper Punch, I also used the Double Oval Punch. The ovals were used together on the front of the box to add some depth for the sweet sentiment. On the tags the smaller one was used and adhered flat to the tag as to not create bulk.
There was one die used on the tags. It is from the Stitched Snowflakes Dies and matched perfectly the snowflakes on the pink piece of the DSP. And of course there has to be bling! I used both the Basic Rhinestone Jewels and the Holiday Rhinestones on the tags and the box sentiment.
PDF of my project
Click on the little photo for a pdf of the box and tags.
Thank you for stopping by today. I hope you’ll hop along to the next stop on the blog hop, Renae Novak at Blessed By Cards. There’s lots of inspiration to be found in this group – and you don’t want to miss it!
Thank you for hopping along with us. If you get stuck during the Blog Hop, please use this line-up as a guide:
Join my team by purchasing the Starter Kit for $75.00 and receive $125.00 of products totally of your choosing! That is a fabulous deal at a $24.00 discount off of the regular Starter Kit price. This is always the Ultimate Bundle of products, and now it is even better! You can simply click on the picture below and Join.
HOST CODE
My November Host Code is M4GF9KZ7. Please use this code for orders under $150.00. I will have a small gift for those with orders over $50.00 in addition to the Perk Rewards Program. You can read all of the information at the top of the page in the Menu Bar under SHOP / Perks.
Thank you for stopping by today. I hope you enjoyed today’s project and will come back. I do read and reply to all of the comments individually. They mean a lot to me. Please reach out if you have a question.
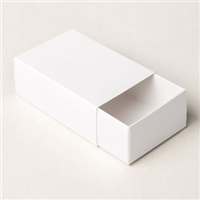
One of my favorite sweet treats is anything with White Chocolate. I am always on the lookout for the White Chocolate Reeses’s. I found the Pumpkins at the store the other day and new I had to find a treat holder it would fit. I found one of The Paper Pixie boxes that I had to resize just a bit, but it is wonderful. Julie is a dear friend and I always look to her projects when I need a box.
I took a side view picture so you could see the Diagonal of the lid. Here is an open view.
And here is a link to The Paper Pixie’s video and directions for the box. Mine is a bit longer. It is easy to adjust the size to what you need. Click HERE for The Paper Pixie Video.
Paper
The paper I used for this great little box is the Cute Halloween 6X6 Designer Series Paper. For the base I chose Pumpkin Pie to match the candy wrapping. The layer of the tag is Old Olive from the polka dots of the DSP. I love all of the possibilities with the colors in the DSP piece.
Stamps
The stamp set I used is the Cutest Halloween from page 51 of the Mini Catalog. The entire Suite is on those pages. A great thing about this stamp set is that the images are not scary. I do not do scary!! Which is another reason that I show a cat face to go with the Trick Or Treat!
Finishing Touches
To make the tag a little special, I used the Essential Tag Punch. It adds just enough detail to keep the tag from being a bit plain. The gorgeous ribbon is part of the Suite as well. It is Black & White 1/4″ Gingham ribbon and is a dream to work with.
Don’t forget to check out The Paper Pixie video and see how easy this project is.
The 2nd Sale-A-Bration Is Here!!
Join My Team Promotion During Sale-A-Bration!!
HOST CODE
My August Host Code is Y4GZ7QNY. Please use this code for orders under $150.00. I will have a small gift for those with orders over $50.00 in addition to the Perk Rewards Program. You can read all of the information at the top of the page in the Menu Bar under SHOP / Perks.
Thank you for stopping by today. I hope you enjoyed today’s project and will come back. I do read and reply to all of the comments individually. They mean a lot to me. Please reach out if you have a question.
Today I have a quick “Treat” to share with you. I have decorated another of the Love You Always Treat Boxes. These boxes are wonderful. They are on page 11 of the Mini Catalog. You get 10 of them for $9.00. They are a good size and are Food Safe! What a deal!
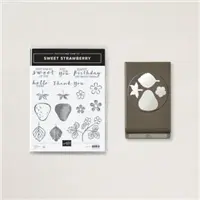
I paired the treat box with the Berry Delightful Designer Series Paper from Sale-A-Bration and the Sweet Strawberry Bundle from the Mini Catalog. These all are a perfect match up.
I began my project deciding on the paper. I love this green plaid. (There is also a red plaid in the pack!) I cut the DSP to 3 3/4 wide and wrapped it around the box, creasing the corners as I went. I left enough at the end to overlap about 1/2″ . I did not adhere the paper to the box but just a tight fit and adhered to itself. Although you could adhere to the box if you wish.
The layer is from the Stitched So Sweetly Dies. I believe this was the third largest die. I think it fits perfectly. For the stamping, I stamped off Granny Apple Green to give a softer look. I colored the leaves with Light Granny Apple Green Stampin’ Blend and the flowers with Daffodil Delight Stampin’ Blends. I had to add some Rhinestones to the flowers ,and one extra, for a touch of bling!
The strawberry is stamped three times The fill color is Real Red Ink with Memento Tuxedo Black as the outline and the seeds. I like having the black seeds. I punched out all three berries using the Strawberry Builder Punch. Each berry was then folded in half long way with the color to the inside. I adhered the three together and then added them to the box using Multipurpose Liquid Glue. I only punched one stem, folded it in half, and added it to the berry with a glue dot.
Here is a picture of the open box.
The candies are leftover Valentine treats. For me the little hearts on the wrapper could be seeds from the strawberries. And Yes, I have a good imagination, LOL!!! I punched a leaf from the Strawberry Builder Punch for each of the candies. They are adhered with just a Glue Dot.
I have made a similar box using the Snail Mail Suite of products. You can see that box decorated by clicking HERE. You can see on that link how much the box will hold. It has candy and a Bath & Body Hand Sanitizer.
Sale-A-Bration is winding down. There is only a little over a week left. Just an idea…..The Sweet Strawberry Bundle along with the two pairs of Stampin’ Blends I used today, will get you to the $50.00 mark. It is not enough to get the paper I used, sadly. It is part of one of the $100.00 bundles. But it will get you one of nine other FREE items.
Thank you for stopping by today. I will share the matching card for today’s project on Monday. I hope you have an enjoyable weekend.
HOST CODE
My February Host Code is: MRYR7XY2 Please use this code for orders under $150.00. I will have a small perk for those with orders over $50.00
The content in this blog is the sole responsibility of Jackie Beers as an Independent Stampin' Up! Demonstrator. The use of and content of classes, services or products offered is not endorsed by Stampin' Up!