I love card challenges as a way to begin creating a card. Sometimes just one idea is enough to get things to fall into place. Today I am playing along with a “Case The Designer” challenge. I hope you like my case..
Challenge
The Challenge of Case The Designer is from the Global Design Project. Here is the card I am casing.
This card is “cleaner” than mine, with it having a lot of White space. I generally don’t do that, so went with my normal backgrounds. However, I had to do the “woven” focal point. This paper weaving has been around forever, and I haven’t used it in about that long!
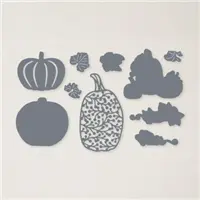
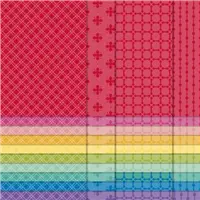
My weaving was done using Gorgeous Grape and Mango Medley from the Brights 6X6 Designer Series Paper. The pumpkin was then cut using the Detailed Pumpkin Dies.
Stamp Set
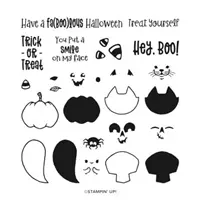
To continue on with the pumpkin, I decided on a Halloween card. The Purple and Orange are my favorite Halloween colors. The stamp set I used is the Cutest Halloween set. I much prefer funny Halloween than scary.
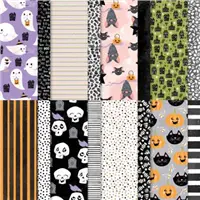
The sentiment is one single stamp. It is stamped and then cut apart and trimmed with my Paper Snips. The ghost is a sweet ghost and is cut from the Cute Halloween Designer Series Paper. Fussy Cutting the ghost was really simple.
Finishing
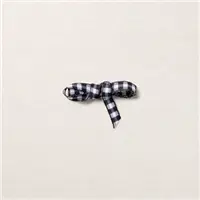
The background DSP is also from the Cute Halloween Designer Series Paper. It is a little on the soft side so it does not overpower the woven pumpkin and ghost. The sentiment and ghost are raised using Stampin’ Dimensionals. A small bow made from the Black and White Gingham Ribbon is the final touch. The Black and White seems to bring all of the colors together.
The 2nd Sale-A-Bration Is Here!!
I hope you have looked through the Sale-A-Bration catalog and seen all of the great products you can earn at No Cost with a qualifying order. The same amount needed for SAB also gets you My Blue Star Rewards. And there is a great Join My Team promotion going on as well. I would love to have you become a Stampin’ Up! Demonstrator on my team. It is one of the best decisions I have ever made. I love the community that we have, plus a discount on my hobby! If you have any questions, please contact me. I would love to talk with you about joining. And……the Added Join promotion items are listed below.
Join My Team Promotion During Sale-A-Bration!!
HOST CODE
My August Host Code is Y4GZ7QNY. Please use this code for orders under $150.00. I will have a small gift for those with orders over $50.00 in addition to the Perk Rewards Program. You can read all of the information at the top of the page in the Menu Bar under SHOP / Perks.
Thank you for stopping by today. I hope you enjoyed today’s project and will come back. I do read and reply to all of the comments individually. They mean a lot to me. Please reach out if you have a question.
My card today is another Fun Fold. I found this with directions from a few different people and none referred to anyone else. So I really do not know who to give credit to. I shrunk it a tiny bit so that it fits in a regular envelope.
The Fold
I am calling this a Diamond Fold. It is actually very similar to the Kite Fold or the fold used for graduation hat cards. The other fold names usually do not stand open. I love that about this one.
To allow this to fit in a regular A2 envelope, 4 1/4 X 5 1/2, I used a piece of 4 1/4 X 8 1/2 piece of cardstock. It is scored at 2 1/8 and 4 1/4. You then mark the center of the 4 1/4 end of the paper that has the 2 1/8 score line. Cut from the score line to that center mark from each side. This makes the front point. Fold the card in half and use the already cut edges to make the same cut on the bottom. It is actually very easy and quick to get all of this done.
The Paper
I used the Harvest Meadow Designer Series Paper. I love these patterns for Fall , or anytime, cards. I have used three different patterns from the paper pack. For a layer between the DSP and Calypso Coral, I added Soft Succulent. The Bumblebee diamond shape pieces are cut 2 @ 2 3/4 X 2 3/4 with a Soft Succulent cut 2@ 2 7/8 X 2 7/8. The wide strips, there is one on the inside as well as the one on the top, is cut 2 @ 4 X 1 7/8 with a Soft Succulent layer of 2 @ 4 1/8 X 2. And finally the corners are a SS layer of 2 X 2, and the DSP 1 7/8 X 1 7/8. Each of these squares is then cut in half to make two triangles. (Simply place them on your cutter with a top and bottom point in the cutting track.
You can see all of the paper placements in the photo. Only one is not shown and it is the inside wide strip. It is just like the top one and I added a piece of White cardstock for a signature. The top Diamond shape is only adhered on the front half to allow it to stand up. Here is a view of the card folded flat for mailing.
It is not laying totally flat. The picture is a bit deceiving in that the point in the back actually is flush with the back of the fold.
The Finishing Touches
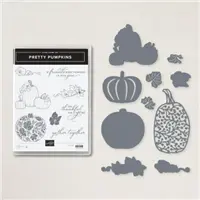
I used the Pretty Pumpkin Bundle for this card. Fall is probably my favorite season. I LOVE Christmas, but Fall seems to get a bit overlooked.
The DSP pumpkin is another sheet from the Harvest Meadows DSP. The stamped and Die cut pumpkin is from the stamp set. I used a variety of the both the 2020-2022 and 2021-2023 In Color Markers to color the various leaves and berries. Both of the pumpkins are raised with Stampin’ Dimensionals.
The sentiment is from the stamp set also. It is cut with the Stitched Rectangle Dies and only adhered in the center so that it hangs over the diamond shape. The final touch was a single gem from the Elegant Faceted Gems.
The 2nd Sale-A-Bration Is Here!!
Join My Team Promotion During Sale-A-Bration!!
HOST CODE
My August Host Code is Y4GZ7QNY. Please use this code for orders under $150.00. I will have a small gift for those with orders over $50.00 in addition to the Perk Rewards Program. You can read all of the information at the top of the page in the Menu Bar under SHOP / Perks.
Thank you for stopping by today. I hope you enjoyed today’s project and will come back. I do read and reply to all of the comments individually. They mean a lot to me. Please reach out if you have a question.
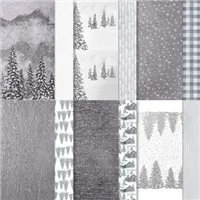
I have a very quick and easy card to share today that is really beautiful!! And it is not due to me or my stamping. It is 100% the beautiful Stampin’ Up! Peaceful Place Designer Series Paper.
It’s All About The Paper!
This beautiful piece from the Peaceful Place Designer Series Paper IS this card. This sheet is designed to be cut into four 6X6 pieces of this pattern. I really hated to trim it down. What I cut off can be used as a strip to carryover to the inside of the card though. I am not about to waste this beauty.
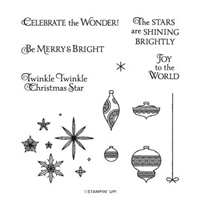
All of the texture, shading, and glimmer is built into the paper. All I did was add the simple sentiment at the bottom. The sentiment is from the Stars Are Shining Stamp set. And it is perfect for this calm scene. Other than the sentiment, the card is layered on Basic Gray with the base of the card being Thick Basic White cardstock. It could not get any easier than this one!
Please forgive my odd placement for the card in the photograph. I did not want to hide the sentiment!
The 2nd Sale-A-Bration Is Here!!
Join My Team Promotion During Sale-A-Bration!!
HOST CODE
My August Host Code is Y4GZ7QNY. Please use this code for orders under $150.00. I will have a small gift for those with orders over $50.00 in addition to the Perk Rewards Program. You can read all of the information at the top of the page in the Menu Bar under SHOP / Perks.
Thank you for stopping by today. I hope you enjoyed today’s project and will come back. I do read and reply to all of the comments individually. They mean a lot to me. Please reach out if you have a question.
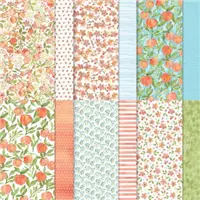
It has been so horribly hot here in the south lately. And quite a few of my friends are commenting about making homemade peach ice cream. Oh My!!! That is a favorite of mine from my childhood and I have been seriously craving some. All of this peach ice cream talk led me to today’s card. I will bet you can guess which Suite of products I am referring to.
The Paper
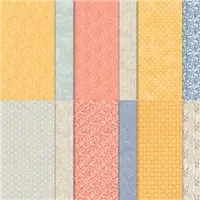
This You’re A Peach Designer Series Paper is full of beautiful paper patterns. I used two of them for this card, but there are several more. I wanted the peach sheet for more of the highlight and not the background. To get that look, I decided on a fun cut instead of a fun fold as I usually do. I call it an envelope fold/cut. This peach piece looks like it has folded over the top of the other layers.
The base piece from the DSP package is so pretty and I hated covering up part of it. The polka dot is always so fun to work with. And the variation of the peach coloring gives it a little worn look. The card base and layer are both pulled from the peach sheet, but pair perfectly with both pieces of DSP.
Stamps and Dies
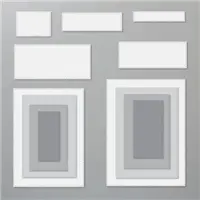
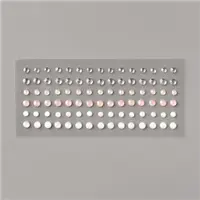
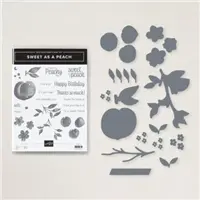
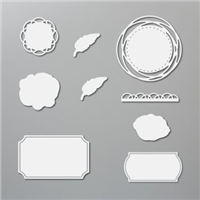
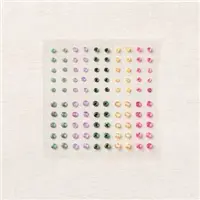
The stamp for the sentiment is from the Sweet As A Peach stamp set. That set has such “sweet” sentiments!! I wanted the words to pop a bit and not blend into the gorgeous paper. After a bit of looking through my dies, I noticed the Painted Labels Dies and this swirl one. I have loved this die from first seeing it and it is perfect for this sentiment and card. All it took for the finishing touch was one of the 2021-2023 In Color Jewels in the Pale Papaya.
Measurements
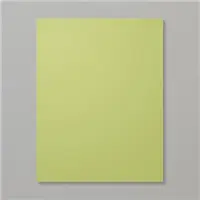
Card base of Calypso Coral cut 5 1/2 X 8 1/2, scored and folded at 4 1/4
Layer of Pear Pizzaz cardstock cut to 5 1/4 X 4
Polka Dot DSP cut to 5 X 3 3/4
Peach DSP cu to 5 1/4 X 3 1/4 layered at an angle and cut to fit the layers.
The 2nd Sale-A-Bration Is Here!!
Join My Team Promotion During Sale-A-Bration!!
HOST CODE
My August Host Code is Y4GZ7QNY. Please use this code for orders under $150.00. I will have a small gift for those with orders over $50.00 in addition to the Perk Rewards Program. You can read all of the information at the top of the page in the Menu Bar under SHOP / Perks.
Thank you for stopping by today. I hope you enjoyed today’s project and will come back. I do read and reply to all of the comments individually. They mean a lot to me. Please reach out if you have a question.
The card I have to share with you today is one that showcases a few of the reasons that I LOVE Stampin’ Up!! As soon as you see today’s card you will recognize at least one of those reasons. It is hard to miss it.
Paper
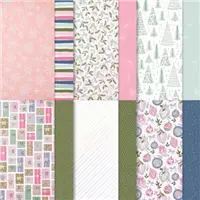
The first of my many reasons to love Stampin’ Up! is the gorgeous Designer Series Paper. This card showcases two sides of one sheet included in the Whimsy & Wonder 12×12 Designer Series paper. I wanted to share those gorgeous snowflakes on the Blushing Bride paper. But then the opposite side shows all of the colors in the paper pack on one sheet. I truly love those stripes. (The DSP piece is cut to 3 3/4 X 5 and then cut 1″ off of the 3 3/4 side. Flip the 1″ strip over for the stripes to show.)
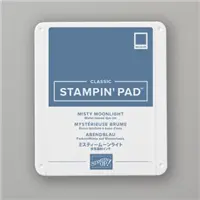
I pulled the Misty Moonlight from the stripes to use as the base of the card. It really showcases the pink. There is a thin layer of Basic White between the Misty Moonlight and the DSP. I just have a hard time putting the DSP directly onto the base cardstock. LOL!!
Stamps
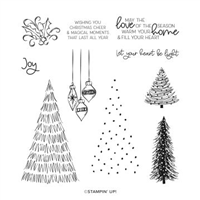
To continue with the paper being the star of the show, I went with a very small sentiment. The “let your heart be light” is so sweet. I tried different positions and sizes of paper for it and nothing seemed correct. Then I placed it at an angle and it seemed to be the proper location. This allows the other products to shine. This adorable sentiment is from the Whimsical Trees stamp set.
Finishing Touches
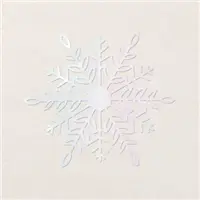
As a finishing touch, I added the Wonderful Snowflake to the center of the card. With these gorgeous papers on the card, it really does not require much stamping. And I hate to cover up the paper. The snowflake piece has some iridescent color on the snowflakes. At first I thought it was silver it shows so well. You get 24 iridescent snowflakes in a package. The opposite side is white paper. So they could be sponged or colored any color you wish on that side.
All of these products, plus the matching Christmas Trees Dies (A Bundle with the Whimsical Trees) and the Blushing Bride Frayed Grosgrain Ribbon, are the complete Suite of products in the Whimsey & Wonder Suite! I do not always purchase the complete Suite of products. But this one is an exception to that. I love everyone of the products included in the Suite.
The price for the entire suite is $80.25. With a couple of added cardstock or supply items you could have a $100.00 order. This amount would earn you FREE SAB Items, either 2 at the $50.00 level or 1 at the $100.00 level. PLUS you would earn 2 of my Star Shopping Rewards for my customers.
The 2nd Sale-A-Bration Is Here!!
Join My Team Promotion During Sale-A-Bration!!
HOST CODE
My August Host Code is Y4GZ7QNY. Please use this code for orders under $150.00. I will have a small gift for those with orders over $50.00 in addition to the Perk Rewards Program. You can read all of the information at the top of the page in the Menu Bar under SHOP / Perks.
Thank you for stopping by today. I hope you enjoyed today’s project and will come back. I do read and reply to all of the comments individually. They mean a lot to me. Please reach out if you have a question.
The content in this blog is the sole responsibility of Jackie Beers as an Independent Stampin' Up! Demonstrator. The use of and content of classes, services or products offered is not endorsed by Stampin' Up!