Happy 4th of July everyone! The card today is made to be a celebration with sparklers. It is also a Challenge card to use “Splatter”. Hopefully both come through on the card.
Make My Monday Challenge
This card is for the Make My Monday Challenge. The theme for this challenge is Splatter. As you can see, I used quite a lot of Splatter! Please join in the fun with your own creation. Click on the link and it will take you to the blog. Look at the cards made by myself and the other Design Team members and then create your own version.
A close up of the Splatter!
Background Splatter
As mentioned above, this challenge is to use Splatter. The method for Splatter that I chose to use is Stampin’ Write Markers. Simply take the brush end of the marker, and flick it against the inside edge of the cap. Start with just a little bit of pressure and then build up. Starting lightly allows you to get a feel for it and to not damage your marker. It really does not take a lot of pressure. This card is Red, White, and Blue so the splatter is Real Red and Starry Sky. The Starry Sky is a bit brighter than Nigh of Navy would be. Stampin’ Write Markers are only available as a Color Family unfortunately. They are great tools to have on hand however.
Dies
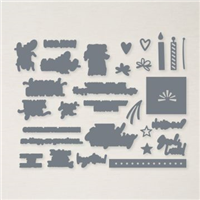
There are quite a few different punches plus a couple of Dies used on this card. The need for different pieces to get the look required searching through quite a lot of my products! To begin, the “sparklers” are actually the candle from the Sentiment Silhouettes Dies. It pairs with the Charming Sentiments set. The “sparkle” tip is another of the dies. The same splatter was done on a scrap of paper large enough to die cut four of the tops.
Punches
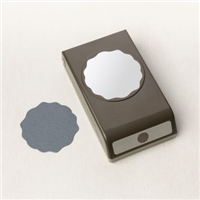
The Decorative Circle Punch was utilized as the background layer for the sparklers. And surprisingly, the Vintage Bottle Punch is the base for the “4”. It needed a platform and by cutting the bottle in half, the bottom half was a perfect size to highlight the 4.
Besides the candle sparklers, the July 4 is the second focal point. The punch Bundle is a favorite of mine. Best Label Punch is the name of it and is a great size. There are outlines that can be punched as well. However the plain on this works perfectly as there are a lot of things going on already.
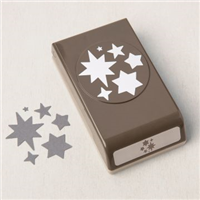
The final punch is the Starlit Punch. There are three stars at the top of the card that are punched from the White and Red Glimmer Paper in the Mini Catalog that just debuted. Paired with the Resin Stars, which sadly just retired, helps them stand out a bit. Some red stars were tried, but they did not make the cut!
Stamps
The Alphabest stamp set is what pairs with the Best Label Punch. As mentioned they are a great bundle to have on hand for quick words, initials, numbers, etc. Due to the overwhelming Blue and Red theme, I opted for the July 4 to be stamped in Memento Tuxedo Black as a different color .
HOST CODE
My July Host Code is ZMG9Q7EX. Please use this code for orders under $150.00. I will have a small gift for those with orders over $50.00 in addition to the Perk Rewards Program. You can read all of the information at the top of the page in the Menu Bar under SHOP / Perks.
Thank you for stopping by today. I hope you enjoyed today’s project and will come back. I do read and reply to all of the comments individually. They mean a lot to me. Please reach out if you have a question.
Today begins the July – December Mini Catalog PLUS Sale-a-bration. Do you have your lists ready to go? Even after doing the preorder, which is available for demonstrators, I still have a lengthy wish list.
The project I am sharing today is a mix of Die, Fussy Cutting, Coloring, and one little Stamp. That is not the normal card I share. But I hope you love it.
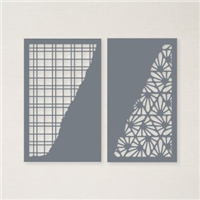
Dies
It is really difficult for me to pick the main point on this card. But I have decided to go with the Die. It is the Split Card Textures Dies. There are two different dies in the set. And they are stand alone dies in the Annual Catalog. They do not pair with a stamp set. Plus they can be used in a variety of ways.
The sample in the catalog on page 86 shows a “layer” piece of probably 4 X 5 1/4 with the right side cut using the die. For my card, and because I was using a Specialty Paper, I cut an angled piece and then only die cut that piece. Either works and gives totally different looks. Additionally, the little squares can all be pushed out I simply opted to keep most of them to show off the Specialty Paper.
Paper
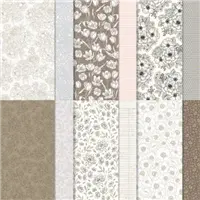
As mentioned above, I used a Specialty Paper for the Die cut piece. It is the Gold & Rose Gold 6X6 Metallic Specialty Paper. The one I used is the Rose Gold as it pairs with the rose in the colored floral arrangement.
Speaking of the floral part, it may look familiar to you. This is a section of the Abigail Rose Designer Series Paper. Cutting a 6X6 piece of one of the patterns, I colored each of the floral arrangements using Stampin’ Blends. One of those was used about two weeks ago. You can see that card HERE. As with the first card, I fussy cut the flowers and then applied it to the edge of the cardstock. On this version I left the part of the flowers which overlap the Rose Gold loose for a bit of dimension.
Stamps & Finishes
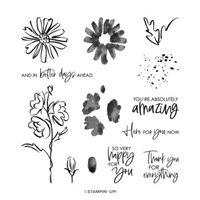
The lone stamp on this card is the sentiment. It is from the Color & Contours stamp set. With the boldness of the Rose Gold die cut layer and the pretty floral, the sentiment was left a little simpler. Since it is an Amazing sentiment (LOL) it is fine by itself.
For the finishing touch there needs to be a bit of bling. In this case I used a single bling. The 2021-2023 In Color Opal Rounds fit the bill. Just a bit of sparkly pink to finish everything off.
HOST CODE
My July Host Code is ZMG9Q7EX. Please use this code for orders under $150.00. I will have a small gift for those with orders over $50.00 in addition to the Perk Rewards Program. You can read all of the information at the top of the page in the Menu Bar under SHOP / Perks.
Thank you for stopping by today. I hope you enjoyed today’s project and will come back. I do read and reply to all of the comments individually. They mean a lot to me. Please reach out if you have a question.
Having a card ready to go when needed is one of the great things about making a lot of cards. And some stamp sets are a perfect fit for making multiples. Today’s card fits both of those criteria.
Stamps
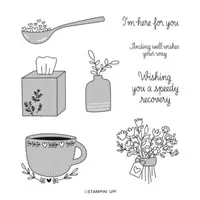
This sweet card uses two different stamp sets. Surprisingly the flowers come from the Speedy Recovery stamp set. This was one I used a few weeks ago with the tissue box. You can see that post by clicking HERE. It was said then how versatile this set really is. These flowers could be for any occasion. Especially with that sweet little tag attached.
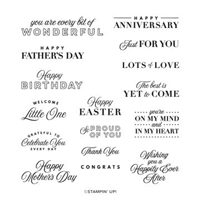
For the sentiment, I went to the Shaded Summer stamp set. Just the simplicity of that sentiment made it a great one for a “just in case” type card. And I love having these type cards on hand.
Paper
This pretty DSP is from the Hues of Happiness Designer Series Paper. It pairs perfectly with the flowers and allows the brighter colors to pop. Since the strip of DSP is only 2 X 4 7/8, it covers half of the front White layer, a lot of cards could come from one piece of DSP. You get more bang for your buck as well as having sweet cards on hand.
Layers
The focal layer is one that made me happy. The flower is punched out using the Decorative Label Punch. And a wonderful discovery was that the roughly 2 1/2″ Layering Circle Die fits it perfectly. For the final touch I used the Fun Flower Resin Shapes next to the sentiment. The little flower mimics the small flowers in the DSP.
Today is the Last Chance on Retiring Mini Catalog Products
Click on the photo to get the complete PDF of retiring products. Pay close attention to discounted items. It may be less expensive to purchase some items that are part of a bundle separately, than at the bundle price! I want you to get the most for your dollars.
HOST CODE
My June Host Code is B4ZVQK6D. Please use this code for orders under $150.00. I will have a small gift for those with orders over $50.00 in addition to the Perk Rewards Program. You can read all of the information at the top of the page in the Menu Bar under SHOP / Perks.
Thank you for stopping by today. I hope you enjoyed today’s project and will come back. I do read and reply to all of the comments individually. They mean a lot to me. Please reach out if you have a question.
Today’s card features some gorgeous DSP and a really fun and interesting Die. It is a shabby, chic sort of birthday card.
Paper and Colors
This layout is a bit out of the norm for me, and especially some of the layers. They are a bit out of order more than anything. In my opinion, the star of the card is the gorgeous Texture Chic Designer Series Paper. Those colors are some of my favorites and they work so well together. Of course all of the colors used came from that pieces of DSP. And I am sure that you are as surprised as I was on some of the colors chosen.
The background of Pool Party cardstock is not a normal companion for the Soft Suede layer. And who would ever decide to add Soft Sea Foam with those two colors? But to top it off with Petal Pink is really stretching! However, since they are all in the gorgeous DSP piece, they all really work well together.
Stamps and Dies
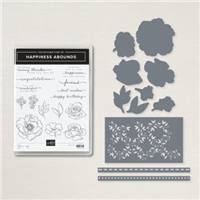
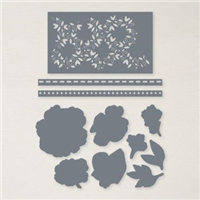
Since I said the DSP was the star of the card, I will add the second best is the “torn notebook page” look given to the DSP. That Die is featured in a few of the samples in the Annual Catalog. Two of my Club ladies found it and the set it was from even before I did. The Die is from the Blossoming Happiness Dies that are part of the Happiness Abounds Bundle. There is also another similar die in the set for a different edging.
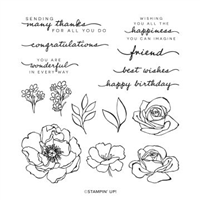
The flower and sentiment both come from the Happiness Abounds stamp set. Not wanting to cover the DSP layer was a priority in choosing what other products were added to the card. By using the small flower, it could be placed on a smaller layer. And the sentiment on a strip of cardstock was so easy as it is a photopolymer stamp set. Simply snipping the ends was quick to finish everything.
Sneak Peek
The flower was not large enough to stand alone, so it was layered using one of the newer punches. This punch is the Handmade Tag Punch. The unique shape is a great one that can be used as a square or as a diamond. A sneak peek of seeing a new product ahead of time is something I love. This lovely tag pairs with a stamp set in the upcoming July – December Mini Catalog.
Last Chance on Retiring Mini Catalog Products
Click on the photo to get the complete PDF of retiring products. Pay close attention to discounted items. It may be less expensive to purchase some items that are part of a bundle separately, than at the bundle price! I want you to get the most for your dollars.
HOST CODE
My June Host Code is B4ZVQK6D. Please use this code for orders under $150.00. I will have a small gift for those with orders over $50.00 in addition to the Perk Rewards Program. You can read all of the information at the top of the page in the Menu Bar under SHOP / Perks.
Thank you for stopping by today. I hope you enjoyed today’s project and will come back. I do read and reply to all of the comments individually. They mean a lot to me. Please reach out if you have a question.
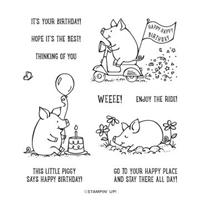
Today is the Fun Folds Blog Hop and I have a fun, Tri-fold card. Best of all it includes the This Birthday Piggy stamp set. It is one I have been excited to use.
Stamps
This Birthday Piggy stamp set is new in the Annual Catalog. Personally, I love all of the animal sets. And this one reminded me of one a couple of years ago. You may remember “when Pigs Fly”. That was special. This one brings back memories of the Geico commercial with the little piggy and his pinwheel saying “WEEEEE”. Well, the “weee” is in the stamp set.
Of course that sentiment had to go on the card!
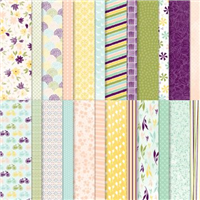
Paper
This beautiful and fun paper is the Design A Daydream Designer Series Paper. It is a Host Rewards in the Annual Catalog. This means that you get A Lot of paper for minimal cost. It is on page 135 and there are 48 sheets of double sided paper for $18.00.
As soon as I saw the pinwheel piece of DSP, I knew it went perfectly with this stamp set. And from a scrap piece of the DSP, I fussy cut a pinwheel. It is attached to the top of the bicycle flag. That was a perfect spot for it to appear as if it was planned that way.
Layout
There are several names for this type of fold as well as several different dimensions. For this one, I went as simple as I could and combined a few of the directions I found. However, it does only allow for one card from an 8 1/2 X 11 piece of cardstock. The card base is 5 1/2 X 11. It is scored on the 11″ length at 3 3/8 from each end.
Making the angle cuts is actually easier than it sounds. Beginning with either end, make a tick mark 1″ down from the top edge, and then 1″ in from the bottom edge. Then cut from the top score line over to the 1″ down mark. That provides the top downward angle. From that point, cut down to the 1″ in at the bottom. This provides the bottom angle. Repeat on the other end.
For the DSP. you need two pieces of DSP that measure 3 1/8 X 5 1/4. Decide which patterns you want to show on the two sides. They can be complimentary or two different ones as I did. Once decided. place the two pieces back to back. In other words, have the front piece with the side you want to show facing you, and if you turn the two over, have the other piece facing you. Make the exact cut that you did for the base. Go down 1″ from the top right and make a mark and in from the bottom right 1″ and make a mark. Then cut same as before. The two pieces will now fit the card. If this is too stressful, you can cut them individually!
I have a template picture to show that may be clearer.
Here is the open card.
Please Hop along with us to see more Fun Folds and ideas.
Last Chance on Retiring Mini Catalog Products
Click on the photo to get the complete PDF of retiring products. Pay close attention to discounted items. It may be less expensive to purchase some items that are part of a bundle separately, than at the bundle price! I want you to get the most for your dollars.
HOST CODE
My June Host Code is B4ZVQK6D. Please use this code for orders under $150.00. I will have a small gift for those with orders over $50.00 in addition to the Perk Rewards Program. You can read all of the information at the top of the page in the Menu Bar under SHOP / Perks.
Thank you for stopping by today. I hope you enjoyed today’s project and will come back. I do read and reply to all of the comments individually. They mean a lot to me. Please reach out if you have a question.
Today’s card is a Many Folds card showcasing the Framed Occasions Bundle with the Beautiful Shapes Dies. Fun Folds are my favorite and this one has some extras.
Card of Many Folds
This card was so much fun to make because of the many folds. It is a CASE of a card from Dawn Griffith. And she has a great video for you instead of me trying to explain. Here are the surprise extra folds.
And the Final one.
Paper
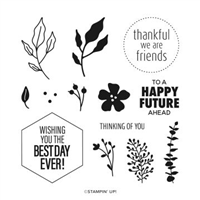
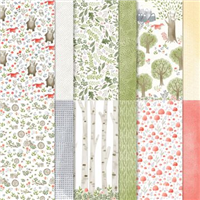
Starting with the paper seems the proper place to begin as this card gives you the opportunity to showcase a variety of it. This paper is the Happy Forest Friends Designer Series Paper. It is a fun, woodsy paper that can be used for many occasion, as I have shown. The first thought when looking at the paper and the matching stamp set is that it is mostly for children. Maybe this will change your mind as it did mine!
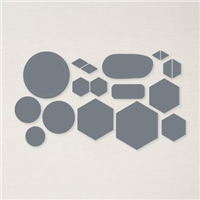
Stamps and Dies
The fun shapes containing sentiments are from the Framed Occasions Bundle. It includes the Beautiful Shapes Dies. These shapes are a bit different from the usual and I love that. The Calypso Coral circle has embossing around it for an extra detail. And the inside White circle includes stitching. A great unexpected shape is the hexagon at the bottom. Not something we would expect in a Die, but I love it as well. The matching inside holds a few of the different sentiments.
For the actual “writing on” layer, I went back to a favorite. That is the Scalloped Contours Dies. Adding the bit of flower finishes the card wonderfully.
Last Chance on Retiring Mini Catalog Products
Click on the photo to get the complete PDF of retiring products. Pay close attention to discounted items. It may be less expensive to purchase some items that are part of a bundle separately, than at the bundle price! I want you to get the most for your dollars.
HOST CODE
My June Host Code is B4ZVQK6D. Please use this code for orders under $150.00. I will have a small gift for those with orders over $50.00 in addition to the Perk Rewards Program. You can read all of the information at the top of the page in the Menu Bar under SHOP / Perks.
Thank you for stopping by today. I hope you enjoyed today’s project and will come back. I do read and reply to all of the comments individually. They mean a lot to me. Please reach out if you have a question.
Pretty and easy do not have to be opposites. Today’s project is both of those things starring the Sun Prints Designer Series paper
This Paper is the Star!
Sun Prints is a perfect name for this beautiful Designer Series Paper. It reminds me of a school project where we placed leaves on construction paper and placed in the sun. Except ours was not nearly as pretty. With the beauty of the paper it could be used as I did for any occasion. All you need to do is adjust the sentiment. And who would want to cover up that paper?
The second Paper star here is the vellum. This is something I tend to forget to use. However, my upline Brian King uses it more often and I always tell myself to use it as well. For this card the vellum was perfect. It gives an added layer without taking away from anything.
Stamp Set
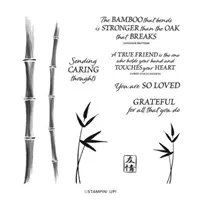
Even though it is only one stamp used from the stamp set, it is a really good one. The set is the Bamboo Beauty stamp set. There are pretty images and caring sentiments. Sadly we need those type sentiment more than we would want.
Layers
There are three card layers of Night of Navy, White , and the DSP. For the sentiment layers the same base colors were used with the added touch of vellum. These layers were all cut using the Layering Circles Dies.
Last Chance on Retiring Mini Catalog Products
Click on the photo to get the complete PDF of retiring products. Pay close attention to discounted items. It may be less expensive to purchase some items that are part of a bundle separately, than at the bundle price! I want you to get the most for your dollars.
HOST CODE
My June Host Code is B4ZVQK6D. Please use this code for orders under $150.00. I will have a small gift for those with orders over $50.00 in addition to the Perk Rewards Program. You can read all of the information at the top of the page in the Menu Bar under SHOP / Perks.
Thank you for stopping by today. I hope you enjoyed today’s project and will come back. I do read and reply to all of the comments individually. They mean a lot to me. Please reach out if you have a question.
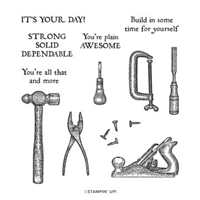
Masculine cards do not have to be difficult. With this simple layout it was a piece of cake. Using the Vintage Tools stamp set makes it even easier.
Stamps
The new Vintage Tools stamp set in the Annual Catalog is amazing! There are a few simple, old fashioned, tools with humorous sentiments. The one on this card may take a minute if you are unfamiliar with the tool. That is my kind of humor since I am somewhat vintage myself!
Punches
You may have noticed that I have used this Decorative Circle Punch a few times recently. It has become my “go to” punch it seems. The stamped image would look just as good with circles or squares, but the new shape of this punch keeps drawing me in. For the sentiment, you should recognize it as the smaller of the Double Oval Punch. That is another of my “go to” punches. Between the two sizes one or both are generally a perfect fit.
Paper & Layout
This fun and simple layout was a Sketch from Mary Fish. Simple sketches can really help with a creativity block, or a way to use a stamp set with smaller images, like this Vintage Tools. An added bonus for this sketch is the scraps of paper. Who doesn’t have a ton of paper scraps?
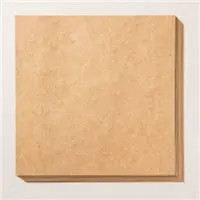
The plaid paper you see is one of the new ones from the upcoming June-January Mini Catalog. It is called Gingham Cottage. All of the patterns are like this. In coordinating colors for a masculine card I went with browns and greens. The paper you may have forgotten about is the Kraft Paper. It was a carryover from the last Mini into the new Annual Catalog.
Last Chance on Retiring Mini Catalog Products
Click on the photo to get the complete PDF of retiring products. Pay close attention to discounted items. It may be less expensive to purchase some items that are part of a bundle separately, than at the bundle price! I want you to get the most for your dollars.
HOST CODE
My June Host Code is B4ZVQK6D. Please use this code for orders under $150.00. I will have a small gift for those with orders over $50.00 in addition to the Perk Rewards Program. You can read all of the information at the top of the page in the Menu Bar under SHOP / Perks.
Thank you for stopping by today. I hope you enjoyed today’s project and will come back. I do read and reply to all of the comments individually. They mean a lot to me. Please reach out if you have a question.
Fun Folds are my favorite type of card. The card I am sharing today is very easy to do and extremely versatile. It features the Cottage Rose Suite of products.
Stamps
This gorgeous rose on the front of the card is the star of the Cottage Rose stamp set. There are matching dies, but they were not used on this project. Stamping for this beauty was done using Early Espresso Ink. And the shading was accomplished by using a Blender Pen to pull the color into the pre shaded areas. Soft Succulent Stampin’ Blends were used on the leaves.
2nd Fold
The inside of the card is stamped using the same Cottage Rose stamp set, just using the smaller rose. It is also colored in the same manner as the front rose is. With the dark Early Espresso it is difficult to see how the white is layered. It is a folded piece of Basic White cardstock that is added as if it were simply a layer. There are equal margins all the way around. This makes opening much easier, as well as the placement of the white.
Last Fold
Hopefully it is now clear why this is called a Multi Fold card. The white opens to the center. The sentiment and leaves are from the same Cottage Rose stamp set. How easy is this card? Pretty and simple are a wonderful combination.
Paper and embellishment
The small strip of the Abigail Rose Designer Series Paper is such a beautiful piece. It was chosen for the softness and that it paired well with the dark of Early Espresso on the card base and the soft of the Soft Succulent for the image layer. Not adding a sentiment on the front of the card was a bit of a quandary. The deciding factor was just that it was so very pretty without covering any portion. Adding the trio of different size Champagne Rhinestones seemed a better fit.
Click on the photo to get the complete PDF of retiring products. Pay close attention to discounted items. It may be less expensive to purchase some items that are part of a bundle separately, than at the bundle price! I want you to get the most for your dollars.
HOST CODE
My June Host Code is B4ZVQK6D. Please use this code for orders under $150.00. I will have a small gift for those with orders over $50.00 in addition to the Perk Rewards Program. You can read all of the information at the top of the page in the Menu Bar under SHOP / Perks.
Thank you for stopping by today. I hope you enjoyed today’s project and will come back. I do read and reply to all of the comments individually. They mean a lot to me. Please reach out if you have a question.
Stampin’ Up! has given us a day of Free Shipping with orders of $75.00 or more. And since I have Rewards Stars on each order of $50.00, you have a double win.
With this offer you have two different catalogs to take advantage of. We are in the last ten days of the January – June Mini Catalog, which has some awesome discounts. Plus the new Annual Catalog is full of new ideas and products.
It would be too long of a list for me to list all of the ones that are the most discounted. But I will say that Die sets are the best deals. Getting 10% off on a bundle is great, but some Dies alone are around 40% off. The discount would be far greater to purchase them not as a bundle.
Assuming that your Wish List is like mine and is always long and has more than one sheet of paper. (No pointing fingers!) This is a great day to place an order. If there is any way I can help you, please do not hesitate to reach out to me.
By clicking on the Free Shipping poster at the top of the post, you will be taken to my Online Store!
Last Chance on Retiring Mini Catalog Products
Click on the photo to get the complete PDF of retiring products. Pay close attention to discounted items. It may be less expensive to purchase some items that are part of a bundle separately, than at the bundle price! I want you to get the most for your dollars.
HOST CODE
My June Host Code is B4ZVQK6D. Please use this code for orders under $150.00. I will have a small gift for those with orders over $50.00 in addition to the Perk Rewards Program. You can read all of the information at the top of the page in the Menu Bar under SHOP / Perks.
Thank you for stopping by today. I hope you enjoyed today’s project and will come back. I do read and reply to all of the comments individually. They mean a lot to me. Please reach out if you have a question.
The content in this blog is the sole responsibility of Jackie Beers as an Independent Stampin' Up! Demonstrator. The use of and content of classes, services or products offered is not endorsed by Stampin' Up!