One of my favorite cards to make are Thank You type cards. Thanksgiving allows me an entire month of sharing my gratitude. Today’s card is one I cased from fellow demonstrator Patty Bennett. It requires 3/4 of a full sheet of cardstock, and is so worth it!!
Patty Bennett has a detailed video on how to make this card. So I am not going to attempt to explain the process. I will say that it is pretty easy to do. There are just quite a few layers.
Front Section
Above is the front of my version. Next is the second layer.
Second Layer
Now you see the second section. I believe you can see how the “window” on the front opens away and leaves the layers and stamped images on this second section.
Third Section
This is the fully opened card. The front flap is open to the left, and the blue second section is on the opposite side of the lower section where you would sign the card. As you have seen, there are three sections, but four decorated panels. I think of it as another version of one of the little accordion mini scrapbooks.
I hope you enjoyed seeing this Fun Fold. As I said, Patty has a video detailing how to make this card. My Supply List is at the bottom of the post. If I can assist you please do not hesitate to reach out. And if you do not currently have a demonstrator, I would love to invite you in to my stamping family.
HOST CODE
My November Host Code is M4GF9KZ7. Please use this code for orders under $150.00. I will have a small gift for those with orders over $50.00 in addition to the Perk Rewards Program. You can read all of the information at the top of the page in the Menu Bar under SHOP / Perks.
Thank you for stopping by today. I hope you enjoyed today’s project and will come back. I do read and reply to all of the comments individually. They mean a lot to me. Please reach out if you have a question.
Welcome to InKing Royalty’s October Blog Hop! During this year’s blog hops, we are having fun with our stamping favorites – our favorite themes for seasonal cards and projects. This month’s projects center around Harvest & Hope, so prepare yourself for gratitude and love in Fall-themed projects. We are excited to share our creations with you today! After you read my post, I hope you’ll hop over to the next person on the list at the base of this post.
The card I have to share today contains Pumpkins and Gratitude for this Harvest Theme. Both inspire memories of childhood, family time and fun
Paper and Colors
I have been using all of the deeper and brighter Fall colors lately. So I wanted to go with a softer look today. The Boldness of the Bumblebee cardstock pairs well with the softer green of Soft Succulent in the piece of Harvest Meadow Designer Series Paper I picked . For an even softer touch, I used Soft Sea Foam for the green of the vines. To pair with that, the Pumpkins are stamped with Smoky Slate and then colored using Pale Papaya Stampin’ Blends. The piece needed another spot of brightness to match the Bumblebee. So I colored the flower bloom from the vine with Daffodil Delight and added a 2021-2023 In Color Jewel.
Stamps
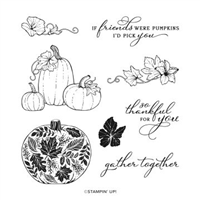
The stamps I used are all from the Pretty Pumpkins set. Being able to make a card from just one set is something I love! The gorgeous font from the Gather Together looks beautiful with the shine of the Bumblebee Ink. I stamped the three pumpkin image twice. Once on the main piece and another on a scrap of White cardstock. They are all colored the same, but I fussy cut the end ones from the extra stamped piece. For a bit of fun I added them to the corners of the focal layer.
Thank you for stopping by today. I hope you’ll hop along to the next stop on the blog hop, Lynn Kolcun at Avery’s Owlery. There’s lots of inspiration to be found in this group – and you don’t want to miss it!
Thank you for hopping along with us. If you get stuck during the Blog Hop, please use this line-up as a guide:
My October Host Code is HSUBS7GX. Please use this code for orders under $150.00. I will have a small gift for those with orders over $50.00 in addition to the Perk Rewards Program. You can read all of the information at the top of the page in the Menu Bar under SHOP / Perks.
Thank you for stopping by today. I hope you enjoyed today’s project and will come back. I do read and reply to all of the comments individually. They mean a lot to me. Please reach out if you have a question.
I have been working on a Skinny card for a card swap. It has been very difficult getting the layout I want. There have been some good results and some not so good ones. Today is one of the good results that I liked but decided not to use in the swap. So I thought I would share it with you.
Stamps
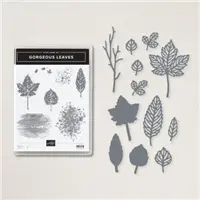
There are two really awesome stamp sets used on this card. The first is the Pretty Pumpkins stamps. This trio of pumpkins is my favorite from that set. And it comes as a Bundle, I just didn’t use the dies. The second stamp set is the Gorgeous Leaves. It is also a Bundle, and I did use two of the Dies.
I love how well these two stamp sets work together. Fall leaves and pumpkins are like Peanut Butter and Jelly! They just go together. The sentiment is such a sweet one and is from the Pretty Pumpkin stamp set. I just love it.
Colors and Finishes
Normally I would say Paper instead of Color, but I did not use any Designer Series Paper on this card. That is very unusual for me. I did choose some of my favorites of the colors I think of for Fall. They are Cinnamon Cider and Soft Succulent for the card base and layer.
The stamped leaves are more of the great Fall colors. They are Merry Merlot, Cinnamon Cider with some speckles of Pale Papaya.
To finish the card I went to the Annual Catalog for some ribbon. It is from the Flowers For Every Season Ribbon Combo. The gingham is actually Just Jade instead of Soft Succulent, but the color matches very well. The final touch was two die cut leaves from Merry Merlot cardstock. These dies are so intricate (The name of the dies are Intricate Leaves!) that it really pops against the white cardstock.
The 2nd Sale-A-Bration Is Here!!
Join My Team Promotion During Sale-A-Bration!!
HOST CODE
My September Host Code is NWZNBFH2. Please use this code for orders under $150.00. I will have a small gift for those with orders over $50.00 in addition to the Perk Rewards Program. You can read all of the information at the top of the page in the Menu Bar under SHOP / Perks.
Thank you for stopping by today. I hope you enjoyed today’s project and will come back. I do read and reply to all of the comments individually. They mean a lot to me. Please reach out if you have a question.
Pumpkins are popping up everywhere now. So I have a pumpkin card to share. It is a second look at the Corner Tuck Card I shared a few weeks ago.
You can click HERE to see the earlier version of this fun fold.
Stamps
I truly Love the stamps in the Pretty Pumpkins stamp set. The matching Dies are awesome as well, but I did not use them today. I stamped the three pumpkins, which is one stamp, and then colored with Stampin’ Blends. The pumpkins are colored using Both Pumpkin Pie , Light Cinnamon Cider, and Light Old Olive. I stamped the pumpkins with Soft Suede Ink.
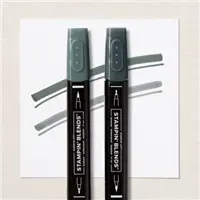
Everyone seems to have their own way of coloring with the Stampin’ Blends. When I want some shading, like with these guys, I start with an all over using the Light Blend. I then come back and add the Dark where needed. I finish with the light again and only drag the dark colors into the lighter area. By not going all over with the Light the second time, I get the really light in the center of the larger pumpkin. However, if you have a method that works for you, then stick with it!
Paper
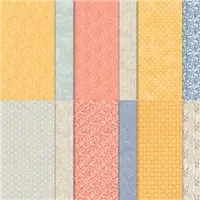
I used the Host Rewards Paper Pack of Pattern Party Designer Series Paper. This pack of paper is awesome! The colors are great, as are the patterns. Plus you get a lot of paper for a very inexpensive price. The only downside is that you can only purchase it with Host Rewards. Anyone interested in a Party???
Measurements and Folds
The base card of Pumpkin PIe is cut 4 1/4 X 8 and scored at the 2 1/2 mark, fold and burnish
The left side strip layer of Old Olive is 1 X 4
The left side strip of DSP is 7/8 X 3 7/8
The focal layer is Old Olive cut 3 X 3
The stamped White is cut 2 7/8 X 2 7/8
The upper right corner that is the Tuck, is a piece of Pumpkin Pie and a DSP piece both cut to 2 7/8 X 2 7/8. they are each placed at a diagonal on the Paper Trimmer and cut in half to form triangles. Then glue the two together for thickness. you only use half, so save one for the next card.
The inside White, that you do not see, is cut 2 3/4 X 2 3/4
Assembly:
Place Stampin’ Dimensionals in each of the corners of the triangle double thick piece and place in the upper right corner.
Adhere the DSP and Old Olive strips together and place on the left side of the flap. Align the left edge, top and bottom.
Layer the Old Olive and Focal Layer together. Place it, centered, up against the strip on the left .
Add the inside White for the sentiment, place it further left than normal so it doesn’t show when the card is closed.
Close the card by tucking the focal layer underneath the raised upper corner
I hope you enjoy this card. Please let me know if you have any questions!
The 2nd Sale-A-Bration Is Here!!
Join My Team Promotion During Sale-A-Bration!!
HOST CODE
My September Host Code is NWZNBFH2. Please use this code for orders under $150.00. I will have a small gift for those with orders over $50.00 in addition to the Perk Rewards Program. You can read all of the information at the top of the page in the Menu Bar under SHOP / Perks.
Thank you for stopping by today. I hope you enjoyed today’s project and will come back. I do read and reply to all of the comments individually. They mean a lot to me. Please reach out if you have a question.
I am loving playing with all of the new products from the Mini Catalog. The one I am showcasing today is the Pretty Pumpkin Bundle. The matching Dies are fabulous!!!
Paper
The beginning of this fun card was this Soft Succulent piece of DSP from the Harvest Meadow Designer Series Paper. I love the faded look to the background as well as the script writing. Knowing that I was playing with pumpkins, I had to choose a color that worked with the Soft Succulent. I actually found two other pieces of DSP from that same pack of paper. Instead of a Pumpkin Pie pattern, they are Calypso Coral. But they are gorgeous pumpkins!
To Die cut the larger and fancier pumpkin, I added the Adhesive Sheet to the piece of DSP. I cut a piece a little larger than the die and added the Adhesive sheet, and then die cut the image. This turns the pumpkin into basically a sticker. No fighting trying to get that pumpkin glued down without a mess! The smaller pumpkin is adhered with a couple of Mini Stampin’ Dimensionals.
Stamps
There is very little stamping on this card. The “vine” for the pumpkins got hidden a bit. You can see it to the left of the smaller pumpkin. It is stamped and colored with Soft Succulent and Evening Evergreen Stampin’ Blends. There is a matching die for it as well.
The sentiment is from the stamp set and I love everything about it. It has such a beautiful font that makes it sort of fancy I believe. To showcase the sentiment I stamped it and then die cut using the Stitched So Sweetly Dies. The finishing touch is a Genial Gem that matches the Soft Succulent perfectly!
The 2nd Sale-A-Bration Is Here!!
Join My Team Promotion During Sale-A-Bration!!
HOST CODE
My August Host Code is Y4GZ7QNY. Please use this code for orders under $150.00. I will have a small gift for those with orders over $50.00 in addition to the Perk Rewards Program. You can read all of the information at the top of the page in the Menu Bar under SHOP / Perks.
Thank you for stopping by today. I hope you enjoyed today’s project and will come back. I do read and reply to all of the comments individually. They mean a lot to me. Please reach out if you have a question.
My card today is another Fun Fold. I found this with directions from a few different people and none referred to anyone else. So I really do not know who to give credit to. I shrunk it a tiny bit so that it fits in a regular envelope.
The Fold
I am calling this a Diamond Fold. It is actually very similar to the Kite Fold or the fold used for graduation hat cards. The other fold names usually do not stand open. I love that about this one.
To allow this to fit in a regular A2 envelope, 4 1/4 X 5 1/2, I used a piece of 4 1/4 X 8 1/2 piece of cardstock. It is scored at 2 1/8 and 4 1/4. You then mark the center of the 4 1/4 end of the paper that has the 2 1/8 score line. Cut from the score line to that center mark from each side. This makes the front point. Fold the card in half and use the already cut edges to make the same cut on the bottom. It is actually very easy and quick to get all of this done.
The Paper
I used the Harvest Meadow Designer Series Paper. I love these patterns for Fall , or anytime, cards. I have used three different patterns from the paper pack. For a layer between the DSP and Calypso Coral, I added Soft Succulent. The Bumblebee diamond shape pieces are cut 2 @ 2 3/4 X 2 3/4 with a Soft Succulent cut 2@ 2 7/8 X 2 7/8. The wide strips, there is one on the inside as well as the one on the top, is cut 2 @ 4 X 1 7/8 with a Soft Succulent layer of 2 @ 4 1/8 X 2. And finally the corners are a SS layer of 2 X 2, and the DSP 1 7/8 X 1 7/8. Each of these squares is then cut in half to make two triangles. (Simply place them on your cutter with a top and bottom point in the cutting track.
You can see all of the paper placements in the photo. Only one is not shown and it is the inside wide strip. It is just like the top one and I added a piece of White cardstock for a signature. The top Diamond shape is only adhered on the front half to allow it to stand up. Here is a view of the card folded flat for mailing.
It is not laying totally flat. The picture is a bit deceiving in that the point in the back actually is flush with the back of the fold.
The Finishing Touches
I used the Pretty Pumpkin Bundle for this card. Fall is probably my favorite season. I LOVE Christmas, but Fall seems to get a bit overlooked.
The DSP pumpkin is another sheet from the Harvest Meadows DSP. The stamped and Die cut pumpkin is from the stamp set. I used a variety of the both the 2020-2022 and 2021-2023 In Color Markers to color the various leaves and berries. Both of the pumpkins are raised with Stampin’ Dimensionals.
The sentiment is from the stamp set also. It is cut with the Stitched Rectangle Dies and only adhered in the center so that it hangs over the diamond shape. The final touch was a single gem from the Elegant Faceted Gems.
The 2nd Sale-A-Bration Is Here!!
Join My Team Promotion During Sale-A-Bration!!
HOST CODE
My August Host Code is Y4GZ7QNY. Please use this code for orders under $150.00. I will have a small gift for those with orders over $50.00 in addition to the Perk Rewards Program. You can read all of the information at the top of the page in the Menu Bar under SHOP / Perks.
Thank you for stopping by today. I hope you enjoyed today’s project and will come back. I do read and reply to all of the comments individually. They mean a lot to me. Please reach out if you have a question.
The content in this blog is the sole responsibility of Jackie Beers as an Independent Stampin' Up! Demonstrator. The use of and content of classes, services or products offered is not endorsed by Stampin' Up!