My card today is for one of the sweetest people I know. She does so much for everyone and I am honored to call her a friend. As a special Thank You, I made this card and hope you are as happy with it as I am.
STAMPS
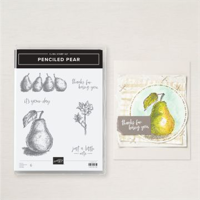
This sentiment is so perfect for the intended recipient. It is a bit different than normal, but fits the bill perfectly. The fun font is awesome as well. I love a different font. This one is from the Penciled Pear stamp set. That set is a hidden gem in the Annual Catalog. The inside sentiment is from the Wonderful Thoughts stamp set. There is also a matching flower from the Painted Lavender stamp set inside. Here is a view of the open card. It is a Double Z fold.
PAPERS
The card base ,or bases, since there are two Z folds are Pretty Peacock cardstock. And all of the DSP is from the Perennial Lavender Designer Series Paper. I normally do not put DSP on the inside of the Z base. However I saw one recently that had done so, and it really added to the card. So I saw this tone on tone floral in the paper pack and said Why Not! Additionally the surround for the front sentiment is also included in the DSP pack. I believe it is the opposite side of this main floral pattern.
EXTRAS
There is only one extra for this card. And that is very surprising even to me! It is the Die used for the sentiment on the front of the card. This Die is from the Unbounded Love Die set. It is one Die, but it cuts the outside and inside both. So it was simple to cut the DSP and then the White with the sentiment separately. Then I simply put them back together again. Plus I now have a White outside and plaid inside leftover for another card. Two for the price of one!
MEASUREMENTS
The Pretty Peacock card base is 11 X 4 1/4 and scored at 2 3/4 and 5 1/2. The inner card is also Pretty Peacock and is 10 1/2 X 3 1/4, and is scored at 4 1/2 and 7 1/2. There are different DSP on each of the layers. For the card base the DSP measures 2 pieces @ 2 1/2 X 4, these are the front and center. And the inside back is 5 1/4 X 4. For the smaller card, the DSP is 4 1/4 X 3 for the front. The middle section is 2 3/4 X 3. The back White layer that is stamped on is 2 3/4 X 3 also.
HOST CODE
My DECEMBER Host Code is SAQE7VYU. Please use this code for orders under $150.00. I will have a small gift for those with orders over $50.00 in addition to the Perk Rewards Program. You can read all of the information at the top of the page in the Menu Bar under SHOP / Perks.
Thank you for stopping by today. I hope you enjoyed today’s project and will come back. I do read and reply to all of the comments individually. They mean a lot to me. Please reach out if you have a question.
Smile and Keep On Stamping,
Jackie
New Scrapbooking Catalog
The newest addition to Stampin’ Up! is an Online catalog of Scrapbooking products. You can see the catalog by clicking the photo below and save it to your computer.
Online Exclusives
New Online Exclusives have dropped. There are Halloween, Fall, Christmas, and many that are great year round. Of course the new Designer Series Papers and Embellishments are fabulous as well!
You can go directly to these in my Online Store by clicking HERE
Sometimes Thank You cards can be difficult to make. The gorgeous Stampin’ Up! DSP makes this pretty easy in my opinion. I have one of these to share today. All it takes is a little bit of extra parts.
STAMPS
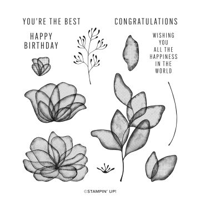
The stamps used on this card are the most simple parts of the card. This front simple, but exactly right, sentiment is from the Translucent Florals stamp set. This is a Thank You for someone who has been a life saver in a way. How do you express Thanks to someone who goes the extra mile besides this sentiment. I think it is perfect.
PAPERS
The DSP is really the star of the card. The lady loves scenery and what could be better than this gorgeous paper. It is from the Splendid Autumn Designer Series Paper. There are several different and equally beautiful scenes. I used this pretty scene as the color choices for the rest of the card. The Azure Afternoon is not one I have ever paired with Fresh Freesia before. If it works in the scene, then it works for me. And it really does!
EXTRAS
To give some additional texture and to help draw your eye to the sentiment, I added an embossed layer to separate the parts of the card. It also saved from adding stamping or additional DSP to the background. I used the Exposed Brick 3D Embossing Folder for this layer. It really has great texture.
The bling on this card is two gold pieces from the Mini Catalog. Behind the sentiment is a strip of Wild Wheat Rustic Stripe Ribbon. Just the little strip was a perfect touch. And of course bling! A single Gold Texture Adhesive Dot was the final touch.
HOST CODE
My DECEMBER Host Code is SAQE7VYU. Please use this code for orders under $150.00. I will have a small gift for those with orders over $50.00 in addition to the Perk Rewards Program. You can read all of the information at the top of the page in the Menu Bar under SHOP / Perks.
Thank you for stopping by today. I hope you enjoyed today’s project and will come back. I do read and reply to all of the comments individually. They mean a lot to me. Please reach out if you have a question.
Smile and Keep On Stamping,
Jackie
New Scrapbooking Catalog
The newest addition to Stampin’ Up! is an Online catalog of Scrapbooking products. You can see the catalog by clicking the photo below and save it to your computer.
Online Exclusives
New Online Exclusives have dropped. There are Halloween, Fall, Christmas, and many that are great year round. Of course the new Designer Series Papers and Embellishments are fabulous as well!
You can go directly to these in my Online Store by clicking HERE
The card I am sharing today is one I cased from the stamping retreat swaps. I changed the pieces just a bit for a sweet Thank You card. There are parts from different products. I love mixing and matching products.
STAMPSAND DIES
The flower / leaves pieces are from the fabulous Changing Leaves Dies. My favorite part is the large leaf with all of the detail. This is created with the Changing Leaves Hybrid Embossing Folder. It creates great detail on a variety of leaves, but also can Die cut this large one. I used Blending Brushes to add color to the leaf.
The additional leaves are Die cut from blackberry Bliss and Gold Foil. For the large background circle I used the largest of the Spotlight on Nature Dies. It is a perfect background with all of the colors of leaves on top.
To create the sentiment I added a sweet one from the Changing Leaves stamp set. The sentiment is a shortened version of the actual one. There are two layers to this one, but I only wanted the upper words. Quick and easily I covered the bottom row with a small post it note when inking the stamp. (Always remember to remove the post it before touching paper!) The sentiment layer is a Die cut from the Changing Leaves Dies also.
LAYER
The background layer is difficult to see in the photo. If you look closely to the upper right you can see the embossing. This is the Forever Plaid 3D Embossing Folder. In person it really stands out. The dark color makes it more difficult to photograph. Trust me when I say it adds quite a lot of detail.
PAPERS
The large Die cut circle is cut from the Natures Sweetness Designer Series Paper. I love the gold flecks in this paper. It makes a perfect match to the Gold Foil used on the Die cut leaves. For a strong overall color Blackberry Bliss is a perfect choice. It is the card base as well as the embossed layer. And is tied together with the little twigs die cut from Blackberry Bliss.
EXTRAS
To give a bit more texture I added some of the Linen Thread as a bow behind the sentiment. And then there must be bling. The Purple Shimmer Gems, the darkest shades, matched perfectly. So I scattered some around the circle and placed a single one on the sentiment layer.
HOST CODE
My DECEMBER Host Code is SAQE7VYU. Please use this code for orders under $150.00. I will have a small gift for those with orders over $50.00 in addition to the Perk Rewards Program. You can read all of the information at the top of the page in the Menu Bar under SHOP / Perks.
Thank you for stopping by today. I hope you enjoyed today’s project and will come back. I do read and reply to all of the comments individually. They mean a lot to me. Please reach out if you have a question.
Smile and Keep On Stamping,
Jackie
New Scrapbooking Catalog
The newest addition to Stampin’ Up! is an Online catalog of Scrapbooking products. You can see the catalog by clicking the photo below and save it to your computer.
Online Exclusives
New Online Exclusives have dropped. There are Halloween, Fall, Christmas, and many that are great year round. Of course the new Designer Series Papers and Embellishments are fabulous as well!
You can go directly to these in my Online Store by clicking HERE
Before I get to today’s project, I wanted to remind you that the Kit Sale is going away soon. It is over on Halloween! So if you have one, or more, that you have been considering now is the time. You cannot bet the 30% off.
I have a a sweet Winter card to share today. It is not necessarily a Christmas card as it is more of a Caring card. I thought the set was adorable when I first saw it. And I am just now getting around to inking it up. It is a fun one for sure.
Stamp Set
This sweet snowman and bunny scene is a single stamp from the Snowman Hugs stamp set. I think it is a perfect one for friends and even as a thank you during this coming Winter months. And even better is the perfect sentiment included in the set as well. There are a couple of snowmen along with a few sentiments that are funny and sweet. I hope you will take a look at it in the Mini Catalog.
The image is stamped using Memento Tuxedo Black Ink and then colored using a variety of Stampin’ Blends. All f them are listed in the Supply List at the bottom of the post. The colors are all pulled from the paper. I may have taken some liberties with my snowman’s vest. I used Poppy Parade for the trim and bow tie and then both of the Shaded Spruce for the vest. The vest has plaid markings. The overall is the Light Shaded Spruce with the striping being the dark Shaded Spruce.
Papers
This fun paper seemed a perfect match for the snowman. It is from the Snowy Scenes Designer Series Paper. This is a great pack that I almost overlooked. It has snowy scenes like this on one side and then fun plaid, snowflakes, and candy canes on the other sides. There is something for any Winter card. I use the Candy Cane piece on another card for later in the week.
The card base and layer were also from the DSP. I pulled the very light Pool Party as the card base. I love this color and use it as a highlight fairly often. Then to help the DSP pop, I added a layer of Poppy Parade. Once I began putting everything together I felt like I needed to ground the snowman. So a thin strip of the Poppy Parade did the trick.
Extras
To give the sentiment a little extra, I used the Everyday Details Dies. These Dies have large holes punched around the pieces. But the smallest circle is this one I used. It has smaller stitching and works great here. To finish the scene I needed some bling. I could not decide on what would work the best and decided on some color. But there is not really a Poppy Parade bling. I fixed that however. All I had to do was color a few pearls with the Poppy Parade Stampin’ Blends. Easy Peasy!!!
Thank you for stopping by today!!
Kit Sale
October Starter Kit promotion…..
New Scrapbooking Catalog
The newest addition to Stampin’ Up! is an Online catalog of Scrapbooking products. You can see the catalog by clicking the photo below and save it to your computer.
Online Exclusives
New Online Exclusives have dropped. There are Halloween, Fall, Christmas, and many that are great year round. Of course the new Designer Series Papers and Embellishments are fabulous as well!
You can go directly to these in my Online Store by clicking HERE
HOST CODE
My OCTOBER Host Code is 2C9JH3D9. Please use this code for orders under $150.00. I will have a small gift for those with orders over $50.00 in addition to the Perk Rewards Program. You can read all of the information at the top of the page in the Menu Bar under SHOP / Perks.
Thank you for stopping by today. I hope you enjoyed today’s project and will come back. I do read and reply to all of the comments individually. They mean a lot to me. Please reach out if you have a question.
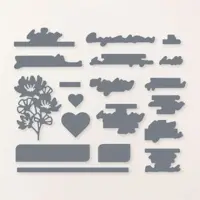
I have an adorable little Appreciated card to share today. The various touches are fairly sweet and feminine. There are a mix of small touches.
Bundle
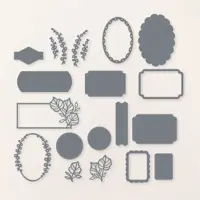
It is a little difficult to decide where to begin in the products used. The Wonderful Thoughts Bundle has a large and small part in this card. The simply sweet sentiment is from the stamp set. And the simple, yet pretty, die cut flower is from the matching Die set. I rarely do a White on White card. So this was a little twist to that. White with a touch of color.
Background
This embossed background is the Eyelet Embossing Folder. I almost skipped over this in the catalog because it seemed more feminine and simple than I usually do. Of course then I began seeing cards using it, and like always, I had to have it! LOL!! These little eyelets were the perfect choice for this card I believe.
Colors
To provide the touch of color that allows the Die cut flower to stand out was simple. Thinking in terms of the colors the flower might be, Granny Apple Green, Daffodil Delight, and Lemon Lime Twist were the easy choices. And to not have the sentiment be too loud, it is stamped on the Lemon Lime Twist using Granny Apple Green Ink. All of these colors really compliment the White on White of the base and background. And help the little flower to pop.
Finishes
This card is so clean and simple that it did not require much in the way of add ons. A small touch that really adds to it however is the rounded corners. On each of the color strips there are opposite corners that are rounded. Any corner punch you have will work. And then to finish everything there had to be bling. After layering everything else, the bling was simple to place one Rhinestone on each of the strips.
Thank you for stopping by today!!
Kit Sale
October Starter Kit promotion…..
New Scrapbooking Catalog
The newest addition to Stampin’ Up! is an Online catalog of Scrapbooking products. You can see the catalog by clicking the photo below and save it to your computer.
Online Exclusives
New Online Exclusives have dropped. There are Halloween, Fall, Christmas, and many that are great year round. Of course the new Designer Series Papers and Embellishments are fabulous as well!
You can go directly to these in my Online Store by clicking HERE
HOST CODE
My OCTOBER Host Code is 2C9JH3D9. Please use this code for orders under $150.00. I will have a small gift for those with orders over $50.00 in addition to the Perk Rewards Program. You can read all of the information at the top of the page in the Menu Bar under SHOP / Perks.
Thank you for stopping by today. I hope you enjoyed today’s project and will come back. I do read and reply to all of the comments individually. They mean a lot to me. Please reach out if you have a question.
I have a two for one for you today. Generally it is just as easy to make two cards as one when we are creating. These cards were definitely easily made at the same time. They have a simple technique playing a large role in the creation.
Background and Colors
To begin with the background is not my normal starting point. However with these cards I kind of have to begin there. And you will learn my reason as we go along. I was looking to make a Fall card. Even though it is 90 degrees right now!! Where is my Fall weather!!! That being said, I still wanted a Fall card. I chose the colors based on that.
The colors chosen are Cherry Cobbler, Pumpkin Pie, and Crushed Curry. My idea was a simple “beginner” type “technique” card. To do this fun center technique I used Clear Block H. First I opened the Cherry Cobbler Ink and used the block to touch the ink pad about a third of the way across. Next I turned the block and opened the Pumpkin Pie ink. This time there was no way to get the ink only into the center of the block. Yes, I could have taped part of it off. But I went the simpler route. I inked the rest of the block by touching it to the crushed curry with the Cherry Cobbler hanging off the side. Then I used a damp paper towel to remove the last third. Finally I turned the block and inked that last section with Crushed Curry. (I did make sure it was dry from having wiped off the ink.)
To stamp on the Basic White card stock was only a matter of giving the inked block a little breath of life. In other words I huffed on it. Breath of life sounds so much better. LOL! After stamping the first time I thought there might be enough ink to stamp again. So I gave it more life saving breaths and stamped on the second piece. And there we have two backgrounds.
Stamps
These bright leaves are from the Caring Leaves stamp set. It is in the back of the Mini Catalog and is what I consider a sleeper set. I thought it was cute when I first saw it. But did not really think much after that. Then I saw other’s creations using it and had to look again. Now I am in love with this set.
The outline for the leaves are not totally closed. This gives them a very artistic look. And the filler stamps have the definition to them that leaves shading in places. I used the same inks for the fillers as I did the background strip. But I stamped with Memento Tuxedo Black for the outlines. I am happy with how it turned out. This sweet sentiment is also from the stamp set. It is stamped using Cherry Cobbler Ink.
Finishes
To keep these cards pretty simple I went with all the same colors for the layers as well. One has Cherry Cobbler base with a Crushed Curry layer and the other is the opposite. To give a touch of some bling, I turned to the Regal Foiled Adhesive Dots. These are so pretty with the gold flecks. I used the darker reddish ones. There are a trio scattered around each card.
Thank you for stopping by today!!
New Scrapbooking Catalog
The newest addition to Stampin’ Up! is an Online catalog of Scrapbooking products. You can see the catalog by clicking the photo below and save it to your computer.
Online Exclusives
New Online Exclusives have dropped. There are Halloween, Fall, Christmas, and many that are great year round. Of course the new Designer Series Papers and Embellishments are fabulous as well!
You can go directly to these in my Online Store by clicking HERE
HOST CODE
My SEPTEMBER Host Code is S9CRPBZ4. Please use this code for orders under $150.00. I will have a small gift for those with orders over $50.00 in addition to the Perk Rewards Program. You can read all of the information at the top of the page in the Menu Bar under SHOP / Perks.
Thank you for stopping by today. I hope you enjoyed today’s project and will come back. I do read and reply to all of the comments individually. They mean a lot to me. Please reach out if you have a question.
The content in this blog is the sole responsibility of Jackie Beers as an Independent Stampin' Up! Demonstrator. The use of and content of classes, services or products offered is not endorsed by Stampin' Up!