Today’s card is a simple masculine card which is a great way to use up DSP scraps. And the He’s All That stamp set is a definite winner in my book!
Paper
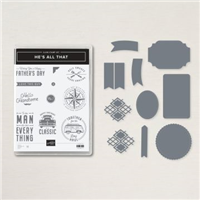
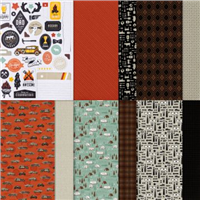
The He’s The Man Suite of products are all awesome. Different products from the suite are used on this card and I love them all. The DSP is a for sure winner. He’s The Man is a great name for this Designer Series Paper. All of the colors have a more masculine look and color scheme, but they all work together wonderfully. Some of the pieces you see are the front and back of a single sheet. The measurements for each piece is listed at the bottom of the post.
Stamp Set
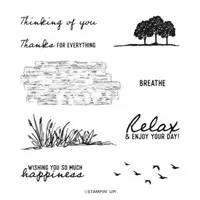
Since this is a Suite card, using the stamp set He’s All That is a given. The different images and sentiments make for a great set. In reading the chosen sentiment it reminded me of the very old Country Music song “Hello Darlin'”. With that thought in my brain, I had to use this sentiment! LOL!!!! For a bit of information, I will also say that at first glance, and in actuality, the mustache does not line up straight with the sentiment wording. This unevenness may not work for everyone. A single Rustic Metallic Dot was the finishing touch for the sentiment layer.
Punches
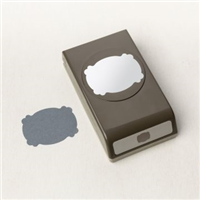
Two different punches were used for this card design. The most obvious one is the sentiment layer. That punch is the Lasting Label Punch, which is part of the Lovely & Lasting Bundle. A bit of a different shape around the edges is a nice addition. And the second punch is the Banner Pick A Punch. It was used for the flags at the top of the page. The punch has three widths and I used all three. They are 1/2″ x 2″, 3/4″ x 2 1/4″ , and 1″ x 2 1/2″. To complete the look I used a small stapler for a different little touch.
Measurements
Besides the little flag sizes above, the card base is 4 1/4 X 11 then scored and folded at 5 1/2. A thin additional layer of the Sahara Sand cardstock is cut to 3 3/4 X 5. The large DSP piece is cut to 3 5/8 X 4 7/8. And finally the strip of DSP beneath the sentiment is cut to 3 5/8 X 1. It was fun playing with the different patterns to decide on which pattern went where.
HOST CODE
My June Host Code is B4ZVQK6D. Please use this code for orders under $150.00. I will have a small gift for those with orders over $50.00 in addition to the Perk Rewards Program. You can read all of the information at the top of the page in the Menu Bar under SHOP / Perks.
Thank you for stopping by today. I hope you enjoyed today’s project and will come back. I do read and reply to all of the comments individually. They mean a lot to me. Please reach out if you have a question.
I have combined three great products for today’s card. The star is the Wildlife Wonder bear paired with the Tasteful Textile Embossing Folder and New Horizon DSP. A simple and pretty card.
Stamps
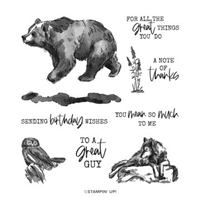
This beautiful bear is from the Wildlife Wonder stamp set, as are all of the stamps used here. The details on the bear really give the illusion of movement. And the shadow at the base adds to it. For a bit of realism, and depth, I added the single wildflower. Of course the sentiment is one of the stars. And if you know me, you know that I love a mix of fonts. This one is perfect and a great size.
Embossed
The Tasteful Textiles Embossing Folder has always been a favorite. It adds subtle texture. But if stamped on prior to embossing it gives the look of a canvas. On this card I went with the Thick Basic White, stamped and then embossed. And it is raised with Stampin’ Dimensionals to give more depth to the card.
Papers
Even though the card base is Thick Basic White and the focal layer is White, this card shows quite a bit of color. That is from the New Horizon DSP. And I promise that I did not use most of a piece of this beautiful paper to only hide it behind the front layer. I would never do that! This piece had some punches cut from it. And I actually thought ahead to position the punches further inside so it could be used as a layer. That is unusual for me to actually think ahead!! Plus I used one of the cut off pieces as the strip which backs the sentiment. It is a great extra touch of color.
Please do not forget that the Last Chance products are winding down. Additionally we have been notified that all of the Natural Tones Stampin’ Blends are back in stock. They are part of the All Together early release shown below. Because of this that special has been extended through the end of May! Woohoo!
WAVES OF THE OCEAN SUITE …EARLY RELEASE
CLICK ON THE PHOTO TO SEE THE COMPLETE SUITE OF PRODUCTS
ALL TOGETHER … SPECIAL BUNDLE
CLICK ON THE PHOTO TO SEE ALL OF THE PRODUCTS
HOST CODE
My April Host Code is STVD4BDV. Please use this code for orders under $150.00. I will have a small gift for those with orders over $50.00 in addition to the Perk Rewards Program. You can read all of the information at the top of the page in the Menu Bar under SHOP / Perks.
Thank you for stopping by today. I hope you enjoyed today’s project and will come back. I do read and reply to all of the comments individually. They mean a lot to me. Please reach out if you have a question.
It is no secret that I have loved using the New Horizon Designer Series Paper. Today’s card is another quick and easy card starring the paper and On The Horizon stamp set.
Paper
The New Horizon Designer Series paper does the majority of the work in making a card. It is like looking out your window at beautiful scenery. And that was the look I was going for on this card. I needed a masculine birthday and this seemed to fit the bill. The card base and layer were both pulled from the paper. With this piece of DSP I could have gone in a variety of different ways color wise.
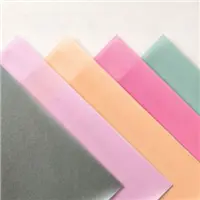
But for masculine I went with the greens of Evening Evergreen and Soft succulent. But for a special touch, the Soft Succulent is actually Vellum. It is from the 2021-2023 In Color Shimmer Vellum. The shimmery look fits perfectly with the DSP. And the last paper is the tag. It is from In Good Taste Designer Series Paper and is a scrap of a light wood look paper.
Stamp
Even though the On The Horizon stamp set is part of a bundle, I only used the stamp set. And I stamped mostly on the beautiful piece of DSP. That can be a bit scary, but is such a reward once you do it. The grasses at the bottom were stamped using Evening Evergreen Ink. Since the birds were more in the distance and not as clear, I went with Basic Gray for them.
Punch and Finishes
The sentiment is from the On The Horizon stamp set also. It is stamped and then punched using the Label Me Fancy Punch. To anchor the punch I used the Crumb Cake of the Bakers Twine Essential Pack. The twine is wrapped around twice and just secured behind the sentiment. To help it stand up a bit away from the twine I raised the sentiment layer with Stampin’ Dimensionals. And with the DSP being so beautiful I did not think the card needed any bling. I know that is shocking!!! LOL!!
WAVES OF THE OCEAN SUITE …EARLY RELEASE
CLICK ON THE PHOTO TO SEE THE COMPLETE SUITE OF PRODUCTS
ALL TOGETHER … SPECIAL BUNDLE
CLICK ON THE PHOTO TO SEE ALL OF THE PRODUCTS
HOST CODE
My April Host Code is STVD4BDV. Please use this code for orders under $150.00. I will have a small gift for those with orders over $50.00 in addition to the Perk Rewards Program. You can read all of the information at the top of the page in the Menu Bar under SHOP / Perks.
Thank you for stopping by today. I hope you enjoyed today’s project and will come back. I do read and reply to all of the comments individually. They mean a lot to me. Please reach out if you have a question.
Today I have a Masculine card that is really quick . It pairs Wildlife Wonder with the New Horizons DSP. The paper is really the star of the show!
Paper and Ribbon
As I said at the beginning, this New Horizons Designer Series Paper is obviously the star of the show here. The colors and the look of a mist or fog in the air is amazing. It makes me think I could be there. Except I would be long gone since the bear is front and center!!
Pulling the colors from the DSP was an easy choice for the card layers. Evening Evergreen and Smoky Slate are the card base and layer. And I used the Evening Evergreen for the back layer of the sentiment. Paired with the sentiment are two strips of ribbon. One is Soft Succulent and the other Evening Evergreen. They are simply to ground the sentiment. I also added one of the gray Classic Matte Dots for the sentiment.
Stamps and Dies
Since the DSP is so amazing, I did not want to cover much of it up. From the Wildlife Wonder stamp set I chose to use the bear, along with the great sentiment. Since masculine cards can be a bit of challenge sometimes, this is a quick and easy one. For the bear, I stamped him on the DSP and then again on scrap paper. I purposely had only the front half on the paper. He is too large and would have covered too much space.
After fussy cutting the extra bear, I layered it directly on top of the DSP bear. This gives the little extra hairs showing that are difficult to cut around. Once I had adhered the bear layer, I took my Paper Snips and trimmed off the extra of his body flush with the DSP. The sentiment is stamped and cut using the Layering Circles Dies. A quick and simple sentiment layer to finish the card.
Sale-A-Bration is the Best Time of Year!!
HOST CODE
My January Host Code is GR679MMV. Please use this code for orders under $150.00. I will have a small gift for those with orders over $50.00 in addition to the Perk Rewards Program. You can read all of the information at the top of the page in the Menu Bar under SHOP / Perks.
Thank you for stopping by today. I hope you enjoyed today’s project and will come back. I do read and reply to all of the comments individually. They mean a lot to me. Please reach out if you have a question.
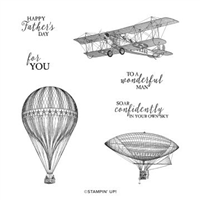
I have a difficult time making cards for men. Especially ones that are not so young. (Isn’t that a nice way of phrasing the age?) One stamp set that is perfect for this age group, or anyone who loves flight, is the Soar Confidently stamp set from the Mini Catalog.
Framing
The Well Suited Designer Series Paper has been a “Go To” for masculine cards. I love the simple patterns and the surprise of the Poppy Parade in some of the sheets. To frame the airplane I used three different sheets of the DSP. The touch of Poppy Parade peeking out behind the Navy layer is the same as the top layer of DSP. My thought with these layers was similar to multiple mats in the framing of a picture.
Let It Shine
For the airplane, I stamped it in Night of Navy Ink and did nothing else. I love the extreme details in the drawing of this stamp. It has all it needs simply with the stamped image.
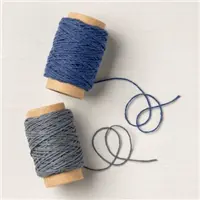
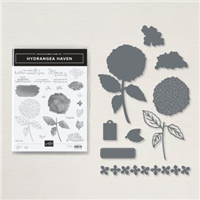
To add the finishing touch, I used the tag from the Hydrangea Haven Bundle. It is the perfect size for a small sentiment. The “for you” is from the Hydrangea Hill stamp set. To add the tag, I used the Navy Twine from the Well Suited Twine Combo. A simple little bow was the finishing touch.
Thank you very much for stopping by here today. I hope you enjoyed this simple card. The layers may appear more difficult, but it is definitely not! A few layers of paper and a stamp is all you need.
Reminder
There are only a few days left of the Annual Catalog as well as the Retiring Items. They go away on Monday Night! So please double check your wish list and don’t miss out on something you like.
HOST CODE
My April Host Code is QGPT9TJG Please use this code for orders under $150.00. I will have a small perk for those with orders over $50.00
I have another Fun Fold to show you today. It is one that I have done a few times, or at least it is the same beginning to previous ones. This one I kept very simple. It is a Pocket Card that could also be used as an Invitation. The time for needing these is almost upon us. At least I hope most can begin having showers, graduation, and other special occasion parties now.
Products I Love
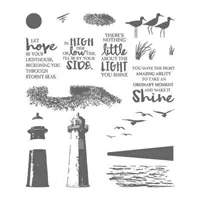
The High Tide stamp set is such a great one to use for quick and easy cards. Or it can be layered and become more advanced. I stuck with quick and simple for this card.
All of the stamps on the pull out card are included in the stamp set. The lighthouse is a 2 step stamp. However I chose to just do the base layer without the detailed stamp. Letting the Light shine, 🙂 , was my idea as it pairs so perfectly with the sentiment. Was that too corny????
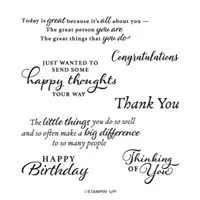
The Happy Birthday is from the Happy Thoughts stamp set. I love the mixed font and especially the beautiful script of the Birthday! To go along with my quick and simple card, I used two punches for the focal sentiment layers. Punches are my go to when I need a quick card. The stamped sentiment is cut with the Tailored Tag Punch. The background is the Label Me Lovely Punch. They fit very well together.
The DSP beneath the sentiment was chosen to go along with the Smoky Slate cardstock. I think it looks sort of stormy! It is from the In Good Taste Designer Series Paper. I am thrilled that paper is carrying over to the next Annual Catalog! It has a little bit of everything needed for backgrounds.
Inside Card
How To Create
To make the card base I began with a strip of Daffodil Delight Cardstock cut 4 1/4 X 11. It is scored at 5 1/2 and then 3″ is cut off of one end. My previous cards made similar to this, I would only cut off 1″ and then fold that end over to create a gift card pocket. So that is an option for you to try. If you take that option however it is not able to be a pocket card.
Adhere the Smoky Slate cardstock (cut 4 X 5 1/4) to the back panel. Lay the stamped white piece (3 1/2 X 5) in place to give the bulk to make ease of pulling out. Same as you do for a gift card holder. Place Tear & Tape on each side of the small front panel and press down.
Add the DSP (2 1/4 X 4) to the front of the small panel. The rope is another great product, the Braided Linen Trim. To make it easy on myself, I add a small piece of Tear & Tape in the center of the small panel where the sentiment will be placed. Lay one end of the ribbon down and wrap it around the back of the card and back to the front. Adhere the other end. Cut a piece approximately 4 ” and double it. We are making an upside down bookmark pull. Start the looped end from the top and run under the rope. Pull the loose ends through and flatten out, being careful not to pull loose your ribbon ends from the tape.
The finishing touch is simply adding the layered sentiment. I used adhesive putting the two pieces together. Then add Stampin’ Dimensionals to the back one to adhere to the panel. You have a cute card and the area you would write on is covered down inside the pocket.
Thank you for stopping by today. I hope you enjoyed the Pocket Card and will give it a try. It can be a Beginning Stamper card or an Advanced if you prefer adding more stamping and details.
Both the stamp set and the ribbon are in the Retiring Products. If you like them as much as I do, consider going ahead and ordering them now!
HOST CODE
My April Host Code is QGPT9TJG Please use this code for orders under $150.00. I will have a small perk for those with orders over $50.00
The content in this blog is the sole responsibility of Jackie Beers as an Independent Stampin' Up! Demonstrator. The use of and content of classes, services or products offered is not endorsed by Stampin' Up!