I have another Fun Fold to show you today. It is one that I have done a few times, or at least it is the same beginning to previous ones. This one I kept very simple. It is a Pocket Card that could also be used as an Invitation. The time for needing these is almost upon us. At least I hope most can begin having showers, graduation, and other special occasion parties now.

Products I Love
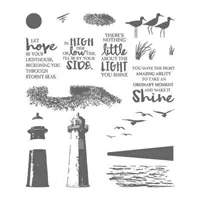
The High Tide stamp set is such a great one to use for quick and easy cards. Or it can be layered and become more advanced. I stuck with quick and simple for this card.
All of the stamps on the pull out card are included in the stamp set. The lighthouse is a 2 step stamp. However I chose to just do the base layer without the detailed stamp. Letting the Light shine, 🙂 , was my idea as it pairs so perfectly with the sentiment. Was that too corny????
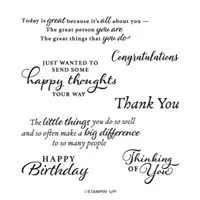
The Happy Birthday is from the Happy Thoughts stamp set. I love the mixed font and especially the beautiful script of the Birthday! To go along with my quick and simple card, I used two punches for the focal sentiment layers. Punches are my go to when I need a quick card. The stamped sentiment is cut with the Tailored Tag Punch. The background is the Label Me Lovely Punch. They fit very well together.
The DSP beneath the sentiment was chosen to go along with the Smoky Slate cardstock. I think it looks sort of stormy! It is from the In Good Taste Designer Series Paper. I am thrilled that paper is carrying over to the next Annual Catalog! It has a little bit of everything needed for backgrounds.
Inside Card

How To Create
To make the card base I began with a strip of Daffodil Delight Cardstock cut 4 1/4 X 11. It is scored at 5 1/2 and then 3″ is cut off of one end. My previous cards made similar to this, I would only cut off 1″ and then fold that end over to create a gift card pocket. So that is an option for you to try. If you take that option however it is not able to be a pocket card.
Adhere the Smoky Slate cardstock (cut 4 X 5 1/4) to the back panel. Lay the stamped white piece (3 1/2 X 5) in place to give the bulk to make ease of pulling out. Same as you do for a gift card holder. Place Tear & Tape on each side of the small front panel and press down.
Add the DSP (2 1/4 X 4) to the front of the small panel. The rope is another great product, the Braided Linen Trim. To make it easy on myself, I add a small piece of Tear & Tape in the center of the small panel where the sentiment will be placed. Lay one end of the ribbon down and wrap it around the back of the card and back to the front. Adhere the other end. Cut a piece approximately 4 ” and double it. We are making an upside down bookmark pull. Start the looped end from the top and run under the rope. Pull the loose ends through and flatten out, being careful not to pull loose your ribbon ends from the tape.
The finishing touch is simply adding the layered sentiment. I used adhesive putting the two pieces together. Then add Stampin’ Dimensionals to the back one to adhere to the panel. You have a cute card and the area you would write on is covered down inside the pocket.
Thank you for stopping by today. I hope you enjoyed the Pocket Card and will give it a try. It can be a Beginning Stamper card or an Advanced if you prefer adding more stamping and details.
Both the stamp set and the ribbon are in the Retiring Products. If you like them as much as I do, consider going ahead and ordering them now!

HOST CODE
My April Host Code is QGPT9TJG Please use this code for orders under $150.00. I will have a small perk for those with orders over $50.00

SUPPLIES: