I hope you were able to get items on your wish list ordered yesterday. If not there is plenty of time. Some items are now not orderable but all are expected back in stop by the end of the month.
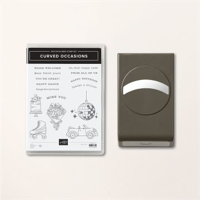
Today’s card was made for a friend’s birthday and uses a new Punch Bundle. It is the Curved Occasions Bundle. This has some fun retro type stamps as well as some versatile ones. I love it!
Stamps
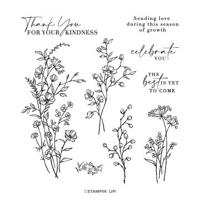
There are several new and fun products used on this card. But I am going to begin with the stamp set. As I said at the top of the post this is the Curved Occasions Bundle. The bundled part is a Punch! LOVE it!!! It is an arch that has a few saying in the set that are curved to fit. But we all know how flexible the photopolymer stamps can be. I see using this quite often with a variety of sentiments. The curved banner is fairly long.
The stamped flowers are part of the stamp set and was stamped using Memento Tuxedo Black ink, as was the sentiment. My friend loves purple, so the flowers are colored with shades of purple Stampin’ Blends.
Layers
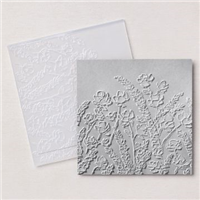
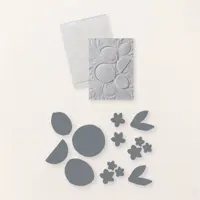
This card ended up with quite a few layers on it. For a pop of color there is a thin layer of Basic Black card stock. Next is an embossed layer using the Painted Posies Embossing Folder. I even touched a few of the flowers with the Fresh Freesia Stampin’ Blend for a different look.
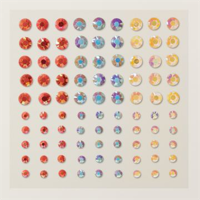
The next layers are two of the New Deckled Circles Dies. These are in the Mini and there are a lot of them!! And there are some really large ones so great for scrapbooking as well as card making!
Thank you for stopping in today!!!
Online exclusives are here to stay! Click on the photo and be taken directly to them in my online store. If you place an order, please use my Host Code listed just below.
HOST CODE
My September Host Code is 7BSV39GV. Please use this code for orders under $150.00. I will have a small gift for those with orders over $50.00 in addition to the Perk Rewards Program. You can read all of the information at the top of the page in the Menu Bar under SHOP / Perks.
Thank you for stopping by today. I hope you enjoyed today’s project and will come back. I do read and reply to all of the comments individually. They mean a lot to me. Please reach out if you have a question.
I hope you are having a relaxing Labor Day Holiday with friends and family. My post is late because I have been relaxing too much! And realizing that I never put out my Paper Share information. Some of my regular share customers reached out early and that messed with my mind! If you have interest message me today and I will get to you quickly. I apologize for falling down on the job!!
Today’s card is a dainty floral birthday with some added texture layers. It is also pretty quick and simple in putting together!
Stamps and Dies
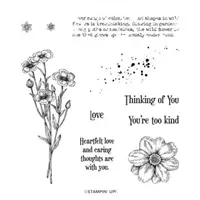
This fun set and Bundle is aptly named Dainty Delight. The florals are all of the dainty variety and are smaller in size. They are great for a simple card, or with a bit added as I have done today. The flower was stamped with Memento Tuxedo Black Ink and then colored using Stampin’ Blends in Parakeet Party, Bubble Bath, and a touch of Sweet Sorbet.
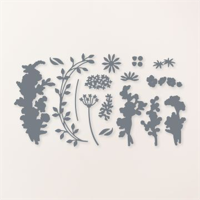
The die cut leaves are part of the Dainty Delight Dies. The stamps and dies are no longer bundled together. But both available individually. I love the detail and texture on the leaves and the texture it adds to the card. The second set of Dies used are the Deckled Rectangle Dies. I used the smallest die for the sentiment. It gives just enough of a fun edge to the white layer.
Layers
This card was built a little differently than I normally do. It began with the focal layer and sentiment layers before the card base. Because of the Natural Ribbon, I decided to go with Crumb Cake as the card base. The Bubble Bath pairs with the flower petals as well as the Sheer Ribbon. And the little Brushed Brass Butterfly is the finishing touch with it’s delicate bling!
Thank you for stopping by today!!
There are only two more days before the Mini Catalog goes Live!! And there will be some great DSP added tot he Online Exclusives. These are while supplies last! And you definitely want a look at them before they are gone. The flyer shows quite a few of the different papers. And the QR Code will be live on the 6th to take you directly to the Online Exclusives page.
Online exclusives are here to stay! Click on the photo and be taken directly to them in my online store. If you place an order, please use my Host Code listed just below.
HOST CODE
My September Host Code is 7BSV39GV. Please use this code for orders under $150.00. I will have a small gift for those with orders over $50.00 in addition to the Perk Rewards Program. You can read all of the information at the top of the page in the Menu Bar under SHOP / Perks.
Thank you for stopping by today. I hope you enjoyed today’s project and will come back. I do read and reply to all of the comments individually. They mean a lot to me. Please reach out if you have a question.
Today’s card stars some beautiful Designer Paper and a simple Fun Fold. I have paired some products that may not seem to go together. So I hope I am showing you new possibilities.
Fun Fold
This is a simple Z fold that I made for a masculine birthday card. The mix of products is not what you would think to pair at first glance. Here is an inside view.
Papers
The gorgeous DSP is from the One Horse Open Sleigh Designer Series Paper. It is an Online Exclusive, and is available now, that pairs with a Christmas set. When I saw this scene it made me think of a quiet walk in the woods. I have paired it with colors that were pulled from the paper itself.
The card base is Misty Moonlight that measures 5 1/2 X 8 1/2 and is scored at 2 1/8 and 4 1/4. This makes the Z fold. And the inside card is 7 X 4, folded in half. The layers are Copper Clay, which again comes from the DSP piece. I thought the falling leaves looked like that color and wanted to highlight the leaves.
Stamps and Inks
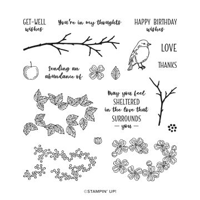
The stamp set is the Seasonal Branches. This branch has stamps of leaves, flowers, etc that can be paired with it. I chose it to match the falling leaves in the DSP. The leaves are colored with a brighter color than the Copper Clay. The Sweet Sorbet seemed to pop against the other colors without looking too red. And the branch was done in Smoky Slate to match the gray of the trees in the DSP.
Finishes
This card did not really need a lot as I tried to keep it simple. The beautiful DSP is the star of the show so just a touch of bling is all that was needed. I chose the Tinsel 4 Pack and in Lemon Lolly to highlight the glow in the DSP.
Thank you for stopping in today!
Only 2 Days left to redeem your Bonus Days Coupons!!!
August 1 – 31 is the redemption period for your Coupon Codes. Now is the time to order something you have been waiting on and treat yourself!
Online exclusives are here to stay! Click on the photo and be taken directly to them in my online store. If you place an order, please use my Host Code listed just below.
HOST CODE
My August Host Code is D6EB6CX7. Please use this code for orders under $150.00. I will have a small gift for those with orders over $50.00 in addition to the Perk Rewards Program. You can read all of the information at the top of the page in the Menu Bar under SHOP / Perks.
Thank you for stopping by today. I hope you enjoyed today’s project and will come back. I do read and reply to all of the comments individually. They mean a lot to me. Please reach out if you have a question.
I am finally back to sharing cards with you! The trip to Norway was fabulous, and since it was a cruise, relaxing as well. But that travel home day was a killer! The time difference plus long flight seemed worse than ever. I have had jet lag for several days. But all is well and I am back with a fun card today. You all know how much I love the Stampin’ Up! critters, well here is a fun one with Hey Chuck!
Stamps
There are two different sets used on this card. The first is the best as it is Hey Chuck. The expressions on the faces in this set are so fun. He is giving the side eye at that birthday cake. I can totally relate because I have a large number birthday coming up myself. LOL!!!
The second stamp is the speckled around the background. I love the added definition that this sort of background gives. This stamp is from the Quiet Meadow stamp set.
Colors and Dies
A chick always has red of some sort. So I went with the Real Red for the layer. The layer is cut using one of the Deckled Rectangle Dies. These are so great and add a bit of texture and different look that is simple to do. A definite win / win!
The coloring of Chuck is something I have not done in a long time. I used Watercolor Pencils. There are some amazing watercolor artists that I have seen cards from lately and thought I would give it a try. Adding the different colors and working up the look I wanted really did not take too long. Sharp pencils and a newer Blender Pen were the key for me. Now that I have done it, I know I want to try it again. I remember when this was all we had for color besides the Stampin’ Write Markers.
Thank you for stopping in today! I will be back to normal posting now (hopefully!!).
Time is running out for Redeeming your Bonus Days Coupons!!!
August 1 – 31 is the redemption period for your Coupon Codes. Now is the time to order something you have been waiting on and treat yourself!
Online exclusives are here to stay! Click on the photo and be taken directly to them in my online store. If you place an order, please use my Host Code listed just below.
HOST CODE
My August Host Code is D6EB6CX7. Please use this code for orders under $150.00. I will have a small gift for those with orders over $50.00 in addition to the Perk Rewards Program. You can read all of the information at the top of the page in the Menu Bar under SHOP / Perks.
Thank you for stopping by today. I hope you enjoyed today’s project and will come back. I do read and reply to all of the comments individually. They mean a lot to me. Please reach out if you have a question.
I wanted to share a refreshing card today. Oranges from the Sweet Citrus Bundle are a refreshing summer drink or snack, and especially a card. The Sweet Citrus Bundle is a great one that doesn’t get utilized enough.
Stamps and Dies Plus
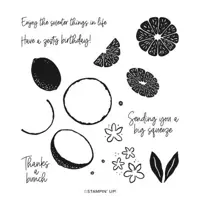
As mentioned above, the Sweet Citrus Bundle is a really nice one that can be used for a few different fruits depending on your colors. I went with an orange. But there is more! You may not be able to see the background very well, but there is an embossing folder which is a Hybrid Folder back there. Not only can you emboss the fruit, but can emboss and cut them out. I love this!! Stampin’ Up! has created a few of these and they work perfectly as intended.
The oranges and leaves are stamped and then die cut. They are arranged to somewhat fit the same image that is embossed on the layer. And the sentiment is from this stamp set as well. That is always a winner for me to be able to do a one stamp set card.
Colors
To keep in mind the oranges, I went with Pumpkin Pie as a highlight layer to emphasize the center of the oranges. The outside was stamped using Crushed Curry. And the leaves are Granny Apple Green. The card layers were kept simple to allow the Pumpkin Pie to really pop. I used Thick Basic White for the base and then the layers are Basic White as well. The sentiment is stamped with the Granny Apple Green to add more of that color. And the finishing touch is a couple of the Iridescent Pastel Gems. They tend to pick up the color they are around.
Layout
This layout is one that has a shorter front section. Looking at the photo, you should be able to see that the sentiment is actually on the inside of the card and the front stops just above it. This measurement is good for showing off a strip of DSP or ,as I did here, the sentiment in a different way. And it works just as well in landscape as in portrait position.
The measurements are the card base is 4 1/4 X 9 3/4 scored at 5 1/2. The Pumpkin Pie layers are 4 X 4 and 4 X 1. For the embossed layer I used Basic White cut to 3 7/8 X 3 7/8. And the sentiment is Basic White at 3 7/8 X 7/8. There is also the same Pumpkin Pie and embossed layer (except not embossed) on the inside. I like to add a layer to write on even on White and the color layer helps make it pop.
Start Redeeming your Bonus Days Coupons!!!
August 1 – 31 is the redemption period for your Coupon Codes. Now is the time to order something you have been waiting on and treat yourself!
Online exclusives are here to stay! Click on the photo and be taken directly to them in my online store. If you place an order, please use my Host Code listed just below.
HOST CODE
My August Host Code is D6EB6CX7. Please use this code for orders under $150.00. I will have a small gift for those with orders over $50.00 in addition to the Perk Rewards Program. You can read all of the information at the top of the page in the Menu Bar under SHOP / Perks.
Thank you for stopping by today. I hope you enjoyed today’s project and will come back. I do read and reply to all of the comments individually. They mean a lot to me. Please reach out if you have a question.
I very much enjoyed the Tucked Pinwheel card I made a few weeks ago. So I recreated it for a class. These folds are addictive in case you have not tried it yet. Today’s card stars a few different products but especially the Fresh As A Daisy DSP.
Here is the open view of the pinwheel.
Papers
The Fresh As A Daisy Designer Series Paper is really the star of this card in addition to the pinwheel. Seeing the two sides of the paper is so pretty. And I pulled the two main colors, Moody Mauve and Wild Wheat, to compliment the DSP. Then softened the final layers with the Bubble Bath. It is a great soft look with the Moody Mauve and one I would never have thought until I tried it.
Stamps
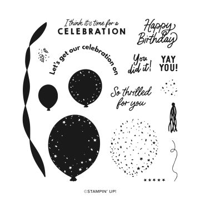
The sentiment and balloon are from the Beautiful Balloons stamp set. Putting an extra sentiment in the center of the pinwheel is a nice surprise. There is additionally a Happy Birthday are on the inside of the card. I made the card a traditional card and then added the pinwheel to the front. This way you see the surprise but still have plenty of room on the card inside for a personal message.
Fold
To create the pinwheel you need a 6X6 piece of DSP. Next score at 1 1/2″ on all four sides. Fold and burnish the score lines. Then cut off each of the corner squares. This leaves a square in the center with 4 flaps. Place your paper in the orientation you want your pattern. (Take a minute to look at both sides with a flap pulled inside to decide which you prefer before you have a lot of fold lines!) Beginning with the flap at the top, fold it in so it is laying on the center square then take the bottom left corner and fold it flush along the score line. Turn your paper and do all four sides. To finish, have each flap standing up. Lay the top one to the inside, then the right flap overlapping it, the bottom overlaps the right, and the left overlaps the bottom. Now at the last flap just tuck the not folded edge under the top flap like you would on a cardboard box.
Here is a view of the previous pinwheel card I made. Click HERE
Start Redeeming your Bonus Days Coupons!!!
August 1 – 31 is the redemption period for your Coupon Codes. Now is the time to order something you have been waiting on and treat yourself!
Online exclusives are here to stay! Click on the photo and be taken directly to them in my online store. If you place an order, please use my Host Code listed just below.
HOST CODE
My August Host Code is D6EB6CX7. Please use this code for orders under $150.00. I will have a small gift for those with orders over $50.00 in addition to the Perk Rewards Program. You can read all of the information at the top of the page in the Menu Bar under SHOP / Perks.
Thank you for stopping by today. I hope you enjoyed today’s project and will come back. I do read and reply to all of the comments individually. They mean a lot to me. Please reach out if you have a question.
The content in this blog is the sole responsibility of Jackie Beers as an Independent Stampin' Up! Demonstrator. The use of and content of classes, services or products offered is not endorsed by Stampin' Up!