A Happy Halloween is my choice for any item related to Halloween. No scary things are allowed. And good surprises are always welcome. Today’s card is a Fun Halloween Surprise with a fun fold and cute paper.
Stamps and Punch
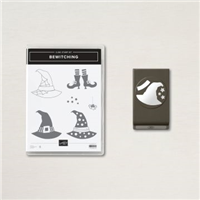
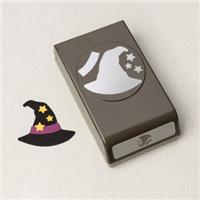
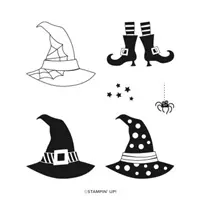
For a fun and pretty quick Halloween card I used the Bewitching Bundle of products. Best of all is that it is a Punch Bundle. You know how I love punches! This stamp set has a variety of Witch’s Hats and the punch will easily cut them out. Also there are additional stars and a hat band included on the punch.
The additional stamp from the set used on the front of the card is the little spider. Now I am definitely NOT a fan of real spiders. Just Yuk!!! But this one is acceptable. Plus he looks perfect hanging off of the hat. There is not a punch for little spider. But he is easy to fussy cut around.
Here is the inside View:
Those adorable Witch’s legs and boots are included in the Bewitching Stamp set also. Personally I love the leggings!! LOL!
Paper
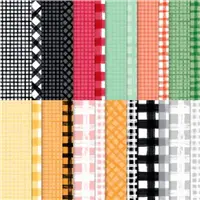
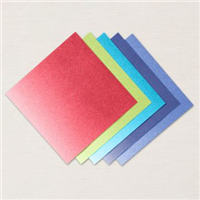
There are a variety of papers used on this fun card. On the front there is the cardbase of Pumpkin Pie cardstock along with a thin layer of Basic Black cardstock. The pretty orange check is from the Gingham Cottage Designer Series Paper. The different shades of orange are a nice touch. For the layer behind the hat ,and the inside thin DSP piece, I used the 2022-2024 In Color 6X6 Designer Series Paper pack. The dots on the DSP paired well with the dots on the hat.
The last piece of “paper” is the hat band. It is punched using the Witch Hat Punch from a piece of the In Color Glimmer Paper. These sheets are variegated from light to dark on each 6X6 piece. The one used is on the lighter end. But the little bit of sparkle is a great “bling” addition.
Surprise Fold
Hopefully you noticed the different open view on the card. There is not really a name I am aware of for this fold. So I called it a Surprise. It could be done vertically or horizontally, it would just be a paper width adjustment.
To create this fold begin with two pieces of Pumpkin Pie cardstock. Both pieces are cut to a size of 4 1/4 X 5 1/2. A White piece of cardstock is cut to 3 3/4 X 11 and scored at 5 & 10. Fold and burnish the folds with the small section, the 10″ score, on top. Lay down the bottom piece of Pumpkin Pie and adhere the White section to it as you would a layer. (The larger 3 3/4 X 5 section) Next, add adhesive only to the small 1 ” scored section. Lay the top piece of Pumpkin Pie and line it up with the bottom Pumpkin Pie sandwiching the white in between the two.
The added strip of DSP on the inside was simply for some additional color. However I believe you could place a gift card pocket there for special occasions. If you have any questions, please reach out to me and I will be happy to try to explain better.
Mini Catalog and Sale-A-Bration
Click on either catalog photo and you will be taken to my Online Store where you can download either or both catalogs.
HOST CODE
My August Host Code is H9KF4JUC. Please use this code for orders under $150.00. I will have a small gift for those with orders over $50.00 in addition to the Perk Rewards Program. You can read all of the information at the top of the page in the Menu Bar under SHOP / Perks.
Thank you for stopping by today. I hope you enjoyed today’s project and will come back. I do read and reply to all of the comments individually. They mean a lot to me. Please reach out if you have a question.
The project I have for today is a Halloween version of the Envelope Fold card, with an added pocket, that was made a couple of weeks ago. I hope you enjoy this version.
The Fold
Let me first say that this card could just as easily be made in the same method as my original Envelope Fold card. You can see that post HERE. In the previous version, I cut off the corners of the front flap to create the point. For this version, I left the corners, scored from the mark to the point, and folded them to the front. Using washi tape, or any tape, the folded pieces are secured together which creates the pocket. After making the pocket, the rest of the steps to creating the card are the same as the original version.
Here is a look into the pocket.
Stamps and Paper
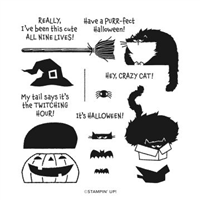
I am sure you recognize the Clever Cat stamp set since I use it fairly often. LOL!!! All of the Halloween stamps in the set are used to create this card. There are not matching dies, so I fussy cut all of the pieces. Not something I would do in the making of multiple cards, but I do not mind for a single card. Plus I love this one! The fat cat is perched on the edge of the pocket, with little kitties playing peekaboo around the sentiment. I allowed the pumpkin to slip partially into the pocket where the broom is sticking out from also.
The paper is the Cute Halloween Designer Series paper. I totally adore this multi-colored dots paper! It has such great colors combined in it. The Highland Heather was my choice, but mixed with Pumpkin Pie. These are my favorite Halloween colors.
Here is a view of the inside of the card.
I could not resist the fat cat in the box. And this sentiment is just a hoot!!!
Directions
Click on this photo for a PDF instructions for the card. This instruction sheet was made rather quickly, so please ignore errors. And if you have questions, please do not hesitate to contact me. I want you to love this Fun Fold as much as I do!!
HOST CODE
My October Host Code is HSUBS7GX. Please use this code for orders under $150.00. I will have a small gift for those with orders over $50.00 in addition to the Perk Rewards Program. You can read all of the information at the top of the page in the Menu Bar under SHOP / Perks.
Thank you for stopping by today. I hope you enjoyed today’s project and will come back. I do read and reply to all of the comments individually. They mean a lot to me. Please reach out if you have a question.
After a break from Halloween cards to participate in the Pals Blog Hop yesterday, I have a fun Cat Halloween to share. If you missed the blog hop, you can start with my card by clicking HERE and then following the lineup.
Stamps
I know you have seen me use this Clever Cats stamp set a few times, or more! The cats are just adorable and I love cats. And especially Black Cats. They are always the sweetest. This guy fits perfectly to sit on just about anything. So today he is sitting on the pumpkin. All of these images are included in the stamp set. The sentiment is included as well, along with some other precious ones. This is one stamp set that will reside with me for quite a while.
Colors
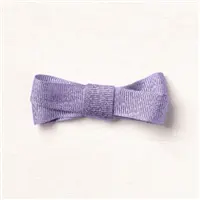
To go along with the Halloween theme, as well as the Black Cat, I went with the traditional Orange and Black as my color pallet. The cat and pumpkin were stamped using Memento Tuxedo Black Ink. I colored the pumpkin with Pumpkin Pie Stampin’ Blends. For the sentiment I wanted a bit more orange, so stamped it using Pumpkin Pie Ink. The final touch is the Black & White Gingham Ribbon. Just to be different I did a double loop bow and am happy with how it turned out.
HOST CODE
My October Host Code is HSUBS7GX. Please use this code for orders under $150.00. I will have a small gift for those with orders over $50.00 in addition to the Perk Rewards Program. You can read all of the information at the top of the page in the Menu Bar under SHOP / Perks.
Thank you for stopping by today. I hope you enjoyed today’s project and will come back. I do read and reply to all of the comments individually. They mean a lot to me. Please reach out if you have a question.
It is the best time of year. The beginning of Fall and the upcoming Fun Holidays makes me a happy person. I have been playing with a variety of holiday cards the last week. Today I have a Halloween one to share.
Stamp Set
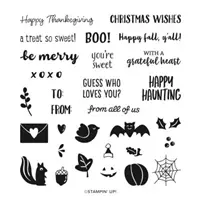
The stamp set I used, for the little bit of stamping on this card, is the Banner Year stamp set. It is a carryover from a Mini Catalog. And I am so happy it is still with us. The images and sentiments cover most of the year for holidays. I have chosen to simply go with the Boo sentiment. It is stamped using Memento Tuxedo Black Ink and then Smoky Slate for the second part. A little bit of paper trimming and that is all the sentiment needed.
Paper
This gorgeous and Fun paper is from the Cute Halloween 6X6 paper pack. I really do love the colors used here. They are soft and fun and definitely Not Scary! No scary stuff for me. I will also add that I am not a fan of bats. We had one that liked to hang out on one of the eave vents on our house. Yikes!!! These fun smiling bats along with the sweet colors makes me smile!
Embellishments
To go along with the great Designer Series Paper, I added the Black Glittered Organdy Ribbon. This ribbon is so sparkly and a perfect compliment to the paper. It is a bit stiff, but still makes a great bow. The other bit of shiny bling I added is to the sentiment. It needed a touch of something to keep it from being boring. A Rhinestone is always a pick me up, and it did it’s job on the sentiment. A really simple card that with the paper, ribbon, and bling becomes a really cute card. I hope you like it!
HOST CODE
My October Host Code is HSUBS7GX. Please use this code for orders under $150.00. I will have a small gift for those with orders over $50.00 in addition to the Perk Rewards Program. You can read all of the information at the top of the page in the Menu Bar under SHOP / Perks.
Thank you for stopping by today. I hope you enjoyed today’s project and will come back. I do read and reply to all of the comments individually. They mean a lot to me. Please reach out if you have a question.
I am one of those folks that as I have gotten older I do not like scary. That said, I have a Cute, and Not Scary, Halloween card to share with you today.
Stamps, Punch, Dies
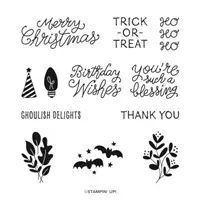
I started this card with the Little Delights stamp set on my desk. The matching image to the Trick or Treat is the bat stamp. I could not envision that on the card with the paper I had pulled. Hippo & Friends Dies were chosen for the sentiment ,as this one fit the sentiment better than any of the punches.
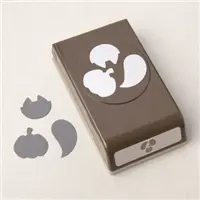
After deciding against the bats, I looked to the Cutest Halloween stamp set. When I saw the ghosts, I knew that was perfect. But instead of stamping the image, I went back to the paper and the Halloween Punch! The Halloween Punch is great with the three different images. It cuts the stamped images as well as the images from the DSP. A Win / Win for my images!
Paper and Embellishments
The paper the ghosts came from is included in the Cute Halloween Designer Series Paper. I also chose the two other DSP pieces from that pack. As it turned out, they were not quite large enough. So I added a strip of Basic Black cardstock to the center of a 5 X 3 3/4 piece of Basic White cardstock. Then layered the two DSP pieces on each side totally covering the White layer.
The shiny and beautiful ribbon down the center of the black is the Highland Heather Grosgrain Ribbon. A bow was not necessary as the sentiment layer fills that purpose. The ghosts are layered around the card while they float to the next Trick or Treat location. The finishing touch is a couple of the Black Dots to give the sentiment a bit of bling.
HOST CODE
My October Host Code is HSUBS7GX. Please use this code for orders under $150.00. I will have a small gift for those with orders over $50.00 in addition to the Perk Rewards Program. You can read all of the information at the top of the page in the Menu Bar under SHOP / Perks.
Thank you for stopping by today. I hope you enjoyed today’s project and will come back. I do read and reply to all of the comments individually. They mean a lot to me. Please reach out if you have a question.
Welcome to InKing Royalty’s September Blog Hop! During this year’s blog hops, we are having fun with our stamping favorites – our favorite themes for seasonal cards and projects. This month’s projects feature candy and treats, so prepare your sweet tooth for some wonderful inspiration. We are excited to share our creations with you today! After you read my post, I hope you’ll hop over to the next person on the list at the base of this post.
My card is not exactly treats, but a pocket card that has sweet images! Here is my card.
And here is the pull out from the pocket.
Paper
The star of this show, in my opinion, is the DSP. This is my favorite sheet from the Cute Halloween Designer Series Paper. I love black cats so that is probably why it is a favorite. I made the pocket out of the DSP and then cut the “V” to look like a shirt. All of the directions are lower down on the post.
Stamps
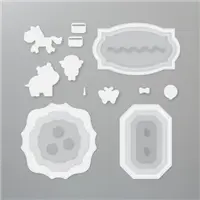
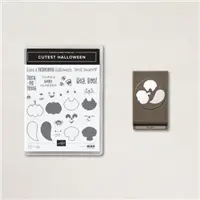
The stamp set I used is the Cutest Halloween Bundle. It is a Punch Bundle so you know I had to have it. I love my punches. The “Pumpkin necklace” is stamped and punched. The “Smile” is part of another saying. I only colored in the Smile and stamped it in the center of the pumpkin. That smile goes along with the cat and pumpkins that are smiling on the paper.
The pull out card is also made using stamps from the stamp set.
Extra Touches
I adore the Black and White Gingham Ribbon. It is so easy to work with. For the necklace, I cut two strips and adhered each end with a glue dot. Then added the pumpkin with Stampin’ Dimensionals. A little Black Matte Dot on the pumpkin was the finishing touch for it.
The hole at the top of the pull out card was made using the Detailed Trio Punch. That punch is a definite must have in my opinion. Making a little ribbon pull with the Black and White Gingham Ribbon was the final touch to the card.
The card is still a Full card. The pocket is attached to a regular size top fold card. There is another stamped white layer on the inside of it as well.
Measurements and Directions
Basic Black card base is 4 1/4 X 11, scored and folded at 5 1/2
A White layer cut 4 X 5 1/4 is placed on the inside of the card
The DSP is cut 5 X 6 ( 5 is the width and 6 is height)
Score the DSP at 1/2 on each of the 5″ sides and 3/4 across the bottom
Put a mark at the center of the 5″ top and cut down 1 1/2″.
Fold and burnish the score lines and fold underneath. Trim the corners at the bottom for a less bulky fold
Adhere the pocket to the front of the card.
Fold the sides of the V back and adhere with a glue dot under each point.
The pull out pocket card is 3 3/4 X 5 with the hole at the top from the Detailed Trio Punch
Thank you for stopping by today. I hope you’ll hop along to the next stop on the blog hop, Lynn Kolcun at Avery’s Owlery. There’s lots of inspiration to be found in this group – and you don’t want to miss it!
Thank you for hopping along with us. If you get stuck during the Blog Hop, please use this line-up as a guide:
My September Host Code is NWZNBFH2. Please use this code for orders under $150.00. I will have a small gift for those with orders over $50.00 in addition to the Perk Rewards Program. You can read all of the information at the top of the page in the Menu Bar under SHOP / Perks.
Thank you for stopping by today. I hope you enjoyed today’s project and will come back. I do read and reply to all of the comments individually. They mean a lot to me. Please reach out if you have a question.
The content in this blog is the sole responsibility of Jackie Beers as an Independent Stampin' Up! Demonstrator. The use of and content of classes, services or products offered is not endorsed by Stampin' Up!