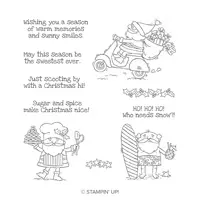
Are you in Love with the Holiday Catalog already? I want it all! I have made a fair dent in that list already. I like “Cute” and the stamp set So Santa definitely fits that bill. The Santas are so cute and there is one for almost any one on your Christmas card list. Even a beachy Santa! Here is the first of my Santa cards.
So Santa, 147821
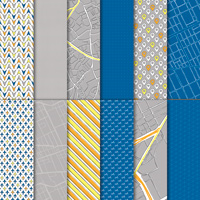
My Santa is a little wacky! But I wanted him to be that way. Did you notice the DSP? It is from the Best Route Designer Series Paper and is a close up of a street grid. How appropriate for a Santa that is delivering presents on his scooter!! I would never have thought of that as a background for a Christmas card but I discovered it as I was searching for DSP with blue in it. I think it is just perfect.
I broke out my Watercolor Pencils for this card. I have been coloring mostly with Stampin’ Blends lately so decided to use a different technique on this one. My preference is watercolor pencils and the blender pen. I feel like I have more control than with the aqua painter. We each have our preferences so you use whichever is most comfortable to you!
Thank you for stopping by today! I very much appreciate it. I have listed all of the supplies I used at the bottom of the page. I hope you have a great rest of your day!
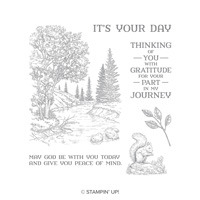
Today is the unveiling of the 2018 Holiday Catalog!! WooHoo!! And instead of the using a set that you have probably seen numerous cards made from, I went with a more non-holiday set. The card I have made today is very simple and very flexible. It can be made in any color and most any sentiment added to it. In fact, you could make quite a few of these very quickly. I know it is pretty plain but I believe it is also super cute.
Flourish Filigree, 147870
This stamp set is not quite as noticeable in the Holiday Catalog as all the beautiful Christmas sets. Please give it a second look. It also coordinates with the Pretty Label Punch with the sentiments in the set. I chose to leave it blank. This way I can add the appropriate sentiment on the inside of the card as needed.
I used the Stamparatus to make this card to insure that I got complete coverage for a somewhat large stamp. Also I made several cards at the same time. The Stamparatus is perfect for that as well.
I wanted to have a little bit of Wow! So I used the Trio Punch to make the little see-through flower in each corner of the main layer. I love anytime you can see the card stock beneath.
Thank you for stopping by today! I very much appreciate it.
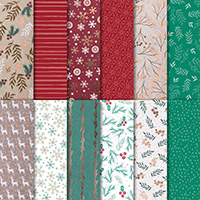
I have showcased the Joyous Noel Suite today! And it is an awesome Suite of products. The colors are traditional with a bit of a twist. Merry Merlot and Tranquil Tide are the main two I focused on. They are more of a jewel tone than a bright Red and Green of traditional Christmas Colors. After seeing these on today’s card though, I believe I will be using them for non-holiday cards as well.
Peaceful Noel, 147694
To go with the Merry Merlot and TranquilTide, I added Sahara Sand as a soft blending color. The DSP includes Sahara Sand and Gray Granite as the soft colors. Either would be perfect and are equally gorgeous.
The Joyous Noel Specialty Designer Series Paper has copper foil details on one side and more traditional paper on the other. For this card I went with the not coppered side. I love the softness of the colors on this particular sheet.
When I noticed the different shades of green in the evergreen sprigs of the paper, I wanted to mimic that as a detail on the focal layer. I inked the stamp with Tranquil Tide, stamped in the corner, then stamped again on each side without re-inking the stamp. I repeated this on opposite corners. I stamped the star design on the opposing corners. I thought it was very cool the dramatically different shades of green from doing that technique. I hope you will give it a try. A note though….it requires a darker color to be able to stamp three times without reinking.
Thank you for stopping by today! I very much appreciate you visiting my blog. And if you do not have a current demonstrator, I would love to assist you. Also, please let me know if you need a new catalog. I have listed the measurements and the supplies I used on this card for you. Please stop back tomorrow for a new card.
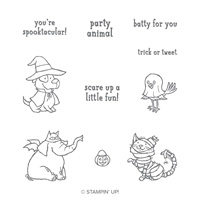
I have broken out the Halloween set today. I am not a “scary” Halloween type, so I chose the Trick or Tweet stamp set from the Holiday Catalog. It contains CUTE characters for Halloween. The catalog goes live on September 5th! You do not have too much longer to wait. Hopefully you have already seen the catalog and have a long Wish List made out. Here is my cute and fairly bright card.
Trick or Tweet, 147722
Do you recognize the Designer Series Paper I have used? If you guessed “Best Route”, then you are correct. I have used this paper for everything but the travel it is inspired by. This is one of the reverse sides and I believe it fits perfectly with the Fall/Halloween time of year.
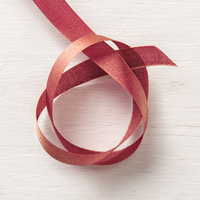
The sparkly black ribbon is one of my favorites in the new Halloween products. There are sparkles in the ribbon. They even show in the photograph a little bit. It also makes a beautiful bow, but I did not think my little mummy cat needed a bow. I just looped it back and forth behind the layer. It might be a tad difficult to mail due to the thickness. It would not add weight though.
The cat is my favorite animal from the set. I gave his mummy wrappings a little sparkle as well. I used the Clear Wink of Stella on all of the wrapping. And what little mummy cat could go trick or treating without his pumpkin for the candy! This is included in the set. I stamped it on scrap Whisper White and fussy cut it out, then used a mini dimensional to popped it up a bit. No real extra time and it does add a little pop to the card.
Thank you for visiting today! I very much appreciate it. I have listed all of the supplies used at the bottom of the post.
I love the cute matchbook type note holders and treat holders. So I had a thought the other day for a gift card holder made along those lines. I remembered a card from a few years ago that the bottom was folded up and stapled to look like a matchbook. After some playing around, this is what I came up with.
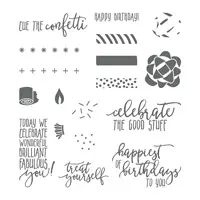
Picture Perfect Birthday, 145519
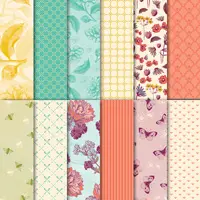
The DSP is one of those sleeper pieces that is a reverse side from the Tea Room Specialty Designer Series Paper. I much prefer the brighter colors and this is right up my crazy alley! The perfect stamp for a gift card holder is this “Treat Yourself” from Picture Perfect Birthday. And anyone would love the little blow pipes. A note on the blow pipes: I “stamped off” first with Coastal Cabana and Daffodil Delight for the background of each pipe.
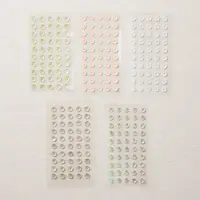
My answer to the matchbook bottom for the card was instead of stapling the folded up bottom section, I used Tear & Tape to secure it. I then decorated with DSP and added a couple of sequins for some bling. And here is the inside for the gift card.
The bottom of the Whisper White inside piece is folded up to make the pocket for the gift card. There is room beneath the gift card itself for you to write your well wishes and sign the card. This did not totally come out as I had envisioned, but that is not really uncommon either! 🙂
I have all of the measurements listed below, along with some directions or suggestions. I hope you will give this one a try. It really is quite simple.
Thank you once again for stopping by today! I appreciate it and hope you will return.
MEASUREMENTS:
The card base is 4 1/4 X 11, scored at 3/4 and 6 1/8
The Daffodil Delight is 4 X 4 3/8 and 4 X 5/8
The DSP is 3 7/8 X 4 1/4 and 3 7/8 X 1/2
The inside White piece is 4 X 5 1/4, scored at 1 on the long side
On the base card for the folded up area, place Tear & Tape along the fold, leaving the top part loose. This allows the top flap to fold under it.
On the inside gift card holder, fold on the score line and place Tear & Tape against the outside edge on each side. This leaves just enough room for the gift card. NOTE: Place a gift card or business card inside the flap as you are securing the sides. This ensures there is sufficient room and the gift card will slide in and out fairly easily without stressing the tape.
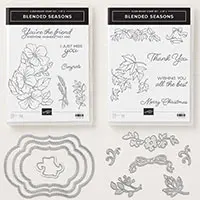
This is the last card I have for you from the Blended Seasons Bundle. This super set and absolutely awesome dies will be waving goodbye tomorrow at midnight. It is very sad, but I may not let my set go because I do really love these dies.
Blended Seasons Bundle, 149894
This card is actually very simple. I die cut the two layers using the Blended dies and stamped the Merry Christmas on the white panel. The bell is part of the set. I stamped and die cut it, then colored it with the Stampin’ Blends.
The DSP is gorgeous and I hated to cover it up. Because of the boldness of the paper, I think it works well with the more simple layer of sentiment. As I layed out the pieces before putting it all together, it reminded me of a gift wrapped package. That is where the little strips of Old Olive came from. Another reason to never throw away your little cut off pieces!
Thank you for visiting again today! I greatly appreciate you checking my blog and I hope you will leave me comments when you like something I have made. The complete supply list is at the bottom of the post.
The content in this blog is the sole responsibility of Jackie Beers as an Independent Stampin' Up! Demonstrator. The use of and content of classes, services or products offered is not endorsed by Stampin' Up!