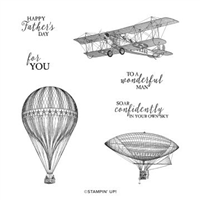
I have another new stamp set to show today. It is from the Mini Catalog and one that I have had, but have not inked up until now. I do love it! The stamped images are very detailed and stamp beautifully. It is the Soar Confidently stamp set. I needed a masculine card and gave this one a try.
I kept this very simple in terms of how much extra I added on. It is for a young man and I didn’t think he would care for much bling! I did use the Painted texture Embossing Folder again. I really am excited every time I see all of the texture it leaves. It may not be the perfect “sky” but I think it works well for it.
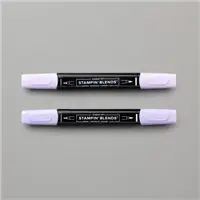
I stamped the hot air balloon and colored with patriotic colors in Light Real Red and Dark Daffodil Delight Stampin’ Blends. Since the background sky is blue, I thought those colors would work well. I stamped the balloon in Night of Navy Ink. A Tip: let the Night of Navy dry a minute or two before you begin coloring or it may bleed over just a bit. The balloon is raised using Stampin’ Dimensionals to add to the 3D effect of it floating.
I fussy cut the balloon and it was a really easy one to do. For the sentiment, I used one from the stamp set. I stamped it in Real Red on White cardstock and used the Banner Pick A Punch to get the banner tip on one end.
Thank you for stopping by today. Please come back tomorrow for another new project.
HOST CODE
My March Host Code is: B6JC9CHE Please use this code for orders under $150.00. I will have a small perk for those with orders over $50.00
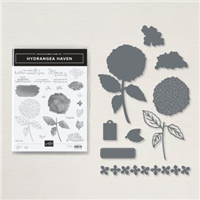
I have previously shared products from the Hydrangea Hill Suite. Today I have again used quite a bit from the suite. I love everything in that group and want to use it regularly!
From the photo it is a bit difficult to see the card base. I played with different colors of cardstock to see what I prefered to pair with this gorgeous DSP this time around. The Hydrangea Hill Designer Series Paper has a variety of gorgeous colors. I finally decided on Purple Posy as the card base and Seaside Spray for the layer. Both are very soft colors that I feel compliment those in the paper.
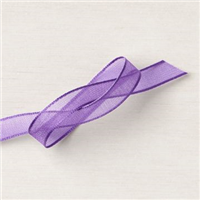
I chose to use two different pieces of the DSP. The stripe piece is 2″ and the floral is 3 1/8 in height. I used the Gorgeous Grape Sheer Ribbon to tie the two pieces together. I made a simple wrap of the ribbon , which is secured on the back of the layers. Then I cut a separate 4″ strip that i slid beneath the ribbon on the front and just tied a knot. These are my favorite kind of bows!!
I also added a tag from the die set, Hydrangea Dies, although it is part of the Hydrangea Haven Bundle. I die cut the tag and then placed a glue dot on the larger section. That made it very easy to slide the small loop beneath the ribbon and position it properly before allowing the opposite end to touch and adhere.
The flower is the star of the show and I wanted it to PoP!! I stamped it with Memento Tuxedo Black Ink and then colored with the Stampin’ Blends. I mixed in a few different colors for the little blossoms after coloring the entire flower lightly with the Light Purple Posy Stampin’ Blend. The leaves are colored with Old Olive Stampin’ Blends. The flower is die cut and then has quite a few Stampin’ Dimensionals under it to raise it to show off its color and give it some depth from the DSP. The final touch was to add a couple of Pearls to the flower head. I opted for the basic white pearl instead of the Pastel Pearls so they would stand out a bit more. The pastel ones would be lovely as well.
Here are the measurements I used.
Base card of Purple Posy cardstock cut 4 1/4 X 11
Layer of Seaside Spray cut 4 X 5 1/4
Flower layer of DSP cut 3 7/8 X 3 1/8
Stripe layer of DSP cut 3 7/8 X 2
Remember that Sale-A-Bration ends on Sunday night. If you have been waiting , the time is almost up. If there is anything I can assist you with, please do not hesitate to reach out to me. Also, Stampin’ Up! has released one little bit of information regarding the Strawberry Punch. It has been backordered and they are two shipments on the way. However, delays happen. So they have allowed us to say that the Strawberry Bundle will be carrying over to the next Annual Catalog! WooHoo!!! I love this bundle, and obviously a lot of you do as well!!. I am thrilled that it will carry over so I can continue to enjoy using it.
Thank you for stopping by today. I hope you will return on Monday for another new project.
HOST CODE
My February Host Code is: MRYR7XY2 Please use this code for orders under $150.00. I will have a small perk for those with orders over $50.00
I have mixed the Forever Greenery Designer Series Paper with the stamp set Free As A Bird for today’s card. I am not sure why I never thought to put these two together before. They seem made for each other.
The DSP speaks for itself and is as gorgeous as ever. For the other card colors, I waited to color the birds before choosing them. I sort of made my own bird with the coloring. We have a lot of little small birds, Cardinals, and Robins at our bird feeders. So I started as a Robin and then took some creative license 🙂
The birds are stamped and colored Flirty Flamingo and Real Red. The branch is Soft Suede and Crumb Cake. The flowers are Light Flirty Flamingo with some Mossy Meadow leaves. Once colored, I cut the birds out using the Stitched Nested Labels Dies. I love the stitching around the edges! Because the DSP is so pretty, and also very Busy, I opted not to put a second layer behind the birds.
Thank you for checking in today. I really appreciate your looking at my creations and I love your comments.
Please remember this is the last week of Sale-A-Bration! A $50.00 product order will get you the addition of a FREE SAB item, a Blue Star Reward (you can read about that under Shop on the menu bar, plus an additional Free little gift from me.
HOST CODE
My February Host Code is: MRYR7XY2 Please use this code for orders under $150.00. I will have a small perk for those with orders over $50.00
Today’s card is Bright, Cheery, and a Fun Fold. I think it is a winner and gives me a Smile. It is Black and Magenta Madness. I was thinking Black with a touch of Red, but wanted something that says Happy. You cannot get much brighter than Magenta Madness.
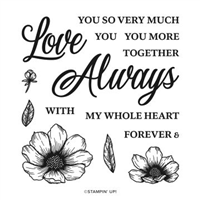
The Magenta Madness along with the True Love Designer Series Paper is a winner in my book. The black and white of the DSP needs a bright color, but just a touch. The flowers are from the Forever & Always stamp set. There are matching dies in the die set, but I wanted a more subtle look. Although a single raised flower would be a step up!
The best part of this card, to me, is the Fun Fold. Better yet, it is a simple Fun Fold. I started with a piece of Thick Basic White cardstock that is cut 4 1/4 X 11. I scored it at 5 1/2, the normal fold, and then cut off 3″ from one end. The cut off piece is 3 X 4 1/4 and becomes the front stamped area with the flowers and sentiment. Here is the ope view.
There is quite a bit of flexibility with this. The card could be turned in two other directions ( upside down so fold is at the top, or sideways with the fold on the left). It could also be used as a gift card holder if instead of cutting off the 3″ piece you scored there and only cut off 1 1/2″ then fold that under. I have made those previously.
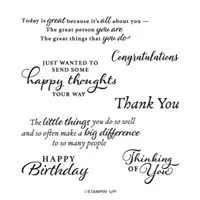
The finishing touches are the sentiment and the In Color Dots. The sentiment is from the Happy Thoughts stamp set. The dots are placed randomly to keep the Magenta look going. The centers of the flowers are also colored using the Dark Magenta Madness Stampin’ Blend.
Measurements:
Base card is 4 1/4 X 11, scored at 5 1/2, then cut off 3″.
The base Magenta Madness is 4 X 5 1/4
The striped DSP is 3 7/8 X 5 1/8
The Magenta Madness folded section is 4 X 2 1/4
The fold DSP is 3 7/8 X 2 1/8
The Magenta Madness sentiment layer is 4 3/8 X 3 1/8
The sentiment layer is the cut off base card and is 4 1/4 X 3
The inside writing layer is 2 1/2 X 4
I hope you will give this Fun Fold a try. It is a great base card and I would love to see your take on it. You will be surprised at the few products I used to make this one. The supply list is at the bottom of the post. Please come back tomorrow for another new card.
HOST CODE
My February Host Code is: MRYR7XY2 Please use this code for orders under $150.00. I will have a small perk for those with orders over $50.00
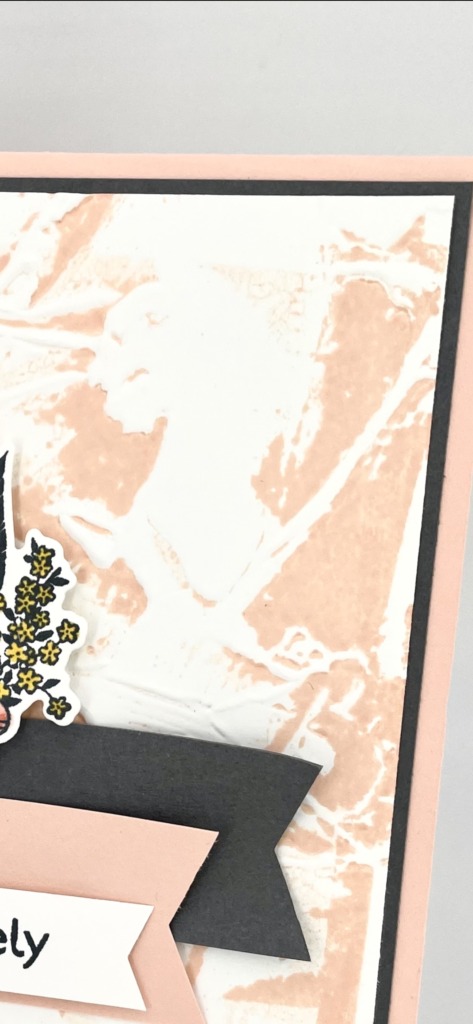
Today’s card has new products and a new technique. The technique is not new, just I have not used it in years. To be truthful, I have always been a little afraid to try it. I worry about messing up my stuff. And that sounds silly even saying it!!
First, let me say that I made this card for the Global Design Project Challenge. It is a CASE the designer challenge. Here is the challenge card.
My new technique is the adding of ink to the inside of the embossing folder. It has been around for a number of years. But I have never tried it. I always worried about messing up my folder. But today I was brave and gave it a try. Silly Me!!! it was a piece of cake to clean up. So please do not be like me, be brave and just go for it!!
Here is a close up of the texture and how the color only is on the “high” points.
I should have said earlier that my color inspiration came from the Peony Garden Designer Series Paper. Then is decided I wanted more texture behind the focal point. So off I went to look at embossing folders. I have not used the Painted Texture Folder previously. I cannot answer as to why not because I purchased it immediately. Duh!!
Anyway, all of that led me to the colors and the background texture. I stamped my Petal Pink Ink on the inside top layer of the embossing folder and then ran it through the Cut & Emboss Machine. I was so excited with the results. I actually did two, as I tend to make two cards when I design one. After the second one, I took the folder to the sink and just ran water over the embossing folder. The ink ran right off and it was clean as could be. I cannot attest to any other brand of ink, but the Stampin’ Up! Ink ran right off.
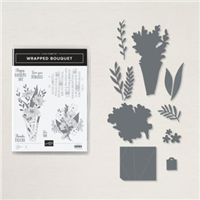
My post is a bit disconbobulated today. I never mentioned the stamp set. I used the Wrapped Bouquet Bundle as the focal point. Several years ago there was a single stamp that looked similar to this one and I totally loved it. In this set, you can stamp the flowers and newsprint as one stamp and die cut or do it as two separate stamps and two separate dies. I used the two separate ones. I like the added dimension the folded newspaper gives.
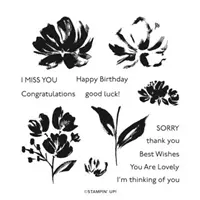
For the banners I took scraps of Basic Gray and Petal Pink cut to different lengths. I then punched one end of them using the Banner Pick A Punch. I did the same with the White for the sentiment. The sentiment is from the Art Gallery stamp set. I finished everything with a couple of Champagne Rhinestone Jewels. They matched my color scheme perfectly.
Thank you for stopping in today. Please come back tomorrow for another new project.
HOST CODE
My February Host Code is: MRYR7XY2 Please use this code for orders under $150.00. I will have a small perk for those with orders over $50.00
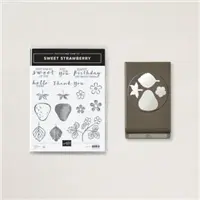
On Friday I shared one of the Treat Boxes I had decorated with the Sweet Strawberry Bundle. Today I have the matching card to show. I intentionally made it quite similar to the layer on the top of the treat box.
Even though the layout of the focal layer is quite similar to the box, it is stepped up somewhat. I added a layer of Granny Apple Green cardstock. I do not know whether this would be considered embossed or die cut? I used the Stitched With Whimsey Dies to add the stitching around the center layer. It does not cut out the piece, it only adds the stitching. I used the second largest die for this project.
The background DSP that is sticking out from behind the center layer is from the Berry Delightful Designer Series Paper from the Sale-A-Bration Bundle Berry Blessings. As I said on Friday’s post, I really LOVE this pack of paper. It is one of the best ever.
For the stamped images, I started with the background zigzag stamp from the Hearts & Kisses stamp set. I stamped it using So Saffron Ink for a very light color. The leaves and flowers are stamped with Granny Apple Green Ink, and stamped off first. I wanted this a little lighter as well. I did not color these so the So Saffron would show through.
The strawberries and caps are stamped and punched using the Strawberry Builder Punch, which is part of the Sweet Strawberry Bundle. I stamped the berries with a black outline because I like the look of the black seeds. I have stamped them before using Cherry Cobbler as the outline and Real Red as the center. The bottom two berries are glued down and the top one is raised using a Stampin’ Dimensional. On the treat box, I made a 3D strawberry. I did not think that would work very well to go in an envelope or mail.
For the final touch, I stamped the greeting using Memento Tuxedo Black Ink. I love my Bling!! So I added three of the Champagne Rhinestone Jewels to give it some shine.
Thank you for stopping by today. I hope you have enjoyed these last two posts and seeing how well a card layout can work for a treat box as well. I have all of the measurements and supplies below.
Measurements:
Card base of Real Red is 5 1/2 X 8 1/2 scored at 4 1/4 and folded
Granny Apple Green layer is 5 1/4 X 4
DSP layer is 2 3/4 X 4
White layer is 2 1/2 X 3 3/4
HOST CODE
My February Host Code is: MRYR7XY2 Please use this code for orders under $150.00. I will have a small perk for those with orders over $50.00
The content in this blog is the sole responsibility of Jackie Beers as an Independent Stampin' Up! Demonstrator. The use of and content of classes, services or products offered is not endorsed by Stampin' Up!