I really like Bundles, and Stampin’ Up! outdoes theirselves constantly with some of the best. My favorite bundle type is the Punch Bundles. Punches are just so quick and easy to use. I like quick cards for the most part and punches aid me in achieving the quick part. For today’s card, I joined Embossing, (is this sounding familiar from the last couple of days?) with a punch bundle. I hope you like this one.
Stamps
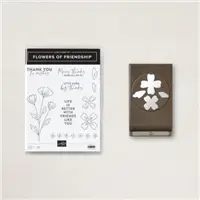
My original idea for this card was actually more simple than the end result. From the beginning however, the focus was the flower from the Flowers of Friendship Bundle. A fellow demonstrator shared the idea of using the stamped and punched image being cut into layered petals for the largest flower. I love the idea and that was my first plans.
I stamped the image onto Basic White using Basic Gray Ink. The Basic Gray is not quite as bold as the Memento Tuxedo Black. The flowers and leaves were colored using Just Jade and Fresh Freesia Stampin’ Blends. For the larger flower, the image is stamped onto Fresh Freesia cardstock using Fresh Freesia Ink. It is punched using the Flowers and Leaves Punch in the bundle, cut into petals and layered over the flower.
Layout
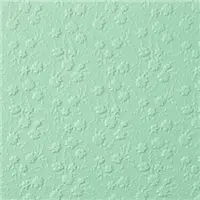
Once I finished the flower layer, the plan was to simply layer it over a piece of Fresh Freesia cardstock. That just looked too plain. I flipped through the embossing folders and found the Ornate Floral 3D Embossing Folder. You can’t have too many flowers! After embossing the cardstock, it is layered on a piece of Thick Basic White cardstock, and the floral layer adhered on top.
Finishing
For the finishing touches, I added the fun sentiment from Happiest of Birthdays. When I placed it on the card the first time, I thought it looked like a flower pot with the flowers sticking out. To tie in something to match the green of the leaves, I added a piece of the Evening Evergreen Open Weave Ribbon. Just a small strip of ribbon really adds a punch. It is adhered and then the sentiment added using Stampin’ Dimensionals. The last thing added was one of the Pastel Pearls at the base of the main flower.
The card is actually still a quick card to make even if not quite as simple as I originally planned.
The picture below shows the Designer Series Papers that are included in the Sale. There are 9 to choose from!!
HOST CODE
My July Host Code is 2GKGF4Q7. Please use this code for orders under $150.00. I will have a small gift for those with orders over $50.00 in addition to the Perk Rewards Program. You can read all of the information at the top of the page in the Menu Bar under SHOP / Perks.
Thank you for stopping by today. I hope you enjoyed today’s project and will come back. I do read and reply to all of the comments individually. They mean a lot to me. Please reach out if you have a question.
You all know how much I love the beautiful Stampin’ Up! Designer Series Paper. Today I have gone a bit overboard in the use of it. LOL!! I even added in an embossed layer of the Gold Foil Sheets. The outcome is well worth all the shine and DSP.
Gold
I have added a variety of “Gold” to today’s card. As I commented in yesterday’s post, I have been neglecting the Embossing Folders. So the star of this show is the Gold Foil Sheet embossed using the Painted Texture 3D Embossing Folder. Oh My, does it show up wonderfully with the gold! I really hated to cover up parts of it.
To carry on the Gold theme, I went with two sheets from the Expressions In Ink Designer Series Paper. This paper is all a work of art! I like using smaller pieces of it in that it makes me think it will last longer. The final gold layer is another small piece of the Gold Foil sheet cut using the Layering Circles Dies.
Shaded Spruce
To break up all of the gold, I pulled Shaded Spruce from the marble looking piece of DSP. It could have been the softer shade of green, but I wanted something that was strong enough to highlight the gold. I still used it somewhat sparingly. By using it as the background layers, it is like the man’s black tuxedo to better show the lady’s sparkling evening gown. (I read that somewhere, I do not wear evening gowns!)
The last touch of greens are on the sentiment layer. Since I went with the Gold background for the sentiment, I stamped the Best Wishes using the Shaded Spruce Ink. Although I have not used Soft Succulent in the card, the softer color for the bow is the correct choice. Plus the texture of that Open Weave Ribbon is a great contrast to the gold.
Measurements
card base of Shaded Spruce is cut 4 1/4 X 11, folded in half at 5 1/2
layer of Basic White is cut 4 X 5 1/4
Gold Foil embossed layer is cut 3 7/8 X 5 1/8
Shaded Spruce long layer is cut 1 5/8 X 4 5/8
Striped DSP is cut 1 1/2 X 4 1/2
Shaded Spruce wider layer is cut 2 5/8 X 3 5/8
Veined DSP is cut 2 1/2 X 3 1/2
The Expressions In Ink DSP is not included in the current 15 % off sale. However, when I checked it is back in stock and available to order. If you place your order through my online store, please use the host code further down, or on the right side of the page depending on your computer.
The picture below shows the Designer Series Papers that are included in the Sale. There are 9 to choose from!!
HOST CODE
My July Host Code is 2GKGF4Q7. Please use this code for orders under $150.00. I will have a small gift for those with orders over $50.00 in addition to the Perk Rewards Program. You can read all of the information at the top of the page in the Menu Bar under SHOP / Perks.
Thank you for stopping by today. I hope you enjoyed today’s project and will come back. I do read and reply to all of the comments individually. They mean a lot to me. Please reach out if you have a question.
I have realized that in my card making of late that I have been neglecting my Embossing Folders. I decided to go back to what used to be my favorite tool in card making and get back to my roots. In doing this, I found some fun new ones from the current Annual Catalog.
The card I made is a very clean looking card with minimal parts when you first glance at it. Actually there are several layers and different products. However all are simply used. There is zero difficulty in making this card!
Layers
There are a few layers in the layout of this card. It begins with the Calypso Coral card base. I paired it with a reverse side of one of the sheets of DSP from the Pansy Petals Designer Series paper. I cut the polka dot piece of DSP into two strips of 5/8 X 5 3/8. They were each layered at the top and the bottom , watching the margins on the ends and either top or bottom of the card. I also cut a second strip of 5/8 X 4 that I cut in half. Those are used as the flags on the focal layer.
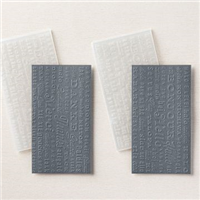
The center embossed layer is made using the new Hello Embossing Folder. The folder comes in a pair with a Thanks folder as well. It is one of the narrow ones, so the Pale Papaya cardstock is 3 1/8 X 5 3/8. This piece was layered slightly over the DSP strips at the top and bottom. I would rather have the little extra coverage from the strips than not quite enough.
I love this folder! It says Hello in a variety of different languages. I placed my focal point to the left side so the English “Hello” is showing in the center. Here is a close up of the embossed image.
Finishing
For the focal point I tried to keep it simple as well. I wanted the embossed layer to not be too overshadowed. To do this I chose the sentiment from Free As A Bird that is another “Hello”. I feel certain my recipient will get the message intended by the card! LOL!!!
The Pansy is cut from a piece of the Pansy Petals Designer Series Paper. I love when the Dies not only cut what is stamped but also matches the images in the DSP. I chose the Pansy that is the same colors as my card choices. The plain White circle was chosen to highlight the single flower. Layering Circles were used to cut the circle.
With the flower added to the stamped circle, it was just a couple of steps to finishing the card. By using the Banner Pick A Punch flag end to cut the two pieces of the DSP I had left, it made a perfect little addition and tied the card together. For the finishing touch I added a trio of Champagne Rhinestones. One is in the center of the flower, one in the upper corner of the circle and the third is the “O” in Hello.
Measurements
card base of Calypso Coral is 5 1/2 X 8 1/2
Pale Papaya embossed layer is 3 1/8 X 5 3/8
DSP strips are 2 @ 5/8 X 5 3/8
DSP flags are 5/8 X 4, then cut in half to 2 @ 5/8 X 2
The Pansy Petals Designer Series Paper is one of the packs that is included in the DSP Sale !!! All of the information is just below.
The picture below shows the Designer Series Papers that are included in the Sale. There are 9 to choose from!!
HOST CODE
My July Host Code is 2GKGF4Q7. Please use this code for orders under $150.00. I will have a small gift for those with orders over $50.00 in addition to the Perk Rewards Program. You can read all of the information at the top of the page in the Menu Bar under SHOP / Perks.
Thank you for stopping by today. I hope you enjoyed today’s project and will come back. I do read and reply to all of the comments individually. They mean a lot to me. Please reach out if you have a question.
I have a fun card to share with you today. The front is a bit of an envelope look to it. Just a different cut of the front, but it adds quite a bit of interest. I hope you like it.
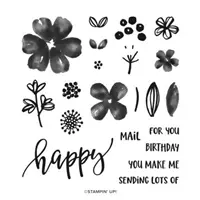
Stamp Set
I love this new stamp set in the Annual Catalog. It is called Shaded Summer. There are a couple of similar flowers and some great sentiments with really pretty fonts. It is a Red Rubber stamp set. So I used Stampin’ Write Markers and colored the stamp itself to get the two colors on the image. I used Granny Apple Green and Flirty Flamingo to color the stamp. After stamping the image, I then added Blushing Bride to color in the openings of the flowers and Soft Sea Foam to fill in the leaves. Note: I do not have the Markers listed in the supply list since they can only be purchased in Color Families or the entire bundle. I will say that they are worth the price to have them on hand.
I made this card over the weekend and was not thinking that I have my Pre-order arriving today. As a demonstrator, we get to order from the upcoming Mini Catalog early, and in this case, earn the Free Sale-A-Bration items as well. There are matching Dies for this stamp set in the SAB Catalog!! I cannot wait. After using this set, I love it. You will definitely see it more once I get the matching dies!! I fussy cut the flowers with my Paper Snips, and it was pretty quick as I only cut around the image. But the dies would have been so much better.
Paper and Cutting
I wanted a bit of a different fold for this card but could not come up with what I wanted. As I was looking at dies for the layers, I saw the Basic Borders Dies. I knew I could make a fun trimmed front using the dies. I used the Stitched Wide V shape die to cut the point. I cut the base card first by placing the point of the V 1/2″ from the bottom of the card. I then cut the Flirty Flamingo and DSP pieces the appropriate sizes. I slid the DSP down and had it flush on top of the Flirty Flamingo layer and cut through both pieces at the same time. I was very pleased that it worked out as I envisioned it.
The DSP is the Pattern Party Designer Series paper. It is the Host Rewards pack of paper. Oh My!!! It is an awesome deal to use Host Rewards for. There are 48 sheets in the pack. I thought this soft flower pattern worked well with my stamped image.
I paired the card colors with the stamped image of Soft Sea Foam and Flirty Flamingo. I also added a Rectangle Stitched layer for the stamped flower and sentiment. The sentiment was stamped and then cut using the Label Me Fancy Punch. Of course I had to add some bling by placing a couple of Rhinestones on the flowers and sentiment.
Inside
Just to be a little different, I used the cut off pieces from the front flap and added them to the inside of the card.
I should have trimmed the bottom edge of the DSP piece a bit to show the border underneath. I will remember that next time.
The picture below shows the Designer Series Papers that are included in the Sale. There are 9 to choose from!!
HOST CODE
My July Host Code is 2GKGF4Q7. Please use this code for orders under $150.00. I will have a small gift for those with orders over $50.00 in addition to the Perk Rewards Program. You can read all of the information at the top of the page in the Menu Bar under SHOP / Perks.
Thank you for stopping by today. I hope you enjoyed today’s project and will come back. I do read and reply to all of the comments individually. They mean a lot to me. Please reach out if you have a question.
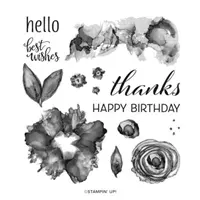
I am sharing another card using the Hand-Penned products. I love the delicacy of these gorgeous stamps and papers. They truly look like someone sat down with Pen and Paper and drew the designs, then colored them using watercolors. A card is pretty much finished as soon as you add the paper and stamps, they are that pretty on their own.
Hand-Penned
The Hand-Penned Suite of products includes the stamp set, Hand-Penned Petals, the matching dies , Penned Flowers Dies, the DSP, Hand-Penned Designer Series Paper, and finally the Genial Gems. All of these products are wonderful.
I used the stamps and DSP for today’s card. The layout is actually a very simple one. The base card is a basic 8 1/2 X 5 1/2 folded in half. I used a strip of the DSP cut to 1 X 5 1/2 and placed that along the cut edge on the front of the card. The layer beneath the stamped image is a second piece of the DSP. It is cut 2 1/2 X 2 3/4. The stamped Basic White is cut to 2 1/8 X 2 3/8.
Colors and Finishes
The base card I chose is darker than the colors in the DSP. There is a Misty Moonlight in the paper, but I went a tad darker with Night of Navy. The darker color helps the Highland Heather of the front layer stand out a bit more. The flower is stamped using Fresh Freesia and Soft Succulent.
To finish the card, I stamped the Thanks using Memento Tuxedo Black Ink. I felt it needed to be darker to pop. One of the final additions is a bow. The Soft Succulent Open Weave Ribbon was the choice I made. It makes an easy bow, and ties the stamped layer to the DSP layer along the edge of the card. For the touch of bling, I added a trio of Pearls to a couple of the Freesia flowers. I have to have some bling!!
DSP Sale
The information for the Designer Series Paper sale is just below. The Hand-Penned used today is included in the sale! Woohoo!!!
The picture below shows the Designer Series Papers that are included in the Sale. There are 9 to choose from!!
HOST CODE
My July Host Code is 2GKGF4Q7. Please use this code for orders under $150.00. I will have a small gift for those with orders over $50.00 in addition to the Perk Rewards Program. You can read all of the information at the top of the page in the Menu Bar under SHOP / Perks.
Thank you for stopping by today. I hope you enjoyed today’s project and will come back. I do read and reply to all of the comments individually. They mean a lot to me. Please reach out if you have a question.
Before I get started on today’s project I wanted to tell you how Awesome the upcoming Mini Catalog is. As a Demonstrator, one of our perks is to get to do a Pre-order for the upcoming catalogs. I ordered way more than I should have. But that is the fun of stamping. And I will have the products to use and get the excitement going for the Catalog debut on August 3rd. If you would like to have this pre-order perk, lets talk about you joining my team!
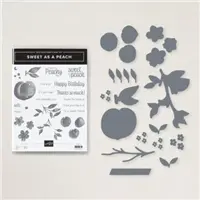
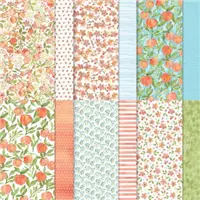
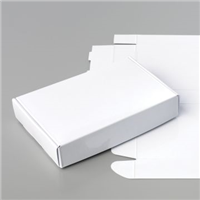
For today’s project I have decorated one of the Mini Paper Pumpkin boxes to hold a small gift and added a sweet gift tag. I used the Sweet as a Peach Bundle along with the You’re A Peach Designer Series Paper. TIP: This DSP is one of the ones on sale for the next month at 15% off!!
Sweet As A Peach
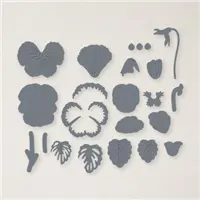
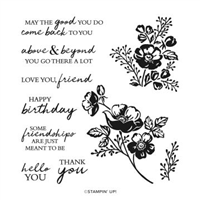
I love everything in this You’re A Peach Suite of products!!! I used the Sweet As A Peach Stamp Set to make the little tag. The branch with the flower are both from the stamp set. The flower itself is die cut using the Peach Dies. The “For You” is from the Pretty Perennials stamp set.
For the Mini Paper Pumpkin Box, (you can see them on page 137 of the Annual Catalog), I covered just the lid with the You’re A Peach Designer Series Paper. The DSP is layered on Balmy Blue cardstock. I think this sheet is my favorite from this DSP pack. I love the mix of colors on the flowers and the tiny blue flower. I chose the Balmy Blue as the stand out color and that it was what I used on the back tag for the Gift Tag.
The gift tag is cut using the Tailor Made Tags Dies. There are two different styles of tags with three sizes of each style. This is a great way to make a darling tag with minimal time and effort.
Finishing Touches
To secure the box, and because it is so pretty, I used the Petal Pink Organdy Ribbon. It is very easy to work with and I love the texture the ribbon has. The gift tag was added just above the bow by making a simple Linen Thread bow.
The layers of the gift tag are secured together with a glue dot, and are a bit offset from each other. The flower is adhered using a Stampin’ Dimensional. I added a single Rhinestone to the center of the sweet flower. It was a toss up to go with Bling or with a Black Matte Dot to match the flowers on the paper. Bling won out!
Designer Series Paper Sale
The papers included in the sale are shown just below. If your order is below $150.00, please use my host code with is below the paper. And for each $50.00 you spend, you earn a Reward perk from me.
The picture below shows the Designer Series Papers that are included in the Sale. There are 9 to choose from!!
HOST CODE
My July Host Code is 2GKGF4Q7. Please use this code for orders under $150.00. I will have a small gift for those with orders over $50.00 in addition to the Perk Rewards Program. You can read all of the information at the top of the page in the Menu Bar under SHOP / Perks.
Thank you for stopping by today. I hope you enjoyed today’s project and will come back. I do read and reply to all of the comments individually. They mean a lot to me. Please reach out if you have a question.
The content in this blog is the sole responsibility of Jackie Beers as an Independent Stampin' Up! Demonstrator. The use of and content of classes, services or products offered is not endorsed by Stampin' Up!