Welcome to the Stampin’ Pretty Pals’ Blog Hop! This month, the theme is Birthday Bash. We really hope that you enjoy and will be inspired by them! As you hop from blog to blog, we would appreciate your comments because we enjoy hearing from you. You will find the lineup at the end of my post to help you “hop” along from Pal to Pal.
I love an opportunity to share Stampin’ Up! products and Birthday cards are the ones I make and send the most. They are always happy cards. For today’s Hop Card, I went with a new product from the Mini Catalog, the Artfully Layered Bundle. After having seen beautiful cards with this Bundle, I ended up casing the catalog somewhat.
I cased the catalog for the front panel and the Fun Fold is from Mary Deatherage. She called it a Book Fold Easel Card. The card folds flat for mailing! Here is a flat view.
The Bundle +
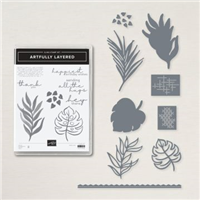
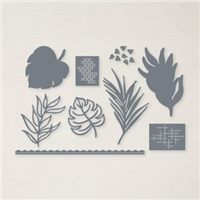
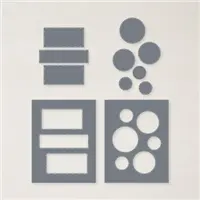
The Artfully Layered Bundle is amazing. I love the mix of fonts in the sweet sentiments, and the leaves can be stamped, embossed, die cut, and are so much fun! The “+” is the Picture This Dies. I used the center of the triangle Picture This for the inside sentiment layer. The stitching around these dies are different from any of the layering dies. And it happened to be laying on my messy desk when I was looking for an idea on the sentiment layer. LOL!! Sometimes messy is a good thing!
The Papers
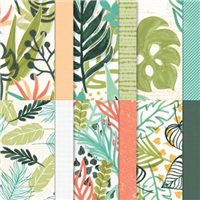
The gorgeous colors of the DSP are all so bright and cheery. That is one of the reasons I chose this Bundle / Suite for this card. The paper is named Artfully Composed Designer Series Paper. And I pulled all of the colors from the paper. For a varied look, I even pulled in lighter versions of some of the main colors. My paper scraps came in very handy for this one. Stampin’ Up! has the best colors for using shades of a color.
Finishing
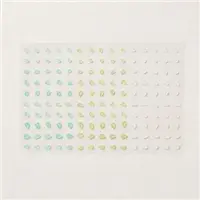
For the final touches of this fun card. I White Heat Embossed the two sentiments. The front one is on one of the die cut leaves. It does not show quite as brightly as I had hoped. And the last touch was using a new product for the first time. It is the Faux Sea Glass Adhesive gems. They are so very different and such fun! I went a bit overboard and added more than the preferred three.
More inspiration awaits, so use the lineup below to visit the rest of the Design Team. The Pals are excited to show you what they’ve created! Then, please mark your calendars for our next blog hop on March 9th. Our theme will be Cute Critters where our Design Team creates a project with any kind of animals, birds, butterflies or insects.
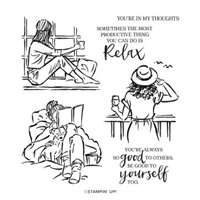
I love to color. The In The Moment stamp set is the perfect set for me to do just that. And pairing it with fun shapes for layers is a great match.
Stamps and Dies
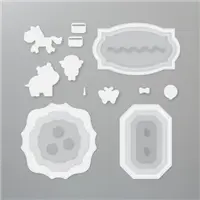
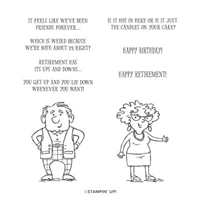
As I said above, I love to color. And these three images in the In The Moment stamp set are made for coloring. They are all about relaxing, and I love them. I made three of the cards as 4X4 cards and will be sharing them over the next few days. All of the stamps for this card are from the stamp set. To get a different “look” I used one of the Hippo & Friends Dies to frame and cut out the image. I adore the fun shapes from these dies.
Paper and Colors
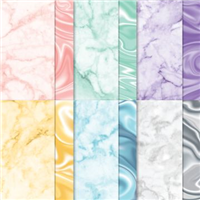
For a bit more of a “fun” look, I chose the Simply Marbleous Designer Series paper from the Sale-A-Bration catalog. The movement in this paper is so beautiful that it could be art itself! So of course my color choices started with the great paper. Although if you look at the card, you see a mix of colors. This is a “lounging around” scene. And when I am doing this, I am never wearing a matcing outfit! LOL!! So I went with a mix of comfy clothing and blankets. And of course, the perfect pet to keep you company.
Sale-A-Bration is the Best Time of Year!!
HOST CODE
My February Host Code is HFEQADCZ. Please use this code for orders under $150.00. I will have a small gift for those with orders over $50.00 in addition to the Perk Rewards Program. You can read all of the information at the top of the page in the Menu Bar under SHOP / Perks.
Thank you for stopping by today. I hope you enjoyed today’s project and will come back. I do read and reply to all of the comments individually. They mean a lot to me. Please reach out if you have a question.
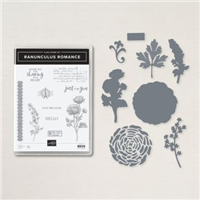
The Ranunculus Romance Bundle was one I overlooked originally. Now I am in LOVE with the elements of this set.
Stamps and Dies
The Ranunculus Romance Bundle may be a little difficult to say, or spell, but it is awesome! In addition to flowers there are postmark, old writing, etc. Plus some great sentiments. I used several of the stamps for this card. I was going for the Time-worn style, which is very different for me.
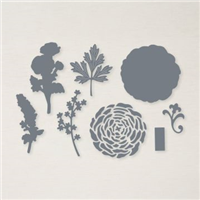
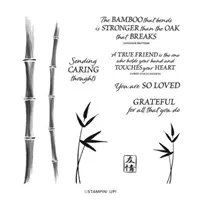
The roses and extra foliage are part of the dies. I randomly and repeatedly stamped the old writing. Then added the ribbon looking long stamp down the side for a bit of a different look. The sentiment is from the Bamboo Beauty stamp set. That is another great set, especially for sweet sentiments.
Paper and Punches
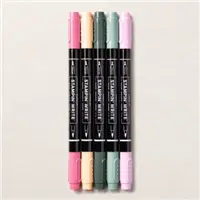
I colored the flowers first to decide on the color palette I wanted. So with Pale Papaya, Soft Succulent and Evening Evergreen as the colors, I looked for a DSP that would work. It was found in the New Horizons 6X6 Designer Series Paper. This is one of the “back sides” of the beautiful water color paper. And this has a watercolor look as well. To better show the paper, I placed the DSP and the focal layer at different angles. Tearing the focal layer was another nod to the time-worn look.
For a finishing touch, and sadly it doesn’t show well in the photo, I flicked the Pale Papaya, Evening Evergreen, and Soft Succulent Stampin’ Write Markers over the focal layer. I had left too many blank spots for the look I wanted. To show off the sentiment, I stamped it and then punched the layers using the Double Oval Punch. This punch is a Must Have in my opinion. And the final touch is the Soft Succulent ribbon around the flowers. Also there is one little Brass Butterfly floating on the largest flower.
Sale-A-Bration is the Best Time of Year!!
HOST CODE
My February Host Code is HFEQADCZ. Please use this code for orders under $150.00. I will have a small gift for those with orders over $50.00 in addition to the Perk Rewards Program. You can read all of the information at the top of the page in the Menu Bar under SHOP / Perks.
Thank you for stopping by today. I hope you enjoyed today’s project and will come back. I do read and reply to all of the comments individually. They mean a lot to me. Please reach out if you have a question.
Today’s projects is a Retirement card using the Special Moments and Best Delivery stamp sets. Moving On To Retirement is a good thing!
Stamps
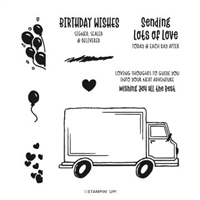
Making it to Retirement is a wonderful event. But cards are a bit difficult for this, and especially when it is a man! However, as soon as I saw the big moving truck, I knew it would make a perfect retirement card. Guys like motor vehicles and it has that large side for the announcement. So Best Delivery stamp set to the rescue!
For the sentiment, I turned to the Special Moments stamp set from Sale-A-Bration. That set has amazing sentiments for so many occasions. And to add some excitement to a large truck, I used the balloons from Best Delivery set, in two colors, blowing out the back. I can envision using this truck for other announcements now. On the inside, I stamped the Happy Retirement sentiment from Senior Years stamp set.
Colors
Since the truck is rather large, I went with a couple of cardstock layers instead of DSP. Not a lot of the layers are actually seen. So Bumblebee and Misty Moonlight were my colors of choice. And that is definitely a change for me since I tend to use multiple pieces of DSP on a card! For the truck to be lighter and allow the outlines to show, I went with Balmy Blue Stampin’ Blends for the cab and boarder of the cargo part.
I hope you will see this truck in a new light now and consider all of the “Announcements” that it can be used for.
Sale-A-Bration is the Best Time of Year!!
HOST CODE
My February Host Code is HFEQADCZ. Please use this code for orders under $150.00. I will have a small gift for those with orders over $50.00 in addition to the Perk Rewards Program. You can read all of the information at the top of the page in the Menu Bar under SHOP / Perks.
Thank you for stopping by today. I hope you enjoyed today’s project and will come back. I do read and reply to all of the comments individually. They mean a lot to me. Please reach out if you have a question.
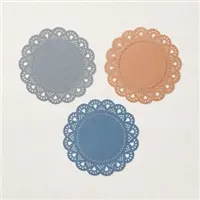
Ladybugs and Daffodils are a perfect pairing. And that is what I have chosen for today’s card. I also added one of the new Heart & Home doilies
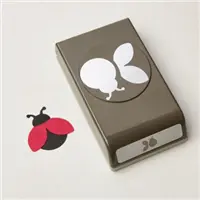
Stamps and Punches
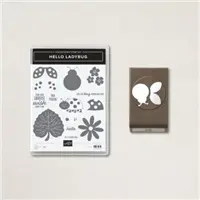
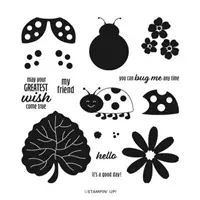
The Hello Ladybug Bundle is a great bundle as well as price point. Because it is a punch bundle, the price is quite a bit less. And I love my punches! This card is a great one for quick and simple cards. Punches and great DSP are the backbone of quick and simple cards.
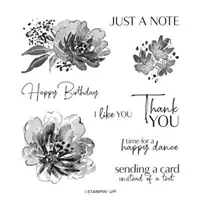
The ladybug is punched from Black cardstock and the wings are stamped onto Flirty Flamingo before punching also. There is no rule of red and black ladybugs in my book! For the sentiment, which is also from the stamp set, I stamped onto scrap Very Vanilla cardstock and then simply cut with my Paper Snips.
Paper and Embellishments
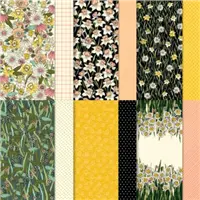
For the second star of the card, I went with the Daffodil Afternoon Designer Series Paper. This paper can definitely stand alone! I pulled all of the colors from this piece of DSP. The doily color is not exactly in the DSP, but compliments those colors. The new doilies come in three different colors and are a great addition to a card. This ladybug needed a place to land and still be the star!
To finish the card, I needed some bling! It does not show well in the photo, but I added some Wink of Stella to the center of the daffodils. Then gave the ladybug her Gold Metallic Pearls for eyes. They do pop against the black of the ladybug body.
Measurements:
I haven’t added my measurements in a while and I apologize for that. These are very basic ones. The card base is 4 1/4 X 11. With the layers being Soft Succulent cut to 5 1/4 X 4 and the DSP cut to 5 1/8 X 3 7/8.
Sale-A-Bration is the Best Time of Year!!
HOST CODE
My February Host Code is HFEQADCZ. Please use this code for orders under $150.00. I will have a small gift for those with orders over $50.00 in addition to the Perk Rewards Program. You can read all of the information at the top of the page in the Menu Bar under SHOP / Perks.
Thank you for stopping by today. I hope you enjoyed today’s project and will come back. I do read and reply to all of the comments individually. They mean a lot to me. Please reach out if you have a question.
I have a simple and beautiful technique to share today. It is painting with the White Craft Ink of the beautiful Flowing Flowers stamp.
I CASEd this idea from one of my downline, Deirdre Reilly. And I mean I really CASEd the layout, technique, etc. I did use a different flower and colors! Thank You Deirdre!!
Stamps and Technique
The stamp set I used, and really it is only one stamp from the set, is the Flowing Flowers set. These are beautiful flowers with the “splatter” built in to the stamp. And I stamped the image all over the card base and then twice on the focal layer. It is stamped in Night of Navy Ink on both the Night of Navy card base and the Misty Moonlight focal layer.
For the technique, I used the White Craft Ink and a Blender Pen. By lightly touching the Blender Pen to the corner of the ink pad, you are able to pick up a bit of ink. Also it is always best to start out light. You can go back to darken the White, but you cannot remove it. This step was repeated many times until I had the amount of White colored in that I liked. Easy Peasy!!
Dies, Colors, and Embellishments
As I mentioned above, the colors were Night of Navy and Misty Moonlight. Because of the White Ink addition, I wanted to add a White layer. And the Scallops from the Scalloped Contours Dies was the perfect choice. I used the 2nd Largest die. To continue the stitching on the focal layer of Misty Moonlight , it is cut using the Rectangle Stitched Dies. I used the 4th Largest die for this one.
The finishing touches are the White Baker’s Twine wrapped around a couple of times. And then a multi-strand bow is tied and added on with a Glue Dot. For the final touch I chose the Blue Adhesive Back Gems.
Sale-A-Bration is the Best Time of Year!!
HOST CODE
My February Host Code is HFEQADCZ. Please use this code for orders under $150.00. I will have a small gift for those with orders over $50.00 in addition to the Perk Rewards Program. You can read all of the information at the top of the page in the Menu Bar under SHOP / Perks.
Thank you for stopping by today. I hope you enjoyed today’s project and will come back. I do read and reply to all of the comments individually. They mean a lot to me. Please reach out if you have a question.
The content in this blog is the sole responsibility of Jackie Beers as an Independent Stampin' Up! Demonstrator. The use of and content of classes, services or products offered is not endorsed by Stampin' Up!