Stampin’ Up! has some exciting promotions going on for October. It is hard to know which one to share first. They are all awesome!
First
The first may excite the majority the most. And it is that tomorrow is a FREE SHIPPING day!. With an order of $75.00 in product you receive FREE Shipping!
Second
The second promotion may be even better than the first. It is a Starter Kit Promotion! From tomorrow thru the end of the month, with purchasing the Starter Kit you will receive an additional $30.00 of products of your choice. The price of the starter kit will remain the same at $99.00. But instead of you choosing $125.00 in product, you get to choose $155.00 in product! I have always said the Starter Kit is the Ultimate Bundle, but adding more FREE product is the best deal!! I would LOVE to talk with you about this offer. Please reach out to me if you are at all interested.
Third
The final “New” is a product Kit. It is the Birthday Card Organizer Kit. This kit contains an 8 X 10 Monthly Planner with pockets. You are able to list all of your birthdays, and other card events. Plus there are products included to make 6 each of 2 different birthday card designs. Of course you can add to it with your own cards. This is a kit that I will definitely purchase as I have a time with birthdays and getting cards out on time. 🙂 This Kit is available beginning tomorrow also.
HOST CODE
My October Host Code is R26UJTTW. Please use this code for orders under $150.00. I will have a small gift for those with orders over $50.00 in addition to the Perk Rewards Program. You can read all of the information at the top of the page in the Menu Bar under SHOP / Perks.
Thank you for stopping by today. I hope you enjoyed today’s project and will come back. I do read and reply to all of the comments individually. They mean a lot to me. Please reach out if you have a question.
Today is the last day the Perfect Partners additional die sets are available for purchase. There are cards to see in this post plus the information about the dies.
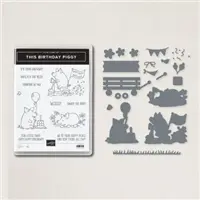
I have the flyer for the die sets and the information for the matching stamps. If you do not already have the stamp set, you can purchase both as a bundle with the 10% discount.
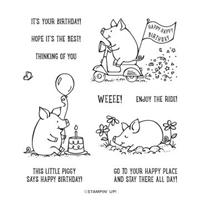
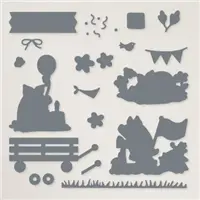
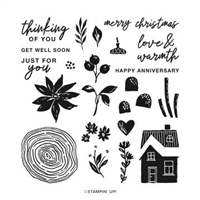
Since this is the last of the die availability, I am showcasing my favorite. It is the Playful Piggy Dies, which match the This Piggy Birthday stamp set. Pigs are a must have for me!
Playful Piggy Dies
The dies that are used here are for the piggy and his cake, the grass, and the banner. For the Tahitian Tide background banner, I fussy cut around the die cut White one. The little flowers at the bottom were fussy cut as well from the piggy that is playing in the dirt.
There are matching dies for each of the three piggies in the die set. Plus there are accessories like bandana and hat, a wagon, flowers, etc. These are wonderful dies that really emphasize the fun idea of the piggies!
Papers and Colors
All of the colors came from this fun Cajun Craze DSP piece. It is from the Rustic Harvest Designer Series Paper. There is the exception of the Tahitian Tide though. I wanted a bright color to pop from the more subdued ones and it was the color of choice. All of the coloring is accomplished by stamping with Memento Tuxedo Black Ink and Stampin’ Blends. Those colors are listed in the supply list at the bottom of the post.
Additional Cards
Here are a few of the additional cards I have made with the This Piggy Birthday Stamp set. None were lucky enough to have the Dies to use. But I bet you can imagine how well it would look with die cut images. These cards show the other two of the three piggy images.
HOST CODE
My September Host Code is KVGNY4TA. Please use this code for orders under $150.00. I will have a small gift for those with orders over $50.00 in addition to the Perk Rewards Program. You can read all of the information at the top of the page in the Menu Bar under SHOP / Perks.
Thank you for stopping by today. I hope you enjoyed today’s project and will come back. I do read and reply to all of the comments individually. They mean a lot to me. Please reach out if you have a question.
Quick layouts for cards are wonderful to have in your craft room book of tricks. Today’s card is one that is quick and really cute. A favorite Bundle is used for this one and would make a variety of themes as well.
Bundle
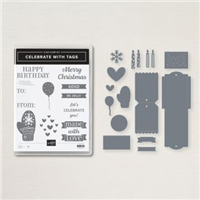
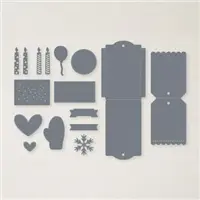
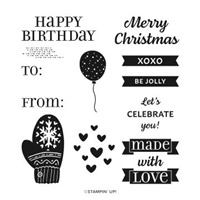
Today’s fun card is made using the Celebrate With Tags Bundle (and Celebrations Tag Dies). I have used the tag from this set a few times, but today is all about the mitten. There is only one mitten. So to create the double, I simply overlapped the thumb section of the bottom one. No one will ever know there are not two to stamp! The mittens are stamped using Bermuda Bay Ink and look like wonderful Winter Mittens! To tie them together, LOL!, I added a length of White Bakers Twine.
Sentiment
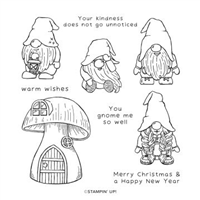
To complete the mitten theme this sentiment seemed perfect. Warm Wishes is from the Kindest Gnomes stamp set. And the banner comes from the Celebration With Tags Bundle. The two seem to be made for each other. Finding sentiments that fit on banners from different sets is like a bonus I believe!
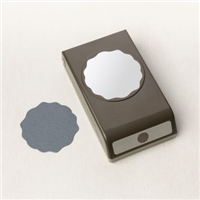
The final touch for the mittens and sentiment is the Decorative Circle Punch layer grounding them. As you know, I use this punch quite often. It seems to be a perfect size for quite a lot of images. And do not forget a touch of bling. The mitten has a single Rhinestone in the center of the snowflake.
Papers
Being mentioned last does not negate the fact that the DSP piece is what decided the colors of the card and the mittens. This snowflake layer is from the Storybook Gnomes Designer Series paper. The soft snowflakes are perfect for the mittens. Plus the Pool Party works wonderfully with the Bermuda Bay.
HOST CODE
My September Host Code is KVGNY4TA. Please use this code for orders under $150.00. I will have a small gift for those with orders over $50.00 in addition to the Perk Rewards Program. You can read all of the information at the top of the page in the Menu Bar under SHOP / Perks.
Thank you for stopping by today. I hope you enjoyed today’s project and will come back. I do read and reply to all of the comments individually. They mean a lot to me. Please reach out if you have a question.
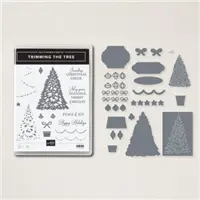
Today’s card is made with the Trimming The Tree stamp set. Plus there is a special promotion going on that has matching Dies for a variety of stamp sets from the Annual and Mini Catalog. And Yes, there are matching Dies for the Trimming The Tree set. Woohoo!! I will share the card first and then add the information regarding the limited Dies.
Stamp Set
The Trimming The Tree stamp set has a variety of sentiments to go along with a 2 step stamped tree. The bold tree can be used alone or with the second stamp, which adds more definition to the center. My tree used both stamps with a mix of Shaded Spruce for the outside and Granny Apple Green for the inside definition. Included with the set is the sweet sentiment. There are also decorations, and a bow that I chose to place on the inside with that sentiment.
Dies
The Dies for this set are available thru the end of September. So time is almost up on this special deal. And these dies are definitely worth the extra order. They give detail to the tree, have two different detailed tree stands, and a variety of decorations for the tree. My card used the tree stand and star cut from the Gold & Rose Gold Specialty Paper. It is a gold with beautiful details in it.
Papers
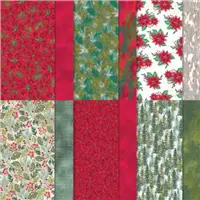
My color choices came from this piece of the Boughs of Holly Designer Series Paper. It reminds me of a painting. The pops of Poppy Parade in the piece sold me immediately. So it was added as the layer, but also to ground the sentiment. There are a variety of greens in this piece of paper, but I went with Old Olive for the card base. The softness helps that Poppy Parade to pop a bit more!
Die Specials
As I mentioned at the top of the post, these are additional dies which match stamp sets in the Mini and Annual Catalog. There is also the bonus of being able to purchase them as a bundle if you do not already own the stamp set. And of course you will get the 10% Bundle discount! Here are the 6 die sets that are available along with all of the information. But remember it ends on September 30th.
HOST CODE
My September Host Code is KVGNY4TA. Please use this code for orders under $150.00. I will have a small gift for those with orders over $50.00 in addition to the Perk Rewards Program. You can read all of the information at the top of the page in the Menu Bar under SHOP / Perks.
Thank you for stopping by today. I hope you enjoyed today’s project and will come back. I do read and reply to all of the comments individually. They mean a lot to me. Please reach out if you have a question.
Today’s Fun Fold is more of a Double Card plus a bit more! It is very flexible and can be utilized as a gift card holder as well as a regular card. And with that confusing beginning, here is my card.
The Star is the Paper
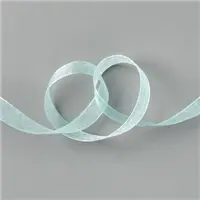
There are more pictures to show the various parts of the card. But I wanted to show how pretty this Storybook Gnomes Designer Series Paper is. There are two layers of the DSP used here on the front. Actually there is no stamping required here at all. Simply use two complimentary papers and some pretty ribbon.
Gift Card holder
Here is a view of the small card on the front open to reveal a gift card. The ribbon tied around this section ensures the card will not accidentally fall out. If you do not want to include a gift card, a little piece of cardstock with a second sentiment would work perfectly.
Inside View
This inside sentiment and the cute little gnome is the only stamping I have on this card. I love the gnomes and colored him to match the paper on front of the small card. Also, the matching dies to the Kindest Gnomes Bundle will cut a little gnome from the DSP if you would rather go that direction.
Directions
The card base of Coastal Cabana is cut to 5 1/2 X 8 1/2 and scored at 4 1/4. The small card is 7 1/2 X 3 3/4 and scored at 2 1/2 and 5. At the 5″ score line, cut from the top of the score line down to the bottom right corner. When folded in, this makes the pocket. Apply Tear & Tape to only the bottom of that angle to finish the pocket.
The Pale Papaya large layer is 4 X 5 1/4 with the DSP cut to 3 7/8 X 5 1/8. And the small Pale Papaya is cut to 2 1/4 X 3 1/2. For the small DSP layer I used the Stitched Rectangle Dies to add a little extra to the cute gnomes. Prior to adhering the small card to the center front of the large card, add the length of ribbon behind it. Tip: Go ahead and tie the bow to ensure you have enough ribbon.
Please continue to the next person on the Blog Hop Lineup for more Inspiration with Fun Folds.
My September Host Code is KVGNY4TA. Please use this code for orders under $150.00. I will have a small gift for those with orders over $50.00 in addition to the Perk Rewards Program. You can read all of the information at the top of the page in the Menu Bar under SHOP / Perks.
Thank you for stopping by today. I hope you enjoyed today’s project and will come back. I do read and reply to all of the comments individually. They mean a lot to me. Please reach out if you have a question.
Today’s card is a second Fall Leaves / Floral challenge. This one is a from the garden flower arrangement with a mix of Fall colors.
Today’s card is for the Make My Monday Challenge. It is Fall Floral / Fauna. You can join in with the challenge by clicking on the link and adding your version of this theme. Everyone is welcome to join in the fun.
Stamps
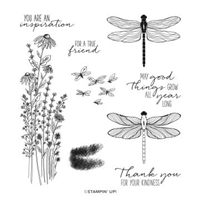
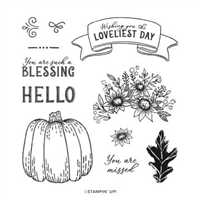
The Jar of Flowers stamp set is one that I have neglected lately. And it is one that I do Love! The various uses for the jar are many, but I particularly love the different bouquets that can be added. For this card I chose the sunflowers. They seem to be a Fall flower for me. Plus I love the purple flowers for a bit more Fall look.
To help cover the joining of the flowers to the jar, I added a single, small sunflower. A second one is added down on the sentiment. These are from the Hello Harvest stamp set and are simply fussy cut and added with a glue dot. The one on the sentiment seems to be the perfect embellishment, which surprised me!
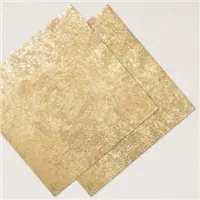
Paper and Ink
With knowing I was using Fall colors for the flowers, I wanted to tie in the blue of the jar in the paper choice. So I went with Bermuda Bay. The outline of the jar is Bermuda Bay with Pool Party as the inside water. But the star of this card is the Distressed Gold Specialty Paper. Not only is it beautiful on it’s own, but it seems to draw the color from the sunflowers also. And I used a little scrap leftover piece behind the sentiment. It can be difficult to use pretty DSP for so little to show, but this tiny sentiment really did not put a dent in my leftovers of this great paper.
HOST CODE
My September Host Code is KVGNY4TA. Please use this code for orders under $150.00. I will have a small gift for those with orders over $50.00 in addition to the Perk Rewards Program. You can read all of the information at the top of the page in the Menu Bar under SHOP / Perks.
Thank you for stopping by today. I hope you enjoyed today’s project and will come back. I do read and reply to all of the comments individually. They mean a lot to me. Please reach out if you have a question.
The content in this blog is the sole responsibility of Jackie Beers as an Independent Stampin' Up! Demonstrator. The use of and content of classes, services or products offered is not endorsed by Stampin' Up!