The card I am sharing today contains an old, but good, technique. It is the “Kiss” technique. By using the Timeless Tropical set I have named it A Tropical Kiss!
I made this card as part of the Make My Monday Design Team Challenge. You are welcome, and encouraged, to play along with us. This theme is the Kiss Technique.
Stamps for Technique
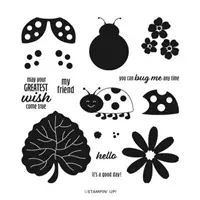
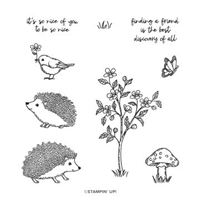
For the Kiss technique, you need a fairly solid stamp as your base. I chose the large leaf from the Hello Ladybug stamp set. It is inked using Soft Succulent Ink. Then I chose the trio of small flowers from the same stamp set and inked them with Poppy Parade Ink. For the Kiss, I touched the flowers to the leaf and held it steady for a couple of seconds. Next, I breathed on the leaf stamp (I call it giving the Ink new life) to re moisten the ink and stamped it. Lastly, I fussy cut the leaf as there is not a matching die set.
Other Stamps and Techniques
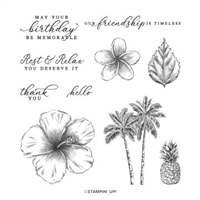
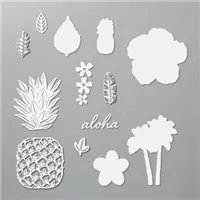
For the tropical theme, I chose the Timeless Tropical stamping and matching dies of In The Tropics. The large flowers and palm trees are from the stamp set and cut using the matching dies. And the second technique is coloring the palm tree with three different Stampin’ Write Markers. I colored the trunk of the tree with the Soft Suede Marker. For the fronds, I started with Evening Evergreen and swiped most of the fronds. Then I went back with the Soft Succulent Marker to fill in the open areas and touch other places. (Tip: Always add the lighter color last when doing this technique) Again, I breathed on the stamp and stamped on Basic White cardstock.
Finishing Touches
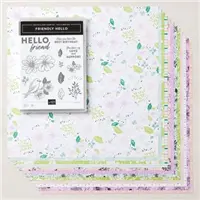
All of the dies cut pieces were glued to the DSP. It is part of the Friendly Hello Sale-A-Bration Bundle. This includes a stamp set with the matching Designer Series Paper of the same name. Then for a bit of an extra touch, I used the In The Tropics Dies to die cut the Aloha. It is adhered to a scrap of Basic White cardstock. And again, there is no second layering die, so I fussy cut the white by following the Aloha. For the final touch, I added a couple of the Iridescent Rhinestones to the centers of the larger flowers.
Sale-A-Bration is the Best Time of Year!!
HOST CODE
My January Host Code is GR679MMV. Please use this code for orders under $150.00. I will have a small gift for those with orders over $50.00 in addition to the Perk Rewards Program. You can read all of the information at the top of the page in the Menu Bar under SHOP / Perks.
Thank you for stopping by today. I hope you enjoyed today’s project and will come back. I do read and reply to all of the comments individually. They mean a lot to me. Please reach out if you have a question.
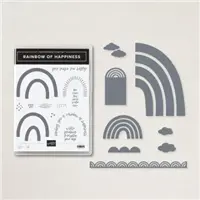
I made Rainbow of Happiness tags for my Product Shares customers. Then I decided to make a matching card to share with you since all of the supplies were out. This set has moved up the ladder of my favorites from the Mini Catalog.
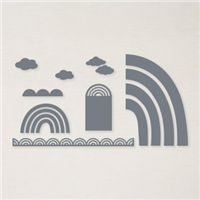
Rainbow of Happiness Bundle +
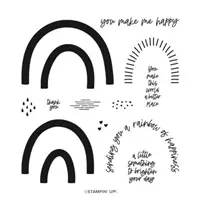
My favorite parts of the Bundle is the tag die, and the various sentiments of the stamp set. I did not photograph the inside of the card, but it includes the sweet statement “a little something to brighten your day”.
However, I did use the “Thank You” from the stamp set for the front of that tag as well as the little hearts. And since both of those stamps are fairly small, I added the butterfly from the Happy Hedgehogs stamp set.
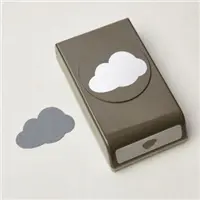
My final “+” on this card is the Cloud Punch! Oh My! I have said before that it is a great size and I truly mean that. Most sentiments will fit on that cloud shape. And I think it is a fun way to add details as well.
Paper, Colors, etc.
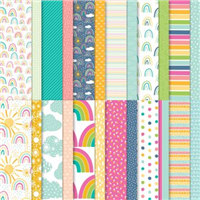
You may recognize the DSP from the Sunshine & Rainbows Designer Series Paper. It is in the Sale-A-Bration catalog as one of the Free with a $50.00 purchase items. I love every piece of that paper!! The stripes are from the pack and helped make my other color choices.
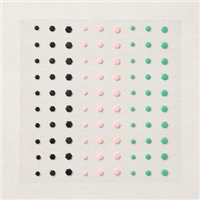
Also, I colored the rainbow of the tag with colors chosen from the paper by using the Stampin’ Blends. The same applies to the butterfly. And the Adhesive Hexagons are a new embellishment in the Mini Catalog. They included the Bermuda Bay color, so were the perfect bling for this card.
Tag for Product Share
I almost forgot to share the tag I made for the Product Share customers! As you can see, it is quite similar to the card.
Sale-A-Bration is the Best Time of Year!!
We are almost half way thru this SAB event! So if you like my card, you can purchase the Rainbow of Happiness Bundle, plus the Adhesive Hexagons, and qualify to choose the Sunshine & Rainbows DSP as your Free item.
Or if you like the Ultimate Bundle…..you can join my team during SAB and in addition to the $125.00 of product of your choice, you get to choose 2 additional stamp sets from any of the active catalogs! Woohoo!!!
HOST CODE
My January Host Code is GR679MMV. Please use this code for orders under $150.00. I will have a small gift for those with orders over $50.00 in addition to the Perk Rewards Program. You can read all of the information at the top of the page in the Menu Bar under SHOP / Perks.
Thank you for stopping by today. I hope you enjoyed today’s project and will come back. I do read and reply to all of the comments individually. They mean a lot to me. Please reach out if you have a question.
The Barn Door style Fun Fold card is a quick one that has great visual appeal. After learning the cut, the hardest part is deciding what image to use as the focal point. Today I paired the Amazing Silhouettes stamp set and Sweet Symmetry DSP with the Fun Fold for a bright and happy card.
Stamp sets
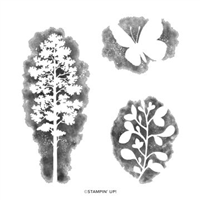
The Amazing Silhouettes stamp set definitely lives up to the name! There are three images in the set that are shaded beautifully and stamp perfectly. I chose the Leaves stamp for today’s card. By using the Bumblebee Ink it pulls the Bumblebee color from the paper. But the one single stamp easily stands alone on the focal panel of my Barn Door card.
To finish the focal section, I stamped the Happy Birthday from the Peaceful Moments stamp set. This is a great set of sentiments that cover most occasions. My choice for the sentiment layers is the Double Oval Punch. I think this is one of the best punches Stampin’ Up! carries. Between the two ovals, they fit most sentiments that we have.
Papers
All of my colors were chosen from this bright DSP. It is the Sweet Symmetry Designer Series Paper. I love the mix of Night of Navy, Calypso Coral, and Bumblee. The bold pattern of the paper is partially covered, but still holds it’s own on the card. You know I love bright colors, and this fits the bill.
For a finishing touch, I added a bit of bling. I wanted a different kind of bling for a change on this card. So I went with the Blue Adhesive Gems. There are two shades of blue in the pack, but they also seem to change colors a little as well. You can see a bit of the gold in the three I used when you look closely.
Directions
I have used this barn door card previously. Take a 5 1/2 X 8 1/2 piece of cardstock and score in half at 4 1/4. Place the score line on the cutting track of your Paper Trimmer. Cut down the score line 2 1/2″. Turn the cardstock and cut from where you stopped over to the edge of the front panel. You are basically cutting off the top section of your front panel. Save this piece to use as the layer for the vertical focal point. Decorate however you wish.
Sale-A-Bration is the Best Time of Year!!
HOST CODE
My January Host Code is GR679MMV. Please use this code for orders under $150.00. I will have a small gift for those with orders over $50.00 in addition to the Perk Rewards Program. You can read all of the information at the top of the page in the Menu Bar under SHOP / Perks.
Thank you for stopping by today. I hope you enjoyed today’s project and will come back. I do read and reply to all of the comments individually. They mean a lot to me. Please reach out if you have a question.
Today I have a Masculine card that is really quick . It pairs Wildlife Wonder with the New Horizons DSP. The paper is really the star of the show!
Paper and Ribbon
As I said at the beginning, this New Horizons Designer Series Paper is obviously the star of the show here. The colors and the look of a mist or fog in the air is amazing. It makes me think I could be there. Except I would be long gone since the bear is front and center!!
Pulling the colors from the DSP was an easy choice for the card layers. Evening Evergreen and Smoky Slate are the card base and layer. And I used the Evening Evergreen for the back layer of the sentiment. Paired with the sentiment are two strips of ribbon. One is Soft Succulent and the other Evening Evergreen. They are simply to ground the sentiment. I also added one of the gray Classic Matte Dots for the sentiment.
Stamps and Dies
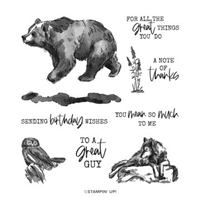
Since the DSP is so amazing, I did not want to cover much of it up. From the Wildlife Wonder stamp set I chose to use the bear, along with the great sentiment. Since masculine cards can be a bit of challenge sometimes, this is a quick and easy one. For the bear, I stamped him on the DSP and then again on scrap paper. I purposely had only the front half on the paper. He is too large and would have covered too much space.
After fussy cutting the extra bear, I layered it directly on top of the DSP bear. This gives the little extra hairs showing that are difficult to cut around. Once I had adhered the bear layer, I took my Paper Snips and trimmed off the extra of his body flush with the DSP. The sentiment is stamped and cut using the Layering Circles Dies. A quick and simple sentiment layer to finish the card.
Sale-A-Bration is the Best Time of Year!!
HOST CODE
My January Host Code is GR679MMV. Please use this code for orders under $150.00. I will have a small gift for those with orders over $50.00 in addition to the Perk Rewards Program. You can read all of the information at the top of the page in the Menu Bar under SHOP / Perks.
Thank you for stopping by today. I hope you enjoyed today’s project and will come back. I do read and reply to all of the comments individually. They mean a lot to me. Please reach out if you have a question.
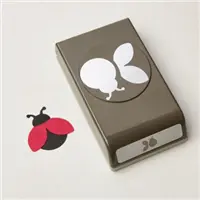
I adore the new Ladybug punch and stamp set. And I have seen where others have turned the ladybug into a bee. Since I have a friend that loves bees, I had to make one.
Paper
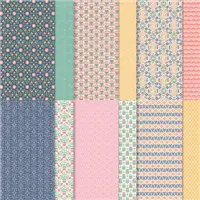
I am beginning with the paper since that is where the bee begins. In case you have not noticed the great Host Rewards pack of paper, this is part of it. The Pattern Party Designer Series Paper is part of the Host Rewards in the Annual Catalog. You definitely cannot beat the value for your Host rewards. I only used part of one piece from the pack. These beautiful hearts are the opposite side of the black and white stripes. I used a small piece of the black and white to color with my Dark Daffodil Delight Stampin’ Blend.
I found a scrap of the Gold Shimmer Vellum to use for the wings. Sadly this vellum is retired. I apologize because I thought it had carried over. However, you could use plain vellum and color it with the Stampin’ Blend as well. I have done it, and it works wonderfully.
Punches
I obviously used the Ladybug Punch for the body and wings of my bee. For the striped body, I aligned the paper so I just cut the fat part of the body. It is glued to the Basic Black full body. And the wings are attached using a glue dot at the center top.
For the Focal Area, I used the larger of the Heart Punch Pack. I like the added benefit of the scallops for the Focal spot. And to carry on the theme, I added that punched out heart to the inside of the card. Since it is a Basic White card base, the bright hearts really pop on the inside.
I hope you will try different bugs/bees with your Ladybug punch and share them with me.
Sale-A-Bration
In my opinion, Punch Bundles are a great value for your money. The Ladybug Bundle is $32.50. With an added $11.50 more, you qualify for one of the Free with $50.00 purchase items from SAB. Have a party with your friends and earn even more rewards. It could include the Pattern Party DSP! I would love to talk with you about hosting a party.
Or the second best part of SAB is the Join Promotion. You can read more below regarding the costs of joining. But there are way more benefits than the price. Currently with the SAB promotion, you can choose TWO stamp sets from either active catalog, in addition to the $125.00 in product. That could be over a $60.00 additional value!
Sale-A-Bration is the Best Time of Year!!
HOST CODE
My January Host Code is GR679MMV. Please use this code for orders under $150.00. I will have a small gift for those with orders over $50.00 in addition to the Perk Rewards Program. You can read all of the information at the top of the page in the Menu Bar under SHOP / Perks.
Thank you for stopping by today. I hope you enjoyed today’s project and will come back. I do read and reply to all of the comments individually. They mean a lot to me. Please reach out if you have a question.
Welcome to InKing Royalty’s January Blog Hop! We are having so much fun with our new Sale-a-Bration products and are excited to share some of that fun with you today. This month’s projects feature papers or stamp sets (or both!) from Stampin’ Up!’s January – February 2022 Sale-a-Bration brochure. After you read my post, I hope you’ll hop over to the next person on the list at the base of this post.
I really look forward to Sale-a-Bration each time. This current SAB is awesome and I definitely have a favorite of the paper and stamp set. So I am using them both on today’s card.
Stamps
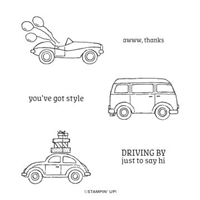
My favorite stamp set from SAB is the Driving By set. I love the three vehicles. And they are all Fun cars. By stamping the images onto the DSP creates even more Fun! Yes, I had to fussy cut them because there is not a matching die, but that is fine. The look is well worth the little bit of time it took. I did cut off the balloons from the sports car. They did not fit the mood I was going for. I had seen a card with the vehicles stamped onto the DSP and knew I had to make one.
To get the sentiment I needed, I went to the A Wish For Everything stamp set. The words are individual so you can make your own sentiment. This made it super easy to stamp the “Wishing You A Happy, Happy, Happy Day”.
Paper and Punch
I am sure that you have identified the gorgeous DSP. It is the bright and happy Sunshine & Rainbows Designer Series Paper. I love bright colors and this pack of 6X6 paper really works for me. Of course, if you prefer more subtle patterns, it can fit that as well. The opposite sides are softer colors like the one I used for the Clouds. I do not think I have ever used five different pieces of DSP before. This may be a personal record!
The cloud was simply a “lightbulb” moment. I had the punch laying on my desk and was sort of looking while I was thinking for what to do with a sentiment. My consciousness came back when I realized I was looking at the answer. It may be a bit out of the norm, but that is totally ok with me. I finished each cloud with one of the Irridescent Rhinestones for a bit of bling.
Thank you for stopping by today. I hope you’ll hop along to the next stop on the blog hop, Sue Jackson at Just Peachy Stamping. There’s lots of inspiration to be found in this group – and you don’t want to miss it!
My January Host Code is GR679MMV. Please use this code for orders under $150.00. I will have a small gift for those with orders over $50.00 in addition to the Perk Rewards Program. You can read all of the information at the top of the page in the Menu Bar under SHOP / Perks.
Thank you for stopping by today. I hope you enjoyed today’s project and will come back. I do read and reply to all of the comments individually. They mean a lot to me. Please reach out if you have a question.
The content in this blog is the sole responsibility of Jackie Beers as an Independent Stampin' Up! Demonstrator. The use of and content of classes, services or products offered is not endorsed by Stampin' Up!