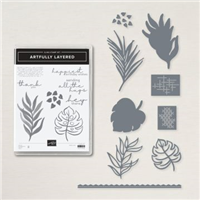
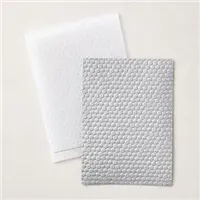
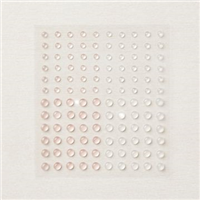
My card for today mixes Artfully Layered products with the Hive 3D Embossing Folder. This folder is a hidden gem in the catalog!
Bundle
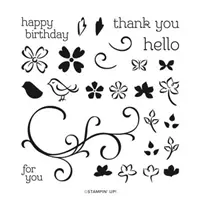
Even though there is not a lot of stamping on this card, I did use the Artfully Layered Bundle. I stamped the circle area using two of the stamps. But the saw tooth edge is from the matching dies. I love the little bit of special an edge die gives to a card. This layout would be okay with a straight edge, but the bit of definition really pops. And the sentiment is a favorite! I love the mix of fonts and that this is an “anytime” sentiment!
Embossing
The Hive 3D Embossing Folder is a very special one. It can be used with either side showing. I chose the indentions. The opposite side reminds me of a layer of pebbles. You can find this folder on page 59 of the Mini Catalog with the Heart & Home Suite of products. Embossing folders are a great value for the price and add so much detail to a card.
Paper
Probably the star of the card is the little strip of DSP. This is from the Artfully Composed Designer Series Paper. The paper is hand painted and then photographed. You can see the shadows on this piece. Sara did a Facebook Live with the artist who created it last week. If you get a chance it is worth a few minutes to watch and see the creative process. For me, this is simply beautiful paper with wonderful colors!
Sale-A-Bration ends and new specials begin!!!
SAB ends on the 28th. And Stampin’ Up! has some great specials coming in March. Stay Tuned!!!
Sale-A-Bration is the Best Time of Year!!
HOST CODE
My February Host Code is HFEQADCZ. Please use this code for orders under $150.00. I will have a small gift for those with orders over $50.00 in addition to the Perk Rewards Program. You can read all of the information at the top of the page in the Menu Bar under SHOP / Perks.
Thank you for stopping by today. I hope you enjoyed today’s project and will come back. I do read and reply to all of the comments individually. They mean a lot to me. Please reach out if you have a question.
You know how much I love Fun Folds! When I made this card, I really did Smile! Using the New Horizon Designer Series Paper for this card was the perfect choice.
Today’s card is a Fun Fold for the Pals Fun Fold Blog Hop. There is a lineup at the bottom of my post that I hope you will follow along with. Please share your love with the other stampers.
Paper
Obviously the paper is the star of this card. This scene reminds me of a mountain meadow and makes me want Spring to arrive. The different scenes on the New Horizon Designer Series Paper are simply gorgeous. Each time I say that this is my favorite. So I guess they all are equally my favorite.
When you look at the other views of the card, you will see that I used most of a sheet of the 6X6 DSP. I trimmed a little from each side to get a piece that was 5 3/4 X 5 1/4 and the view of liked. The front is 4 X 5 1/4, and the inside piece is a bit smaller at 1 3/4 X 5. Even though you do not see them at the same time, I like that it is a continuation of the scene.
Stamps
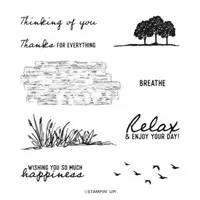
The matching stamp set to the New Horizon DSP is the On The Horizon stamp set. It has stamps that work perfectly when paired with this paper, or on their own to create scenes. And it has a couple of great sentiments. The “Relax and enjoy your day” is perfect for this peaceful meadow scene. And yes, I stamped directly onto the DSP! Sometimes that is the way to go.
Dies
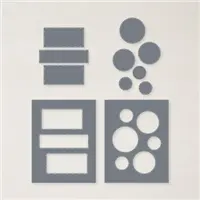
Part of what makes this Fun Fold so sweet is how the fold works! And that goes back to using the Die for the focal point. Do you see that the little label it is stamped on moves? That is part of the Fun Fold! I used the Painted Labels Dies for this one. The size was perfect for the sentiment.
The card I cased this Fold from had circles for the sentiment opening. But I wanted to stamp onto the paper and not take away from the DSP itself. So I came up with this idea instead.
Here are views of the card in a few open positions. The second piece of DSP is a nice surprise!
Directions
Card base is Misty Moonlight cut to 5 1/2 X 8 1/2 and scored at 4 1/4
Front DSP layer is cut to 4 X 5 1/4
Inside White is cut to 8 X 5 1/4 and scored at 4 and 6. Then mountain and valley fold.
Inside DSP layer is cut to 1 3/4 X 5 ( I used a 5 3/4 X 5 1/4 piece and cut the two sections to save DSP)
Adhere the large DSP to the front of the card
Center the Painted Label Die on the front and Die Cut. Save the cut out. By adhering the DSP to the card first, it gave more stability to my focal layer than only the DSP would.
Adhere the largest section of the inside White (the 4 X 5 1/4) to the inside of the card with the accordion fold on the right side.
Adhere the small DSP to the center section of the White inside
Decorate the inside of the card as you like
Stamp the sentiment on the Die cut piece
Fold the inside White and close the card. Add adhesive to only the right half of the sentiment layer and place it inside the cut out. It will fit easily and be exactly where you need it.
TIP: You can change this card by using layered circles, squares, or any shape for the center focal piece. And you do not need to use DSP for the front. It can be any normally decorated front using the same idea! Enjoy!!
Thank you for stopping by today! I hope you will follow along on the hop to see other Fun Folds.
My February Host Code is HFEQADCZ. Please use this code for orders under $150.00. I will have a small gift for those with orders over $50.00 in addition to the Perk Rewards Program. You can read all of the information at the top of the page in the Menu Bar under SHOP / Perks.
Thank you for stopping by today. I hope you enjoyed today’s project and will come back. I do read and reply to all of the comments individually. They mean a lot to me. Please reach out if you have a question.
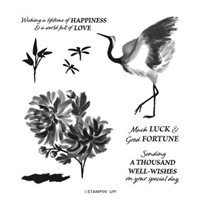
I have paired the fun Picture This Dies with the Crane of Fortune stamp set. And added the gorgeous Abstract Beauty DSP. Oh My!!
Stamps and Dies
This sweet stamp set is the Crane of Fortune. I used most of the stamps with the exception of the flower. It was just too large for these small circles. And as you can see, the crane does not fit very well either. But from my experience seeing them at my local park, you rarely get a full view of one. So creative license won out!
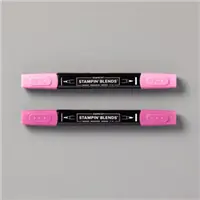
To get the single words, I used the Cinnamon Cider Stampin’ Write Marker to color only the one word from two of the sentiments included in the stamp set. Since this set is Red Rubber, that is a wonderful option for color! The bottom right dragonfly is punched from a scrap of DSP and is the small one in the Dragonfly Punch.
Paper and Color
This gorgeous piece of DSP is from the Abstract Beauty 4 X 6 Designer Series Paper. I chose the paper first and then looked for a stamp set that would work with the dies. All of the colors are pulled from the paper. Although I almost erased the Just Jade with the top left dragonfly circle.
All of the cards I have made previously with the Picture This Dies, I did in a solid color. I wanted to try one with DSP for that layer. But….I wanted white circles, and the benefit of having a thicker die cut layer. To achieve this goal, I added just a touch of adhesive to the for corners of a Basic White cut the same size as the DSP. After running through the Stampin’ Cut & Emboss machine, I carefully peeled the two layers apart. This left me with both DSP circles and white circles. And the added benefit of my papers lining up perfectly. A little bit of glue was added in strategic places to hold the two together permanently.
Sale-A-Bration is the Best Time of Year!!
HOST CODE
My February Host Code is HFEQADCZ. Please use this code for orders under $150.00. I will have a small gift for those with orders over $50.00 in addition to the Perk Rewards Program. You can read all of the information at the top of the page in the Menu Bar under SHOP / Perks.
Thank you for stopping by today. I hope you enjoyed today’s project and will come back. I do read and reply to all of the comments individually. They mean a lot to me. Please reach out if you have a question.
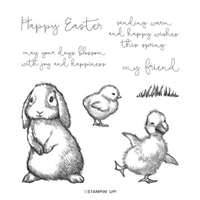
Today’s card is a “Z Fold, Friend “card, using the Easter Friends stamp set. This set is more versatile than you would think with some anytime sentiments.
Stamps
The Easter Friends stamp set is in the Mini Catalog. At first glance you will think of only Easter cards. I know that was my first thought. But on closer look at the adorable little chicks, I also noticed the sentiments. There is a Happy Easter stamp, and one for Spring, My Friend, as well as wishing happiness. And those little chicks are so cute and fluffy!
Paper and Dies
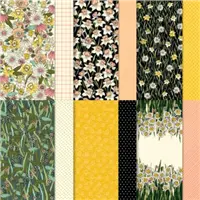
This beautiful Spring looking DSP is from the Daffodil Afternoon Designer Series Paper. It is one of the Sale-A-Bration options. I chose the pretty Spring flowers to pair with the cute little green hearts. The green hearts goes well with the grass and leaves. However, I did not follow the colors in the DSP totally with all of my greens. There is a mix of Granny Apple Green for the grass and Mint Macaron for the heart layer.
To give the cute chick a special layer, I used the Stitched So Sweetly Dies. The two largest of the rectangles were the ones I used. The soft scallops are a perfect fit to the happy little girl. There is also one special / different addition. On the inside of the card I added a flower from the DSP. It was on the edge of the scrap when I cut the front layer. After fussy cutting, It fit perfectly on the edge of the inside layer. And it is matches the sentiment as well! I love it.
Directions:
I mentioned this is a Z Fold card. It is just a bit different of a Z, but I love how it still stands perfectly.
The card base of Pale Papaya is 5 1/2 X 8 1/2 and scored on the long side at 2 1/8 and 4 1/4
The front layer of Mint Macaron is 2 7/8 X 5 3/8
The floral DSP strip is 2 X 5 3/8
The heart DSP is 2 3/4 X 5 1/4
The inside Vanilla is 4 X 5 1/4
The Mint layer is adhered after the floral DSP and is adhered with the card closed. I lined up the Mint Macaroon with the floral DSP and the inside card base. The edge is the same all around, like the Mint is another layer when closed.
Sale-A-Bration is the Best Time of Year!!
HOST CODE
My February Host Code is HFEQADCZ. Please use this code for orders under $150.00. I will have a small gift for those with orders over $50.00 in addition to the Perk Rewards Program. You can read all of the information at the top of the page in the Menu Bar under SHOP / Perks.
Thank you for stopping by today. I hope you enjoyed today’s project and will come back. I do read and reply to all of the comments individually. They mean a lot to me. Please reach out if you have a question.
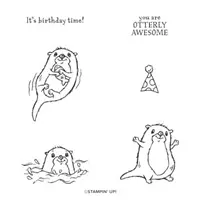
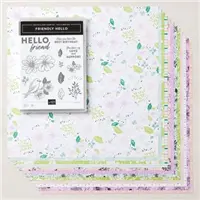
I have another Fun Fold to share with you today. It is starring the Awesome Otters stamp set from Sale-A-Bration. These little guys are adorable!
*** I crack myself up sometimes….. I made this card for a class and could not decide what was best to put on the bottom DSP in way of a sentiment. Yesterday I found a perfect Happy Birthday to fit in the space. And then I mailed it without taking an updated photo!! So put your imagination to work for the sentiment please.
Stamps
The stamp set is the Awesome Otters from Sale-A-Bration. I love this set! Animal sets are always a favorite of mine. They are fun to color and have a good time with. For this card I chose this guy for the front, but also added one to the inside of the Fun Fold. It is like a Surprise Party!
Paper
I wanted a Happy card, so I went with a Happy Color. Granny Apple Green is one that always brings a smile for me. And the Friendly Hello Designer Series Paper strip is full of Happy colors. This is also from SAB and is part of the Friendly Hello stamp and DSP combo for a $100.00 order.
After coloring the Otters, I wanted a bit more. So I stamped the party hat on the inside layer, but also on a piece of scratch paper. It is fussy cut and then glued on top of the standing Otter’s head. I wanted it to go above the square a bit for some definition.
Fun Fold
This Corner Flip Card is a CASE from The Paper Pixie, Julie DiMatteo. She is the best on videos and directions. So here is the link to her post and video. Click Here
Sale-A-Bration is Winding Down…….so place your orders now for this fun set. If you have any questions or do not have a current demonstrator, I would love to assist you!!
Sale-A-Bration is the Best Time of Year!!
HOST CODE
My February Host Code is HFEQADCZ. Please use this code for orders under $150.00. I will have a small gift for those with orders over $50.00 in addition to the Perk Rewards Program. You can read all of the information at the top of the page in the Menu Bar under SHOP / Perks.
Thank you for stopping by today. I hope you enjoyed today’s project and will come back. I do read and reply to all of the comments individually. They mean a lot to me. Please reach out if you have a question.
Welcome to InKing Royalty’s February Blog Hop! This is a great time of year to build your stash of handmade birthday cards, so we are sharing birthday-themed projects with you today. We are excited to share our creations and hope you love them! After you read my post, I hope you’ll hop over to the next person on the list at the base of this post.
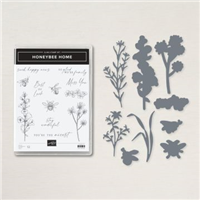
My choice for a great birthday card is the pairing of Honeybee Home stamps with the Abstract Beauty Designer Series Paper. And of course, a Fun Fold!
Paper
The gorgeous DSP is from t he Abstract Beauty 4 X 6 Designer Series Paper. These sheets have beautiful colors plus some gold accents. I chose to pair this piece with a bold Magenta Madness as the base card. And surprisingly a soft Balmy Blue for the layer. I love how they look together. There is also the back of the flowered DSP as the layer behind the focal flower.
Stamps
Even though the brightest star of the card is the beautiful paper, I do love the stamped flower. It is from the Honeybee Home Bundle. I stamped , colored, and then Die cut with the matching die. And the Happy Birthday is from the Sentimental Swirls set. (I used that set on Monday’s card). The font and the size of the sentiment fit perfectly in the open space.
Finishes
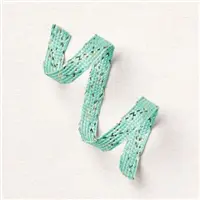
To finish this fun layout, I added a bow to the flower. It is the Jade & Gold Braided Ribbon in the Annual Catalog. And it is amazing to work with! In a way, it sort of stretches. And I will say that the ends fray when cut. But the way it stretches and flattens out makes for a beautiful bow! For the final touch I added three of the Genial Gems next to the sentiment. And yes there is still plenty of room to sign and write a note beneath the upper and lower flaps plus the flower layer.
Layout
This fun card layout, or Fun Fold, is a Mary Fish sketch. It is #38 if you want to see her versions of the design. I love that it is a Fun Fold but yet very quick and easy to do.
The card base of Magenta Madness s 4 1/4 X 9 1/4 (if you take 4 1/4 X 11 and cut off the 1 3/4 save that for the flower layer)
The Balmy Blue layer is 4 X 1 5/8 (x2)
The DSP layer is 3 3/4 X 1 3/8 (x2)
The focal layer is Magenta Madness (the cut off piece) 4 1/4 X 1 3/4
The focal layer DSP is 4 X 1 1/2
The inside White is 4 X 5 1/4
The focal layer is only adhered to the top flap!
Thank you for stopping by today. I hope you’ll hop along to the next stop on the blog hop, Lisa Graham at Lisa’s Little Ink Spots. There’s lots of inspiration to be found in this group – and you don’t want to miss it!
Thank you for hopping along with us. If you get stuck during the Blog Hop, please use this line-up as a guide:
My February Host Code is HFEQADCZ. Please use this code for orders under $150.00. I will have a small gift for those with orders over $50.00 in addition to the Perk Rewards Program. You can read all of the information at the top of the page in the Menu Bar under SHOP / Perks.
Thank you for stopping by today. I hope you enjoyed today’s project and will come back. I do read and reply to all of the comments individually. They mean a lot to me. Please reach out if you have a question.
The content in this blog is the sole responsibility of Jackie Beers as an Independent Stampin' Up! Demonstrator. The use of and content of classes, services or products offered is not endorsed by Stampin' Up!