This month, the theme is Create Your Own Background. We really hope that you will be inspired by all the amazing creations the Pals are sharing with you! As you hop from blog to blog, we would love for you to leave a comment. You will find the lineup at the end of my post to help you “hop” along from Pal to Pal.
This month’s theme of creating your own background was a bit of a challenge. Trying to think of something not commonly seen was my idea. It took a while but I finally came up with an idea that I hope you will like.
Background
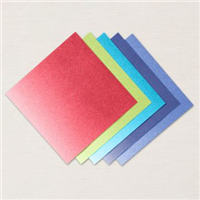
With the theme being the background, let’s start there. My idea was to create a bright and fun background using the 2022-2024 In Color Metallic Woven Ribbons. These are individual ribbons in each of the five colors. By adding adhesive to a piece of cardstock it was fairly easy to wrap the ribbon around it. Of course the back of this piece is a hot mess! But I was happy with the finished product and I love the metallic shine it gives to the card. As an aside, I will say that a wider ribbon would probably be easier to work with if you decide to give this technique a try. And I hope you will try it.
Papers and Colors
With the shine of the background, I wanted a bright rest of the card as well. Going with the Tahitian Tide cardstock for the base layer was my choice. It is the brightest of all of the In Colors. To partner with the bright Tahitian Tide, but still be one of the In Colors, it took a few minutes to decide on the background layer. But the Orchid Oasis was the one that seemed to match. This piece is a “back side” of a piece of the Tea Boutique 6 X 6 Designer Series paper. And of course I had to add the White layer between the base and layer. For some reason I find it difficult to put the DSP directly on the base. One of my many quirks!!
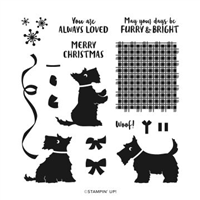
Stamps
After the Theme and the brightness it created, the stamp set seemed to take a backseat on this card. That is really not true but it is simply the last item I chose in making the card. Finally the Christmas Scottie was chosen to be the star. There are a couple of images of the scottie to choose from. For the layout I had going on, the standing up little guy was the one that fit the best.
But that was not the hardest part of the stamp choosing. The sentiment choice was the hardest. After stamping and punching out a sentiment, it was discarded and I decided on the barking. Since I have never had a dog that did not love to hear themselves talk, I thought it was a perfect choice! Each In Color is stamped and then trimmed using my Paper Snips. Spreading them the height of the layer was making sure that the little guy’s words were loud and clear! 🙂 And the finished touch is a bit of bling on this collar. A single rhinestone was all that was needed.
More inspiration awaits, so use the lineup below to visit the rest of the Design Team. The Pals are excited to show you what they’ve created! Then, please mark your calendars for our next blog hop on August 10th. Our theme will be Seasons’ Greetings, where we will showcase projects inspired by our favorite seasonal time of the year.
My July Host Code is ZMG9Q7EX. Please use this code for orders under $150.00. I will have a small gift for those with orders over $50.00 in addition to the Perk Rewards Program. You can read all of the information at the top of the page in the Menu Bar under SHOP / Perks.
Thank you for stopping by today. I hope you enjoyed today’s project and will come back. I do read and reply to all of the comments individually. They mean a lot to me. Please reach out if you have a question.
It is definitely a good thing when there are stamps which remind you of your happy place. For me that is the beach. Sitting on the beach with friends is perfect and that is what today’s card is about.
Stamps
This small stamped scene reminds me of a peaceful morning on the beach. The fact that this was a really quick card to make is just the icing on the cake. These images are from the Sunkissed stamp set in the Mini Catalog. And the best part is it is an inexpensive set that has wonderful sentiments for any time plus a Christmas sentiment. We tend to forget that there are places who do not have cold weather for Christmas. Although I live in the South, so our Winters are generally not very cold. And I am thankful for that!
All of these images were stamped using Early Espresso Ink. Leaving the chairs without additional color was a bit difficult for me since I love to color. But it works and it made the card much faster to make. Adding the touches of the Tahitian Tide helps to make the hat and umbrella pop. The seagull was fussy cut and added to fill in for a sentiment layer.
Paper
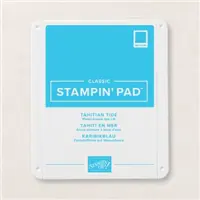
A star of this card is obviously the Glimmer Paper. This is a piece from the In Color Glimmer Paper and is the Tahitian Tide piece. It really mimics the sky and water so fits perfectly with my beach theme. And the card base is Crumb Cake for the sand. This card is a 4 X 4 card, which makes it a great one to make multiples of. Quick and easy is the way to go for multiple card making.
Punch
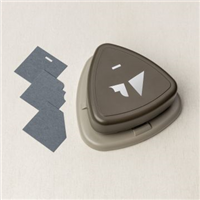
To create the edging on the beach scene was so easy with the new Trio Punch. It is in the Mini Catalog and named the Very Best Trio Punch. And it pairs with an awesome sentiment set named Very Best Occasions. There are great every day sentiments as well as some Christmas sentiments in this set. As soon as I saw this bundle, I knew it was coming to my house. And this detail for a layer is so pretty that it does not require a layer under it.
Mini Catalog and Sale-A-Bration
Click on either catalog photo and you will be taken to my Online Store where you can download either or both catalogs.
HOST CODE
My July Host Code is ZMG9Q7EX. Please use this code for orders under $150.00. I will have a small gift for those with orders over $50.00 in addition to the Perk Rewards Program. You can read all of the information at the top of the page in the Menu Bar under SHOP / Perks.
Thank you for stopping by today. I hope you enjoyed today’s project and will come back. I do read and reply to all of the comments individually. They mean a lot to me. Please reach out if you have a question.
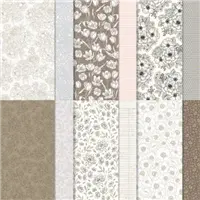
The card I am sharing today is based on a leftover die cut piece from a class. It stars the Texture Chic Designer Series paper. That paper is so beautiful!
Paper
You may remember this piece of the gorgeous Texture Chic Designer Series Paper from a previous card. It was used in a similar layout then. One extra piece remained after I did the die cutting to get the maximum amount of these from one piece of DSP for the class. For sure this is not a piece of paper that I wanted to waste! My favorite part of the paper are the images on it. There is no need for us to stamp on it, because Stampin’ Up! has done that for us. What a great reminder that we can stamp on the DSP!
The Petal Pink and Soft Suede were pulled from the DSP piece. They create a great base for the more colorful layer. And tearing the edge of the middle layer adds detail without having to really do anything. But always remember to tear towards you on all sides to get the similar look.
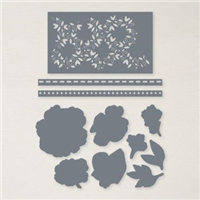
Dies
The “notebook edge” die is actually the only one I used and is from the Blossoming Happiness Dies. For me this single die is almost worth the Die set! Truthfully, there are great dies in that set, it is simply a favorite for now. Plus it adds quite a lot of detail and flexibility by bending and giving it the worn look. But is just as pretty if left flat.
Stamps
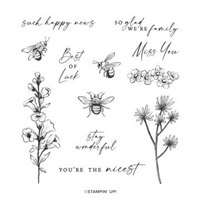
Similar to the single die, there is only a single stamp used on the front of the card. The You’re The Nicest is from the Honeybee Home stamp set. A bee from the set was intended, but was canceled at the last minute. Instead I went with the Brushed Brass Butterfly to embellish the sentiment. That strip is stamped and then angle cut using my Paper Snips. There was nothing fancy in that.
Mini Catalog and Sale-A-Bration
Click on either catalog photo and you will be taken to my Online Store where you can download either or both catalogs.
HOST CODE
My July Host Code is ZMG9Q7EX. Please use this code for orders under $150.00. I will have a small gift for those with orders over $50.00 in addition to the Perk Rewards Program. You can read all of the information at the top of the page in the Menu Bar under SHOP / Perks.
Thank you for stopping by today. I hope you enjoyed today’s project and will come back. I do read and reply to all of the comments individually. They mean a lot to me. Please reach out if you have a question.
Today’s card is a mix of products from two different catalogs. This is one of the things I love about Stampin’ Up!.
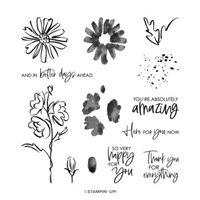
Stamps
This cute stamp set is called Forever Friendship. It is new in the Mini Catalog. There are a couple of quite different images along with fun sentiments in the set. A fun sentiment is something I love and this is one I strive for with some really long time friends. However keeping those plants alive forever is not going to happen. Even the one on the right, which the country nickname for it is Mother In Law’s Tongue!!, I have managed to let die. And that is saying something.
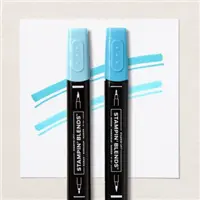
The flowers are all inked using Memento Tuxedo Black Ink and then colored using Stampin’ Blends. All of the Blends used are listed at the bottom of the post in the supply list. Due to the different plants represented a variety of greens were used to color them. And for the pots I used colors from the DSP.
Paper
This sweet DSP is from the Annual Catalog. It is the Rings of Love Designer Series paper. This is probably considered one of the “back” sides of the DSP. Using those reverse sides is one of my things I love to do. But this paper was chosen for the colors. Bright colors are what I love most and this piece of DSP has quite a few.
The cardstock for the base is Crushed Curry. Once it was pulled out I asked myself why I do not use it more. It is a fairly vibrant color and works well with a lot of other colors. Additionally the layers are Crumb Cake which is also pulled from the paper. And it works wonderfully with the Natural Finish Ribbon.
Layering
Layering on top of the ribbon was in my thoughts as mimicking the layering of the Crumb Cake. Plus it helps to separate the Parakeet Party sentiment layer from the DSP. Sometimes a color from the paper can get a bit lost if it layers next to that color in the DSP. For the finishing touch a trio of the 2022-2024 Matte Dots are used. These helped to make the sentiment popped and then tie it to the stamped layer.
HOST CODE
My July Host Code is ZMG9Q7EX. Please use this code for orders under $150.00. I will have a small gift for those with orders over $50.00 in addition to the Perk Rewards Program. You can read all of the information at the top of the page in the Menu Bar under SHOP / Perks.
Thank you for stopping by today. I hope you enjoyed today’s project and will come back. I do read and reply to all of the comments individually. They mean a lot to me. Please reach out if you have a question.
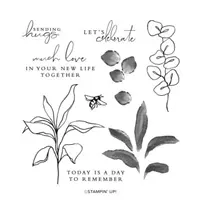
From the New Mini Catalog comes wonderful new products. Today’s card is a quick one using the Splendid Thoughts stamp set paired with the Sale-A-Bration cards and envelopes.
This fun card was a CASE of a card I made from one of our Stampin’ Up! online events for demonstrators. It is a bit different from my normal card layers. And if was fun to step outside of my box. So I decided to CASE my own card. Here is the card i made during the event, which was made along with the presenter.
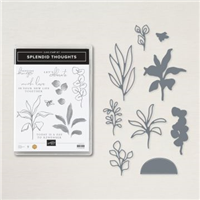
Bundle
Both cards were made using the same stamp set. It is the Splendid Thoughts set. There are dies included which are the Splendid Stems Dies. These can be purchased as a Bundle for a 10% discount!
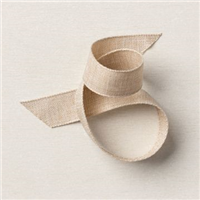
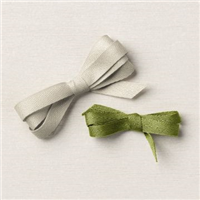
Looking at the second card, you will see a Soft Sea Foam Ribbon. It is included in the Splendid Day Suite of products. The Suite includes the Bundle, Ribbon, Trinkets, and gorgeous Splendid Day Designer Series Paper.
On the first card, I stamped the leafy stem and it’s filler stamp using Old Olive Ink and Soft Sea Foam Ink. There is a die for this, but I didn’t think about it??? Duh! I just grabbed my Paper Snips and snipped away.
Punch
The Sending Hugs sentiment is a treasure. And I wanted it to stand out, but not cover all of the background. This was accomplished by using the Rectangle Postage Stamp Punch. It is a perfect size for a smaller layer and still has some definition to it.
Background
To begin with the card base, it is a FREE Sale-A-Bration item. Instead of me using cardstock, I went with these cards and envelopes. They are the Pool Party & Soft Sea Foam Cards & Envelopes. The best part is the price! They are FREE with a $50.00 order during this SAB. Here is a picture of the card and the matching envelope.
Don’t you just love the white detail on the envelope? Plus there are 20 cards and 20 envelopes! That is an awesome deal for such pretty cards.
The second part of the background is the White layer. It is colored using the Pool Party and Soft Sea Foam Stampin’ Blends. Simply take the light of one and “squiggle” it from the top to the center. Then do the same with the light of the other color going from bottom up to the center. For a bit more color, take the dark of each and from the center go a little bit into the lighter of the same color. When they are dry they blend together and create a pretty and quick background. It is more noticeable on the second card due to brighter colors.
Sale-A-Bration
As mentioned SAB is ongoing now through August 31st. If you place an order through me that reaches the SAB requirement of $50.00 pre tax, you receive one of my Blue Star Rewards. There is a Host Code listed below. If your order is below $150.00, please use my host code. Do not hesitate to reach out to me if you have any questions.
HOST CODE
My July Host Code is ZMG9Q7EX. Please use this code for orders under $150.00. I will have a small gift for those with orders over $50.00 in addition to the Perk Rewards Program. You can read all of the information at the top of the page in the Menu Bar under SHOP / Perks.
Thank you for stopping by today. I hope you enjoyed today’s project and will come back. I do read and reply to all of the comments individually. They mean a lot to me. Please reach out if you have a question.
Today begins the July – December Mini Catalog PLUS Sale-a-bration. Do you have your lists ready to go? Even after doing the preorder, which is available for demonstrators, I still have a lengthy wish list.
The project I am sharing today is a mix of Die, Fussy Cutting, Coloring, and one little Stamp. That is not the normal card I share. But I hope you love it.
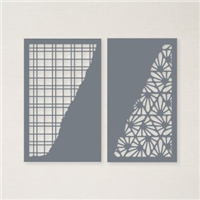
Dies
It is really difficult for me to pick the main point on this card. But I have decided to go with the Die. It is the Split Card Textures Dies. There are two different dies in the set. And they are stand alone dies in the Annual Catalog. They do not pair with a stamp set. Plus they can be used in a variety of ways.
The sample in the catalog on page 86 shows a “layer” piece of probably 4 X 5 1/4 with the right side cut using the die. For my card, and because I was using a Specialty Paper, I cut an angled piece and then only die cut that piece. Either works and gives totally different looks. Additionally, the little squares can all be pushed out I simply opted to keep most of them to show off the Specialty Paper.
Paper
As mentioned above, I used a Specialty Paper for the Die cut piece. It is the Gold & Rose Gold 6X6 Metallic Specialty Paper. The one I used is the Rose Gold as it pairs with the rose in the colored floral arrangement.
Speaking of the floral part, it may look familiar to you. This is a section of the Abigail Rose Designer Series Paper. Cutting a 6X6 piece of one of the patterns, I colored each of the floral arrangements using Stampin’ Blends. One of those was used about two weeks ago. You can see that card HERE. As with the first card, I fussy cut the flowers and then applied it to the edge of the cardstock. On this version I left the part of the flowers which overlap the Rose Gold loose for a bit of dimension.
Stamps & Finishes
The lone stamp on this card is the sentiment. It is from the Color & Contours stamp set. With the boldness of the Rose Gold die cut layer and the pretty floral, the sentiment was left a little simpler. Since it is an Amazing sentiment (LOL) it is fine by itself.
For the finishing touch there needs to be a bit of bling. In this case I used a single bling. The 2021-2023 In Color Opal Rounds fit the bill. Just a bit of sparkly pink to finish everything off.
HOST CODE
My July Host Code is ZMG9Q7EX. Please use this code for orders under $150.00. I will have a small gift for those with orders over $50.00 in addition to the Perk Rewards Program. You can read all of the information at the top of the page in the Menu Bar under SHOP / Perks.
Thank you for stopping by today. I hope you enjoyed today’s project and will come back. I do read and reply to all of the comments individually. They mean a lot to me. Please reach out if you have a question.
The content in this blog is the sole responsibility of Jackie Beers as an Independent Stampin' Up! Demonstrator. The use of and content of classes, services or products offered is not endorsed by Stampin' Up!