The September – December Mini Catalog is live today!! Woohoo!! I have my order ready to go for my Paper Shares and product I did not get on my Pre-order. Hopefully you are as excited as I am.
Today’s card is a new Punch Bundle from the Mini Catalog. With a couple of new extras added in. The weather is not saying Fall where I am, but for many it is right around the corner.
Background
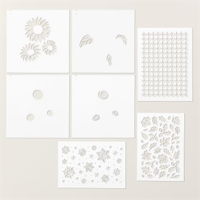
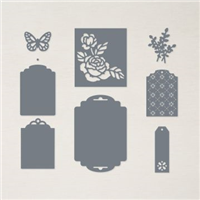
This card features a variety of products. But one of the first I notice, besides the sign, is the background. So we are beginning there. I created the background by using a mask from the Abundant Beauty Decorative Masks. This set has layering stencils, or masks, to create a sunflower scene, plus this Fall , and a herringbone looking one. Deciding on colors and then how they will blend is the hard part.
For this background I used Daffodil Delight lightly all over, then added some Old Olive, and finally some Copper Clay. I did not want it to be too dark. But maybe should have added some Blackberry Bliss to pop some. The best part is the stencil cleans in just a second under running water. I was impressed!
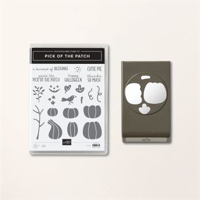
Stamp Bundle
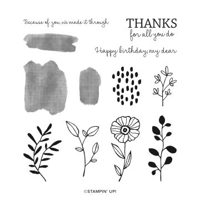
The stamp set used is the Pick of The Patch. And it has a matching Punch! Yay on the punch because they are my favorite. Both of the pumpkins, stems, and leaves are all in the punch. So easy peasy there. I stamped the pumpkins with Pumpkin Pie Ink and then filled in some shadows with the Copper Clay Stampin’ Blends. The leaves and stem are stamped with Old Olive.
The sentiment is from the stamp set as well. It is stamped using Memento Tuxedo Black Ink and is stamped on a piece of the All About Autumn Designer Series Paper. I thought a wooden sign was perfect for the pumpkin patch.
Dies
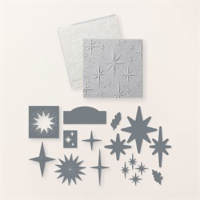
The sign is cut using a Die from the Stars At Night Die set. I love the beautiful stars in that stamp set and dies, which is a hybrid by the way. But the shape of this die is what really sold me. And yes I know that is silly! For me a great shape that fits a large number of sentiments is a must have!!
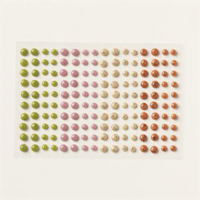
The card is finished with a scattering of the Adhesive Backed Speckled Dots. The Copper one was placed as a nail holding up the sign. And a few green ones are scattered. To finish a bit more, I added some flecks from the Copper Clay Stampin’ Write Marker.
Thank you for stopping by today!!! Please reach out if you have any needs regarding the Mini Catalog.
Online exclusives are here to stay! Click on the photo and be taken directly to them in my online store. If you place an order, please use my Host Code listed just below.
HOST CODE
My September Host Code is 7BSV39GV. Please use this code for orders under $150.00. I will have a small gift for those with orders over $50.00 in addition to the Perk Rewards Program. You can read all of the information at the top of the page in the Menu Bar under SHOP / Perks.
Thank you for stopping by today. I hope you enjoyed today’s project and will come back. I do read and reply to all of the comments individually. They mean a lot to me. Please reach out if you have a question.
Tomorrow is the debut of the Mini Catalog!! I hope you have your Wish List ready to go. I know I have a long one. Also, the Online Exclusive Papers are available tomorrow. The flyer is at the bottom of the post. If you do not currently have a demonstrator, I would love for you to place your order with me. There is a host code at the bottom of the post, and on the side depending on your device. I have a rewards program also which is explained at the bottom of the post.
The card I have to share today is one that hit home with me as I made it. It is about spending time with friends. I know that I need to get outside my little world and do just that. It is good for all of us! And this stamp set is a great beginning.
Stamps
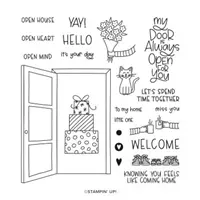
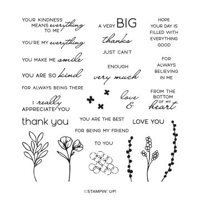
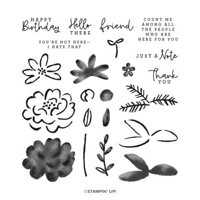
All of these stamps are from the set Warm Welcome. And that is an apt name for this set. The smiling cat makes me smile every time! This set has moved to the Online Exclusives site and is available now. There are a variety of images to put in the doorway and great sentiments to match.
I went with a simple pairing of the friends with coffee, or tea. Of course the cat has to be there to greet everyone! All are stamped with Memento Tuxedo Black Ink and colored with Stampin’ Blends. The shadow of the door on the ground was made with Light Gray Granite Stampin’ Blend.
Layers
To keep this a really simple card, I started with a base of Thick Basic White. The layer is Orchid Oasis, as is the door. The layers are smaller which seems to highlight the top layer more. The Orchid Oasis is 3 5/8 X 4 7/8 and the top Basic White is 3 1/2 X 4 3/4. There is a single Bling that does not show in the photo very well. It is one of the Adhesive Back Sparkle Gems. I used it as the doorknob. But since it is dark and the door is also, you have to look really close.
Thank you for stopping by today!!
Online exclusives are here to stay! Click on the photo and be taken directly to them in my online store. If you place an order, please use my Host Code listed just below.
HOST CODE
My September Host Code is 7BSV39GV. Please use this code for orders under $150.00. I will have a small gift for those with orders over $50.00 in addition to the Perk Rewards Program. You can read all of the information at the top of the page in the Menu Bar under SHOP / Perks.
Thank you for stopping by today. I hope you enjoyed today’s project and will come back. I do read and reply to all of the comments individually. They mean a lot to me. Please reach out if you have a question.
Today is the last day to redeem your Bonus Days Coupon Codes!!! Don’t let those bucks get away from you!!!
The card I am sharing today is one that I really love! I have always been a big reader. So as soon as I saw this set I knew it had to come home with me. Plus it makes some great cards!
Stamp Sets
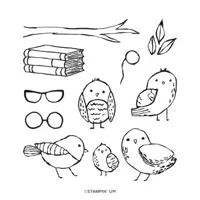
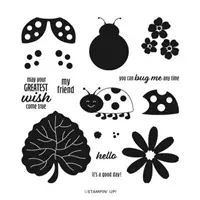
The main stamp set is the Birds Eye View set. The books, owl, and glasses are from the set. There are two other owls included, as well as some additional images. Since I love to read I had to go with the books for the first card. And those glasses are just the icing on the cake!! There is another set of glasses and a monocle. I used the large round ones in the same Moody Mauve as the layer.
The simple sentiment is from the Artistically Inked stamp set. I did not want to add more layers. So looked for a simple sentiment. This is a perfect one for any occasion and it fits perfectly there in the corner.
Layers
The card base is Balmy Blue with a layer of Moody Mauve. The focal layer came about from a negative of the new Deckled Circles laying on my desk. (These are a must have an are available once the new Mini goes LIve.) I know you have heard me say things on my desk are the beginning of a card. It is true once again. The negative was the perfect size for the images. For a soft color I chose Bubble Bath. It is a current favorite of mine! And used the Blending Brushes to put a light layer of it down.
Coloring
The images all have a shimmer to them. You may need to look closely to see it in the photo. I colored everything using the ink pads by squeezing them and getting ink onto the lid. This is old school for coloring with the blender pen! But this time I used Wink of Stella as my paint brush. It works the same way as adding water or the blender pen liquid. Just with the addition of getting the shimmer. That is a Win / Win!!!
Thank you for stopping by today!!!
Online exclusives are here to stay! Click on the photo and be taken directly to them in my online store. If you place an order, please use my Host Code listed just below.
HOST CODE
My August Host Code is D6EB6CX7. Please use this code for orders under $150.00. I will have a small gift for those with orders over $50.00 in addition to the Perk Rewards Program. You can read all of the information at the top of the page in the Menu Bar under SHOP / Perks.
Thank you for stopping by today. I hope you enjoyed today’s project and will come back. I do read and reply to all of the comments individually. They mean a lot to me. Please reach out if you have a question.
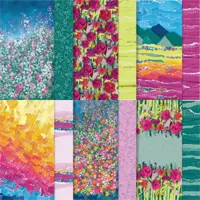
Today’s card is another one where the paper has done all of the work. The Fresh As A Daisy paper has such beautiful paintings included. I saw the actual paintings at a Stampin’ Up! Event. The SU artists are so very talented. And it makes for an easy and pretty card for us!
Papers
This pretty flower panel is from the Fresh As A Daisy Designer Series Paper. There are two pieces that have a variety of similar panels on a single piece. All you have to do is cut them apart. It could not be any easier! The striped section is a scrap that fit perfectly and added more color.
The card colors were pulled from the floral piece. I chose Garden Green as the card base but added the surprise of Moody Mauve. It is included in the floral and was a debate between it and a pop of Basic White as the thin layer. I also added the sentiment on a strip of the Moody Mauve for a different look.
Sentiment
This card could be part of a gift of cards, or just some to have on hand. So I went with a basic sentiment. “You are the best” works for so many occasions. The little sentiment is part of the Timeless Arrangements stamp set. There are several great sentiments in this set. And I love the size as well.
Finishes
To ground the sentiment I went with a soft layer of ribbons. The base layer is from the Real Red & Burlap Combo Ribbon. And the pink is part of the Sheer Ribbon Combo pack. Of course there must be bling! So there is a scattering of Iridescent Pearls. They not only pop, but add to the white of the flowers.
Thank you for visiting today!!
Start Redeeming your Bonus Days Coupons!!!
August 1 – 31 is the redemption period for your Coupon Codes. Now is the time to order something you have been waiting on and treat yourself!
Online exclusives are here to stay! Click on the photo and be taken directly to them in my online store. If you place an order, please use my Host Code listed just below.
HOST CODE
My August Host Code is D6EB6CX7. Please use this code for orders under $150.00. I will have a small gift for those with orders over $50.00 in addition to the Perk Rewards Program. You can read all of the information at the top of the page in the Menu Bar under SHOP / Perks.
Thank you for stopping by today. I hope you enjoyed today’s project and will come back. I do read and reply to all of the comments individually. They mean a lot to me. Please reach out if you have a question.
I have a different Fun Fold to share with you today. This one is more of a Die Set Fold and really simple to make. The Countryside Corners Dies are the stars.
Die Sets
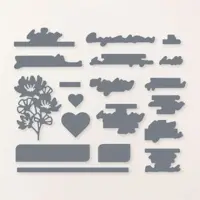
There are actually two Die Sets used on this card. The Countryside Corners Dies are the ovals and the Designer Tag Dies are the two containing the sentiment. And here is an open view for you to see the “rest of the story”! (I am dating myself there. LOL!!)
You can see from the inside view how there are two of both the largest and next largest of the Countryside Corners Dies. This idea is a CASE from Susan Edwards a South Caroline Demonstrator. I fell in love with this layout as soon as I saw it.
Papers and Colors
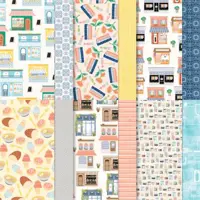
The colors for this card all came from the DSP piece. This is from a piece of the Les Shoppes Designer Series Paper. I have had difficulty using this paper until now. But cutting it with the die and being a focal point makes it seem as if you are looking out a window. And you should only see parts of the buildings. At least that is what I am thinking!
The card base is the Misty Moonlight with the largest of the Countryside Corners Dies in Petal Pink. And the two tags were to pull in the more color. The Granny Apple Green was my first choice and I love how it pops! But I felt like it needed more to the sentiment. So it was joined by a second tag in Misty Moonlight. I do like the double tags. They are held with a bow using the Starry Sky Metallic Ribbon which adds some sparkle to the front.
Measurements
The card base of Misty Moonlight is 8 1/2 X 4 1/2 and scored at 4 1/2. The Petal Pink layers are both cut using the largest of the Countryside Corners Dies. And the DSP plus the inside White layers are cut using the next size down of the Dies. Easy Peasy!!! The one thing to keep in mind is when adding the front panel, which is what I added first. Make sure your card does not exceed 5 1/2 in height so it fits in a regular envelope.
Start Redeeming your Bonus Days Coupons!!!
August 1 – 31 is the redemption period for your Coupon Codes. Now is the time to order something you have been waiting on and treat yourself!
Online exclusives are here to stay! Click on the photo and be taken directly to them in my online store. If you place an order, please use my Host Code listed just below.
HOST CODE
My August Host Code is D6EB6CX7. Please use this code for orders under $150.00. I will have a small gift for those with orders over $50.00 in addition to the Perk Rewards Program. You can read all of the information at the top of the page in the Menu Bar under SHOP / Perks.
Thank you for stopping by today. I hope you enjoyed today’s project and will come back. I do read and reply to all of the comments individually. They mean a lot to me. Please reach out if you have a question.
Today’s card is using one of the new Online Exclusive stamp sets. It is the Timeless Charm. I love this style of stamp and hope you do as well!
Stamp sets
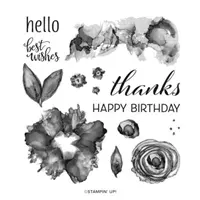
The sweet little flower with the shaded background are stamps from the Timeless Charm set. I apologize in that I thought it was back in stock. However, it will return so just keep an eye out. It is in the Online Exclusives and should be back the week of August 14. I do love the simple flower and especially paired with that shadow stamp. There are a couple of these in the set. This is stamped and then colored using Stampin’ Blends.
The second set is a quick usage. The sentiment stamped inside the Heart is from the Darling Details stamp set. I love this fun set and it is the star of tomorrow’s card. So stay tuned for that!
Papers
The bright colors of this card are from the fun papers I have used for layers. Normally my layers are card stock. So I decided to shake things up a bit, or brighten things up, and used the Masterfully Made Designer Series Paper. All of the sheets in this pack are just Fun! And the colors all coordinate very well. The two sheets I used are both colors of the Stampin’ Blends used to color the flower. To help even the layers and colors I went with the Thick Basic White as the card base. The bottom of White and the top of White really balance things.
Extras
The “extras” are a few different things. The bright and sheer ribbon is from the Sheer Ribbon Combo. This bright yellow matches the Lemon Lolly that I used for the flower shadow. And the simple folded piece behind the heart is different, which is perfect! The heart for the sentiment adds an extra love to the Thank You. The heart die is from the Wonderful Thoughts Die set. And the final touch is one of the Tinsel Gem 4 pack that is similar to the Fresh Freesia flower. It is placed in the center of the flower.
Start Redeeming your Bonus Days Coupons!!!
August 1 – 31 is the redemption period for your Coupon Codes. Now is the time to order something you have been waiting on and treat yourself!
Online exclusives are here to stay! Click on the photo and be taken directly to them in my online store. If you place an order, please use my Host Code listed just below.
HOST CODE
My August Host Code is D6EB6CX7. Please use this code for orders under $150.00. I will have a small gift for those with orders over $50.00 in addition to the Perk Rewards Program. You can read all of the information at the top of the page in the Menu Bar under SHOP / Perks.
Thank you for stopping by today. I hope you enjoyed today’s project and will come back. I do read and reply to all of the comments individually. They mean a lot to me. Please reach out if you have a question.
The content in this blog is the sole responsibility of Jackie Beers as an Independent Stampin' Up! Demonstrator. The use of and content of classes, services or products offered is not endorsed by Stampin' Up!