Today’s project is a fun and quick masculine card. This is a #simplestamping card, which means you do not need a lot of products to accomplish. And that can be the best kind.
Stamps
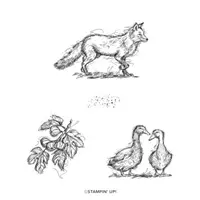
There are two different stamp sets used on this card. The first is the Stylish Sketches, which is where the fox is from. It is a Free with a $50.00 qualifying order during Sale-A-Bration. And the second is the Amazing Phrasing stamp set. This is such a fun set of great sentiment and phrases. They mix and mingle together or alone. And it is also a Sale-A-Bration stamp set that is Free with a $100.00 qualifying order. (Qualifying means it is the amount prior to shipping & tax)
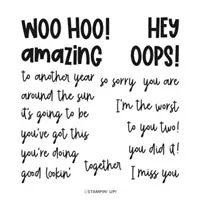
With using a darker piece of DSP for the fox, I knew it would need multiple stampings to be dark enough. So out came the Stamparatus. This way I could stamp, check the darkness, and repeat as much as needed. The sentiment was stamped on scrap paper. It is actually two different stamps. The Hey is alone. After stamping I trimmed around them using my Paper Snips. The Hey was more squarely cut to emphasize the boldness . And the other two words were more closely snipped to mimic the Charming Sentiments Bundle where the words are closely die cut. That is such a fun look!
Paper
The DSP used is two pieces from the He’s The Man Designer Series Paper. With the fox, I knew I wanted masculine and loved the Cajun Craze striped piece. But I thought finding a complimentary piece might be difficult. It was a piece of cake. The next sheet I pulled out was this herringbone looking piece in soft looking Sahara Sand. The two work beautifully together. Using Basic Black cardstock was more to draw more from the fox image. And it is difficult to see in the photo, but the Black behind the fox is over top of the Sahara Sand DSP.
Finishing
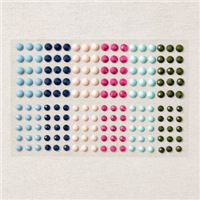
Actually adding the fussy cut sentiment was one of the last things I placed. They are all raised with Dimensionals. For the final touch I added three of the Brushed Metallic Dots. These are so nice and come in three different shades of metal.
SAB is winding down!
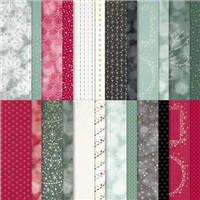
There are only ten days left of Sale-A-Bration. If you have any items left on your wish list, now is the time to place an order. There are items in the little booklet, which is shown below and can be downloaded. Or the first photo which has the new additions to the product list for August. Either way once we hit September 1 SAB is over for 2022.
Mini Catalog and Sale-A-Bration
Click on either catalog photo and you will be taken to my Online Store where you can download either or both catalogs.
HOST CODE
My August Host Code is H9KF4JUC. Please use this code for orders under $150.00. I will have a small gift for those with orders over $50.00 in addition to the Perk Rewards Program. You can read all of the information at the top of the page in the Menu Bar under SHOP / Perks.
Thank you for stopping by today. I hope you enjoyed today’s project and will come back. I do read and reply to all of the comments individually. They mean a lot to me. Please reach out if you have a question.
This is the last month of Sale-A-Bration for this year. Today’s card showcases two of the fun FREE items you can earn with qualified purchases. They are a stamp set and matching dies of happy hippos.
Stamp Set(s)
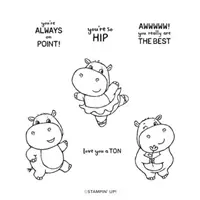
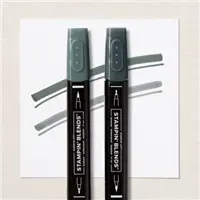
The hippo stamp set is FREE with qualified purchase from Sale-A-Bration called Hippest Hippos. There are three hippos and I used all of them. The facial expressions are so darn cute that I could not resist making a fun loving type card. And what is better than a stack of fun hippos? All of the stamping was done using Memento Tuxedo Black Ink. And the coloring is with Stampin’ Blends. The lighter shades on the hippos are Gray Granite and Smoky Slate. Smoky Slate is the darker areas. How well these colors worked on the hippos was a pleasant surprise.
For the sentiment, I wanted something that would fit proportionally to one of the hippos. Personally I love sweet and small sentiments for little tags. This one was located in the Season of Chic stamp set. “Love You” works for most any occasion!
Dies
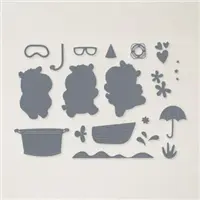
As with the stamp sets, there were two different die sets used. The first is the 2nd FREE from Sale-A-Bration dies. They are the Hippo Dies. There are additional cute and fun pieces that fit the stamp set, as well as the hippo dies. Since I had not stamped any of the extra pieces, all I needed were the hippos.
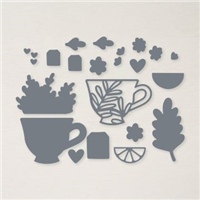
The other Die set used is the Tea Cup Dies. The cute little tag is from that Die set. And the little “Love You” fit on it perfectly! Additionally, it may appear the tree stump is a die cut, but it was fussy cut from the piece of DSP. There is a tree stump and matching die in the Happy Forest Friends. Those are adorable, except this one has the little leaf and stem attached. That adds a bit since the hippos are standing on it. Plus it is so beautifully colored that I chose to go this route.
Paper
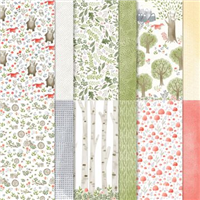
Of course all of the colors used came from the DSP. It is the Happy Forest Friend Designer Series Paper. The colors in this pack are good variety of colors. Having fun paper is a great benefit from Stampin’ Up!. In keeping with the hippos in gray, I went with a Smoky Slate card base and Old Olive as the layer. And to ground the trio of balancing hippos I added a fun piece of the Smoky Slate for them to stand on.
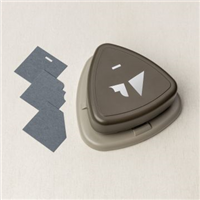
The hippo layer of Smoky Slate is cut using two of the punches from the Very Best Trio Punch. The top section was cut using the decorative edge punch. And the bottom was cut using the Angle punch. This is a great punch that I find myself using more and more often.
Slim Card Measurements
The card base is cut to 7 1/2 X 8 3/4 and scored at 3 3/4 on the 7 1/2 side. Then folded and creased well. For the Old Olive layer it is cut to 3 1/2 X 8 1/2. And the DSP layer is cut 3 1/4 X 8 1/4. The Smoky Slate behind the hippos was cut to give equal distance around the balancing act and I failed to notate the final measurements. My apologies there!
Mini Catalog and Sale-A-Bration
Click on either catalog photo and you will be taken to my Online Store where you can download either or both catalogs.
HOST CODE
My August Host Code is H9KF4JUC. Please use this code for orders under $150.00. I will have a small gift for those with orders over $50.00 in addition to the Perk Rewards Program. You can read all of the information at the top of the page in the Menu Bar under SHOP / Perks.
Thank you for stopping by today. I hope you enjoyed today’s project and will come back. I do read and reply to all of the comments individually. They mean a lot to me. Please reach out if you have a question.
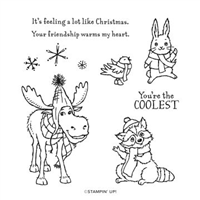
Mr. Moose is in the spotlight today! By using the Spotlight Technique I am only highlighting a portion of the moose image. This is a fun technique that is an oldy but goody!
Technique
The Spotlight Technique is a simple one to accomplish. This card was made as part of the Make My Monday Challenge that I am a Design Team Member for. You can join in the fun by creating your own version and then adding your card on the challenge page. Simply click on the picture below to go to the page.
My version of the spotlight was created by using the Heart Punch, the smaller one, and punching a heart from a scrap of cardstock. Next I placed the negative, the scrap of cardstock with the heart missing, over the stamped image of Mr. Moose. After finding the perfect section to color, I used the Basic Black Stampin’ Write Marker to draw around the inside of the negative. A quick and easy method. You may use any shape you wish as long as you are not covering the majority of the image. By using the heart I thought it was a bit different and shows love for Mr. Moose.
Stamps
Because the stamped image of Mr. Moose is so large I did not add a sentiment. But there are cute sentiments included in the stamp set named All Bundled Up, as well as a few other cute critters. You may remember that I used the Raccoon last week. There is also a bunny and a bird. Mr. Moose is stamped using Memento Tuxedo Black Ink and then colored using Stampin’ Blends. As mentioned above the spotlight shape was drawn using a Black Stampin’ Write Marker. This is the only marker that is available individually. It is a very handy tool to have.
Paper
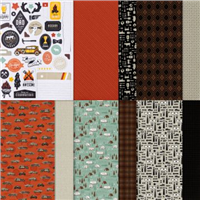
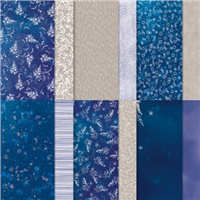
Leaving the paper discussion to last was very difficult for me. This paper is amazing!! It is from the Lights Aglow 6X6 Designer Series Paper. All of the sheets are gorgeous but this is my favorite. The gold simply shines and I am in love with the design on this sheet. The colors used are very similar to the Raccoon card from last week. But after seeing this piece of paper, I knew it was The One to help Mr. Moose be the star!
And to further help Mr. Moose shine, I added more gold to bring out the gold in the DSP piece. It is not just a plain Gold Foil however. This is the Gold and Rose Gold 6×6 Metallic Specialty Paper. It carried over to the current Annual Catalog from last year’s Fall Mini. And I am so happy. Both colors in this paper pack are wonderful. Before you shake your head at me for wasting some of this beautiful paper, rest assured that I took this into consideration. I cut the layer behind Mr. Moose from the center of the larger gold layer. No one but me would know, and it saves a second piece of the paper. Now you can released the shocked breath you took after seeing two layers of gold! 🙂
Mini Catalog and Sale-A-Bration
Click on either catalog photo and you will be taken to my Online Store where you can download either or both catalogs.
HOST CODE
My July Host Code is ZMG9Q7EX. Please use this code for orders under $150.00. I will have a small gift for those with orders over $50.00 in addition to the Perk Rewards Program. You can read all of the information at the top of the page in the Menu Bar under SHOP / Perks.
Thank you for stopping by today. I hope you enjoyed today’s project and will come back. I do read and reply to all of the comments individually. They mean a lot to me. Please reach out if you have a question.
Today’s card is a fun birthday card using a Christmas set from the new Mini Catalog. Using it for a different occasion is a great bonus!
Stamps
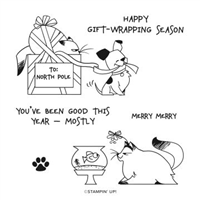
Since I love most animal stamps, and especially cats, it was a surprise to No One that I would purchase this stamp set as soon as possible. A mischief cat is just a fact! So when I needed a birthday card for someone who loves cats as well, I was ready to give this stamp set a try. The name is appropriate as it is North Pole Mischief. It will be such fun to make Christmas cards with these stamps, but this was the first use.
Sentiment
At first glance in looking at the stamp set, this sentiment is for Christmas and the good or naughty list. But I looked at it for a birthday and feel that it fits there as well. Plus the recipient is an adult and would get a kick out of those words! And with the lighter color of the DSP, I took a scrap and used it to stamp the sentiment.
To finish the front sentiment I added a couple of the Solid Faceted Dots. Grounding the little banner was a necessity I thought.
The inside birthday wishes are from the Peaceful Moments stamp set. Here is a look at the inside of the card. It is a gift card holder which adds to fun.
There is still plenty of room to write underneath the card. No worries for you there.
Paper
This gorgeous DSP is from the Sun Prints Designer Series paper. Both the stripes and the distressed looking gray work perfectly together and are pretty to boot. Plus they highlight the stamped images. It always surprises me when I think to stamp on the DSP. When the paper is a light enough color it works for images, but this paper was perfect for the sentiment and helps tie everything together.
Measurements
This gift card layout is a good one for multiples. It only requires a half sheet of cardstock cut to 4 1/4 X 11, and then scored at 3 1/2 and 8 3/4. Fold up the smaller scored end for the gift card pocket. There is a White layer under the DSP pieces. It is 4 X 3 1/4 beneath the stripe and 4 X 2 beneath the gray. The Sun Prints striped paper is cut to 3 7/8 X 3 1/8 and the gray is 3 7/8 X 1 7/8.
For the stamped area, the Starry Sky cardstock is cut to 3 1/2 X 2 1/8 with the White at 3 3/8 X 2 1/16. Sorry for the funky measurement there, you can adjust the size to fit your image of course. On the inside of the card, the stamped White is 4 X 2 3/4 with the piece beneath the gray at 4 X 2. And the gray is cut to 3 7/8 X 1 7/8.
HOST CODE
My July Host Code is ZMG9Q7EX. Please use this code for orders under $150.00. I will have a small gift for those with orders over $50.00 in addition to the Perk Rewards Program. You can read all of the information at the top of the page in the Menu Bar under SHOP / Perks.
Thank you for stopping by today. I hope you enjoyed today’s project and will come back. I do read and reply to all of the comments individually. They mean a lot to me. Please reach out if you have a question.
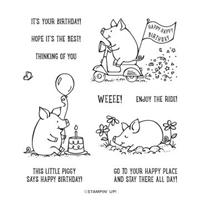
Today is the Fun Folds Blog Hop and I have a fun, Tri-fold card. Best of all it includes the This Birthday Piggy stamp set. It is one I have been excited to use.
Stamps
This Birthday Piggy stamp set is new in the Annual Catalog. Personally, I love all of the animal sets. And this one reminded me of one a couple of years ago. You may remember “when Pigs Fly”. That was special. This one brings back memories of the Geico commercial with the little piggy and his pinwheel saying “WEEEEE”. Well, the “weee” is in the stamp set.
Of course that sentiment had to go on the card!
Paper
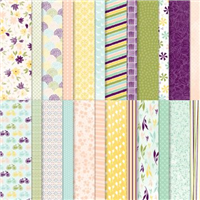
This beautiful and fun paper is the Design A Daydream Designer Series Paper. It is a Host Rewards in the Annual Catalog. This means that you get A Lot of paper for minimal cost. It is on page 135 and there are 48 sheets of double sided paper for $18.00.
As soon as I saw the pinwheel piece of DSP, I knew it went perfectly with this stamp set. And from a scrap piece of the DSP, I fussy cut a pinwheel. It is attached to the top of the bicycle flag. That was a perfect spot for it to appear as if it was planned that way.
Layout
There are several names for this type of fold as well as several different dimensions. For this one, I went as simple as I could and combined a few of the directions I found. However, it does only allow for one card from an 8 1/2 X 11 piece of cardstock. The card base is 5 1/2 X 11. It is scored on the 11″ length at 3 3/8 from each end.
Making the angle cuts is actually easier than it sounds. Beginning with either end, make a tick mark 1″ down from the top edge, and then 1″ in from the bottom edge. Then cut from the top score line over to the 1″ down mark. That provides the top downward angle. From that point, cut down to the 1″ in at the bottom. This provides the bottom angle. Repeat on the other end.
For the DSP. you need two pieces of DSP that measure 3 1/8 X 5 1/4. Decide which patterns you want to show on the two sides. They can be complimentary or two different ones as I did. Once decided. place the two pieces back to back. In other words, have the front piece with the side you want to show facing you, and if you turn the two over, have the other piece facing you. Make the exact cut that you did for the base. Go down 1″ from the top right and make a mark and in from the bottom right 1″ and make a mark. Then cut same as before. The two pieces will now fit the card. If this is too stressful, you can cut them individually!
I have a template picture to show that may be clearer.
Here is the open card.
Please Hop along with us to see more Fun Folds and ideas.
Last Chance on Retiring Mini Catalog Products
Click on the photo to get the complete PDF of retiring products. Pay close attention to discounted items. It may be less expensive to purchase some items that are part of a bundle separately, than at the bundle price! I want you to get the most for your dollars.
HOST CODE
My June Host Code is B4ZVQK6D. Please use this code for orders under $150.00. I will have a small gift for those with orders over $50.00 in addition to the Perk Rewards Program. You can read all of the information at the top of the page in the Menu Bar under SHOP / Perks.
Thank you for stopping by today. I hope you enjoyed today’s project and will come back. I do read and reply to all of the comments individually. They mean a lot to me. Please reach out if you have a question.
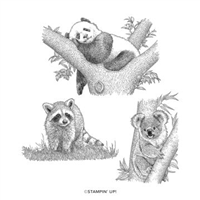
The Wild & Sweet stamp set images are all gorgeous and somewhat large. To showcase this I cut the image into panels after stamping. It turned out better than expected.
Panda Bear
A Panda Bear is so pretty and this beautiful image is from the Wild & Sweet stamp set. Three other animal images complete the set. Large images, like this one, can be a bit difficult to use because they cover most of the card. To help with this problem I pulled out an old trick. After stamping and coloring the image, I cut the one piece of cardstock into three pieces. The starting size is Basic White cut to 4 3/4 X 3 1/2. After cutting 1 1/2 from each end, that left 1 3/4 in the center. These layers are then added to Basic Black layers cut to 1 5/8 X 3 5/8 for each end piece and 1 7/8 X 3 5/8 for the center.
Sentiment Layer
Lovely fonts for sentiments are a weakness of mine. Having two different fonts adds quite a bit to a simple two word sentiment. It may be difficult to see from the photo, but the back layer of the sentiment is actually embossed using the Fern 3D Embossing Folder. Both pieces are cut using Layering Circles Dies. For a final touch there is a single Matte Black Dot added to the sentiment.
Last Chance on Retiring Mini Catalog Products
Click on the photo to get the complete PDF of retiring products. Pay close attention to discounted items. It may be less expensive to purchase some items that are part of a bundle separately, than at the bundle price! I want you to get the most for your dollars.
HOST CODE
My June Host Code is B4ZVQK6D. Please use this code for orders under $150.00. I will have a small gift for those with orders over $50.00 in addition to the Perk Rewards Program. You can read all of the information at the top of the page in the Menu Bar under SHOP / Perks.
Thank you for stopping by today. I hope you enjoyed today’s project and will come back. I do read and reply to all of the comments individually. They mean a lot to me. Please reach out if you have a question.
The content in this blog is the sole responsibility of Jackie Beers as an Independent Stampin' Up! Demonstrator. The use of and content of classes, services or products offered is not endorsed by Stampin' Up!