The days are getting warmer and longer, and I LOVE it!!! Today I have a card that shows my enthusiasm for the warmer Spring weather.
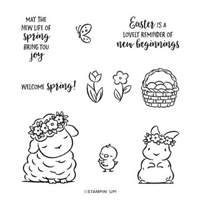
One of the old time sayings has something about “coming in like a lamb”. I cannot remember if it is Spring though. When I saw this stamp set, Springtime Joy, I immediately thought of Spring and Easter. Regardless, I think this little lamb is adorable! I kept the lamb image very simple. I stamped using Smoky Slate Ink on Basic White cardstock. I colored the flower headband with Petal Pink and Mint Macaron Stampin’ Blends.
The paper is from the Peony Garden Designer Series Paper. I love the softness and the flecks of color in the larger piece. I layered the DSP onto a piece of Smoky Slate cardstock. The base of the card is Thick Basic White. The ribbon wrapped around the card is Petal Pink Organdy Striped Ribbon from the Annual Catalog. Sometimes I get carried away with the newer catalogs and don’t use the other items.
To join all of the colors together I cut two banner pieces and cut one end of each using the Banner Pick A Punch. To finish, I decided not to layer the lamb circle. I simply added a few Stampin’ Dimensionals and let it overlap the banners a bit. I did add some Basic Pearls to the flowers on the lamb. I know it is a norm to only use an odd number of embellishments, but there were four flowers, so I added four pearls.
Thank you for stopping in today. I have the measurements just below. Please stop by on Monday for another new project.
Measurements:
Card base of Thick Basic White is cut 4 1/4 X 11, scored at 5 1/2
Smoky Slate cardstock cut to 4 X 5 1/4
Peony Garden DSP cut to 1 X 5 1/8 and 2 7/8 X 5 1/8
Smoky Slate banner cut to 1 X 3 3/4, before punched banner
Basic White stamped banner cut to 1/2 X 3 1/2, before punched banner
HOST CODE
My March Host Code is: B6JC9CHE Please use this code for orders under $150.00. I will have a small perk for those with orders over $50.00
Hello, welcome to the Stampin’ Pretty Pals’ Blog Hop! This month our Design Team’s theme is “Cute Critters” – showcasing their card/project with adorable animals, birds, or insects for any occasion. We hope you enjoy and will be inspired by them! Don’t forget to leave comments! We love hearing from you. At the end of my post, you will find the full line-up to help you “hop” along from Pal to Pal.
You simply cannot go wrong with Cute Critters. The problem I had was which one to choose. A friend recently adopted a puppy and I saw him for the first time last week. That became my inspiration, and I added a touch of whimsy for good measure.
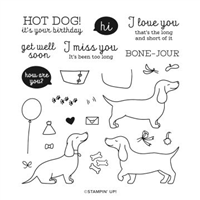
When I saw the Hot Dog stamp set, I knew it would be perfect. My idea came from the sitting dog and the little envelope. I realized I could stack the dogs to reach a mailbox. This is a great example of how the photopolymer stamps can be very flexible. Because I could see through the stamp, It was easy to have one climbing on the back of the other.
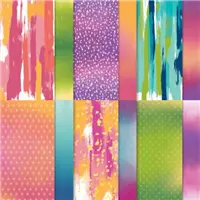
The background paper is from the Artistry Blooms Designer Series paper. The various shades of green matched my “out in the yard” theme. I added the mailbox by simply using a strip of Cinnamon Cider cardstock 1/4″ wide. The mailbox is a square of Basic Black cardstock. I cut off a tiny bit from the end and “hinged” it with a glue dot on the back side. To finish off the yard part, I added a couple of pieces of grass from the Dandy Wishes Die set.
The dogs are stamped and colored with Cinnamon Cider Stampin’ Blends. I stamped the little envelope prior to die cutting the dog piece using the Stitched Rectangle Dies. I then stamped and colored a second envelope and cut it out. It is raised with a Mini Dimensional so it appears to go above the mailbox lid.
The sentiment is from the Hot Dog stamp set also. I stamped and die cut it using a different Stitched Rectangle Die. I backed the sentiment with Poppy Parade cardstock to help the Resin Hearts pop a little. The finishing touch is a Resin Heart on the mailbox to act as a Flag.
I hope you like my whimsical pups. Thank you very much for stopping by today.
More inspiration awaits! Use the Blog Hop Line-up below to visit the rest of this month’s Design Team. My fellow Pals are excited to show you what they’ve created! Mark your calendars for our next blog hop on April 14th when our theme is “Great Family Occasions” when our Design Team creates a project for any special occasion. Don’t miss the fun! Until then, please stay safe and have fun in your craft space.
I have a fun card to share today. It is a bit whimsical in design and the paper I chose. The title of the post should give you a hint.
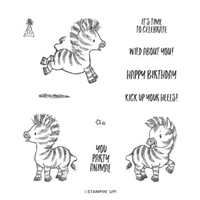
Did you guess the Zany Zebra stamp set? I love this cute little guys. I stamped them using Memento Tuxedo Black Ink and then hit the highlights with the Light Smoky Slate Stampin’ Blend. I debated on how to cut them out, would it look best with circles, squares, ovals, etc. I finally decided just to do a quick trim around the image with my Paper Snips. This is a design that is easily trimmed in this manner. I did not get into detailed cutting, I just went easily around the edges. New stampers, or those without a die cut machine could use this method for quite a lot of stamps.
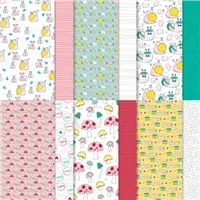
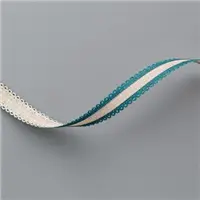
I paired these cuties with the Snail Mail Designer Series Paper to add to my whimsical idea. I used both sides of the same sheet of DSP. The “Hello” side is 1 3/4 X 3 7/8, and the mushroom side is 3 3/8 X 3 7/8. To help tie the pieces together, I added a layer of Pool Party cardstock beneath the two pieces. Both it and the card base of Pretty Peacock work well with the colors of the mushrooms. To finish the coordination, I added a piece of the Pretty Peacock Scalloped Linen Ribbon across the center. The zebras are grounded by the ribbon.
The finishing touch is the sentiment. The DSP says Hello and Bonjour, so I simply added the “Kick Up Your Heels”. The left side zebra took me up on that and has his heels kicked up a bit. For the flags of the sentiment, I first punched the sentiment using the Classic Label Punch. I then placed each pointed end back into the punch to make the flags.
I appreciate you stopping by today. Please come back tomorrow for the March Pals Blog Hop. There will be a great variety of cards for your to hop through.
HOST CODE
My March Host Code is: B6JC9CHE Please use this code for orders under $150.00. I will have a small perk for those with orders over $50.00
Welcome to InKing Royalty’s February Blog Hop! During this year’s blog hops, we are having fun with our stamping favorites – our favorite themes for seasonal cards and projects. This month’s projects feature balloons, so you are in for a celebratory treat. We are excited to share our creations with you today! After you read my post, I hope you’ll hop over to the next person on the list at the base of this post.
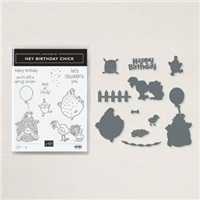
I believe balloons are a definite Fun item. Anything that makes me Smile is fun. So I have combined the smile inducing, adorable, Happy Birthday Chick stamp set with a Fun Fold to share for this Blog Hop Challenge.
This is the first time I have made this Fun Fold. There are a couple of names that I have seen in looking for it on various card sites. So I chose to call it the Corner Fold. It worked perfectly to show off the balloons. And since the little chicks are shouting Happy Birthday, the balloons are appropriate.
Here is the inside view and you can see the fold as well.
I LOVE the chick with the balloon hanging off her tail! You can see the corner pieces under the chick and above her. Those fold inside the card when it is closed. I positioned the chick to lay down with the fold and not be seen when the card is closed. The three balloons from the closed card are attached on the back side of the fold.
The chicks are all stamped with Memento Tuxedo Ink and colored with the Stampin’ Blends. All of the colors will be listed in the supply list. They are all cut out using the matching Dies in the bundle. The Happy Birthday from the front is stamped and punched out using the Classic Label Punch.
I chose to have a background for the balloons as the strings are not really sturdy. I used the 2″ Circle Punch for this. All of the DSP is from the Ice Cream Corner Designer Series Paper. I think it worked perfectly for this birthday card.
Thank you for stopping by today. I hope you’ll hop along to the next stop on the blog hop, Ann Murray at Murray Stamps Ink. There’s lots of inspiration to be found in this group – and you don’t want to miss it!
Thank you for hopping along with us. If you get stuck during the Blog Hop, please use this line-up as a guide:
Last week I had asked on my Facebook page, Blue Line Stamping, to name a few stamp sets that you would like to see used. I used one on Monday. You can see that card HERE. And today I am sharing the second one. It is Kangaroo & Company.
I chose to make the Kangaroo as a Valentine Card. But since it doesn’t say that on the front, it could be used for any expression of love. The little envelope is part of the stamp set and I think it is simply adorable, so I wanted to include it. It’s sort of hanging in the air, so I see it as love is being sent. Yes, I know I have a crazy imagination!!! LOL!
The background for the card is from the True Love Designer Series Paper. I used the new Blending Brushes with Flirty Flamingo and Poppy Parade Inks to blend the colors onto the paper. I love how the dots still show through so well.
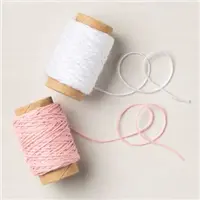
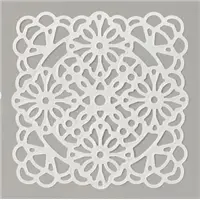
To ground everything, I added one of the Vellum Doilies. These little squares are so versatile and are perfect for this use. I also added the White Baker’s Twine from the Snail Mail Combo Trim Pack.
The kangaroo is adorable alone or with one of the included inserts for the belly slot. I went with the hearts for the “Love” theme. They are colored using Poppy Parade Stampin’ Blend Combo. I also utilized the little “stick” for lack of a better word. It is what the inserts can be attached to so they pull out of the belly slit. Here is a closer look at that.
Isn’t that adorable? The smaller sayings in the stamp set will all work on this little piece. It is long enough to easily hold the attached hearts in place. You do need to pay attention when adding your dimensionals so they do not interfere with it.
Thank you for stopping in today! I really do appreciate it. If you have any stamps you would like to see me create a card for, hop over to my Facebook Blue Line Stamping page and leave me a note. There are not very many that I do not have 🙂
HOST CODE
My February Host Code is: MRYR7XY2 Please use this code for orders under $150.00. I will have a small perk for those with orders over $50.00
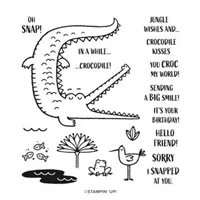
Oh Snap! is perfect for this card. This past year has really messed with my brain and how I seem to operate. I have become LATE on way too many things. This card is one of them. I needed a Congratulations card and am very late getting it made and sent. I hope you are not like me!!
I used the gator and his bird friend to shout Congratulations. They are both colored using Stampin’ Blends. I added some light Pool Party to the bottom of the card to ground them and also serve as some water.
The Congratulations is from the Peaceful Moments stamp set. I layered it onto a piece of Granny Apple Green cardstock. I added a few of the Opal Rounds to be add some bling as well as look like water droplets. I apologize for the poor photo quality as it is hard to see them or the Pool Party at the bottom.
I forgot to take a photo of the inside. Of course I did!!! But, I stamped the Oh Snap, and die cut it along with a Granny Apple Green background using the scalloped small circles in the Layering Circles Dies. I added this to the inside along with a handwritten apology for being so late.
This is a really quick card to make and hopefully will make the recipient Smile. That is always my goal with my projects.
Thank you for stopping in today. Tomorrow is the Pals Blog Hop. I hope you will join me and hop along through all of the blogs for some great card ideas.
HOST CODE
My February Host Code is: MRYR7XY2 Please use this code for orders under $150.00. I will have a small perk for those with orders over $50.00
The content in this blog is the sole responsibility of Jackie Beers as an Independent Stampin' Up! Demonstrator. The use of and content of classes, services or products offered is not endorsed by Stampin' Up!