Today’s project is another of my envelope fun fold card using the Sweet Stockings products.
Stamps
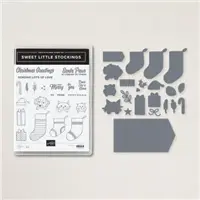
The Sweet Stockings Suite of products are simply adorable! I used the Sweet Little Stockings Bundle for today’s project. All of the stamps used are from the stamp set. And the adorable kitty head sitting on the sentiment is the perfect addition. I am an animal lover. Especially cats and dogs. We only have cats right now, but any of the babies in this set are adorable. (Except maybe the hamster!)
The kitty head is stamped using Basic Gray and then colored with Smoky Slate Stampin’ Blends. There are matching dies for most of the items in the stamp set. I used just the kitty head to die cut. The adorable little girl is added so her paws are hanging over a bit.
Paper
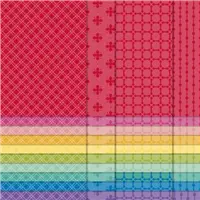
The DSP sheet of tangled Christmas lights is from the Sweet Stockings Designer Series Paper. As pretty and cute as all of the sheets in the paper pack are, this piece is my favorite. I just have to Smile when I see it. And the best part is that even though the paper is a starring role in the card, it only uses a 3 1/2 X 3 1/2 square of it. You can get nine of these from one piece of 12 X 12 paper!
Here is a view of the inside of the card. There is a little surprise n there.
The sentiment is from the Sweet Little Stockings set and the cute little kitty is from another piece in the DSP pack. There are both cats and dogs in these little stockings on one of the sheets. I used my Paper Snips to cut this one out. The trick to this little cutting is to leave a bit of white around the edges. But the most important part of fussy cutting is to turn your paper and not the scissors. Plus it helps to have sharp scissors!
Directions
Click on this picture for a pdf of the directions.
Fabulous Stampin’ Up! Join Promotion
Join my team by purchasing the Starter Kit for $75.00 and receive $125.00 of products totally of your choosing! That is a fabulous deal at a $24.00 discount off of the regular Starter Kit price. This is always the Ultimate Bundle of products, and now it is even better! You can simply click on the picture below and Join.
HOST CODE
My November Host Code is M4GF9KZ7. Please use this code for orders under $150.00. I will have a small gift for those with orders over $50.00 in addition to the Perk Rewards Program. You can read all of the information at the top of the page in the Menu Bar under SHOP / Perks.
Thank you for stopping by today. I hope you enjoyed today’s project and will come back. I do read and reply to all of the comments individually. They mean a lot to me. Please reach out if you have a question.
The card for today is to honor a dear friend’s sweet kitty. Any sympathy card is difficult to make. I hope I was able to honor the sweet girl with a simple card.
Stamps
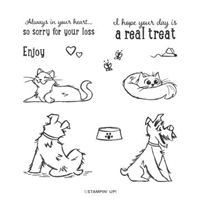
The precious kitty is from the Pampered Pets stamp set. I stamped her with Basic Gray ink and then colored with Smoky Slate Stampin’ Blends. The kitty is fussy cut, which was quite easy as it has pretty simple lines.
The sentiment is from the set as well. Actually the sentiment also says “Sorry For Your Loss” . I wanted a bit smaller wording and also to focus on the “Heart” part of the wording. To achieve this, I inked the part of the sentiment I wanted by using the Basic Black Stampin’ Write Marker. This is the only marker that can be purchased individually. And it is a must have for me! Included in the stamp set are these adorable little hearts. I added them as a compliment for the sentiment.
Paper
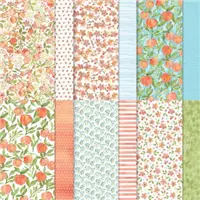
This pretty paper is from the You’re A Peach stamp set. It creates a soft background for the kitty to sit on. The DSP piece is 4 X 3 and cut at an angle. I placed one edge on the trimmer track and the other on the 3/4″ mark. The same was done for both top and bottom.
The base card is Thick Basic White. For a bit of dimension, I added the kitty layer to a piece of Basic White that is cut 4 X 5 1/4. This is then added to the base card with Stampin’ Dimensionals.
Fabulous Stampin’ Up! Join Promotion
Join my team by purchasing the Starter Kit for $75.00 and receive $125.00 of products totally of your choosing! That is a fabulous deal at a $24.00 discount off of the regular Starter Kit price. This is always the Ultimate Bundle of products, and now it is even better! You can simply click on the picture below and Join.
HOST CODE
My November Host Code is M4GF9KZ7. Please use this code for orders under $150.00. I will have a small gift for those with orders over $50.00 in addition to the Perk Rewards Program. You can read all of the information at the top of the page in the Menu Bar under SHOP / Perks.
Thank you for stopping by today. I hope you enjoyed today’s project and will come back. I do read and reply to all of the comments individually. They mean a lot to me. Please reach out if you have a question.
Today’s project is a gift card holder. The Fun Fold inside is a way to make any card a Gift Card holder. What a fun idea!!
Stamps
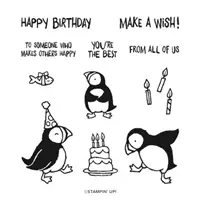
The fun stamp set with the name of Party Puffins is exactly what the name implies. They are really party animals. And I love them!! At first glance I thought they may be more for younger recipients. But the more I play with them, I now know they are perfect for anyone. And they bring a Smile to my face!
All of the stamps I used are from the one stamp set. Here is the inside of the card.
Inside Fun Fold
I cased the inside fold from Dawn Griffith. It is really simple to do and makes such a Wow for your card. The “fold” is a piece of 4 1/4 X 11. (It looks much smaller because the card itself is a regular 5 1/2 X 8 1/2 folded in half) Fold and score the White piece at 5 1/2. Then fold each end back on itself and score. This gives you the accordion fold. You want the mountain to be in the center. For the gift card slot, mark 2″ up from the bottom of the right end and then cut from the mark to the score line.
Finishing Card
Adhere the folded piece to the inside by having it in the accordion fold, apply adhesive to the left end piece. Place it evenly spaced , top to bottom, and with a narrow border on the end of the inside front of the card. Lay it down and then close the back of the card over the folded piece. Open the card and apply glue to the angle cut end, but only the bottom and the short side. Do the same alignment and close the front of the card over it to adhere.
The inside panels are 2 1/4 X 3 1/2 (3) and 2 X 3 1/4 (3). Be sure to adhere the panels prior to adding the accordion fold to the inside of the card. It is Much Easier to do the panels first. Ask me how I know this 🙂 LOL!!
Thank you for visiting today! If you have any questions about today’s card or any products, please reach out to me. I would love to assist you.
HOST CODE
My November Host Code is M4GF9KZ7. Please use this code for orders under $150.00. I will have a small gift for those with orders over $50.00 in addition to the Perk Rewards Program. You can read all of the information at the top of the page in the Menu Bar under SHOP / Perks.
Thank you for stopping by today. I hope you enjoyed today’s project and will come back. I do read and reply to all of the comments individually. They mean a lot to me. Please reach out if you have a question.
After a break from Halloween cards to participate in the Pals Blog Hop yesterday, I have a fun Cat Halloween to share. If you missed the blog hop, you can start with my card by clicking HERE and then following the lineup.
Stamps
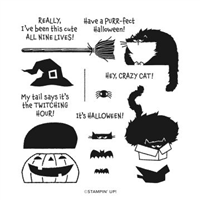
I know you have seen me use this Clever Cats stamp set a few times, or more! The cats are just adorable and I love cats. And especially Black Cats. They are always the sweetest. This guy fits perfectly to sit on just about anything. So today he is sitting on the pumpkin. All of these images are included in the stamp set. The sentiment is included as well, along with some other precious ones. This is one stamp set that will reside with me for quite a while.
Colors
To go along with the Halloween theme, as well as the Black Cat, I went with the traditional Orange and Black as my color pallet. The cat and pumpkin were stamped using Memento Tuxedo Black Ink. I colored the pumpkin with Pumpkin Pie Stampin’ Blends. For the sentiment I wanted a bit more orange, so stamped it using Pumpkin Pie Ink. The final touch is the Black & White Gingham Ribbon. Just to be different I did a double loop bow and am happy with how it turned out.
HOST CODE
My October Host Code is HSUBS7GX. Please use this code for orders under $150.00. I will have a small gift for those with orders over $50.00 in addition to the Perk Rewards Program. You can read all of the information at the top of the page in the Menu Bar under SHOP / Perks.
Thank you for stopping by today. I hope you enjoyed today’s project and will come back. I do read and reply to all of the comments individually. They mean a lot to me. Please reach out if you have a question.
If you are a regular follower of my blog, then you know I have Cats. And I love Cats! So me purchasing the Clever Cat stamp set was a given as soon as I saw it. Then when it was in my hands, I really fell in love with the images and sentiments. I hope you enjoy today’s card.
Stamps
That black cat is just the cutest guy to me. But then I have always had a black cat, or two. My beginning idea for this card was going to be a Halloween card. That is the reason for the broom. But then I saw the sentiment and couldn’t resist using it.
Paper
The DSP piece is from the Cute Halloween Designer Series Paper. As I said, my original thought was Halloween. LOL!! However, these black stripes would work for any card. As does most of the “Other Side” of the papers. The card base is Thick Basic White and a layer of Basic Black. This is a very quick and easy card.
Sentiment Layer
I wanted the sentient to stand out a little, but did not want more layers. After looking through punches, I landed on the Tailored Tag Punch. (If you saw yesterday’s post, I used this punch to make the banner on my tag layer. It is a very versatile punch) After punching out the sentiment, I wanted to give it some depth. A little trick I found several years ago was to edge a punched image with a Stampin’ Write Marker. In this instance I used the Basic Black Stampin’ Write Marker. A Bonus is that it is the only marker that can be purchased individually.
All it takes to give the black edge is a steady hand. I hold the paper at a little bit of an angle, and using the brush tip of the marker, run the marker around the paper. Just don’t have the tip too far onto the front of the paper or you have way too much edge. I suggest practicing on a scrap piece of paper. But I think you will like the results.
The 2nd Sale-A-Bration Is Here!!
Join My Team Promotion During Sale-A-Bration!!
HOST CODE
My September Host Code is NWZNBFH2. Please use this code for orders under $150.00. I will have a small gift for those with orders over $50.00 in addition to the Perk Rewards Program. You can read all of the information at the top of the page in the Menu Bar under SHOP / Perks.
Thank you for stopping by today. I hope you enjoyed today’s project and will come back. I do read and reply to all of the comments individually. They mean a lot to me. Please reach out if you have a question.
Stampin’ Up! is the best as coordinating their products. The card I am sharing today is one made from a stamp set from the Annual Catalog along with paper from the Sale-A-Bration Catalog.
Stamps
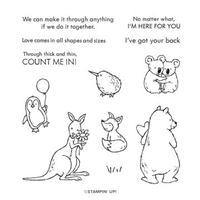
This adorable penguin is from the Annual Catalog stamp set named Count On Me. It has several precious little animals. They are sized similar to this one for ease of card making. I love this little guy and the cute attached balloon. His floating along did not even require a sentiment.
Paper
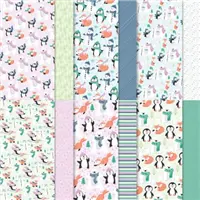
The two pieces of DSP are both from the Penguin Playmates Designer Series Paper that is one of the FREE Sale-A-Bration items. You know I tend to use opposite sides of DSP and I did the same here. Each of these pieces has penguins and some other animals, that not surprisingly, will coordinate with the stamp set I used.
Colors
To coordinate with the DSP, I chose Misty Moonlight and Fresh Freesia. I do not mind that these colors are not generally associated with penguins. The color I used for the penguin is the Light Misty Moonlight Stampin’ Blend. His feet and nose are Dark Daffodil Delight , and the balloon is Light Fresh Freesia Blends.
The 2nd Sale-A-Bration Is Here!!
Join My Team Promotion During Sale-A-Bration!!
HOST CODE
My September Host Code is NWZNBFH2. Please use this code for orders under $150.00. I will have a small gift for those with orders over $50.00 in addition to the Perk Rewards Program. You can read all of the information at the top of the page in the Menu Bar under SHOP / Perks.
Thank you for stopping by today. I hope you enjoyed today’s project and will come back. I do read and reply to all of the comments individually. They mean a lot to me. Please reach out if you have a question.
The content in this blog is the sole responsibility of Jackie Beers as an Independent Stampin' Up! Demonstrator. The use of and content of classes, services or products offered is not endorsed by Stampin' Up!