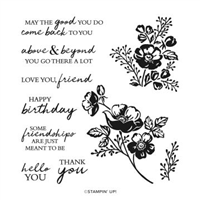
Thank You cards are always needed and today’s is a quick one. Using the Shaded Summer stamp and matching Die set it came together easily.
Colors
It is very unusual for me to say a color choice came from anywhere other than some designer paper. But today’s card color choice came from the stamp and me wanting a Red Rose! Then it became a pretty simple and quick card by stamping tone on tone for the base. Which is another unusual technique for me because I tend to have a few layers. But today’s card is mostly Sweet Sorbet all the way!
Stamps
The stamp set for this sweet flower, I believe it is a rose???, is the Shaded Summer stamp set. The Tone On Tone was done using Sweet Sorbet Ink on the Sweet Sorbet card base using the smaller flower stamp. Then using the larger one I stamped on a scrap of White and fussy cut only the flower. With not wanting the card totally one color, I opted for stamping the large image using Pale Papaya. The softness blends well with the Sweet Sorbet, even if it is not a green as expected.
Adding the sentiment took a bit of thought. In trying something different, I stamped the sentiment and then did a bit of fussy cutting around it. Most of the edges are straight lines, but I did go around the Y and u on each end.
Dies and Vellum
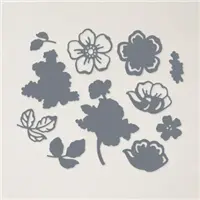
A matching Die set for the Shaded Summer stamp set is the Summer Shadow Dies. They are not a bundle however. The dies were released as a special edition last year and then added to the Annual Catalog in June. Personally I was thrilled because dies for flowers are awesome! So the large Pale Papaya flower was Die cut and then the fussy cut Sweet Sorbet flower was layered in to place.
The second Die is the Deckled Rectangles Dies. It was used on the Vellum layer. And it may be a bit difficult to see in the photo, but is very noticeable in person. The Third largest die was used for this piece. Lovely Layers Vellum is a package of Layer Sized pieces of vellum. Some are printed and most are the same as I used.
Finishes
To give the card a bit of bling and shine, there are three different elements. First is the Wink of Stella on the red flower. That leaves a very subtle bit of shine. Secondly is the beautiful Sweet Sorbet Metallic Ribbon bow. This ribbon is available in all of the new In Colors and is a dream to tie bows with. And the metallic shine is a perfect touch. Finally there are three of the 2021-2023 Opals in the Pale Papaya scattered around.
Mini Catalog and Sale-A-Bration
Click on either catalog photo and you will be taken to my Online Store where you can download either or both catalogs.
HOST CODE
My August Host Code is H9KF4JUC. Please use this code for orders under $150.00. I will have a small gift for those with orders over $50.00 in addition to the Perk Rewards Program. You can read all of the information at the top of the page in the Menu Bar under SHOP / Perks.
Thank you for stopping by today. I hope you enjoyed today’s project and will come back. I do read and reply to all of the comments individually. They mean a lot to me. Please reach out if you have a question.
Today’s card is a different layout for a Gatefold Card. Turning the orientation really changed the look. A layered sentiment joins the fold together.
Stamps and Dies
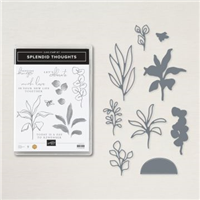
The Splendid Thoughts Bundle includes the Splendid Thoughts Stamp set and the Splendid Stems Dies. The Dies are wonderful and I have used them more than the stamp set. My favorite is the sentiment Die used here. That taco shape with some added definition is great for a lot of sentiments in the catalog.
And the Splendid Stems Dies include a variety of flower and stems. Two of the images above are stamped and then Die cut. But the third Crushed Curry piece is simply Die cut. This more open stem adds quite a lot of texture.
Last, but not least, is the Deckled Rectangles Dies. The NIght of Navy layer is cut using one of those and the edge is very different from any other of the current Dies in the catalog.
Inside View
The inside sentiment is from the Peaceful Moments Stamp set. There is an added touch of one stem of flowers. On the front I stamped the same image on Sweet Sorbet cardstock and then die cut. For the inside one, I stamped on the White and then colored with Sweet Sorbet Stampin’ Blends.
Paper
Stampin’ Up!’s DSP is one of my most favorite things in the catalog. This paper is from the Sale-A-Bration catalog and is FREE with a qualifying order. It is the Rings of Love Designer Series Paper. All of the colors in this sheet are wonderful. And I probably used the majority of them in either cardstock or coloring. The combination of the Night of Navy and Sweet Sorbet are perfect I believe.
Measurements:
The Sweet Sorbet card base is cut to 5 1/2 X 8 1/2 and scored at 2 1/8 and 6 3/8. It may be a bit difficult to see in the photo, but there is a White layer under the DSP. It is two pieces that are each cut 5 1/4 X 1 7/8. And the DSP layers are two pieces cut at 5 1/8 X 1 3/4.
Inside is a regular size White layer cut to 5 1/4 X 4. For the front, theNight of Navy Deckled layer is cut from a piece of scrap that is 2 1/2 X 4. And the Crumb Cake layer is from a piece measuring 2 3/4 X 3 1/2. The Sweet Sorbet image truly was a narrow scrap that was approximately 1 X 3. And and even smaller scrap was used on the Crushed Curry piece.
The stems were adhered to the Night of Navy layer only at the bottom. By leaving the upper parts free it gives a touch more dimension. And the sentiment is adhered with Stampin’ Dimensionals. The whole sentiment / stems layer was centered on the right side of the card with only the upper half adhered to the top flap by using Stampin’ Dimensionals also.
Mini Catalog and Sale-A-Bration
Click on either catalog photo and you will be taken to my Online Store where you can download either or both catalogs.
HOST CODE
My August Host Code is H9KF4JUC. Please use this code for orders under $150.00. I will have a small gift for those with orders over $50.00 in addition to the Perk Rewards Program. You can read all of the information at the top of the page in the Menu Bar under SHOP / Perks.
Thank you for stopping by today. I hope you enjoyed today’s project and will come back. I do read and reply to all of the comments individually. They mean a lot to me. Please reach out if you have a question.
Stampin’ Up! has added ten new items to the Sale-A-Bration products. So you now have some wonderful new products to finish off your next order. These items are the same pricing as in the SAB booklet. They are FREE with a qualifying order, either $50.00 or $100.00. Plus these are all items from the current Annual Catalog. You can see them in use as you peruse the catalog for your wish list and next order.
These items are also the same in that they are while supplies last. Although the fact they are in the Annual Catalog should make that a slim chance of running out.
Page 20 of the Annual Catalog has two sweet cards showing the Daffodil Dies in use. And page 75 showcases three beautiful cards using the Flowers of Home Dies which pairs with the Blessing of Home stamp set. These two are favorites of mine. But so are both of the embossing folders. And I absolutely love the Foil papers. But then you know that I love it all!!!
If you have any questions, please reach out to me. I would love to be your creative assistant!
Mini Catalog and Sale-A-Bration
Click on either catalog photo and you will be taken to my Online Store where you can download either or both catalogs.
HOST CODE
My August Host Code is H9KF4JUC. Please use this code for orders under $150.00. I will have a small gift for those with orders over $50.00 in addition to the Perk Rewards Program. You can read all of the information at the top of the page in the Menu Bar under SHOP / Perks.
Thank you for stopping by today. I hope you enjoyed today’s project and will come back. I do read and reply to all of the comments individually. They mean a lot to me. Please reach out if you have a question.
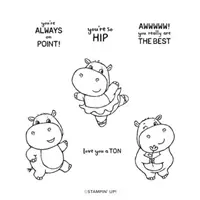
This is the last month of Sale-A-Bration for this year. Today’s card showcases two of the fun FREE items you can earn with qualified purchases. They are a stamp set and matching dies of happy hippos.
Stamp Set(s)
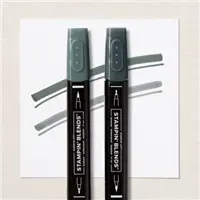
The hippo stamp set is FREE with qualified purchase from Sale-A-Bration called Hippest Hippos. There are three hippos and I used all of them. The facial expressions are so darn cute that I could not resist making a fun loving type card. And what is better than a stack of fun hippos? All of the stamping was done using Memento Tuxedo Black Ink. And the coloring is with Stampin’ Blends. The lighter shades on the hippos are Gray Granite and Smoky Slate. Smoky Slate is the darker areas. How well these colors worked on the hippos was a pleasant surprise.
For the sentiment, I wanted something that would fit proportionally to one of the hippos. Personally I love sweet and small sentiments for little tags. This one was located in the Season of Chic stamp set. “Love You” works for most any occasion!
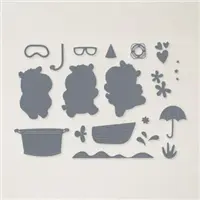
Dies
As with the stamp sets, there were two different die sets used. The first is the 2nd FREE from Sale-A-Bration dies. They are the Hippo Dies. There are additional cute and fun pieces that fit the stamp set, as well as the hippo dies. Since I had not stamped any of the extra pieces, all I needed were the hippos.
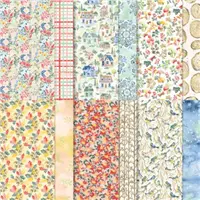
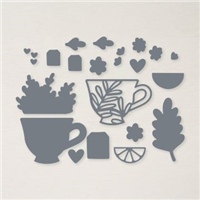
The other Die set used is the Tea Cup Dies. The cute little tag is from that Die set. And the little “Love You” fit on it perfectly! Additionally, it may appear the tree stump is a die cut, but it was fussy cut from the piece of DSP. There is a tree stump and matching die in the Happy Forest Friends. Those are adorable, except this one has the little leaf and stem attached. That adds a bit since the hippos are standing on it. Plus it is so beautifully colored that I chose to go this route.
Paper
Of course all of the colors used came from the DSP. It is the Happy Forest Friend Designer Series Paper. The colors in this pack are good variety of colors. Having fun paper is a great benefit from Stampin’ Up!. In keeping with the hippos in gray, I went with a Smoky Slate card base and Old Olive as the layer. And to ground the trio of balancing hippos I added a fun piece of the Smoky Slate for them to stand on.
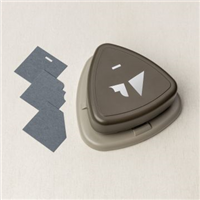
The hippo layer of Smoky Slate is cut using two of the punches from the Very Best Trio Punch. The top section was cut using the decorative edge punch. And the bottom was cut using the Angle punch. This is a great punch that I find myself using more and more often.
Slim Card Measurements
The card base is cut to 7 1/2 X 8 3/4 and scored at 3 3/4 on the 7 1/2 side. Then folded and creased well. For the Old Olive layer it is cut to 3 1/2 X 8 1/2. And the DSP layer is cut 3 1/4 X 8 1/4. The Smoky Slate behind the hippos was cut to give equal distance around the balancing act and I failed to notate the final measurements. My apologies there!
Mini Catalog and Sale-A-Bration
Click on either catalog photo and you will be taken to my Online Store where you can download either or both catalogs.
HOST CODE
My August Host Code is H9KF4JUC. Please use this code for orders under $150.00. I will have a small gift for those with orders over $50.00 in addition to the Perk Rewards Program. You can read all of the information at the top of the page in the Menu Bar under SHOP / Perks.
Thank you for stopping by today. I hope you enjoyed today’s project and will come back. I do read and reply to all of the comments individually. They mean a lot to me. Please reach out if you have a question.
Mr. Moose is in the spotlight today! By using the Spotlight Technique I am only highlighting a portion of the moose image. This is a fun technique that is an oldy but goody!
Technique
The Spotlight Technique is a simple one to accomplish. This card was made as part of the Make My Monday Challenge that I am a Design Team Member for. You can join in the fun by creating your own version and then adding your card on the challenge page. Simply click on the picture below to go to the page.
My version of the spotlight was created by using the Heart Punch, the smaller one, and punching a heart from a scrap of cardstock. Next I placed the negative, the scrap of cardstock with the heart missing, over the stamped image of Mr. Moose. After finding the perfect section to color, I used the Basic Black Stampin’ Write Marker to draw around the inside of the negative. A quick and easy method. You may use any shape you wish as long as you are not covering the majority of the image. By using the heart I thought it was a bit different and shows love for Mr. Moose.
Stamps
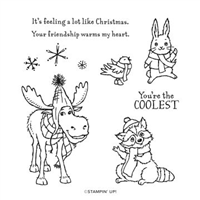
Because the stamped image of Mr. Moose is so large I did not add a sentiment. But there are cute sentiments included in the stamp set named All Bundled Up, as well as a few other cute critters. You may remember that I used the Raccoon last week. There is also a bunny and a bird. Mr. Moose is stamped using Memento Tuxedo Black Ink and then colored using Stampin’ Blends. As mentioned above the spotlight shape was drawn using a Black Stampin’ Write Marker. This is the only marker that is available individually. It is a very handy tool to have.
Paper
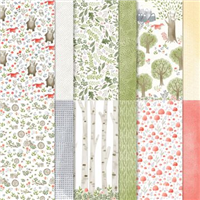
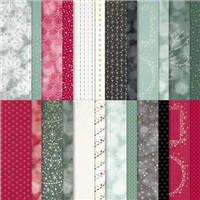
Leaving the paper discussion to last was very difficult for me. This paper is amazing!! It is from the Lights Aglow 6X6 Designer Series Paper. All of the sheets are gorgeous but this is my favorite. The gold simply shines and I am in love with the design on this sheet. The colors used are very similar to the Raccoon card from last week. But after seeing this piece of paper, I knew it was The One to help Mr. Moose be the star!
And to further help Mr. Moose shine, I added more gold to bring out the gold in the DSP piece. It is not just a plain Gold Foil however. This is the Gold and Rose Gold 6×6 Metallic Specialty Paper. It carried over to the current Annual Catalog from last year’s Fall Mini. And I am so happy. Both colors in this paper pack are wonderful. Before you shake your head at me for wasting some of this beautiful paper, rest assured that I took this into consideration. I cut the layer behind Mr. Moose from the center of the larger gold layer. No one but me would know, and it saves a second piece of the paper. Now you can released the shocked breath you took after seeing two layers of gold! 🙂
Mini Catalog and Sale-A-Bration
Click on either catalog photo and you will be taken to my Online Store where you can download either or both catalogs.
HOST CODE
My July Host Code is ZMG9Q7EX. Please use this code for orders under $150.00. I will have a small gift for those with orders over $50.00 in addition to the Perk Rewards Program. You can read all of the information at the top of the page in the Menu Bar under SHOP / Perks.
Thank you for stopping by today. I hope you enjoyed today’s project and will come back. I do read and reply to all of the comments individually. They mean a lot to me. Please reach out if you have a question.
The content in this blog is the sole responsibility of Jackie Beers as an Independent Stampin' Up! Demonstrator. The use of and content of classes, services or products offered is not endorsed by Stampin' Up!