Today’s card is a fun and different use of Dies. The Basic Borders Dies makes a fun edging, and in this case center, for a card. And best of all it is really quick and easy to do.

Dies
The fun little details down the center of the card are made using the Basic Borders Dies. It is usual to see these cute Dies used on an edge or as a layer, but this is a fun and fairly new way to use them. The best part is that when these Dies cut the paper the same design is on both edges. In this case it almost looks like a tear in fabric. I could see it being used as a path also. Achieving a different look from the norm is always a good thing.
Papers
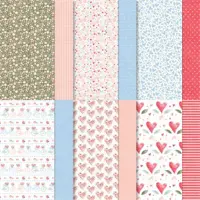
The DSP is from the Country Floral Lane Designer Series Paper. It is always sad when a catalog closes and we lose all of the beautiful paper. Of course I look forward to what new papers are coming. But this has been a package I found worked easily with so many stamp sets. Both of these pieces are from the Country Floral Lane.
To choose the card base and layer was so easy with the DSP. I went with soft colors and chose Mint Macaron for the card base and Balmy Blue for the Heart. Both they and the Ribbon of Petal Pink come from the papers.
Stamp and Punch
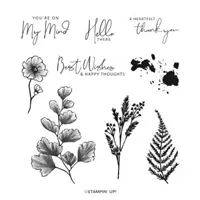
To emphasize the hearts in the DSP, I opted to use the larger of the Heart Punch Pack and the scalloped heart for my sentiment layer. The sweet sentiment comes from the Nature’s Print stamp set. All of the hearts seemed appropriate for the “Heartfelt” thank you!
Embellishments
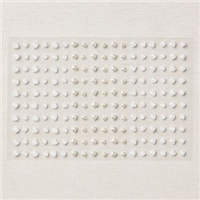
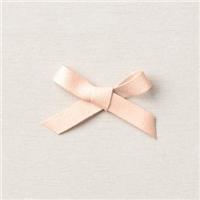
The heart needed something to hold on to since the only thing on the front of the card was the paper. So I added a strip of the Petal Pink Soft Polyester Ribbon. A simple knot was all it needed as a finish. The final touch for the heart was to add one of the Heart Pearls. I love these adorable hearts. You cannot have too many of those. But I stuck with only one as a highlight.
Directions for Die Cut
To place the DSP on the front of the card I began with a piece of the blue and white DSP cut to 3 X 5 1/4. Using the Basic Borders Die I placed the die down the center and die cut. Beginning with a piece of Basic White cut 4 X 5 1/4, place the second piece of DSP, the pink one, to the center of the White. It is cut 2 1/4 X 5 1/4. Adhere it flush with the top and bottom. Next adhere the two other pieces on each side. They will be flush with left or right edge and top and bottom. I added a bit of glue towards the center but left the center edges loose for a 3D look.
RETIRING LISTS. CLICK ON THE ICON TO GET THE FULL PDF.


Online Exclusives are here to stay….. Click on the photo to be takendirectly to them in my Online Store.

HOST CODE
My APRIL Host Code is ZE6UJ4TF. Please use this code for orders under $150.00. I will have a small gift for those with orders over $50.00 in addition to the Perk Rewards Program. You can read all of the information at the top of the page in the Menu Bar under SHOP / Perks.
Thank you for stopping by today. I hope you enjoyed today’s project and will come back. I do read and reply to all of the comments individually. They mean a lot to me. Please reach out if you have a question.
Smile and Keep On Stamping,
Jackie

SUPPLIES:


Really cute card. Love the diagonal technique.