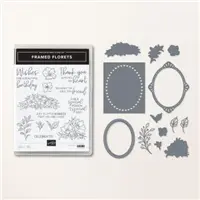
The Fitting Florets Suite is 2 stamp sets, Dies, and beautiful DSP that is available until the next Mini Catalog goes Live. At that time the Framed Florets Stamp Bundle will be in the Mini, but the other items will go away. The second stamp set is a wonderful Christmas set titled Framed and Festive. Today’s card is that set paired with the Fitting Florets DSP.
Stamps and Dies
I have to back up to say that this card was part of a Team stamping with my upline Brian King. He is who designed the card and we all made it. This card uses the Framed and Festive stamp set paired with the dies from Framed Florets. I love the sentiments and the mix of fonts in the Framed and Festive set. And as I mentioned at the top of the post, it is only available through January 4th.
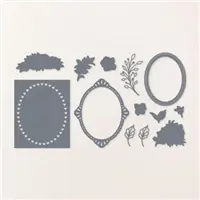
As you can see the frame is actually two different pieces. And there are more that layer together as well. This one really helps the sentiment and the white of the paper pop! The sentiment is White heat embossed and then has a few Pearls for a touch of bling.
Papers
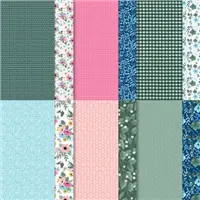
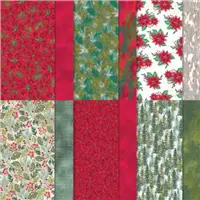
This paper is part of the Suite and is also only until January 4th or while supplies last. It is the Fitting Florets Designer Series Paper. There are some really beautiful papers that are both Christmas, traditional and non traditional, and any time prints. This one is subdued but I love the White and paired with the frame it really works.
The card base is Evening Evergreen which is the dark of the paper. If you look to the right, you can see a different piece of the DSP for the strip on the side. I love that added touch. And there is still plenty of room on the inside that allows you to sign and write a short message to the recipient.
The information on all of these products is in the Supply List at the bottom of the post!
HOST CODE
My December Host Code is Y7T7EMTC. Please use this code for orders under $150.00. I will have a small gift for those with orders over $50.00 in addition to the Perk Rewards Program. You can read all of the information at the top of the page in the Menu Bar under SHOP / Perks.
Thank you for stopping by today. I hope you enjoyed today’s project and will come back. I do read and reply to all of the comments individually. They mean a lot to me. Please reach out if you have a question.
Before I get to today’s project, I have some news to share. Stampin’ Up! is doing a Today Only Free Shipping! With a $75.00 (pre tax) order, Shipping is FREE!! A great way to finish your Wish List.
Stamps
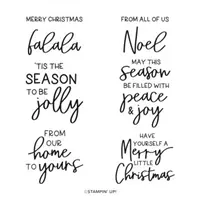
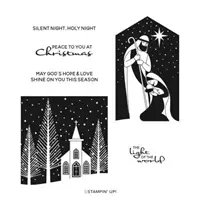
The stamp set I am using today is one of the Last Chance stamp sets. It is the Peace To You set.
The image and the sentiment are both from this stamp set. I love the simplicity and creativity of the image. Stampin’ Up! has the best artists! Both of these stamps were inked with Starry Sky Ink.
Papers
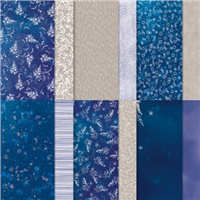
This card began with a Thick Basic White stamp set. I chose that to go with the border around the image. My layers are first the 2022-2024 In Color Glimmer Paper in Starry Sky. And the blue layer is the back of of one of the Sun Prints Designer Series Paper pieces. It is the one with the large fern images. This back side is solid blue with a variegated look.
Extras
I wanted to keep this card fairly clean and have the image be the focal point. But I could not resist adding a large Iridescent Pearl to the center of the star. The second extra is the frame used for the sentiment. I chose the sentiment die from the Holly Berry Dies. It works great to give a little detail to the sentiment piece without having to add another layer. And by stamping the sentiment to the right side, it allowed room to tuck the left side of that piece behind the main image a bit. I wanted this to be a clean and simple card with just a touch of bling from the Glimmer Paper and the Pearl.
HOST CODE
My December Host Code is Y7T7EMTC. Please use this code for orders under $150.00. I will have a small gift for those with orders over $50.00 in addition to the Perk Rewards Program. You can read all of the information at the top of the page in the Menu Bar under SHOP / Perks.
Thank you for stopping by today. I hope you enjoyed today’s project and will come back. I do read and reply to all of the comments individually. They mean a lot to me. Please reach out if you have a question.
This month, the theme is Last Minute Gifts/Cards to inspire you with your holiday list. We really hope that you will be enjoy all the amazing creations the Pals are sharing with you! As you hop from blog to blog, we would love for you to leave a comment. You will find the lineup at the end of my post to help you “hop” along from Pal to Pal.
My Last Minute Gift idea is a small gift and Gift Card holder in one. I give quite a lot of Gift Cards over the year. But at the same time like to give a little something. This is a perfect mix.
2 in 1 Gift card Box
You can see the top of the gift card peeping out of the finger notch at the top. Here is a view of what it holds.
This sweet box holds perfectly the hand cream from Bath and Body. My Gift Card is not a Bath and Body (I forgot to purchase one!) but you can see the one I substituted. These little boxes go together really quickly. The scoring and cutting of the card stock is the most time consuming. And that is not long at all. I made this one in less than thirty minutes total.
In case you do not recognize this sweet 3D item, it is from The Paper Pixie. And since her videos and directions are the best!, I am going to give you the link instead of trying to explain how to make this. It is Hand Cream & Gift Card Box. Simply click on that highlighted name.
Stamps and Embellishments
The only stamping on this is the ‘Tis The Season from the Brightest Glow stamp set. It is a great size with a fun font. By using the Double Oval Punch, it become a tad taller than the box itself, but still fits perfectly. I think the bit of added height helps it to stand out a little. The only embellishments are the Ribbon bow and the three little Red Rhinestone Gems.
Papers
The beginning of this project, after choosing the box, was what papers would show best on a rather small scale. This DSP is from the Boughs of Holly Designer Series Paper. There are a couple of different Poinsettia prints in this pack. I liked this one on the White with smaller flowers. It helps the flowers to stand out individually. And I chose the Shaded Spruce as the green. There are several different ones included in the leaves of the bundles. The Shaded Spruce is the brighter one. This sweet project is a good ones for making multiples of. I am in the process of doing just that. It takes very little DSP and once the scoring is complete you are almost finished!
More inspiration awaits, so use the lineup below to visit the rest of the Design Team. The Pals are excited to show you what they’ve created! Then, please mark your calendars for our next blog hop on January 11th when our theme will be Sale-A-Bration Time. The design team will showcase projects made from Sale-A-Bration items.
My December Host Code is Y7T7EMTC. Please use this code for orders under $150.00. I will have a small gift for those with orders over $50.00 in addition to the Perk Rewards Program. You can read all of the information at the top of the page in the Menu Bar under SHOP / Perks.
Thank you for stopping by today. I hope you enjoyed today’s project and will come back. I do read and reply to all of the comments individually. They mean a lot to me. Please reach out if you have a question.
I have another card to share that uses the fun stamps from the Jingle Jingle Jingle stamp set. And this one does Jingle!
Stamps
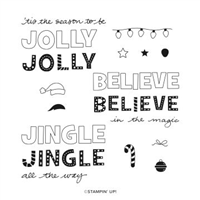
As mentioned at the top of the page, this card’s stamps are from the Jingle Jingle Jingle stamp set. There are three words and each has the outlined letters and filler letters. And they are super easy to line up since the set is Photopolymer. But I had to be different! LOL!! I opted to stamp the outline onto DSP and not use the filler stamp. Then I went a step further and decided to cut out the letters. Not really a difficult task, but it takes a minute.
To finish my focal strip I glued the letters sort of “jiggly” and then stamped the rest of the sentiment below. As much as I liked the banner, it still needed something. So back to the stamp set and there was the finishing piece. Stamping the bell and adding a ribbon hanger was the perfect finish. I hope you think so as well.
Papers
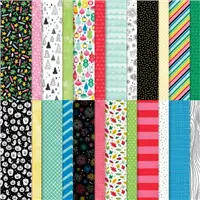
You know me and paper being one of the first in my card development. And yes, as soon as I picked the polka dot paper for the words, I picked the other pieces as well. All of these DSP pieces are from the Santa Express Designer Series Paper pack. Actually they all were scraps from other projects. I keep all of my scraps in the front of the pocket holding the 12 X 12 papers. They come in very handy for cards like this!
The card base and layers were all pulled from the different pieces of DSP. The card base is Shaded Spruce with a layer of Basic White behind the DSP halves. Then to not blend too well with either DSP piece, I opted for Mint Macaron for the layer behind the banner strip. It is in the background of the upper DSP piece, and blends with the others. My original plan was for the banner to be straight across the center of the card. Obviously that changed and I went with the angle. I believe the “jiggly” words and fun sentiment needed a little more jauntiness.
Thank you for visiting today!
Clearance and Last Chance……..
Things are going quickly with both of these sales as they are While Supplies Last. However, as I am typing this (Monday evening) both the Jingle Jingle Jingle stamp set and the Santa Express Designer Series Paper are both still available! Woohoo!!!
HOST CODE
My December Host Code is Y7T7EMTC. Please use this code for orders under $150.00. I will have a small gift for those with orders over $50.00 in addition to the Perk Rewards Program. You can read all of the information at the top of the page in the Menu Bar under SHOP / Perks.
Thank you for stopping by today. I hope you enjoyed today’s project and will come back. I do read and reply to all of the comments individually. They mean a lot to me. Please reach out if you have a question.
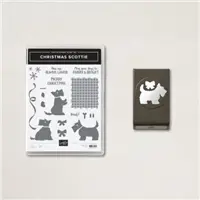
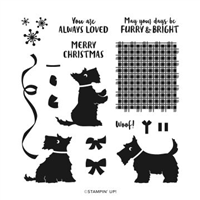
The title of this post is probably a give away of the stamp set I am using today. The Christmas Scottie is such a fun bundle, set, and punch. And are not necessarily only for Christmas. I love when that is the case. It gives more bang for your buck!
Stamps
This fun stamp set is the Christmas Scottie set. I stamped the cute little Scottie with Memento Tuxedo Black Ink and then fussy cut around him. (The Scottie Dog Punch does not include this position of the dog.) And the adorable sentiment is from the set as well. It is cut using the Lovely Labels Pick A Punch.
Background
The background for the Dog is from the Lights Aglow Designer Series Paper. There are a couple of sheets that have circle and squares with the gold swirls and stars. I think this is so pretty and wanted to use it. By looking through my dies, I decided on the Layering Circles Dies. I chose the second largest of the Scalloped Circles. Those scallops seem to add just a bit extra to that layer.
Papers
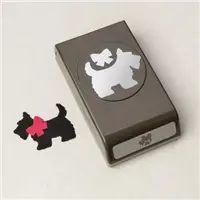
As is mentioned above, the circle layer is from the Lights Aglow DSP. After deciding on that piece, I found these other two pieces that were leftovers from other projects. They are from that pack of DSP as well. So I cut them to fit on the Basic White layer and then chose Soft Succulent for the card base. And did you notice the Dog’s bow? I used a scrap of the red DSP to punch his bow. The bow and standing view of the dog are both on the punch.
Embellishments
To finish this card, I went with two different ribbons to help ground the sentiment. I chose the Soft Succulent Open Weave Ribbon and the Gold Shimmer Ribbon. And to pull a bit more of the gold from the DSP, I added a few of the Gold Pearls from the Festive Pearls embellishments. There is one on the Dog’s bow and two on the sentiment.
Apologies!!!
Due to the awesome Last Chance Sale, most of this card’s products are sold out. I am really sorry. When I made it a few days ago most were available. The Scottie Dog Punch is still available. And there are other beautiful DSP that would work beautifully.
HOST CODE
My December Host Code is Y7T7EMTC. Please use this code for orders under $150.00. I will have a small gift for those with orders over $50.00 in addition to the Perk Rewards Program. You can read all of the information at the top of the page in the Menu Bar under SHOP / Perks.
Thank you for stopping by today. I hope you enjoyed today’s project and will come back. I do read and reply to all of the comments individually. They mean a lot to me. Please reach out if you have a question.
The card I have to show you today is a very Bright and Loud Christmas card. I believe it is a Smile card as well. A bit of a different look for a Christmas card.
Colors
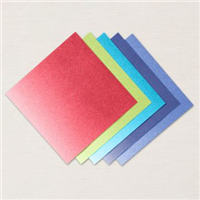
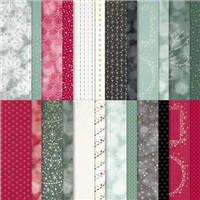
As is my norm, all of the colors came from the DSP. There are more subdued colors in this paper, or more “normal” colors. But I wanted the bright and happy ones. This paper is from the Celebrate Everything Host Rewards Designer Series Paper. It is an amazing pack of papers with quite a lot of paper in the pack. This one is a favorite with the bright colors.
I knew immediately I wanted to use the Polished Pink as a main color on this card. And it would have paired with any of the other colors. But the Pacific Point kept calling to me. The layers and the stamping are in those two colors. Of course by adding Santa’s Hat it required an additional color. The little hat is done in Poppy Parade, which is also in the DSP piece.
Stamps
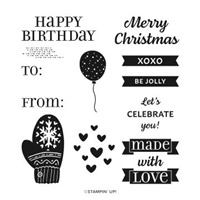
All of the stamps you see are in this extremely fun stamp set named Jingle, Jingle, Jingle! There are other large stamps of Jingle and Joy. They all are like this one and have the outline stamp and then the filler stamp. Since the stamp set is photopolymer it was very easy to line the two up properly. Additionally there are other small stamps that add to the different words like the Santa Hat does, plus additional wording that works with the main word. There are not matching dies to this stamp set. But all of the little additional stamps, like the hat, are really easy to fussy cut.
Finishing
To complete the card was one of the more difficult steps of this one. And that was where to place the Believe layers. I wanted to show as much of the pretty DSP as possible, but also a place to hang Santa’s hat. This finally came together, after much moving around, at the bottom right. The Believe layer is raised using Stampin’ Dimensionals as well as is the hat.
The final touches were to add some Wink of Stella to the White parts of the hat for some shine. And to give a touch of bling. It was debated on adding bling to a couple of the ornaments. But I contained myself and only added the one Pastel Pearl next to the complementing sentiment. I have to say that this is a quick card once you decide on the components. And would be great for multiples using the Stamparatus. And, it is on the Last Chance Product List.
Don’t forget the Clearance and Last Chance Products…….
HOST CODE
My December Host Code is Y7T7EMTC. Please use this code for orders under $150.00. I will have a small gift for those with orders over $50.00 in addition to the Perk Rewards Program. You can read all of the information at the top of the page in the Menu Bar under SHOP / Perks.
Thank you for stopping by today. I hope you enjoyed today’s project and will come back. I do read and reply to all of the comments individually. They mean a lot to me. Please reach out if you have a question.
I am sharing a quick card that is more Spring than Winter. Hopefully you will like the technique of the focal layer and try it yourself.
Background Technique
The DSP is probably more the star of this show because it is so soft and elegant looking. However, I am focusing on the background I used with the focal layer. But the softness of the DSP did give me the color combinations I used on the floral layer. This is my Squiggle Technique!
The Squiggle Technique is simply taking a Stampin’ Blend and using the brush end to “squiggle” lines back and forth across the paper. For this floral stamp, I wanted different colors to simulate (sort of) looking eye level to the flowers. So I began with Dark Mint Macaron, next was Light Mint Macaron followed by Light Soft Sea Foam. Then I added Dark Soft Sea Foam and finished with Light Pool Party. My mind sees the darker grass at the bottom moving up to lighter and then the sky. You may just see squiggles! And that is okay. 🙂
Stamps
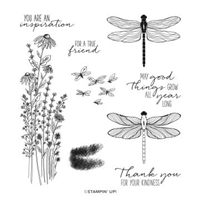
The floral stamp is from the Dragonfly Garden stamp set. This looks to me like a bunch of wild flowers growing up from my imaginary field. Part of the thought with the background was a way to not have to color all of the flowers with shades of green and flowery colors. I thought the squiggles were a much quicker route to take.
For the sentiment I went to the Charming Sentiments stamp set. This set is one of all wonderful sentiment in a mixture of fonts. I love the mix of fonts and partially chose this one for the fun look it gives. It seems to be trying to get your attention with the exclamation point!
Papers
Last but not least is the beginning of the card! This beautiful embossed DSP is from the Splendid Day Designer Series Paper. It contains this same pattern in a few of the softer colors. Since this DSP piece is a Soft Sea Foam, I went a shade darker for the card base. That is Mint Macaron with a layer of Basic White between the two.
Finishes
To finish this card I added just a few little touches. First is the Brass Butterfly with the larger flower in the field. As I said in the beginning, it really is not a Winter card! Next I used the Label Me Fancy Punch to cut the fun sentiment with. The floral layer is placed close to the left edge to leave room on the right side for the tag. The two are almost touching in the center. So I added a simple White Baker’s Twine Bow to break that up a bit.
Don’t forget the Current Clearance and Last Chance Products!!!
HOST CODE
My December Host Code is Y7T7EMTC. Please use this code for orders under $150.00. I will have a small gift for those with orders over $50.00 in addition to the Perk Rewards Program. You can read all of the information at the top of the page in the Menu Bar under SHOP / Perks.
Thank you for stopping by today. I hope you enjoyed today’s project and will come back. I do read and reply to all of the comments individually. They mean a lot to me. Please reach out if you have a question.
Today’s card was a fun idea that made a turn in the middle. And I love the way it ended up. Sometimes my idea doesn’t work out exactly as planned. In this case, it was better!
Dies
The cute little tree in the center of the card was created with the Spruced Up Dies. They are also called “Outline” Dies. That is because when I die cut this tree, I got not only the tree from the center, but the outline also. I love this idea! It allows us to mix and match, which is what I have done here.
To create this fun little tree, I adhered the DSP to the Soft Suede piece. But I did not add adhesive around the center of the layer. I then used the single die for the largest tree and centered it in the middle of the card layers. After die cutting, I had a DSP tree and outline, and also a Soft Suede tree and outline.
My method for putting these back together was the simplest idea I could come up with. I took a scrap of White cardstock cut to 3 X 4. And I put adhesive all over it, not totally covered but more than I would with a normal layer. By placing the White on the table and centering the two layers over top, I could see through the die cut and know that there was White behind the opening. Press this down and choose the outline piece. I chose to use the Soft Suede outline. Carefully place it in the opening and against the edges. Lastly add the DSP tree to the center. Easy Peasy!! And I have an outline and a tree left for another use.
Paper
When I saw these trees on the DSP sheet, I knew it was perfect for the idea I had. Even though the idea changed a bit, I love this paper. It is from the Storybook Gnomes Designer Series paper. The different shades of green are especially nice at this time of year when we see a lot of the same ones. I chose the Bermuda Bay from the paper to be the card base. And of course I had to go with the Soft Suede for the trunk of the trees. These two colors work very well together.
Here is a close up of the paper and the Die Cut tree.
Stamps and Embellishments
The only stamp showing on the front of the card is the little sentiment. This is from the Celebrate With Tags stamp set. I love this simple and sweet sentiment. My goal of late has been to choose to be Happy. So this fits perfectly! The Be Jolly is stamped on White card stock using Soft Suede Ink. There is not a die for this little guy. So fussy cutting was needed. Although they are all straight cuts so it is pretty easy to do.
There are two finishing touches to this card. Although the rhinestone does not show very well in the photo. But there is an Iridescent Rhinestone at the top of the tree for the star. And to carry on with my more rustic tree and card, I used Linen Thread for the ribbon. I tied a double bow and added it to the base of the tree with a Glue Dot. Another easy touch.
SALES
There are still quite a lot of great deals available on the Clearance Rack from the refresh. And the Last Chance Product Sale is going strong. These All Spruced Up Dies are available at a discounted price. So compare the price of the stamp and dies separately vs the Bundle price!!
HOST CODE
My December Host Code is Y7T7EMTC. Please use this code for orders under $150.00. I will have a small gift for those with orders over $50.00 in addition to the Perk Rewards Program. You can read all of the information at the top of the page in the Menu Bar under SHOP / Perks.
Thank you for stopping by today. I hope you enjoyed today’s project and will come back. I do read and reply to all of the comments individually. They mean a lot to me. Please reach out if you have a question.
Today’s card is a Winter card instead of a Christmas one. The weather has turned colder even here in the South. It is now sweater weather and the paper used reminds me of a sweater pattern. Additionally this card is for the Make My Monday Challenge and that is for a Winter card.
Everyone is welcome to join in on the Make My Monday Challenges. Simply click on the icon and you will see all of the design team cards. And you can add your own version of the current challenge.
Paper
My idea for the Winter card came from the piece of DSP. It is from the Storybook Gnomes Designer Series Paper. This pattern is a sweater pattern to me. This soft blue is different than all of the Christmas cards I have been making. But also is the color of cold ! This lead to an almost monochromatic card.
Stamps
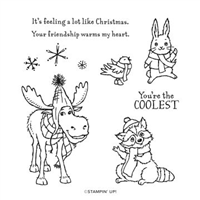
After deciding on paper I went looking for a stamp to match. I immediately thought of the All Bundled Up stamp set where the sweet critters are all wearing scarves. By using the sweet little cardinal, it allows a lot more of the DSP to shine. The cardinal is stamped and colored with Stampin’ Blends. And to add some additional stamping, I added the snowflakes as well as a bit of “snow” on the ground. A few squiggles of Balmy Blue Stampin’ Blend is all it took.
Finishes
To complete my warm sweater card, I added one of the Wonderful Snowflakes to the mix. The iridescent shine is perfect. And just a few of the Fine Sparkle Gems scattered around completed the card. Even though I put more than an odd number of them. I can never get that correct 🙂
Clearance Rack Refresh and Last Chance Products……..
HOST CODE
My December Host Code is Y7T7EMTC. Please use this code for orders under $150.00. I will have a small gift for those with orders over $50.00 in addition to the Perk Rewards Program. You can read all of the information at the top of the page in the Menu Bar under SHOP / Perks.
Thank you for stopping by today. I hope you enjoyed today’s project and will come back. I do read and reply to all of the comments individually. They mean a lot to me. Please reach out if you have a question.
I hope you have taken advantage of the Clearance Rack Refresh as well as the Last Chance Sale for the Mini Catalog. There are some amazing deals in both places.
My project today is a package of Gift Tags, or Random Act of Kindness cards, using one of the Retiring products. It is the Decorated With Happiness set. This is a wonderful Bundle, and one that is less expensive purchased separately with the sale pricing.
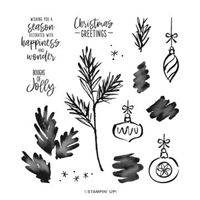
Stamps
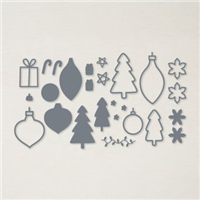
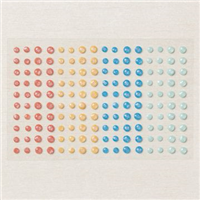
All of the stamps used on this project are from the Decorated With Happiness set. There are matching dies as I mentioned at the top of the post. However, I wanted to keep this as flat as possible. The bough is stamped and then the shadow stamped added. As is the two ornaments. For the sentiment I used the Layering Circles Dies and then turned it into the look of an ornament. To do that I drew a straight line for the hanger using the Sweet Sorbet Stampin’ Write Marker. And to finish that look I tied a bow using the In Color Baker’s Twine in Sweet Sorbet and White.
Cards
The 3 X 3 cards are made the same way as the front of the gift holder. Here is a view of one of those. They do not have the added layers of the sentiment though. I made a few with different ornaments but all done the same way. They each received a Festive Pearl in the center of the ornament for a touch of bling.
Directions for Card Holder
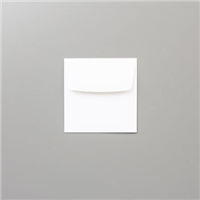
The front stamped layer is 4 X 3 3/4 to begin with. After doing the stamping I cut 1 1/8 off the top to fit over the flap. When adhering this layer, place the bottom section first and allow equal measures on the bottom and sides. Do this with the holder closed and the bottom section you are adhering will be flush against the bottom of the flap. Then add the top piece with it being flush with the bottom of the flap and equal on sides and top.
Here is an open view of the card holder.
This is a very simple card holder. It is another oldy but goody that I found when looking for something! That seems to happen fairly often. The holder begins with a piece of Garden Green card stock cut to 4 1/4 X 11. It is then scored at 1 1/4, 5 1/4, 6 1/4, and 7 1/4. Fold and burnish the score lines to create the mountain in the center .
For a closure, I used clear velcro dots. They were added after the front layer is adhered. You may have your own method for adding these. But I add the one under the flap first. I can place it towards the bottom of the flap and then with the second half attached simply close the flap on to the closed box. This ensures perfect placement.
I included 4 cards and envelopes and there is plenty of room.
HOST CODE
My December Host Code is Y7T7EMTC. Please use this code for orders under $150.00. I will have a small gift for those with orders over $50.00 in addition to the Perk Rewards Program. You can read all of the information at the top of the page in the Menu Bar under SHOP / Perks.
Thank you for stopping by today. I hope you enjoyed today’s project and will come back. I do read and reply to all of the comments individually. They mean a lot to me. Please reach out if you have a question.
The content in this blog is the sole responsibility of Jackie Beers as an Independent Stampin' Up! Demonstrator. The use of and content of classes, services or products offered is not endorsed by Stampin' Up!