The new catalog is only a few days away. And today I have a sneak peek at an awesome stamp set and some beautiful paper!
Stamp Bundle
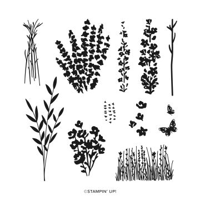
This upcoming set titled Country Flowers is filled with flowers, different containers, and sweet sentiments. I chose to use the little stool along with the tea pot for my floral display. All of the coloring is done using Stampin’ Blends. I love that there are dies to fit each of the different elements of the set! That makes fitting the piece together so easy.
Papers
The background piece of DSP is from the upcoming Unbounded Beauty Designer Series Paper. I was in love as soon as I pulled this sheet out of the package. The mix of colors is so cute. And it is the New In Colors! For the card and layer I chose two of the In Colors from the DSP. The base is Petunia Pop and the layer is Summer Splash. These colors are definitely Spring and Summer colors. I pulled all of the Stampin’ Blend colors from the DSP as well. The little stool is Pecan Pie stamped with Early Espresso Ink.
Extra Touches
To give some added shapes to the card, I used two of the Deckled Rectangle Dies for the layers. I used the 2nd and 4th largest dies. Then to give add some different shapes, I fussy cut around the sentiment. It seems to actually make the sentiment pop a little more being cut around. And then there must be bling. Using the 2024-2026 In Color Shimmer Gems spreads more of the Petunia Pop and one of the Pretty In Pink gems. These are really precious gems!
Thank you for stopping by today!!
Both of the Last Chance Lists are listed below. Click on either the Mini or Annual Catalog list and you will get a PDF of the full list.
HOST CODE
My APRIL Host Code is A7AUT6UB. Please use this code for orders under $150.00. I will have a small gift for those with orders over $50.00 in addition to the Perk Rewards Program. You can read all of the information at the top of the page in the Menu Bar under SHOP / Perks.
Thank you for stopping by today. I hope you enjoyed today’s project and will come back. I do read and reply to all of the comments individually. They mean a lot to me. Please reach out if you have a question.
I hope you got a chance to check out the Clearance Rack Refresh. There are / were some awesome deals on there. It is not too late to take a look. Click on the menu bar and Shop Now. This will take you to my online store. And while you are on the Shop Now button, my Product Share is listed there as well. I will be placing that order on May 1st and will get the shares out as soon as I can.
I am sharing a card with a mix of products today. The Cheerful Daisies meets Hello Irresistible. This is a fun combination and one that uses paper scraps.
Stamps and Dies
The Cheerful Daisies Bundle is all of the stamps and dies used on this card. I love the large and then the droopy daisy. With matching dies, these are so quick to do. And even better is the lovely sentiment layer shape. It is part of the die set as well. Of course that means the sentiment is part of the set. It is a sweet wish for someone’s birthday.
Papers
The DSP is three different pieces from the Hello Irresistible Designer Series Paper. I love my scraps! And this is a great use for them. The two outside pieces were trimmed a bit. They are each 1 1/2″ wide with different lengths. Then the center piece was a strip that I could not just toss away. I used it as is, and believe it is about 1/2″ wide. You can make whatever you have work I am sure!
The card base was pulled from the DSP and is Soft Sea Foam. I added the layer of Lost Lagoon to pull both of the colors of the DSP out. And from a scrap of another piece, I fussy cut the leaves that are just above the sentiment. I really love this paper!!
Finishes
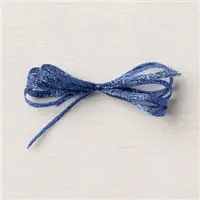
The added touches of the card are the Baker’s Twine, which is wrapped around a few times. The bow is added separately. For some bling, I used the Petal Pink and Pretty Peacock Foiled Gems. I used both of the sizes of Pretty Peacock and scattered them around. More bling is better!!
Thanks for stopping by today!!
Both of the Last Chance Lists are listed below. Click on either the Mini or Annual Catalog list and you will get a PDF of the full list.
HOST CODE
My APRIL Host Code is A7AUT6UB. Please use this code for orders under $150.00. I will have a small gift for those with orders over $50.00 in addition to the Perk Rewards Program. You can read all of the information at the top of the page in the Menu Bar under SHOP / Perks.
Thank you for stopping by today. I hope you enjoyed today’s project and will come back. I do read and reply to all of the comments individually. They mean a lot to me. Please reach out if you have a question.
The Clearance Rack is updated today!!! There will be quite a lot of new items added and discounted. Remember that all of these products are while supplies last.
Both of the Last Chance Lists are listed below. Click on either the Mini or Annual Catalog list and you will get a PDF of the full list.
HOST CODE
My APRIL Host Code is A7AUT6UB. Please use this code for orders under $150.00. I will have a small gift for those with orders over $50.00 in addition to the Perk Rewards Program. You can read all of the information at the top of the page in the Menu Bar under SHOP / Perks.
Thank you for stopping by today. I hope you enjoyed today’s project and will come back. I do read and reply to all of the comments individually. They mean a lot to me. Please reach out if you have a question.
Today’s card is a fun one that is skinny but regular height. It stars the upcoming Spotlight On Nature stamp set from the new Annual Catalog. This will be live on May 1st, so not long left to wait.
The Card
This card is so fun to make and has a extra folds as you open it. I cased this from Karen Titus and new I had to make it as soon as I saw It. Here are the inside views.
I love the extra folds and different stamped images. There will be more of this card to come as I have many ideas for the different layers. The card base is 3 1/4 X 11 with the circle punched using the 2″ Circle Punch. After folding the card at 5 1/2, push the paper all the way in the punch and down about a 1/4″ from the fold. This automatically centers the circle. The inside card is 6 X 5 1/4 and folded at 3″. That is all there is to it!!
Stamps
The stamp set is one I used once before since I received it at OnStage. It is the Spotlight On Nature set and is part of a Bundle. The Dies are several circle dies. They each have different detailing around the edges. I used the leaves for the inside stamping. They are stamped using Pretty Peacock Ink. Some are full strength and others are stamped a second time without re-inking. For the butterfly I went a little wild with the Stampin’ Blends. I tried to cover all of the colors in the DSP. There is not a die for the butterfly, but he is very easy to fussy cut.
Papers
The strip of DSP is from the Perennial Lavender Designer Series Paper. I hope you are as excited that this paper is carrying forward as I am! It is just gorgeous. And there are so many colors that can be pulled from each sheet of paper. I decided on Pretty Peacock for the card base as it helps the DSP to pop.
UPDATE On Product Share
The Paper Share form has been changed to a lesser price point. I deleted the Color Family DSPs and added one additional regular DSP. This changed the Paper Share price to 45.00 from 68.00. Now you can get Paper and Ribbon for 68.00 if you want. Click on Shop/Product Share at the menu of this post to see the new information. You can sign up by emailing me or filling out the form beneath that page.
Thank you for stopping by today!!
Both of the Last Chance Lists are listed below. Click on either the Mini or Annual Catalog list and you will get a PDF of the full list.
HOST CODE
My APRIL Host Code is A7AUT6UB. Please use this code for orders under $150.00. I will have a small gift for those with orders over $50.00 in addition to the Perk Rewards Program. You can read all of the information at the top of the page in the Menu Bar under SHOP / Perks.
Thank you for stopping by today. I hope you enjoyed today’s project and will come back. I do read and reply to all of the comments individually. They mean a lot to me. Please reach out if you have a question.
The inspiration for today’s card is one I received at On Stage from one of my Up Line. It is a simply gorgeous card that is great for so many occasions. Thank You to Pam Morris for this wonderful card idea.
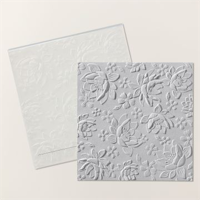
Background
This gorgeous background is from the Layered Floral 3D Embossing Folder. The flowers are wonderful and have really great detail to them. This folder is from the current Mini Catalog and is going to carryover. I am thrilled about that!
Stamps and Dies
The little “Hello” sentiment is from the Wonderful Thoughts Bundle. It includes the matching die for this tiny Hello. They both are fairly small and such a sweet addition to the card. Also the heart is from this same Die set. I was thrilled to find the Hello fit perfectly inside the heart.
The bouquet of flowers is from the Die set as well. When layering these pieces, I added Mini Stampin’ Dimensionals to the upper flowers of the bouquet and placed it. Then I added a large and two small Stampin’ Dimensionals to the heart and placed it over top of the bottom portion of the bouquet. By having the upper flowers raised a bit it gives some added texture.
Papers and Finishes
To have no designer series paper and only two colors is very unusual for me. Simply having only the two colors makes for an elegant card with just a touch of the color popping. There was much debate in my brain about adding additional finishing touches. But in the end I went with the simplicity that Pam had on her card. I only used a single Rhinestone jewel. Sometimes that is all you need. 🙂
Thank you for stopping in today!!
Both of the Last Chance Lists are listed below. Click on either the Mini or Annual Catalog list and you will get a PDF of the full list.
HOST CODE
My APRIL Host Code is A7AUT6UB. Please use this code for orders under $150.00. I will have a small gift for those with orders over $50.00 in addition to the Perk Rewards Program. You can read all of the information at the top of the page in the Menu Bar under SHOP / Perks.
Thank you for stopping by today. I hope you enjoyed today’s project and will come back. I do read and reply to all of the comments individually. They mean a lot to me. Please reach out if you have a question.
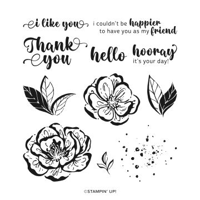
One of the On Line Exclusives is the star of today’s card. It is the Irresistible Blooms stamp set. This makes for a quick card that would be great in any floral color.
Stamps
The Irresistible Blooms is a great stamp set with a matching Die set. It is one of the Online Exclusives and is a Bundle for some additional savings. I only used the stamps for this card. There are two different size flower heads. The larger one is stamped side by side using Berry Burst Ink and the smaller bloom is stamped above them. For the leaves, I stamped it three times across the bottom using Garden Green Ink.
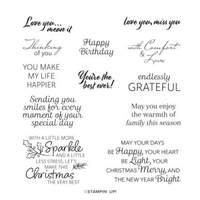
The joyous sentiment is from the stamp set as well. It is stamped with Memento Tuxedo Black Ink and then simply trimmed. Because it is sitting on the ribbon, I felt it was fine as is. The centers of the flowers are colored using the Daffodil Delight Stampin’ Write Marker. I was being a little different instead of using the Stampin’ Blends. However either would be fine. There is also “splatter” made with an additional stamp in the set. It is scattered around the flowers using Lemon Lolly Ink.
Papers
This is the second card in a row that I did not use Designer Series paper! That is shocking!! I used the same colors of paper as Ink. The card base is Garden Green that is 5 1/2 X 8 1/2 folded at 4 1/4. For the layer I used Berry Burst that is 3 7/8 X 5 1/8. And the Basic White layer is 3 3/4 X 5.
Finishes
To ground the sentiment, I used the Garden Green Ribbon from the Garden Green and Real Red Ribbon Combo. Two lengths were cut to add some texture and color beneath the sentiment. And to finish the card I added a scattering of the Adhesive Back Solid Gems. These include a few different colors. But most importantly for this card they include yellow. I added two of the large size on the sentiment layer and then a few more around the flowers.
Both of the Last Chance Lists are listed below. Click on either the Mini or Annual Catalog list and you will get a PDF of the full list.
HOST CODE
My APRIL Host Code is A7AUT6UB. Please use this code for orders under $150.00. I will have a small gift for those with orders over $50.00 in addition to the Perk Rewards Program. You can read all of the information at the top of the page in the Menu Bar under SHOP / Perks.
Thank you for stopping by today. I hope you enjoyed today’s project and will come back. I do read and reply to all of the comments individually. They mean a lot to me. Please reach out if you have a question.
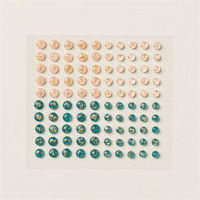
I have made a card to show all of the New In Colors in one spot. It really allows you to see how well they work together. And what better way to show colors than by painting them.
Colors
This card shares the five New In Colors for 2024-2026. I thought “painting” with them was a good way to show each one, but all together. From left to right they are Petunia Pop, Summer Splash, Peach Pie, Shy Shamrock and Pretty In Pink. I hope you will share your favorites. Mine are Petunia Pop and Shy Shamrock. Although I am happy to see Pretty In Pink again after many years.
Stamp Sets
This fun paint brush that helps to show the colors is from the Trusty Tools set. Having a filler stamp for the handle simply added to the ease of making and showed additional of the color. The sentiment is from the Very Best Occasions stamp set. It and the Double Oval Punch, which the sentiment is punched using, are both retiring. That is so sad. But I am almost over loosing my favorite punch.
Finishes
This is a extremely plain card from my norm. That is more due to the White on White. No DSP is what is most unusual. So I had to add bling. But first to ground the sentiment I added a couple of loops of Linen Thread and then a double bow. Twine goes perfectly with painting. For the Bling, I went with the new In Colors again. These are one of each of the In Colors from the 2024-2026 In Color Shimmer Gems. You know I love these with that bit of shimmer to them. And they are pretty flat. That is a win as well for mailing!
My 2024-2025 Annual Catalog Paper and Ribbon Shares are open to sign up now. If you are interested, the form is HERE
Thank you for stopping by today!!!
Both of the Last Chance Lists are listed below. Click on either the Mini or Annual Catalog list and you will get a PDF of the full list.
HOST CODE
My APRIL Host Code is A7AUT6UB. Please use this code for orders under $150.00. I will have a small gift for those with orders over $50.00 in addition to the Perk Rewards Program. You can read all of the information at the top of the page in the Menu Bar under SHOP / Perks.
Thank you for stopping by today. I hope you enjoyed today’s project and will come back. I do read and reply to all of the comments individually. They mean a lot to me. Please reach out if you have a question.
The card I have today is a little Pocket card. And the small card could be used as a bookmark if someone wanted to do that. It stars the Perennial Lavender Designer Series Paper and the Hills of Tuscany stamp set.
Here is the tag removed.
Paper
The gorgeous Perennial Lavender Designer Series Paper really helps to make this scene complete. It has such gorgeous colors and works great with so many other colors. I pulled the Crumb Cake card stock for the card base and then went with Gorgeous Grape as the layer. Then the Crumb Cake is repeated on the back of the tag as well.
Stamps
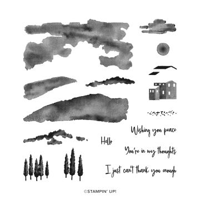
The Hills of Tuscany stamp set is retiring and I love it. The ability to maneuver the “hill” stamp to create a variety of layers of grass is one of my favorite things. The tree and cloud stamps are great as well. I do love the font on both the main sentiment as well as the little “hello”.
The Painted Lavender stamp set came into play as well. I used the bunch of greenery with the group of flower heads to add lavender to the base of the hill on my tag. Previously I made a card with a similar scene on the card front. You can see that card HERE.
Finishes
To complete this card I added some of my favorite ribbon. It is the 2022-2024 In Color Metallic Ribbon. This time I used the Orchid Oasis Ribbon. I know you see me using this ribbon quite a lot. But sadly it will be gone at the end of the month. The other finish is the Best Label Punch that the Hello is stamped on. This little guy is great for simple and small sentiments. It makes the perfect little tag. And it is going away as well. I recommend grabbing this ribbon and punch!
Measurements
The card base is Crumb Cake cut to 4 1/4 X 5 1/2 with the Gorgeous Grape layer at 4 X 5 1/4. For the main White layer it is 3 3/4 X 5. There are two pieces of Perennial Lavender Designer Series Paper used. Each is 3 3/4 X 3 and cut top left to bottom right for the left side and then top right to bottom left for the right side pieces. This leaves you pre cut DSP for another card only with the patterns opposite sides of this card.
Before stamping the inside sentiment, test your tag to see how far it will come up so you are covering that sentiment. For the tag you need a Crumb Cake that is 2 3/4 X 4 and the White is 2 1/2 X 3 3/4. To put the card together, add Tear & Tape to the outside and bottom of the two DSP pieces. Put the tape right up to the edge. ***Place the tag under the layers before you adhere so you have a bit of extra room.
Thank you for stopping by today!!!
Both of the Last Chance Lists are listed below. Click on either the Mini or Annual Catalog list and you will get a PDF of the full list.
HOST CODE
My APRIL Host Code is A7AUT6UB. Please use this code for orders under $150.00. I will have a small gift for those with orders over $50.00 in addition to the Perk Rewards Program. You can read all of the information at the top of the page in the Menu Bar under SHOP / Perks.
Thank you for stopping by today. I hope you enjoyed today’s project and will come back. I do read and reply to all of the comments individually. They mean a lot to me. Please reach out if you have a question.
My Paper and Ribbon Shares for the upcoming 2024-2025 Annual Catalog are open. Below is the information . You can sign up by emailing me at the address on the bottom of the form. Or message me or comment here.
Paper Share $68.00 (+$9.00 shipping)
Country Lace, Country Woods, Full of Life, Lily Pond Lane, Mediterranean Blooms, Take to the Sky, Thoughtful Journey, To Market, Unbounded Beauty, Wildly Flowering, 2023-2-25 In Color, 2024-2026 In Color, Brights, Neutrals, Regals, and Subtles. **The In Colors and color families are all beautiful papers and a wonderful opportunity to have a DSP in every color!
Ribbon Share $23.00 (+ $4.00 shipping)
Basic Beige 3/8″ Bordered Ribbon, Iridescent 1/2″ Striped Trim, Peach Pie 3/8″ Bordered Ribbon, Petal Pink & White 1/4″ Diagonal Trim Combo Pack, Petunia Pop 3/8″ Bordered Ribbon, Pretty In Pink 3/8″ Bordered Ribbon, Shy Shamrock 3/8″ Bordered Ribbon, Summer Splash 3/8″ Bordered Ribbon
I want it All !!! $91.00 (+ $9.00 shipping)
Includes all of the above plus a free gift!
Additional Details:
US addresses only
Invoices will be sent on or after April 24.
Payment is due by April 30, no exceptions
Paper will come individually packaged and labeled
Ribbon will come individually packaged and labeled
If any items are not in stock on May 1, an item of equal value will be substituted.
Not eligible for Star Rewards.
Sign up at Jackie@jackiebeers.com or comment to this page and I will email back individually.
Both of the Last Chance Lists are listed below. Click on either the Mini or Annual Catalog list and you will get a PDF of the full list.
HOST CODE
My APRIL Host Code is A7AUT6UB. Please use this code for orders under $150.00. I will have a small gift for those with orders over $50.00 in addition to the Perk Rewards Program. You can read all of the information at the top of the page in the Menu Bar under SHOP / Perks.
Thank you for stopping by today. I hope you enjoyed today’s project and will come back. I do read and reply to all of the comments individually. They mean a lot to me. Please reach out if you have a question.
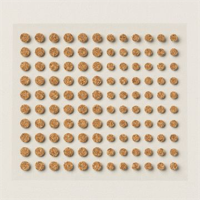
I have a Fun Fold to share today. It is a little twist on a Z Fold. The star image is a sneak peek from the Hearts & Hugs Bundle in the upcoming Annual Catalog.
Stamp Bundle
This little hamster / gerbil, or whatever he is, is so cute. This is the only kind of these critters I like, those that are on a card!!! The hamster is stamped and die cut using the Hearts & Hugs Bundle. All of the images are adorable little critters. And there is an actual mouse as one of the images.
The set of hearts are also in the matching Die set. I trimmed them down to fit his hands. And added the Pool Party background. The sentiment is from the stamp set as well. Below is the inside of the card views. The inside sentiment is from the Perennial Postage stamp set that is retiring.
Open Views
Papers
The DSP used is from the Bee Mine Designer Series Paper. The stripes and flowers work great together and add to the cheerfulness of the front image. The cards are both Basic White. With all of the layers, I used regular weight instead of the Thick Basic White. The inside hearts are the cut outs of the strand of hearts Mr. Hamster is holding. I thought this was a great use for them.
Measurements
The large card base is 4 1/4 X 11 and scored at 5 1/2. I cut from the right score line down to the left corner of the front flap. The DSP for that angle cut is 5 1/4 X 4 and cut in landscape from the top left to bottom right. For a bonus, you have a piece already to go for a second card. The inside striped DSP is also 5 1/4 X 4. For the mini card you need Basic White cut 8 X 3 1/8 and scored/folded at 4. The DSP for the front of this card is 3 7/8 X 3. Definitely need to dry fit this to ensure you have even borders around the small card on the inside of the large card, but that the front flap will also close.
Thank you for stopping by today!!!
Both of the Last Chance Lists are listed below. Click on either the Mini or Annual Catalog list and you will get a PDF of the full list.
HOST CODE
My APRIL Host Code is A7AUT6UB. Please use this code for orders under $150.00. I will have a small gift for those with orders over $50.00 in addition to the Perk Rewards Program. You can read all of the information at the top of the page in the Menu Bar under SHOP / Perks.
Thank you for stopping by today. I hope you enjoyed today’s project and will come back. I do read and reply to all of the comments individually. They mean a lot to me. Please reach out if you have a question.
The content in this blog is the sole responsibility of Jackie Beers as an Independent Stampin' Up! Demonstrator. The use of and content of classes, services or products offered is not endorsed by Stampin' Up!