I took a whimsical turn for today’s card. I used a whimsical stamp set, Seasons of Whimsy, and used very non-traditional colors as well. I am still surprised that I really like how it ended up.
So what do you think? Did I go over the top on my color choices? I surprised even myself. I am usually more the traditional Christmas colors. But I strayed pretty far on this one!
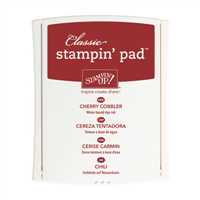
I will try to quickly explain my madness. I started with a watercolor wash using Wild Wasabi Ink on Shimmery White card stock. I then stamped the ornament in Tuxedo Black Memento Ink. The string is in Wild Wasabi. I watercolored the highlights of the ornament with an Aqua Painter and the Melon Mambo Ink. I will also confess that the sparkles stamped in both colors were an after thought. Actually they were after I discovered a stray Melon Mambo to the bottom left of the ornament. So a stamped sparkle comes to the rescue. Then I realized I really liked the addition. So a win/win!!
Thank you very much for visiting today! I very much appreciate your comments. The supplies I used are listed at the bottom of the page. Clicking on any item will take you directly to my online store. Have a Great Day!
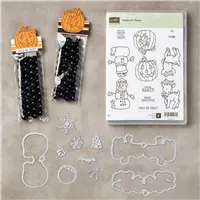
For today’s card I have taken the super cute Seasonal Chums Bundle and made a musical snowman. This set is extremely flexible and just really darn cute!
Seasonal Chums Bundle, 146077
Isn’t that snowman just adorable? And this is only half of him! I know you are saying “huh”? If you have not noticed this set in the Holiday Catalog, these are tags that are the front and back image and are connected at the top. I only needed the front for this card. So I took my paper snips and rounded it off at the top of his hat. You can check out Pinterest for all kinds of treat holders, etc made with this set.
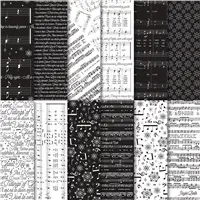
I understand that these are not traditional Christmas Colors, or I don’t think they are. My inspiration was the black music sheets from the Merry Music Specialty Designer Series Paper. It made me think of Christmas and of night. So I thought a white snowman would really pop against the darkness.
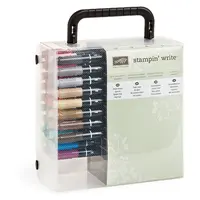
I colored the snowman and bunny with Stampin’ Write Markers in Real Red, Garden Green, Smoky Slate, and Pumpkin Pie. Since there is so little to color, and only one thing to cut out, this is a quick little card to put together.
Thank you for visiting today! I hope you like this card. The supplies I used are listed at the bottom of the page. If you click on any item you will be taken directly to my online store. I hope you have a wonderful day!
MEASUREMENTS:
Thick Whisper White card stock cut to 4 1/4 X 11 and folded in half
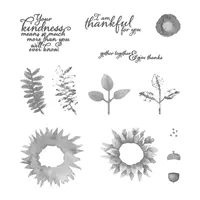
I adore this new Painted Harvest stamp set! Actually the entire suite, but I am only using the stamp set for today’s card. I know you have seen hundreds on Pinterest or other craft sites but I could not help myself in continuing to play with it.
Painted Harvest, 144783
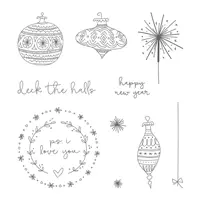
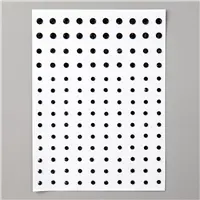
For me, this card is very minimal. I think that is a good change of ideas. I focused on the wreath from Painted Harvest. I stamped both stamps (it is a two step stamp) in Always Artichoke and both were full strength. I then used the little dots that are intended as the center of the sunflower for my berries for the wreath. And a little Linen Thread bow is all it needed for a cute and country looking wreath.
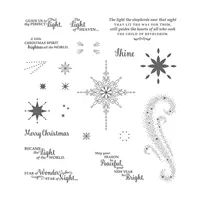
I cut out the Whisper White wreath piece with the Stitched Shapes largest square before I stamped. Since the Painted Harvest set is photopolymer, it is so easy to center it on the paper. The sentiment is from Star of Light stamp set. This was my favorite set from last year and I was thrilled when it carried over into this annual catalog.
The DSP I used is from the Be Merry Designer Series Paper in the annual catalog. I have already used one pack of that paper! I debated on embossing the Always Artichoke layer but in the end just left it plain. I like this simple look.
Thank you for visiting today. I hope you liked my minimalist card and wreath. I love reading your comments, so please let me know what you think. I have listed the supplies I used below. You can click on any item and be taken directly to my online store. Have a great day!!
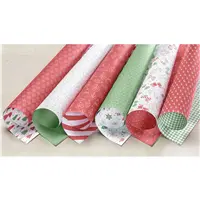
I have CASED a card from Mary Fish for today. She did a beautiful wreath from the new Leaf Punch that is in the Holiday Catalog. Mary’s wreath was done in metallic colors. So I decided to try making one with the new Merry Music Specialty DSP.
Leaf Punch, 144667
My card is fairly simple with the exception of the wreath. I punched ten leaves each from the white and the black pieces of music sheet DSP. I used my bone folder to gently curl the leaves just a little bit. Then I alternated the colors in laying them down to form the wreath.
The bow is made with the wonderful 1/8″ Real Red Ribbon that is also new in the Holiday Catalog. I really love narrow ribbon. The sentiment is from the Label of Love stamp set in the Holiday Catalog as well. It is stamped in Memento Tuxedo Black ink on a strip of Whisper White card stock. The Memento black ink is my black of choice for most stamping because it does not smear on the whisper white and very vanilla card stock.
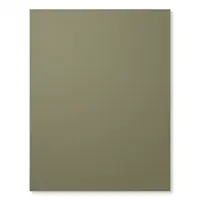
HINT: I punched a 2″ circle of Old Olive card stock and adhered it to the center of the Old Olive panel. I used that as the guide for laying down my leaves. I added adhesive just to the outside of that circle. (Trust me….I had a really ugly non-round wreath before I came up with that idea!)
Thank you very much for visiting today. I hope you enjoyed this project and please do not hesitate if you have any questions or comments. I love to hear from you. The supplies I used are listed below. If you click on any item it will take you directly to my online store. I hope you have an awesome day!!
I had a “senior moment” yesterday and posted a blog hop a week early! I apologize to those of you who were looking for my post yesterday that it disappeared. I had to take it down or spoil all the fun of the hop for next week. I will try not to ever do that again!!! Yikes!!!
So today I have a really cute card that I hope will make up for my absence yesterday. It is stamping directly on the Designer Series Paper. I remember doing this at my club one day and a couple of the ladies had never considered stamping on DSP. Here is today’s card.
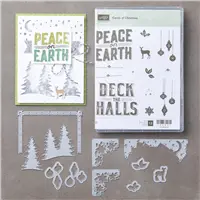
Carols of Christmas, 144804
I love that you can see the music through the stamping. I am not a musical person at all, but I love sheet music and I believe this paper is just gorgeous. The name is Merry Music Specialty Designer Series Paper. A mouthful but well worth it.
The colors I chose are Cherry Cobbler and Garden Green. I have to confess that I have never really used Garden Green until this year. When the Be Merry Designer Series Paper came out in the current annual catalog I was surprised to see Garden Green in the packet. Now I feel that I have been very wrong in ignoring this beautiful color.
There is not very much I can say extra about this card other than I used the ink pads and stamps to stamp on the DSP. I felt it needed just a touch extra when I was finished. So I added the cute little corner touches.
Thank you for visiting today. Again I apologize for yesterday’s No Post! I may miss a post in the future, but I hope I never have to remove one again. LOL!!! The supplies I used are listed below. You can click on any item and be taken directly to my online store.
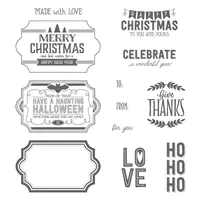
I have another card from the Carols of Christmas stamp set . The set has two large greetings, but it also has matching Thinlits that can be purchased as a bundle. The Thinlits are called Card Front Builder Thinlits Dies. They do not really look like they match the stamp set. They only technically cut out a few things that you stamp, BUT…..they have additional pieces that are just beautiful. Here is the card and you will see the stamped and die cut areas.
Carols of Christmas Bundle, 146037
The card is very simple, but I love it. It is fairly clean and uncluttered. That is so hard for me to do! The sentiment is stamped and then die cut with the Layering Squares Thinlits, as is the scalloped frame. The trees at the bottom are from the Card Front Builder Thinlits. I love the look they give. The deer actually has a matching thinlet but I just stamped him. I did give him a coat of Clear Wink of Stella. Although it doesn’t show up in the photo.
I love Smoky Slate with almost any other color! I used this combination for my Christmas cards a few years ago. I hope you like these colors as much as I do. I would love to see any cards you make with this color combination.
Thank you for visiting today! I love your comments and questions. The supplies I used are listed at the bottom of the page. You can click on any item and be taken directly to my online store.
Please do not forget to look at this Awesome special for Paper Pumpkin. New Subscribers can try their first month for 50% off. That means it is only $10.00 to get the first box. The contents are worth well over that amount. There is no obligation to continue the subscription. But I hope you will fall in love with it as I have. If you decide that you do not want it after the first, or even the tenth, you simple go to the website and cancel. It is that easy. So give it a try at this half price rate.
The content in this blog is the sole responsibility of Jackie Beers as an Independent Stampin' Up! Demonstrator. The use of and content of classes, services or products offered is not endorsed by Stampin' Up!