When trying to think what to name this card, I thought of the Ugly Sweater Contests each year. So I went with the Ugly Hat. It isn’t really Ugly! It is just a bit on the gaudy side. And I love it !
Sunday evening after our Stampin’ Up! At Home Convention was over, my Upline had a Zoom get together to share what we learned. And it included a sketch challenge. This was my version of the sketch challenge.
I have come to really love the Gnome For The Holidays stamp set. And one of the reasons I love them is that each of the little gnomes are small enough to be a quick focal point of a card without taking up to much coloring time.
The DSP I used is the Tis The Season Designer Series paper. I know I have used it quite a lot, but all of the patterns are gorgeous!! For this card I was able to use scraps from where I had done backgrounds and this is the piece that was cut off. Each of the pieces is 1 1/4 X 4. I placed them on a piece of Whisper White card stock cut to 5 1/4 X 4. I left equal amounts of white at the top and bottom with the colors in the middle. I used my grid paper for lining everything up. I hope you use your grid paper for things like this. I won’t tell you how long it took me to realize how helpful it is!!!
I colored the lady gnome with Stampin’ Blends and then decided her hat needed some Bling! The more Red Rhinestones I added, the more it became the Ugly Hat Contest. But I couldn’t stop myself! The finished touch was the sentiment and candy canes.
The sentiment is from the Warm Hugs stamp set. I stamped and then used the Pick A Punch banner tip on the one end. For the other end, I stamped the crossed candy canes, also from Warm Hugs, and fussy cut them.
The card is a base of Thick Whisper White. The DSP is layered on a piece of regular Whisper White which is added with dimensionals to the base.
I believe it is wonderful to be part of a large group of stampers having fun. And that is what we do as demonstrators. If you have been thinking about ordering products, please consider the Ultimate Bundle, and join my team. I would love to talk with you about all of the perks and my favorite reasons for being a Stampin’ Up! Demonstrator.
Thank you for stopping in today! I do appreciate it! Please come by tomorrow as it is the Pals monthly Blog Hop. There will be a lot of great projects for you to hop along through.
HOST CODE
My November Host Code is: 7C63XEUQ Please use this code for orders under $150.00. I will have a small perk for those with orders over $50.00
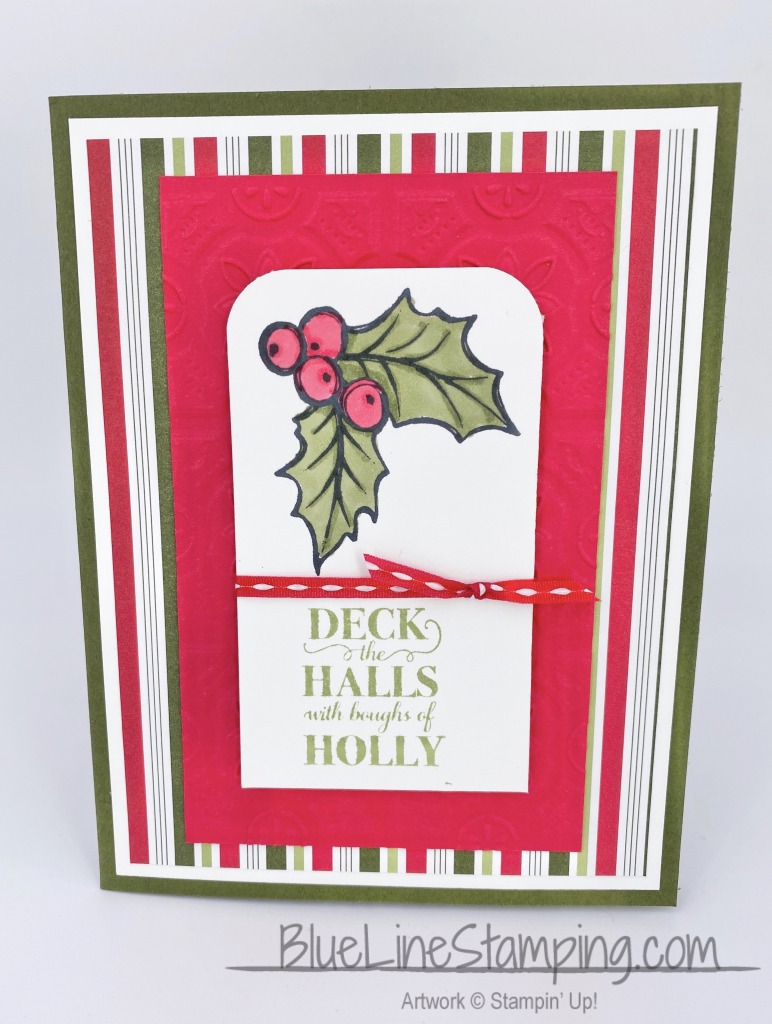
I have a fun Christmas card to share today. And one of the details allows you to easily make two and have some cute pieces left over. I love that!
I may have lightened the colors too much. I wanted you to be able to see the Tin Tiles detail behind the focal center piece. The large Real Red section is embossed with the Tin Tiles 3D Embossing Folder. And that is the special piece I mentioned at the beginning. I embossed a 6X6 piece of Real Red card stock. That size fits perfectly inside the embossing folder. It also makes lining up the tiles properly very simple. That was my main goal. The after part was just a happy bonus!! After embossing, I cut off the bottom two squares, and then cut in half the remaining six. This gives what I have on the card. You have the same piece plus the two cut from the bottom for additional projects.
The stamps are all from the Christmas Gleaming stamp set. I used the Heartwarming Hugs Designer Series paper for the striped background. It is where all of my color choices came from. The ribbon is from the Playful Pets Trim Combo. I have used this red and white ribbon on several projects.
Measurements:
Mossy Meadow cut to 5 1/2 X 8 1/2 folded in half
Whisper White cut to 5 1/4 X 4
DSP cut to 5 X 3 3/4
The embossed Real Red as mentioned in the narrative
Whisper White cut to 2 X 3 1/2
Thank you for stopping in today. Please come back tomorrow for a non-Christmas card. I try to give you a mix of cards.
HOST CODE
My November Host Code is: 7C63XEUQ Please use this code for orders under $150.00. I will have a small perk for those with orders over $50.00
This cute card I have for you today is another card I received in a swap. It is a case from fellow demonstrator Cheryl Campbell. She cased page 12 of the Mini Catalog. I love her version!! All I changed is the colors.
This is a great card to make multiples of. And a great use of DSP, in that you are not using a large amount of it. I used the Garden Green side of the Toile Tidings Designer Series Paper for the “ribbon” on this package.
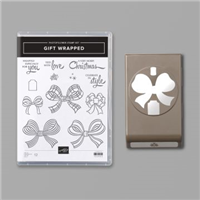
The bow is stamped tone on tone onto the Garden Green and punched using the matching bow. The sentiment is from the Gift Wrapped stamp set. That is even better! The only thing you may not be able to see in the photo is that I raised the top layer. The Garden Green is glued to the Thick Very Vanilla, and then the top layer is added using Stampin’ Dimensionals.
I have all of the measurements for you below. Thank you again for stopping by today.
Measurements:
Thick Very Vanilla cut to 4 1/4 X 11, scored and folded in half
Garden Green cut to 4 X 5 1/4
Very Vanilla cut to 3 3/4 X 5
Garden Green cut to 1 X 5 and 1 X 3 3/4
Toile Tidings DSP cut to 7/8 X 5 and 7/8 X 3 3/4
Scrap Garden Green for the bow
HOST CODE
My November Host Code is: 7C63XEUQ Please use this code for orders under $150.00. I will have a small perk for those with orders over $50.00
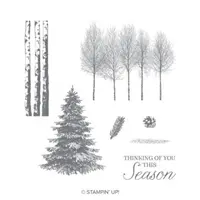
I have a quick and easy Christmas card to share with you today. I have combined the Winter Woods stamp set with some matching DSP for a cute Christmas Tree card.
The beautiful tree is from the Winter Woods stamp set and stamped using Shaded Spruce Ink. I love the detail in the stamp! I paired it with a similar looking tree on the DSP from the Tis The Season Designer Series Paper.
The sentiment is from the Cherish The Season stamp set. I love the beautiful script of the sentiment. The ground beneath the tree is stamped in Pool Party. For the finishing touch I added the darker red rhinestones from the Holiday Rhinestones.
Today’s measurements:
base of Shaded Spruce is 4 1/4 X 11
Cherry Cobbler is 4 1/8 X 5 3/8
DSP is 4 X 5 1/4
Whisper White is 3 3/8 X 4 7/8
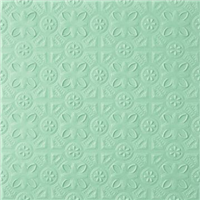
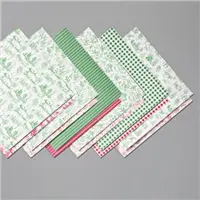
Thank you for stopping in on this last Friday of October. Wow, where has the month gone!! And as it is almost the end of the month, the DSP Sale is almost over. The 15% off Designer Series Paper sale ends tomorrow night. The Tis The Season I Used today is one of the packs included. All of the ones included in the sale are shown below.
HOST CODE
My October Host Code is SXDVJZF3 Please use this code for orders under $150.00. I will have a small perk for those with orders over $50.00
Last Wednesday I shared a great Fun Fold card for the InKing Royalty Blog Hop. I made a slim card using the same fold that I am sharing with you today. This fold is a CASE from Paula Butler and a card I received in a swap we were part of. I LOVE this fold and all of it’s possibilities.
And here is the open view:
As you can see from this open view, it is also a gift card holder! WooHoo. This version of the card has the top focal layer pushed to the left. This allows room for the sentiment, which is a bit long, to go to the right side. One of the things I love about this fun fold is that you can move that center section to wherever you want it to accommodate different elements. And you could eliminate the gift card slot as well.
This gorgeous DSP is the Snowflake Splendor Designer Series Paper. I think having the various shades of blue along with the Highland Heather makes it very special! I love traditional Christmas colors, but I also like “different” some times. This definitely fits that bill!
The snowman and sentiment are from the Snowman Season stamp set. It is in the Annual Catalog and was a carry over from last year. There is a matching punch as well. The inside sentiment is from the Wrapped In Christmas stamp set.
I have the measurements for this card just below. You can click HERE to see the slim line card I did using the same Fun Fold.
Measurements:
Base card of Highland Heather is 4 1/4 X 5 1/2
Center folded / gift card layer is 3 1/8 X 10 1/2, scored at 4 1/4 and 8 1/2
Fold the 8 1/2 score line to the inside for the gift card pocket
Inside Whisper White layer , and front stamped layer, are 2 7/8 X 4
Left side DSP is 3/4 X 4
Right side DSP is 1 1/4 X 4
Gift slot DSP is 2 7/8 X 1 3/4
Sentiment layers are 1 1/4 X 3, and 1 X 2 3/4
Regarding assembly: For me, it was easiest to apply to DSP pieces on each side allowing the same spacing on the outsides. Then simply fit the center piece into place. The center piece fits flush with the top and bottom of the base card.
Thank you for stopping by today! Please come back tomorrow for another new project.
HOST CODE
My October Host Code is SXDVJZF3 Please use this code for orders under $150.00. I will have a small perk for those with orders over $50.00
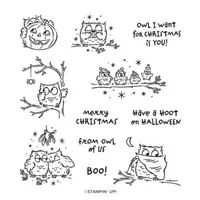
You all know that I LOVE Gift Card Holders. I have one to share today that I have made several variations of for classes this year. The one I am showing you is made with two of my favorite products from the Mini Catalog.
I paired the super cute Have A Hoot stamp set with one of my all time favorite DSP, the Heartwarming Hugs Designer Series Paper. I also used the Wrapped In Christmas stamp set as well.
Somehow I failed to take a picture of the inside of this version! DUH!!! But I have a picture of one of the other versions. Other than the DSP, it looks the same. So here is the inside view.
The only difference on this inside view, is that I added the Circle Die cut to the top. This allows the gift card section to tuck underneath it for a closure.
I love this fold and layout. It allows quite a lot for your stamped and written sentiments, as well as the gift card slot.
Here are a few different versions of the same fold.
Here are the measurements for the top photo and the inside.
base card is Whisper White Thick cardstock cut 4 1/4 X 11, scored at 1 1/2, 5 1/2
Fold and burnish the score lines. The 1 1/2 is the gift card holder. Fold it to the inside. Place a gift card or business card into the slot as you secure it with Tear & Tape. This allows a bit of extra room so that the card does not tear the paper when added later.
When closed, the fold of the card (the 5 1/2 score line, is at the bottom.
The DSP is cut to 4 X 1 1/2 and 4 3 3/4 for the front. The gift card slot DSP is 4 X 1 1/4
The front layer is 2 X 3 1/8 and 1 3/4 X 2 7/8 for the owls.
The inside sentiment layers are 4 X 3 3/4 and 3 3/4 X 3 1/2
The top circles are cut using Layering Circles Dies. It is added with dimensionals that are placed center and top. This allows the bottom portion of the card to tuck underneath.
Reminder that the Designer Series Paper sale is almost over. It ends of the 31st!! This is a great deal on the papers shown below.
Thank you for stopping by today. I very much appreciate it and love to get your comments. I do respond individually to each response. Please come back tomorrow for another new project.
HOST CODE
My October Host Code is SXDVJZF3 Please use this code for orders under $150.00. I will have a small perk for those with orders over $50.00
The content in this blog is the sole responsibility of Jackie Beers as an Independent Stampin' Up! Demonstrator. The use of and content of classes, services or products offered is not endorsed by Stampin' Up!