This time of year offers opportunities for a variety of card themes. It is hard to believe that we will be making Christmas cards soon, or even now! I have a little Fun Fold card to share with you today.
Stamps and Dies
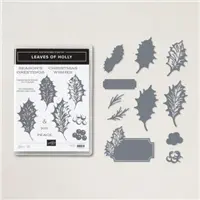
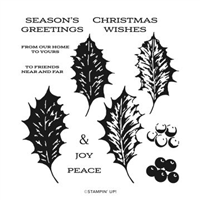
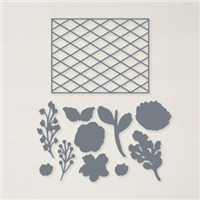
These fun holly leaves and berries are from the Leaves of Holly Bundle which includes the stamp and Holly Berry Dies. There are solid leaves plus the open ones that I have used that are awesome layered together. The berries, if you can see up close, are actually layered. Sweet Sorbet and Poppy Parade were layered to show the shading.
The sentiment and it’s layer are from the Bundle also. To have the little ticket like notches on the corners of that layer adds great detail as opposed to a straight strip.
Papers and Finishes
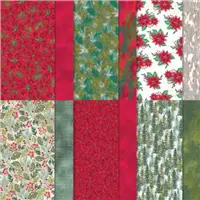
The DSP was the consideration for the specific greens and reds chosen. It is from the Santa Express Designer Series Paper. Shaded Spruce was pulled from the paper for the card base and the holly leaves. The layer of White, along with the White sentiment layer helps to make others pop against that darker background.
The real red ribbon is from the Red and Green combo pack. It is very easy to work with for tying bows, which I love. To give a touch of sparkle, I added an Opal Dot from the 2021-2023 Opal Dots.
Fold
This card is a little bit narrower than a normal card due to the fold. Here is a look at the open card.
To make the angle pocket on the inside required a 10 3/4 length of cardstock and then divide that into thirds. So it had no choice but to be a little smaller. That is not a problem for me and hopefully not for you either. The card begins with 10 3/4 X 5 1/2 and is scored at 3 5/8 and 7 1/4. On the far right section, cut from the score line down to the outer bottom corner. When folded inside, it creates the little pocket. Only place a small amount of glue at the bottom of the pocket to leave room for the insert. Plus, a gift card will fit there as well! That is a win in my book.
The inside DSP is the reverse of the front piece. It is cut 3 X 4 7/8 and cut on the diagonal. When making the diagonal cut, have your preferred side up. Cut from top right to bottom left. The inside White layer is 3 1/4 X 5.
Mini Catalog and Sale-A-Bration
Click on either catalog photo and you will be taken to my Online Store where you can download either or both catalogs.
HOST CODE
My August Host Code is H9KF4JUC. Please use this code for orders under $150.00. I will have a small gift for those with orders over $50.00 in addition to the Perk Rewards Program. You can read all of the information at the top of the page in the Menu Bar under SHOP / Perks.
Thank you for stopping by today. I hope you enjoyed today’s project and will come back. I do read and reply to all of the comments individually. They mean a lot to me. Please reach out if you have a question.
Today’s card is an early Christmas card for the Make My Monday Challenge. It consists of a mixture of stamp sets and Die sets to create a Cup of Christmas.
Today’s card is Christmas in August for the Make My Monday Challenge. As a member of the Design Team, I try to make cards that can inspire you. This one is two fold. It contains pieces from a variety of die sets for the sprigs. And begins with the tea cup, which is not at all Christmas. Hopefully you will be inspired and join this challenge. At least go to the blog and take a look at everyone’s creations. Simply click on the picture below.
Stamps
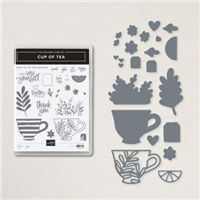
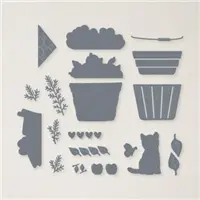
As I said above, this is definitely a “parts” card. The beginning was the idea of sprigs of evergreen, etc in a container. But what container was the question. The answer came in the form of this cup from Cup of Tea. After stamping and coloring it, the fun began. However, the second question was how to add a sentiment to the cup and little scene I was creating. After trying a few different things, I remembered the little tea bag, or tag in my case, in the Tea Cup Dies. With the tag ready to go all I needed was a sentiment. It was found in the Leaves of Holly stamp set. The simple “Joy” was a perfect match for this scene.
Dies
With the container taken care of with the cup from the Cup of Tea stamp set and Tea Cups Dies, I moved on to the sprigs and leaves. A little confession is in order here. Over the last year I have found myself pulled to quite a lot of the Stampin’ Up! Die sets. The change is that I look at them for overall content and not simply that they cut out a stamped image. It is more of what else is included and other uses. And for that reason, I have more die sets than ever! (Both good and bad news)
With seeing quite a few Christmas cards being shared of late, I have begun looking at my dies for pieces that would be background or additions for Christmas cards. And that has paid off hugely on this card. Best of all is that I have cut a few in traditional colors when I am using the dies for other cards. Having these on hand made this card go much quicker. The harder part was remembering where the little pieces came from!
Fill Pieces
Here is a list of the various pieces. Hopefully you have some of these in your Die library! Maybe an unexpected one is the Old Olive stem in the center. It is from the Organic Beauty Die set. As is the Poppy Parade piece depicting holly berries. The Fir pieces are from the Full Basket die set. That is the one with the cute basket and kitten. And the white piece is from the Splendid Stems dies.
DSP and Finishes
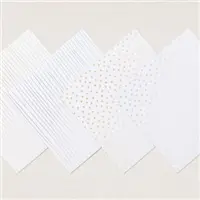
Of course the DSP is what prompted my color choices all the way around this card. This beautiful piece is from the Boughs of Holly Designer Series Paper. The colors are really stunning in person. And the choices for all of the stems were due to the DSP piece as well. Additionally, the silver dotted piece of DSP is from the Sale-A-Bration 6×6 pack of Silver & Gold Foil. It adds a touch more bling to the card.
There are two things added for finishes to the card. First is the gorgeous Parakeet Party Metallic Ribbon to hold the tag. This ribbon is so sparkly and very easy to work with. And last but not least are the Rhinestones. Just one on the tag was not enough. So there are a couple placed on a few of the silver dots in the paper. More bling is best!
Mini Catalog and Sale-A-Bration
Click on either catalog photo and you will be taken to my Online Store where you can download either or both catalogs.
HOST CODE
My August Host Code is H9KF4JUC. Please use this code for orders under $150.00. I will have a small gift for those with orders over $50.00 in addition to the Perk Rewards Program. You can read all of the information at the top of the page in the Menu Bar under SHOP / Perks.
Thank you for stopping by today. I hope you enjoyed today’s project and will come back. I do read and reply to all of the comments individually. They mean a lot to me. Please reach out if you have a question.
This month, the theme is Seasons’ Greetings. This month’s design team members showcase projects inspired by their favorite seasonal time of the year. We really hope that you will be inspired by all the amazing creations the Pals are sharing with you! As you hop from blog to blog, we would love for you to leave a comment. You will find the lineup at the end of my post to help you “hop” along from Pal to Pal.
Choosing a favorite season is really difficult. All are great for very different reasons. But to only choose one, I have to go with Christmas. The Love, Family, Decorations all joined together make it the best time of year. So I created a “Joined Together” card for today’s theme with Wishes & Kisses.
Stamp and Die Bundles
As soon as I saw the sentiment used today, I knew this was going to be a combined card. That sentiment of “Candy Cane Wishes and Mistletoe Kisses” is so sweet! And I happened to have both stamp bundles to make that work.
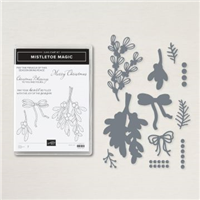
The candy cane and sentiment are from the Sweet Candy Canes Bundle which includes the Candy Canes Dies. There are two candy canes facing opposite directions included. But I only needed one for this. And to pair it with some mistletoe, I pulled out the Mistletoe Magic Bundle. That bundle includes the Mistletoe Dies.
For the sentiment you may be surprised as where that Die is from. It is a part of the All That Die set that pairs with the masculine He’s All That set. The oval with a bit of embossed inner ring seemed to fit perfectly with the size of the sentiment.
Paper and Color
The colors on this card are not exactly pulled from the DSP as is usual for me. For the candy cane, it is stamped using Cherry Cobbler Ink. The Mistletoe is stamped using Shaded Spruce for a bit brighter look. However it is colored using Soft Succulent, which is a color from the DSP piece.
The DSP is the Texture Chic Designer Series Paper. The opposite side of this piece is Evening Evergreen with Gold designs. But this side had snowflakes which goes with my Christmas Theme. The card base of Shaded Spruce also pulls the brighter colors together. And the White layer helps bring out the white snowflakes of the DSP.
Finishes
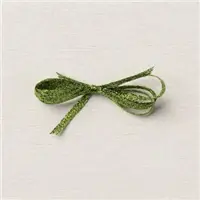
To “hang” my mistletoe required some ribbon strong enough to hold the candy cane as well. LOL!! This was achieved using the Evening Evergreen Open Weave Ribbon. This ribbon makes a beautiful bow. And the tag fits perfectly on the ribbon as well. The final touch is the Red Pearl from Festive Pearls embellishments. Also there is a bit of Wink of Stella on the candy cane and mistletoe for a little shine and sparkle.
More inspiration awaits, so use the lineup below to visit the rest of the Design Team. The Pals are excited to show you what they’ve created! Then, please mark your calendars for our next blog hop on [second Wednesday]. Our theme will be Focus on the Sentiment, when the design team will showcase a sentiment as the focal point of their project.
Click on either catalog photo and you will be taken to my Online Store where you can download either or both catalogs.
HOST CODE
My August Host Code is H9KF4JUC. Please use this code for orders under $150.00. I will have a small gift for those with orders over $50.00 in addition to the Perk Rewards Program. You can read all of the information at the top of the page in the Menu Bar under SHOP / Perks.
Thank you for stopping by today. I hope you enjoyed today’s project and will come back. I do read and reply to all of the comments individually. They mean a lot to me. Please reach out if you have a question.
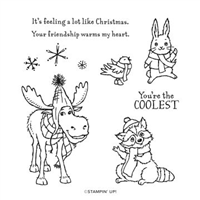
Mr. Moose is in the spotlight today! By using the Spotlight Technique I am only highlighting a portion of the moose image. This is a fun technique that is an oldy but goody!
Technique
The Spotlight Technique is a simple one to accomplish. This card was made as part of the Make My Monday Challenge that I am a Design Team Member for. You can join in the fun by creating your own version and then adding your card on the challenge page. Simply click on the picture below to go to the page.
My version of the spotlight was created by using the Heart Punch, the smaller one, and punching a heart from a scrap of cardstock. Next I placed the negative, the scrap of cardstock with the heart missing, over the stamped image of Mr. Moose. After finding the perfect section to color, I used the Basic Black Stampin’ Write Marker to draw around the inside of the negative. A quick and easy method. You may use any shape you wish as long as you are not covering the majority of the image. By using the heart I thought it was a bit different and shows love for Mr. Moose.
Stamps
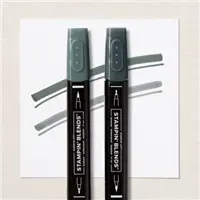
Because the stamped image of Mr. Moose is so large I did not add a sentiment. But there are cute sentiments included in the stamp set named All Bundled Up, as well as a few other cute critters. You may remember that I used the Raccoon last week. There is also a bunny and a bird. Mr. Moose is stamped using Memento Tuxedo Black Ink and then colored using Stampin’ Blends. As mentioned above the spotlight shape was drawn using a Black Stampin’ Write Marker. This is the only marker that is available individually. It is a very handy tool to have.
Paper
Leaving the paper discussion to last was very difficult for me. This paper is amazing!! It is from the Lights Aglow 6X6 Designer Series Paper. All of the sheets are gorgeous but this is my favorite. The gold simply shines and I am in love with the design on this sheet. The colors used are very similar to the Raccoon card from last week. But after seeing this piece of paper, I knew it was The One to help Mr. Moose be the star!
And to further help Mr. Moose shine, I added more gold to bring out the gold in the DSP piece. It is not just a plain Gold Foil however. This is the Gold and Rose Gold 6×6 Metallic Specialty Paper. It carried over to the current Annual Catalog from last year’s Fall Mini. And I am so happy. Both colors in this paper pack are wonderful. Before you shake your head at me for wasting some of this beautiful paper, rest assured that I took this into consideration. I cut the layer behind Mr. Moose from the center of the larger gold layer. No one but me would know, and it saves a second piece of the paper. Now you can released the shocked breath you took after seeing two layers of gold! 🙂
Mini Catalog and Sale-A-Bration
Click on either catalog photo and you will be taken to my Online Store where you can download either or both catalogs.
HOST CODE
My July Host Code is ZMG9Q7EX. Please use this code for orders under $150.00. I will have a small gift for those with orders over $50.00 in addition to the Perk Rewards Program. You can read all of the information at the top of the page in the Menu Bar under SHOP / Perks.
Thank you for stopping by today. I hope you enjoyed today’s project and will come back. I do read and reply to all of the comments individually. They mean a lot to me. Please reach out if you have a question.
Before I get to today’s project, I wanted to let you all know that I am doing a Product Share from the upcoming January – June Mini Catalog. Last catalog I only did the paper. This time I am doing Ribbon shares as well. You can email me if you have questions, or would like to order.
Now for today’s project! This is a Corner Fold card that I have cased from The Paper Pixie. Julie did a video on it that is great, as she always is.
Stamps and Dies
The stamping and die cut star are from the Tidings & Trimmings Bundle of products. I am in love with the star! It looks so delicate and elegant. Both of the stars are included in the bundle. For the background of the stars, I repeatedly stamped the image from the Tidings & Trimmings stamp set. This card is actually a quick and easy one to do.
Paper
I used the stamped image to mimic the berries in the DSP. This piece of Designer Series Paper is from the Painted Christmas DSP. The pop of red goes great against the Evening Evergreen, except it is actually Poppy Parade instead of Red. LOL!! The Soft Succulent background star is pulled from the paper as well. The intricate star is cut from the Gold Metallic paper. This is a two pack of Gold and Rose Metallic papers. To make for ease in adhering the intricate cuts, I added the Adhesive Sheet to the Gold prior to die cutting. The adhesive sheet turns the die cut image into a sticker.
Directions
As I mentioned above, I cased this from The Paper Pixie. Here is a link to her video. Click Here
HOST CODE
My December Host Code is AVHFJFAU. Please use this code for orders under $150.00. I will have a small gift for those with orders over $50.00 in addition to the Perk Rewards Program. You can read all of the information at the top of the page in the Menu Bar under SHOP / Perks.
Thank you for stopping by today. I hope you enjoyed today’s project and will come back. I do read and reply to all of the comments individually. They mean a lot to me. Please reach out if you have a question.
Simple and easy to make gift card holders are the best. When they show off beautiful DSP, they are perfect. That is what I have to share with you today.
And here is the good part.
Stamps and Punches
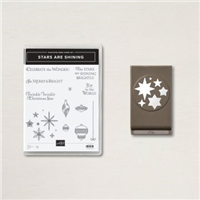
The beautiful stars are punched from DSP using the Starlit Punch which is part of the Stars Are Shining Bundle. I love punch bundles! They are so easy to create multiple cards with. And this one gives multiple stars in one punch. I did not use all of them on the front of this card.
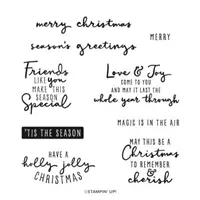
The sentiment is from the Stars Are Shining Stamp Set, the other half of the bundle. There are some great sentiments and stamps in the set. This one fit perfectly with my theme. For the inside sentiment I went to the Christmas To Remember stamp set. This set is all sentiments that are sweet and perfect.
I used the Banner Pick A Punch to cut the sentiment. This may be the first time I have used the single point banner instead of the two point one. Also I used the Label Me Lovely punch to make the finger pocket on the gift card pouch. Although it is not really necessary if you want to skip that step.
Papers
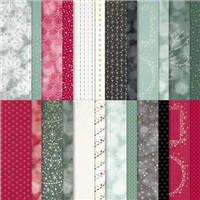
This Whimsy & Wonder Designer Series Paper is one of the prettiest papers this year. I chose the snowflakes because the pink looks beautiful against the Misty Moonlight card base. Afterwards I had the idea to punch the stars from the same paper. The bits of foil in the snowflakes are now in the stars as well. And it was a little scrap of DSP that I used, so no waste. There are a few added Rhinestones for a touch more bling!
Directions and Measurements
The card base is Misty Moonlight cut to 4 1/4 X 5 1/2
The DSP layer is 4 X 5 1/4
The accordion folded White piece is cut 4 1/4 X 9 3/4 and scored at 3 1/4 & 6 1/2
The decorated top Misty Moonlight is cut 4 1/8 X 3 1/8
The gift card pocket Misty Moonlight is cut 4 X 2 and then notched using the Label Me Lovely Punch
The DSP strip across the pocket is cut 4 X 1
HOST CODE
My December Host Code is AVHFJFAU. Please use this code for orders under $150.00. I will have a small gift for those with orders over $50.00 in addition to the Perk Rewards Program. You can read all of the information at the top of the page in the Menu Bar under SHOP / Perks.
Thank you for stopping by today. I hope you enjoyed today’s project and will come back. I do read and reply to all of the comments individually. They mean a lot to me. Please reach out if you have a question.
The content in this blog is the sole responsibility of Jackie Beers as an Independent Stampin' Up! Demonstrator. The use of and content of classes, services or products offered is not endorsed by Stampin' Up!