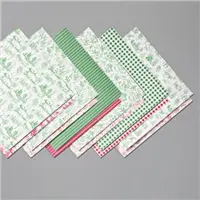
I really like the Toile Tidings Designer Series Paper. I have used it a few times this season since it came back as a Returning Favorite. Today I have a little bit different fold to showcase it. Because the paper is so pretty, I hate covering it up. And it is difficult to find ways to Not cover it.
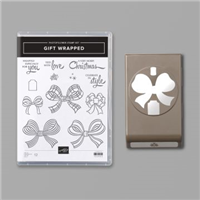
I paired the Toile Tidings Designer Series Paper with the Gift Wrapped Bundle. To not cover the DSP, I created a band to go around the card to hold it closed. Did I mention it was a Gift Card Holder? You know how much I love these!!
Here is the inside view
The gift card slot is just above my watermark. I was not thinking that I did not have a card in there!
From this picture I think you can see that the card is basically divided into two equal parts. The DSP is cut to line up perfectly. And the seem is covered my the belly band.
Thank you for stopping by today! I do appreciate your following me and my projects! Reminder that the OnLine Extravaganza is TOMORROW!!! There are very few exclusions, compared to the size of the Annual Catalog. This is a great time to stock up on card stock, build your Ink collection, etc.
ClickHERE for the post I did on Saturday showing all of the exclusions.
Measurements and Directions for today’s project:
Card base of Garden Green is 4 1/4 X 5 1/2
Very Vanilla is cut to 4 X 10 1/4, and scored at 5 1/2 and 8 1/4
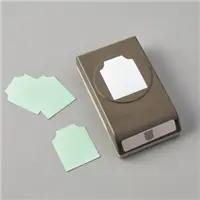
The 8 1/4 fold is for the gift card. Fold it to the inside and punch a thumb hole using a circle punch inserted halfway prior to securing the edges with Tear & Tape
DSP is one piece cut 3 3/4 X 5. On the 5″ side cut at the 2 1/2 mark for two equal pieces.
Adhere one piece to the front of the fold down (gift card) section, close it and then add the second piece and align them
The belly band is 1 1/2 X 11. Score at 2 5/8 and 7. Fold and burnish.
Wrap around the closed card and secure the overlap in front.
Add the stamped and punched bow and tag so they cover the overlap on the band
If you have any questions, please do not hesitate to reach out to me.
HOST CODE
My November Host Code is: 7C63XEUQ Please use this code for orders under $150.00. I will have a small perk for those with orders over $50.00
Last Wednesday I shared a great Fun Fold card for the InKing Royalty Blog Hop. I made a slim card using the same fold that I am sharing with you today. This fold is a CASE from Paula Butler and a card I received in a swap we were part of. I LOVE this fold and all of it’s possibilities.
And here is the open view:
As you can see from this open view, it is also a gift card holder! WooHoo. This version of the card has the top focal layer pushed to the left. This allows room for the sentiment, which is a bit long, to go to the right side. One of the things I love about this fun fold is that you can move that center section to wherever you want it to accommodate different elements. And you could eliminate the gift card slot as well.
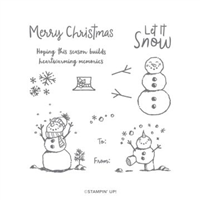
This gorgeous DSP is the Snowflake Splendor Designer Series Paper. I think having the various shades of blue along with the Highland Heather makes it very special! I love traditional Christmas colors, but I also like “different” some times. This definitely fits that bill!
The snowman and sentiment are from the Snowman Season stamp set. It is in the Annual Catalog and was a carry over from last year. There is a matching punch as well. The inside sentiment is from the Wrapped In Christmas stamp set.
I have the measurements for this card just below. You can click HERE to see the slim line card I did using the same Fun Fold.
Measurements:
Base card of Highland Heather is 4 1/4 X 5 1/2
Center folded / gift card layer is 3 1/8 X 10 1/2, scored at 4 1/4 and 8 1/2
Fold the 8 1/2 score line to the inside for the gift card pocket
Inside Whisper White layer , and front stamped layer, are 2 7/8 X 4
Left side DSP is 3/4 X 4
Right side DSP is 1 1/4 X 4
Gift slot DSP is 2 7/8 X 1 3/4
Sentiment layers are 1 1/4 X 3, and 1 X 2 3/4
Regarding assembly: For me, it was easiest to apply to DSP pieces on each side allowing the same spacing on the outsides. Then simply fit the center piece into place. The center piece fits flush with the top and bottom of the base card.
Thank you for stopping by today! Please come back tomorrow for another new project.
HOST CODE
My October Host Code is SXDVJZF3 Please use this code for orders under $150.00. I will have a small perk for those with orders over $50.00
You all know that I LOVE Gift Card Holders. I have one to share today that I have made several variations of for classes this year. The one I am showing you is made with two of my favorite products from the Mini Catalog.
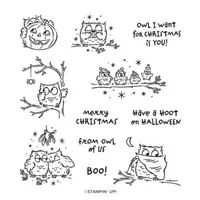
I paired the super cute Have A Hoot stamp set with one of my all time favorite DSP, the Heartwarming Hugs Designer Series Paper. I also used the Wrapped In Christmas stamp set as well.
Somehow I failed to take a picture of the inside of this version! DUH!!! But I have a picture of one of the other versions. Other than the DSP, it looks the same. So here is the inside view.
The only difference on this inside view, is that I added the Circle Die cut to the top. This allows the gift card section to tuck underneath it for a closure.
I love this fold and layout. It allows quite a lot for your stamped and written sentiments, as well as the gift card slot.
Here are a few different versions of the same fold.
Here are the measurements for the top photo and the inside.
base card is Whisper White Thick cardstock cut 4 1/4 X 11, scored at 1 1/2, 5 1/2
Fold and burnish the score lines. The 1 1/2 is the gift card holder. Fold it to the inside. Place a gift card or business card into the slot as you secure it with Tear & Tape. This allows a bit of extra room so that the card does not tear the paper when added later.
When closed, the fold of the card (the 5 1/2 score line, is at the bottom.
The DSP is cut to 4 X 1 1/2 and 4 3 3/4 for the front. The gift card slot DSP is 4 X 1 1/4
The front layer is 2 X 3 1/8 and 1 3/4 X 2 7/8 for the owls.
The inside sentiment layers are 4 X 3 3/4 and 3 3/4 X 3 1/2
The top circles are cut using Layering Circles Dies. It is added with dimensionals that are placed center and top. This allows the bottom portion of the card to tuck underneath.
Reminder that the Designer Series Paper sale is almost over. It ends of the 31st!! This is a great deal on the papers shown below.
Thank you for stopping by today. I very much appreciate it and love to get your comments. I do respond individually to each response. Please come back tomorrow for another new project.
HOST CODE
My October Host Code is SXDVJZF3 Please use this code for orders under $150.00. I will have a small perk for those with orders over $50.00
I have been cleaning, sorting, etc in my craft space a bit lately. One of the best parts of this is I find old projects that I saved because of the layout, folds, etc. Today I have a gift card holder that is an “Oldie but a Goodie”. This is one that is very quick and simple in terms of cutting and scoring. And it it super flexible so that different stamping or DSP makes it appropriate for anyone at any time of year. I know I need gift card holders year round!
As I started working on this post, I realized I did not add the touch of bling that I had planned on. So imagine that there is some bling next to the sentiment! LOL!!! Sometimes I would forget my head. I was running out of time, so did not go back down to my room to fix it. Sorry!!
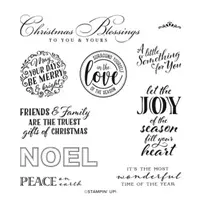
Besides the Plaid Tidings Designer Series Paper, I used the Little Treats stamp set. This little set has decorations and sentiments for a variety of occasions. Plus the Little Treat Box is adorable.
Here is the inside of the card.
As you can see , the gift card sort of stands up in the center fold. You can decorate this card as much, or as little as you want. I opted to just show the pretty DSP. It is from the Plaid Tidings Designer Series Paper. As I have this one done, which is DSP on every panel on both sides, it takes 2 sheets of the 6X6, with just a bit left over. I have the measurements for you below.
Here is a close up of the slit that the gift card fits in.
I cut the slit just after I have made all of the score lines. Go back to the 6″ score line. It is the center one of the three that are close together. Using the Paper Trimmer, lay that score line on the cutting track. Come in 3/8″ and slice down the score line, and stop at 3/8″ from the other end. To make the little stand up holder, use Tear & Tape and place it against the cut edge on one of the panels above or below the cut line. You do not need to do it on both of those sections. But the tape does need to be against the edge so you don’t close up the opening you made.
Thank you for stopping by today. I will add the instructions and measurements just below. If you have any questions, don’t hesitate to contact me. I would love to help you out.
MEASUREMENTS:
Card base is 4 1/4 X 10
Score along the 10″ side at 2, 5, 6, & 7.
Place the 6″ slit on the Paper Trimmer and cut , leaving 3/8″ from each end solid
Fold and burnish on all score lines. Make a “mountain, Valley ” fold with the three short lines. The slit for the gift card should be at the top.
Place Tear & Tape along the edge on each end of one of the 5-6 or 6-7 scored sections.
Cut DSP to: 2 pieces cut 1 3/4 X 4, and 4 pieces cut 2 3/4 X 4
After adhering the paper, remove the Tear & Tape and make the mountain with the slot at the top.
Decorate the front as you see fit. I did use a velcro dot to hold the card closed due to the thickness.
HOST CODE
My August Host Code is 6M4NU6C2 Please use this code for orders under $150.00. I will have a small perk for those with orders over $50.00
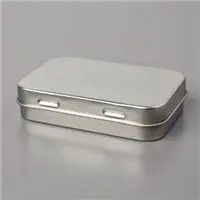
If you follow my posts, you know I love gift card holders. I have a pretty but different one to share today. And it is not a card. However, you could take the properties and make a really cute card.
This adorable tin is on page 55 of the upcoming August – December Mini Catalog. It is a perfect size of not too large and not too small. It holds a Gift Card perfectly. Plus, you have a little room to add some extra surprises. It measures 4″ x 2 3/4″ x 1″. And it is food safe as well. They come very well packaged in a group of 4.
I wrapped the tin with the Heartwarming Hugs Designer Series Paper that is cut 8 1/4 X 2. It is tight enough not to easily slide off, but does slide off and on. The length gives a good bit of overlap, which I like for sturdiness.
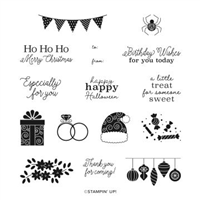
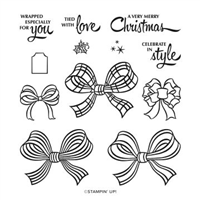
The banner is from Heartwarming Hugs DSP as well. I started with a piece cut 2 x 3. It is punched using the Banner Triple Punch. The sentiment is from the Gift Wrapped set. I layered it using the Ornate Frames Dies. The finishing touch is the bow I made with the Real Red Double Stitched Satin Ribbon. It ties wonderful bows that stay fluffy!
Thank you for stopping in today. I will have another card project to share with you tomorrow.
Bonus Days is back and that means it’s time for you to start earning coupon codes to redeem in August! If you need a refresher on this promotion, here’s how it works: For every $50 USD you spend 1 July–3 August 2020 (before shipping and tax), you earn a $5 USD Bonus Days coupon code that can be redeemed 4–31 August 2020. When you place a qualifying order, you will receive an email containing the code. SAVE the email!!! There is no way to retrieve it later. So print it and put it with your catalog or on your calendar to redeem in August. There is no limit to the number of coupon codes you can get. WooHoo!
HOST CODE
My July Host Code is AHTQERJB. Please use this code for orders under $150.00. I will have a small perk for those with orders over $50.00
Welcome to the Pals’ Blog Hop! We’re so glad you’re here. You may be starting the hop here or coming from a previous Pal’s blog. Either way, you’ve come to the right place. This month we are celebrating the 10th anniversary of the Pals Blog Hop with “Critters” from the Stampin’ Pretty Pals. Many of the design team members are offering “Mystery Blog Candy” of their choice to 1 lucky winner. To play along, just leave a comment on as many blog posts as desired. A random winner will be announced on a subsequent blog post by each participating design team member. You’ll find the full line-up below to help you “hop” along from Pal to Pal.
I am playing along with the Mystery Blog Candy! So be sure and leave a comment on this post and I will pick a random winner on Friday! WooHoo!!
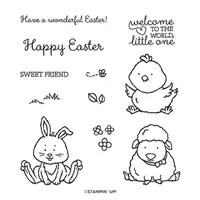
My “Critter” is a cute little baby chick. I have been surprised by my friends having Grand Babies lately. So I have needed Baby Cards. The Welcome Easter Stamp set is a perfect “Critter” set for all times of the year, and not just Easter. I love versatile stamp sets.
I don’t know if you can tell from the photo, but the chick’s head is raised. I stamped it on the card, but then stamped on a scrap and just cut out the head. It is raised with Stampin’ Dimensionals to give it a bit of depth. It looks really cute in person.
Of course if you follow me very much, you know what my favorite kind of card is. Yes, it is a gift card holder. And this is my “Go To” layout. At least the base of it is. I sometimes just do a flap attached to the left side. Which I could have done with this card and it would look the same from the front. But I decided to add an additional fold. That is why I had to hold it closed for the photo. (I apologize for the bad manicure, I haven’t been since I had surgery!)
Here is a picture of the inside with the added fold and the gift card slot.
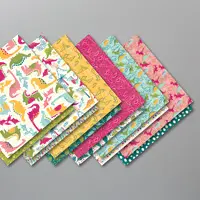
Do you recognize the designer series paper i have used? If you guessed the Dinoroar Designer Series Paper then you are correct! I tend to use the opposite sides of the DSP. This was a no brainer as soon as I saw the eggs. We just will not tell anyone that they are dinosaur eggs instead of chicken eggs!!
I will include the measurements and directions after the blog line up. Also the supply list is at the bottom of the post. I hope you will give this sweet stamp set another look. This card is a “One Set” card. I love sets that can stand alone. This is a good one for the beginner stamper up to the advanced stamper!
More inspiration awaits! Use the Blog Hop Line-up below to visit the rest of this month’s Design Team. My fellow Pals are excited to show you what they’ve created! Mark your calendars for Wednesday, April 8th, for our “Special Occasions” blog hop when our Design Team showcase projects for weddings, graduation, anniversary, baby, Mother’s/Father’s Day or any special occasion. Don’t miss the fun!
4 1/4 X 10, score at 5 1/2 and 8 1/4, Fold on all the score lines.
Inside layer base is 5 1/4 X 4
DSP layer inside is 5 X 3 3/4
Front left layer base is 2 1/2 X 4
Front left DSP layer is 2 1/4 X 3 3/4
Second fold card (with chick) is 8 1/2 X 3 1/8, scored at 4 1/4
Chick layer is 3 X 4
Tip: When you fold in the gift card slot, you can add a thumb hole if you want but it is not necessary. However, do put a gift card of card stock piece in the slot as you adhere the sides with Tear & Tape. Otherwise it makes it a very snug fit and bends the front a tad bit.
Join Promotion …… The Ultimate Shopping Spree !!
The Ultimate Bundle is the Stampin’ Up! Starter Kit. During Sale-A-Bration you get the extra value for your $99.00. If you have a wish list or are ready to place an order and it totals close to 99.00, please read this first.
There is NO OBLIGATIONS to do anything beyond ordering the kit. You pay $99.00 + tax and receive $125.00 of your choice of products + any stamp set from the annual or mini catalog (the most expensive one is the Well Said set with a $45.00 price) + the Mini Paper Cutter, a $26.50 value + the 6X6 DSP sampler pack (48 sheets of DSP) an $11.50 value + a Paper Pumpkin Kit with a value of $22.00 + FREE Shipping which is usually 10% of the order and would add another $23.00 value here. This equals over $230.00 value + business supplies added in at no cost. That is an awesome deal!! And you never have to purchase another thing. But while you are trying it out, and you have until the end of July before your trial period runs out, you are part of my Team! As well as my upline’s team. We have Facebook groups to share our projects and assist each other. I would love to talk with you about this opportunity.
The content in this blog is the sole responsibility of Jackie Beers as an Independent Stampin' Up! Demonstrator. The use of and content of classes, services or products offered is not endorsed by Stampin' Up!