Free Shipping on Wednesday for orders of $75.00 or more!!
Tomorrow you can take advantage of the Designer Series Paper sale and other Wish List items with Free Shipping. That is a double Win in my book and I have my list ready to go.
Today’s card
I failed to post the one Father’s Day card I created. So I am posting it a few days late. The best part is that it is a Fun Fold / Gift Card Holder. And with a change of the inside sentiment it could be for any manly occasion! The star is the He’s All That stamp set and Dies.
Stamps and Dies
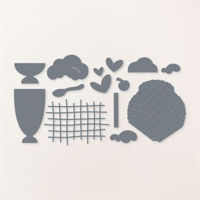
The starring stamp set is the He’s All That set. All of the stamped images are from that set. And the coordinating, but no longer a bundle, dies are the All That Dies. Dies were used for the main sign shape as well as the arrow. For some fun, I used the crosshatch die from the Share A Milkshake Dies for some added texture and color.
Extras
Extras are always needed but sometimes hard to see. Especially in the photo. The white layer is embossed using the Exposed Brick Embossing Folder. Oh My!! I really love the look of this and the different textures. And I do apologize that you cannot see it in the photo. Some of the other extras are the Rustic Metallic Dots that are scattered around. They add an extra manly touch as they look sort of like a nail head in color.
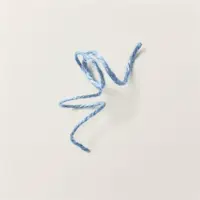
The final Extra is the Jute twine. This is a new pack of 2023-2025 In Color Jute Twine. I used the Pebbled Path to match the card base and ink used. I love the jute and how well it ties a bow. But I will say that it is a bit fuzzy with the strands. That is the nature of jute however.
Colors
This section was added last so I could share the Fun Fold and colors. It can be a little difficult to make manly cards except in dull colors. So I went through my colors seeing what would pair well with Pebbled Path. It is new and I have not used it really. Surprisingly it really popped with the Coastal Cabana. So I went with that. And I love the outcome!
The card design shows a good bit of the Pebbled Path card base. After that it is mostly White and Coastal Cabana. As I mentioned in the opening, this is a Fun Fold and Gift Card Holder. Here is the open view:
Layout
The card base is a piece of Pebbled Path that is cut to 5 1/2 X 4 1/4. The White layer is 5 X 3 3/4 and embossed. For the tri-fold Coastal Cabana you need a piece that is 4 1/4 X 11 and scored at 3, 6, & 9. Accordion fold these pieces as shown in the photo. The sections are even sizes with the exception of the last one which is 2 1/2. Fold that one in and adhere with Tear & Tape for your gift card holder.
The only important thing to remember is to center and adhere the Jute Twine to the back of the accordion fold prior to adding it to the card. The inside layers are 3 7/8 X 2 5/8 of Pebbled Path, and 3 3/4 X 2 1/2 of White. Simply change the inside sentiment and you are ready to go for any manly occasion!
Designer Series Paper Sale! June 1-30
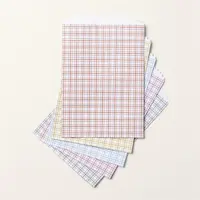
Click on the photo to see all of the available papers. If you are ready to order please click on the shop button in the menu and you will be taken to my online store! I also have a host code of 34QVEY4F that I would appreciate you using!
New Starter Kit opportunity for the month of June!
If you have a large Wish List, I would love to talk with you about the Starter Kit. It is the Ultimate Bundle!
Online exclusives are here to stay! Click on the photo and be taken directly to them in my online store. If you place an order, please use my Host Code listed just below.
HOST CODE
My June Host Code is 34QVEY4F. Please use this code for orders under $150.00. I will have a small gift for those with orders over $50.00 in addition to the Perk Rewards Program. You can read all of the information at the top of the page in the Menu Bar under SHOP / Perks.
Thank you for stopping by today. I hope you enjoyed today’s project and will come back. I do read and reply to all of the comments individually. They mean a lot to me. Please reach out if you have a question.
Today I have a Treat or Gift Bag to share with you. This is quick and easy. I used a variety of punches to make it faster and I really like the outcome.
Bag
Most of the work for this project is already done for you. This bag is from the 2023-2025 In Color Treat Bags. All of the new In Colors are represented in this package of bags. There are 25 bags included, 5 of each New In Color, for the reasonable price of $10.00.
To create my bag, I used the Paper Trimmer to make a slit across the bottom to open the bottom of the bag. I then cut up an inch from the bottom on each side. The last touch was to score at 1/2″ on each side all the way down the bag. By cutting and opening the bottom, I was able to create a flat bottom.
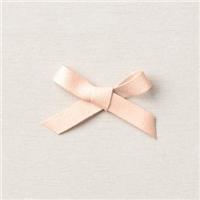
The ribbon is wrapped around the folded over top of the bag and secured in place with a glue dot. It will slip over the fold to open. The bow is made separately and also added with a couple of glue dots. They are strong and my go to for bow adhering!
Tag
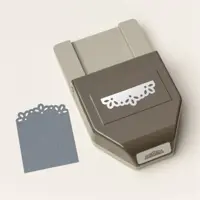
This tag may be a bit more elegant than you would think for a guy. It has the filigree look at the top. But that is mostly covered and doesn’t really show all that much. I do love this new tag punch though! It is the Elegant Edge Punch. It will create a tag up to 2″ wide. That is the width of this one. And it is 3 1/2″ long.
The circles are made using the 1 3/4″ Circle Punch and the 2″ Circle Punch. I am so thrilled that Circle Punches are available again! Punches are so quick to grab when you need a simple layer. The stamp is from the He’s All That stamp set. I love the retro bus and it looks great in just one color.
Colors and Finishes
I chose to use the Copper Clay version of the Treat Bag, so made the tag in that color. As well as the stamped image. To add some contrast I turned to another of the New In Colors and went with Wild Wheat. The ribbon is really nice with just a touch of a sheen to it. And the circle layer fits perfectly. The finishing touch for Bling is a bit different. At least it is positioned differently. I used two of the 2023-2025 In Color Dots in Wild Wheat to cover the wheels on the van. That is a retro look that has returned. But we must have bling!
Thank you for stopping by today!!!
Designer Series Paper Sale! June 1-30
Click on the photo to see all of the available papers. If you are ready to order please click on the shop button in the menu and you will be taken to my online store! I also have a host code of 34QVEY4F that I would appreciate you using!
New Starter Kit opportunity for the month of June!
If you have a large Wish List, I would love to talk with you about the Starter Kit. It is the Ultimate Bundle!
Online exclusives are here to stay! Click on the photo and be taken directly to them in my online store. If you place an order, please use my Host Code listed just below.
HOST CODE
My June Host Code is 34QVEY4F. Please use this code for orders under $150.00. I will have a small gift for those with orders over $50.00 in addition to the Perk Rewards Program. You can read all of the information at the top of the page in the Menu Bar under SHOP / Perks.
Thank you for stopping by today. I hope you enjoyed today’s project and will come back. I do read and reply to all of the comments individually. They mean a lot to me. Please reach out if you have a question.
Today’s card is a Card, Tag, and Gift Card Holder. I love multiple use cards and this one is a pretty one using the By The Bay Designer Series paper. Plus who does not love a Pearl!!!
This project is my design for the Make My Monday Challenge Blog. The challenge is a Tag. I went a bit beyond that. You can click on the icon and go to the blog to see what the other designers have made. And you can join the challenge yourself.
Tag
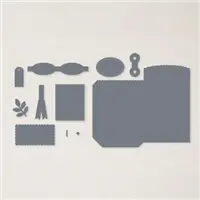
My tag is made using the Mini Pocket Envelope Die. It is the perfect size for a gift card as you can see in the second photo. There is the main pocket die and several additional decorative pieces to go with it. I used one of them to create the sentiment layer. My sentiment is shorter than the die cut, but that was an easy fix. With it being scallops it was very simple to die cut, then place it back into the die with the end that needs shortening falling right into the scallops. Easy peasy and oh so cute.
Paper
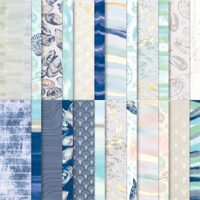
This gorgeous DSP is from the By The Bay Designer Series Paper. I love the soft colors and then the pop of Gold and Starry Sky! They are all beautiful together. The tag is angled a bit to better see the little bit of the Petal Pink in the paper.
From another piece of this paper pack is where the sea shell came from. There is a stamp in the stamp set. But this goldish version was on the back side of one of the pieces of DSP. I fussy cut it out, which was really quick, and just added a bit of Petal Pink color to it. The pearl got some Wink of Stella to give it the shine it deserves.
Stamp
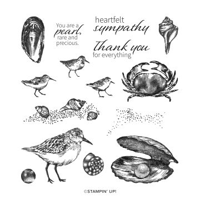
The sweet sentiment came from the Seaside Bay stamp set. I did not use the matching Dies. But I thought this sentiment went perfectly with the shell and pearl. It is stamped using the Starry Sky Ink which really pops. This is an adorable set of everything on the beach , matching Dies, and this beautiful perfect which coordinates all of the stamps.
Embellishments
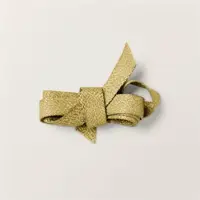
To complete this project I went with shiny things. The ribbon on the gift card Tag is the Petal Pink soft Ribbon and has a touch of a sheen to it. I used an old 1/8″ hole punch to make a hole in the flap of the tag and fed the ribbon through.
The finishing touch is the pink pearl. This is a larger one that is in the Pastel Pearls pack from the Annual Catalog. It was the perfect finish to this card.
Thank you for visiting today!
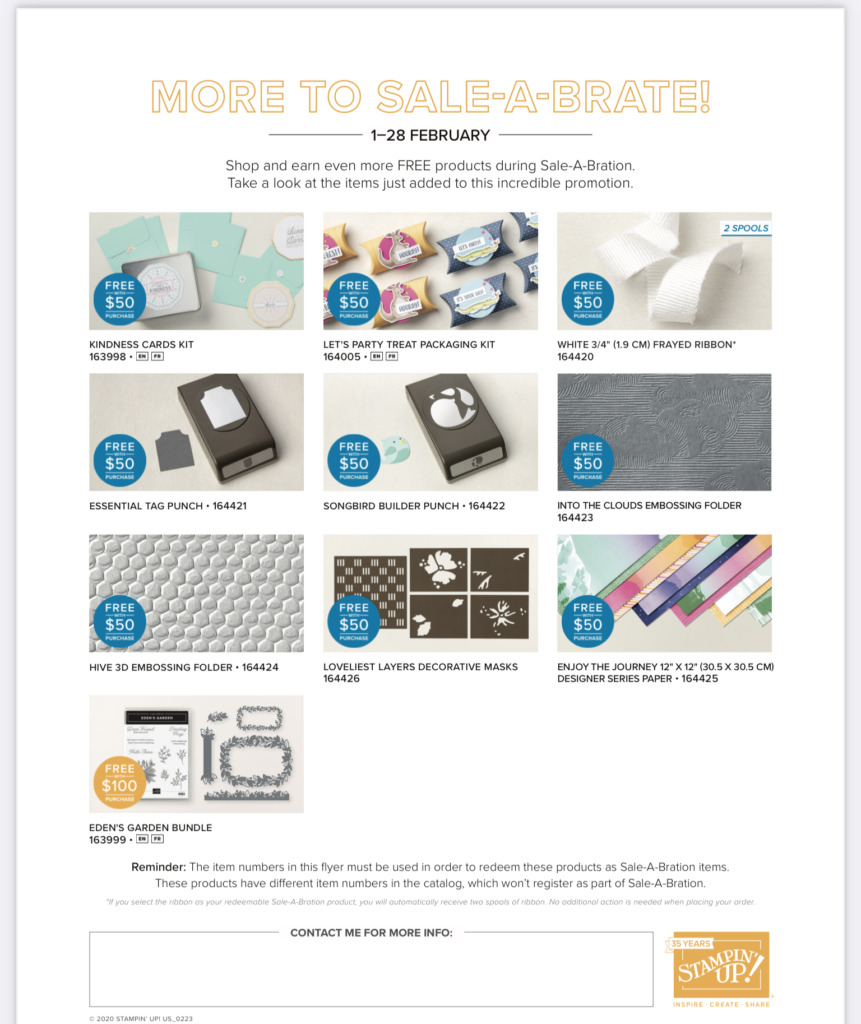
Sale-A-Bration has just two days left! Please don’t miss out on this awesome Join Promotion to get more Free products than I can ever remember.
Additional FREE Sale-A-Bration Items for February…..
Sale-A-Bration and Join Promotion
Not only is SAB all about Free Products, but Stampin’ Up! has really upped the rewards if you choose to join my team.
The regular Starter Kit, I call it the Ultimate Bundle, is 125.00 in product for 99.00. You get to choose all of the products yourself. For these two months of SAB, there are three options for you to choose and the rewards are amazing!
Option 1: The exclusive Boho Blue Mini Machine ($63 ) + your choice of $175 of Stampin’ Up! products for only $129 .
Option 2: The original white Mini Machine ($63 ) + your choice of $175 of Stampin’ Up! products for only $129 .
Option 3: Your choice of $175 of Stampin’ Up! products for only $99 .
Options 1 and 2 offer you 50.00 more in product and the Mini Machine for only 30.00 above the regular price.
Option 3 offers you $50 more product than the standard Starter Kit offer for the regular price!
These are the best deals I have seen. If you are interested, please reach out to me and let’s chat about it.
HOST CODE
My February Host Code is FCF2FJVJ. Please use this code for orders under $150.00. I will have a small gift for those with orders over $50.00 in addition to the Perk Rewards Program. You can read all of the information at the top of the page in the Menu Bar under SHOP / Perks.
Thank you for stopping by today. I hope you enjoyed today’s project and will come back. I do read and reply to all of the comments individually. They mean a lot to me. Please reach out if you have a question.
This month, the theme is Last Minute Gifts/Cards to inspire you with your holiday list. We really hope that you will be enjoy all the amazing creations the Pals are sharing with you! As you hop from blog to blog, we would love for you to leave a comment. You will find the lineup at the end of my post to help you “hop” along from Pal to Pal.
My Last Minute Gift idea is a small gift and Gift Card holder in one. I give quite a lot of Gift Cards over the year. But at the same time like to give a little something. This is a perfect mix.
2 in 1 Gift card Box
You can see the top of the gift card peeping out of the finger notch at the top. Here is a view of what it holds.
This sweet box holds perfectly the hand cream from Bath and Body. My Gift Card is not a Bath and Body (I forgot to purchase one!) but you can see the one I substituted. These little boxes go together really quickly. The scoring and cutting of the card stock is the most time consuming. And that is not long at all. I made this one in less than thirty minutes total.
In case you do not recognize this sweet 3D item, it is from The Paper Pixie. And since her videos and directions are the best!, I am going to give you the link instead of trying to explain how to make this. It is Hand Cream & Gift Card Box. Simply click on that highlighted name.
Stamps and Embellishments
The only stamping on this is the ‘Tis The Season from the Brightest Glow stamp set. It is a great size with a fun font. By using the Double Oval Punch, it become a tad taller than the box itself, but still fits perfectly. I think the bit of added height helps it to stand out a little. The only embellishments are the Ribbon bow and the three little Red Rhinestone Gems.
Papers
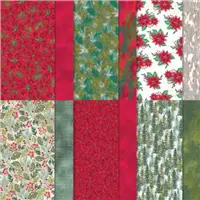
The beginning of this project, after choosing the box, was what papers would show best on a rather small scale. This DSP is from the Boughs of Holly Designer Series Paper. There are a couple of different Poinsettia prints in this pack. I liked this one on the White with smaller flowers. It helps the flowers to stand out individually. And I chose the Shaded Spruce as the green. There are several different ones included in the leaves of the bundles. The Shaded Spruce is the brighter one. This sweet project is a good ones for making multiples of. I am in the process of doing just that. It takes very little DSP and once the scoring is complete you are almost finished!
More inspiration awaits, so use the lineup below to visit the rest of the Design Team. The Pals are excited to show you what they’ve created! Then, please mark your calendars for our next blog hop on January 11th when our theme will be Sale-A-Bration Time. The design team will showcase projects made from Sale-A-Bration items.
My December Host Code is Y7T7EMTC. Please use this code for orders under $150.00. I will have a small gift for those with orders over $50.00 in addition to the Perk Rewards Program. You can read all of the information at the top of the page in the Menu Bar under SHOP / Perks.
Thank you for stopping by today. I hope you enjoyed today’s project and will come back. I do read and reply to all of the comments individually. They mean a lot to me. Please reach out if you have a question.
It is the time of year for Gift Card holders. They are a favorite of mine to make and share. Today’s card showcases the Poinsettia paper.
And here is the inside view:
Paper
The Boughs of Holly Designer is where I found the beautiful Poinsettias. The two pieces you see when the card is closed I wanted to be the same. They could easily be two different coordinating papers. And for the gift card pocket I opted for a different Poinsettia piece. There are a variety of greens in the paper, but I opted to go with Mossy Meadow as the card base. And I know you are shocked, but I did not add a layer between the DSP and the card base. That is something I almost always do. Since this card, including the gift card, is fairly thick, I did not want to add anymore layers to that.
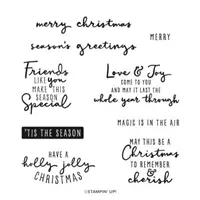
Stamps
I used two different stamp sets on this card. The two sentiments are from the Christmas To Remember stamp set. And the greenery are from the Christmas Season stamp set. To get the focal layer greenery I simply stamped around the edges and left room in the center for the sentiment. The colors used are ones from the DSP. That made the choices rather easy! For the inside layer I only added a sentiment. That piece is rather small and did not want to take up any more of the writing room.
Measurements:
The card base is cut to 4 1/14 X 11 and scored at 2 1/2 and 5 1/2. Fold and burnish the score lines. The DSP pieces are two at 2 1/4 X 4. These are the gift card pocket and the far right pieces. The front left DSP is 2 3/4 X 4. Adhere all of the DSP pieces and then use a circle punch or die to create the finger notch on the gift card pocket. Then adhere it with Tear & Tape placed very close to the edge on each side. It also helps to place your gift card inside when closing. That insures that the fit is not too tight when you place it afterwards.
The front sentiment layer is a Mossy Meadow cut to 3 X 4 1/4 and a White cut to 2 3/4 X 4. And the final is the inside White at 2 3/4 X 4. I hope you will give this one a try!
Birthday Organizer Kit
DETAILS
Kit includes one 8″ x 10″ (20.3 x 25.4 cm) monthly planner with space to record birthdays each month as well as a pocket sleeve to hold birthday cards.
Includes 12 full-size birthday cards, 6 of 2 designs, and 12 coordinating envelopes.
Includes Glue Dots, Stampin’ Dimensionals, Adhesive-Backed Embellishments, and Tear & Tape Adhesive
Includes die-cut florals and pieces ready for you to use—no prep work required!
Includes sticker sentiments and die-cut labels in Dutch, English, French, and German
My November Host Code is XUE6MDFV. Please use this code for orders under $150.00. I will have a small gift for those with orders over $50.00 in addition to the Perk Rewards Program. You can read all of the information at the top of the page in the Menu Bar under SHOP / Perks.
Thank you for stopping by today. I hope you enjoyed today’s project and will come back. I do read and reply to all of the comments individually. They mean a lot to me. Please reach out if you have a question.
Today’s Fun Fold is more of a Double Card plus a bit more! It is very flexible and can be utilized as a gift card holder as well as a regular card. And with that confusing beginning, here is my card.
The Star is the Paper
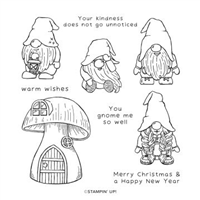
There are more pictures to show the various parts of the card. But I wanted to show how pretty this Storybook Gnomes Designer Series Paper is. There are two layers of the DSP used here on the front. Actually there is no stamping required here at all. Simply use two complimentary papers and some pretty ribbon.
Gift Card holder
Here is a view of the small card on the front open to reveal a gift card. The ribbon tied around this section ensures the card will not accidentally fall out. If you do not want to include a gift card, a little piece of cardstock with a second sentiment would work perfectly.
Inside View
This inside sentiment and the cute little gnome is the only stamping I have on this card. I love the gnomes and colored him to match the paper on front of the small card. Also, the matching dies to the Kindest Gnomes Bundle will cut a little gnome from the DSP if you would rather go that direction.
Directions
The card base of Coastal Cabana is cut to 5 1/2 X 8 1/2 and scored at 4 1/4. The small card is 7 1/2 X 3 3/4 and scored at 2 1/2 and 5. At the 5″ score line, cut from the top of the score line down to the bottom right corner. When folded in, this makes the pocket. Apply Tear & Tape to only the bottom of that angle to finish the pocket.
The Pale Papaya large layer is 4 X 5 1/4 with the DSP cut to 3 7/8 X 5 1/8. And the small Pale Papaya is cut to 2 1/4 X 3 1/2. For the small DSP layer I used the Stitched Rectangle Dies to add a little extra to the cute gnomes. Prior to adhering the small card to the center front of the large card, add the length of ribbon behind it. Tip: Go ahead and tie the bow to ensure you have enough ribbon.
Please continue to the next person on the Blog Hop Lineup for more Inspiration with Fun Folds.
My September Host Code is KVGNY4TA. Please use this code for orders under $150.00. I will have a small gift for those with orders over $50.00 in addition to the Perk Rewards Program. You can read all of the information at the top of the page in the Menu Bar under SHOP / Perks.
Thank you for stopping by today. I hope you enjoyed today’s project and will come back. I do read and reply to all of the comments individually. They mean a lot to me. Please reach out if you have a question.
The content in this blog is the sole responsibility of Jackie Beers as an Independent Stampin' Up! Demonstrator. The use of and content of classes, services or products offered is not endorsed by Stampin' Up!